background image


16 

Features


Line analysis 

Procedure     

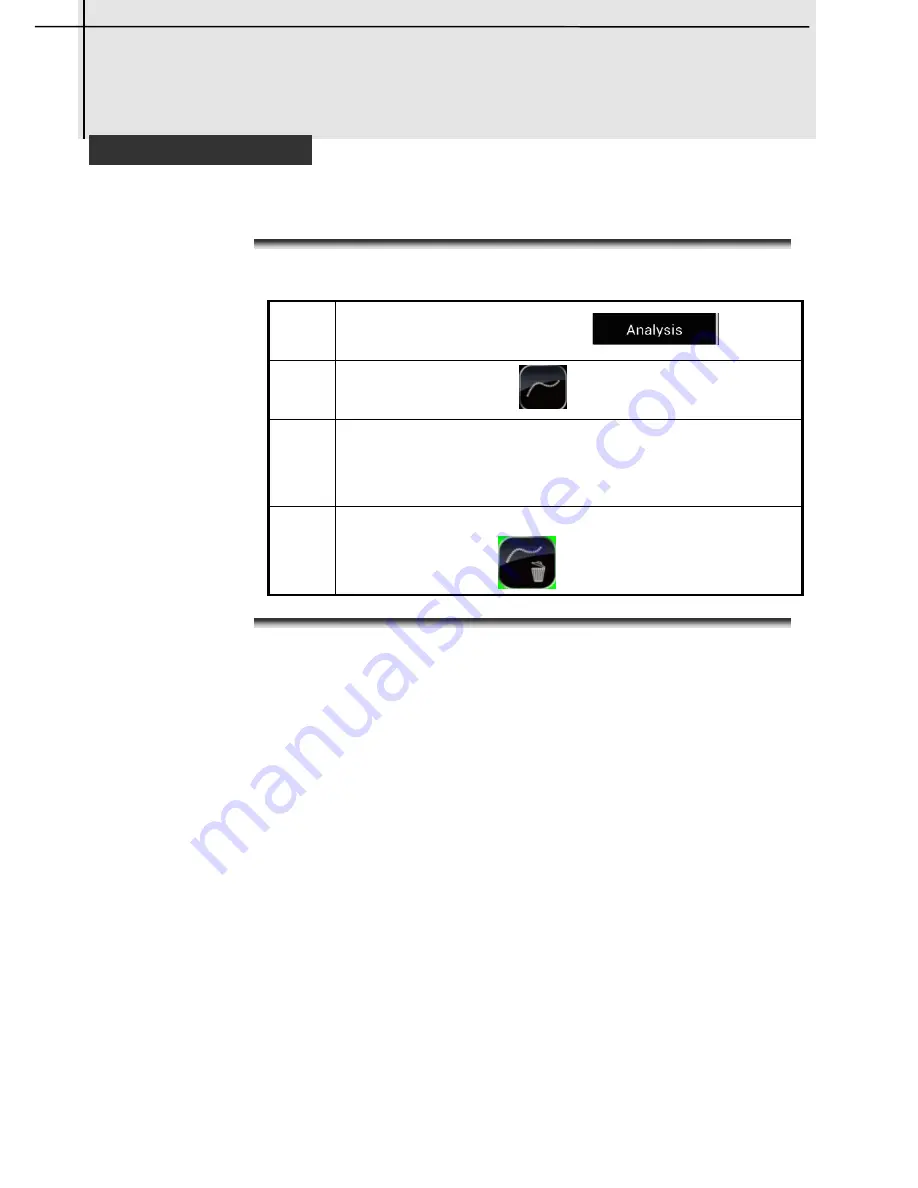
Follow this procedure to fulfill line analysis tool. 


Line analysis 

Click the 

Analysis

 button 

Click the line icon 

  to add a line analysis. 

Moving the line 

Drag the line analysis directly to anywhere of 
the image. 

Removing the line 

Drag the line to 

  icon to clear it. 

Содержание PK-160

Страница 1: ...nd Windows logo is either registered trademarks or trademarks of Microsoft Corporation in the United States and or other countries Other names and products not mentioned above may be registered trademarks or trademarks of their respective companies Copyright 2017 SATIR LTD All rights reserved Handheld Thermal Tablet ...

Страница 2: ...ttery 7 Turn the power on off 9 Local setting 10 Checking the Information on the LCD 11 Parameter setting 12 Pseudo color selection Image quality regulation 13 Features 14 Spot analysis tools 14 Area analysis 15 Line analysis 16 Image adjustment 17 ISO mode 18 Save image 19 Record video 20 File browser 21 Data transmission Update 22 TroubleShooting 23 Specification 24 ...

Страница 3: ...se the device in a wet environment to avoid liquid moisture damage Before you try to snapshot important subjects we highly recommend that you snapshot several trial images to confirm that the IR camera is operating and being operated correctly Only use chargers batteries and cables provided as others may cause damage to either both the battery and device Connecting the charger incorrectly may dama...

Страница 4: ...dures to clean the camera body lens LCD monitor and other parts Camera Body Wipe the body clean with soft cloth or eyeglass lens wiper Lens First use a lens blower to remove dust and dirt then remove any remaining dirt by wiping the lens lightly with soft cloth Never use synthetic cleaners on the camera body or lens LCD monitor Use a lens blower brush to remove dust and dirt If necessary gently wi...

Страница 5: ...3 Parts Introduction Figure Back and left side 1 Visual camera 2 Illuminator 3 Infrared camera 4 Shutter NUC button 5 Infrared image save button 6 Battery compartment 1 2 3 4 5 6 ...

Страница 6: ...4 Parts Introduction Figure Right side and top 1 Volume button 2 Power button 3 Micro USB 4 3 5 mm Headset jack 1 2 3 4 ...

Страница 7: ... suit your purpose 5 After adding the analysis tools we suggest you freeze the image and also you can click the Image icon to save the image You can click the File icon to find the image you saved 6 If you want to save a video you can click the Video icon Then click the File icon to find the video 7 Use the standard USB cable you can copy your file to the computer 8 To power off the camera hold th...

Страница 8: ... must charge the battery fully Procedure Charge the battery 1 Plug the small end of the charger into the USB port of the device 2 Plug the large end of the charger into an electric socket 3 When fully charged disconnect the device from the charger First unplug the charger from the device Then unplug it from the electric socket ...

Страница 9: ...ut the battery pack Note Please replace the battery in 30 seconds otherwise Install the battery 1 Insert the battery pack into the slot and close the back cover and then push the locker to the right to lock the cover 1 Pull out the battery pack Push the locker to the left to unlock the cover and lift up the cover then pull out the battery ...

Страница 10: ...8 will result in the loss of the saved parameters Remove the battery pack when the camera is not in use ...

Страница 11: ...ppear on the screen Click the infrared App icon to access the infrared camera function 3 Press power switch and then there will pop up a prompt box and click the Power off You can download the IR Wizard APP installation package from our website www satir eu com or find out the package in the built in storage directory file1 file2 then install the APP for editing thermal image and creating temperat...

Страница 12: ...d time when the IR camera is turned on for the first time Procedure Follow this procedure to set your local language 1 Find out and click Settings icon 2 Slide up to find out Language input Date time option 3 Click to set the local language and time Local setting ...

Страница 13: ...mation view Main interface Explanation This table explains the figure above Checking the Information on the LCD 1 Battery status 2 Main page 3 Main tool 4 Toolbar 5 Auto Shutter Time Device Info 6 Temperature scale 7 Shortcuts 8 File browser 1 2 4 3 6 5 7 8 ...

Страница 14: ...e parameters according to work field Parameter setting 1 Parameters Set up 2 Pseudo color Select 3 Image quality regulation 1 Click the main page 2 Click parameter setting icon 3 Click one option of the list then slide to set the value 4 Click Confirm to save the changes if you do not want to save the changes click Cancel 5 Click to return and hide the menu 1 2 3 ...

Страница 15: ...Click pseudo color setting icon 3 Click the pseudo color you want to select 4 Click to return and hide the menu Image quality regulation General Select Original Image Image Smooth or Detail Enhance Procedure Follow this procedure to adjust the quality of image 1 Click the main page 2 Click icon 3 Click the image mode you want to select 4 Click to return and hide the menu Pseudo color selection Ima...

Страница 16: ...Click the icon to add a spot 3 Warning Mode Settings Press and hold the spot you want to set for a while then the warning mode interface will pop up In this mode you can set the warning temperature and warning mode After you finish the settings click the Confirm to save you settings 4 Moving the spot Press and drag the spot directly to anywhere of the image 5 Removing the spot Move the spot to the...

Страница 17: ...ou want to set for a while then the area display settings will pop up After you finish the settings click the Confirm to save your settings 4 Moving the area Drag the line analysis directly to anywhere of the image 5 Removing the area Move the rectangle or oval to the or icon to remove the rectangle or oval 6 Changing the shape of the analysis area Hold and drag the corner or edge of the area to c...

Страница 18: ...cedure to fulfill line analysis tool Line analysis 1 Click the Analysis button 2 Click the line icon to add a line analysis 3 Moving the line Drag the line analysis directly to anywhere of the image 4 Removing the line Drag the line to icon to clear it ...

Страница 19: ...ll pop up When you choose the manual regulation mode click the number you want to change to call the Level or Span adjustment menu Then you can slide to select the value or click the number and input the value directly After you finish the settings click Confirm to save your settings You can also slide on the screen directly as the screen prompt to adjust Level Span Slide up or down to adjust the ...

Страница 20: ...1 Click the Image button 2 Click the ISO icon 3 Select Between Above Below ISO mode 4 Click ISO Color Picker Pick up one color from the ring color plate and then click the center of the ring color plate to confirm 5 Click Confirm to save the settings Click Cancel to cancel the settings ...

Страница 21: ...o storage and analyze the image 2 Calibration Click the icon or press shutter button to do temperatures drift and picture quality correction 3 The switch between infrared and CCD lens 1 Click the Image button 2 Click the camera icon or press the infrared image taking button Hold the camera steadily when taking image 3 During the saving time there will have a sign be displayed on the screen 1 2 3 ...

Страница 22: ...eo Procedure Follow this procedure to record a video About image 1 Click the Image button 2 Click the video icon to start recording There will have recording time be displayed on the screen 3 Click the icon to stop recording ...

Страница 23: ... button 2 Click the directory to browse the image files 3 Slide to select and click the image to check 4 Click and then will pop up Delete and Analysis 5 Delete the image If you want to delete the image click Delete button 6 Image analysis If you want to reanalyze and check on the infrared image click Analysis button ...

Страница 24: ...lick Turn on USB storage 4 All the pictures and video are saved in the default folder inside SAT Find this folder now you can begin the data transmission You can analyze the thermal image via IR report 5 Update Copy the update App from PC to the device Pull out the USB cable and cover up the cover Find and click to install the App via File Manager If the App can t run please unload the App and rep...

Страница 25: ...the Internal memory is full If required download the images to a computer and erase them to make some space Battery pack consumed quickly Replace the battery pack with a new one Battery pack will not charge Clean the battery terminals with clean cloth Connect the power cord to the battery charger and insert its plug firmly into the power outlet Replace the battery pack with a new one Trouble Shoot...

Страница 26: ... screen File format IR CCD JPG Temperature measurement Measurement range 20 to 200ºC 20 150 150 350 Measurement mode 3 movable spot auto hot cold spot capture isotherm analysis profile analysis 1 circle analysis 1 rectangular analysis 5 movable spot auto hot cold spot capture isotherm analysis profile analysis 2 circle analysis 2 rectangular analysis Measurement accuracy 2 or 2 of readings Protect...

Страница 27: ...oth Yes Electronic compass Yes Physical characteristic Weight 415g Additional features Built in memory Yes Video record Yes Ports USB port 3 5 mm Headset jack Please download quick user guide user manual and SatIrReport Software from SATIR website if need be ...

Отзывы: