background image

105

Specifications

User Manual Secura

®

, Quintix

®

, Practum

®

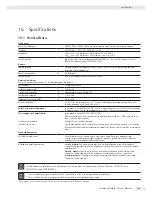
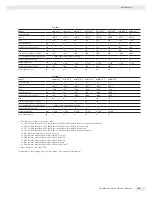
15.2  Model-specific Data

Secura

®

Model

224-1

x

1)

124-1

x

1)

1103-1

x

1)

613-1

x

1)

513-1

x

1)

313-1

x

1)

213-1

x

1)

6102-1

x

1)

5102-1

x

1)

3102-1

x

1)

2102-1

x

1)

1102-1

x

1)

612-1

x

1)

6101-1

x

1)

3101-1

x

1)

Weighing capacity

g

220

120

1,100 610

510

310

210

6100 5100 3100 2100 1100 610

6,100 3,100

Readability

mg

0 .1

0 .1

1

1

1

1

1

10

10

10

10

10

10

100

100

Repeatability  

(standard deviation)

mg

0 .1

0 .1

1

1

1

1

1

10

10

10

10

10

10

50

50

Linearity deviation

mg

0 .2

0 .2

2

2

2

2

2

20

20

20

20

20

20

100

100

Min . initial weight according  

to USP, typical

g

0 .12

0 .12

1 .5 

1 .5 

1 .5 

1 .5 

1 .5 

12

12

12

12

12

12

60

60

Sensitivity drift  

b10 to +30°C

± ppm/K 1 .5

1 .5

1 .5 

2

2

2

2

2

2

2

2

2

2

2

2

Typical stabilization time

s

2

2

1 .5

1

1

1

1

1

1

1

1

1

1

1

1

isoCAL: 

–  Temperature change 

–  Time interval


h


1 .5 

4


1 .5 

4


1 .5 

4


6


6


6


6


6


6


6


6


6


6


6


6

Display result (depending  

on the set filter level)

s

0 .2

0 .2

01/

0 .2

0 .1/

0 .2

0 .1/

0 .2

0 .1/

0 .2

0 .1/

0 .2

0 .1/

0 .2

0 .1/

0 .2

0 .1/

0 .2

0 .1/

0 .2

0 .1/

0 .2

0 .1/

0 .2

0 .1/

0 .2

0 .1/

0 .2

Weighing pan size

mm

d

 90

d

 90

d

 120

d

 120

d

 120

d

 120

d

 120

d

 180

d

 180

d

 180

d

 180

d

 180

d

 180

d

 180

d

 180

Weighing chamber height*

mm

209

209

209

209

209

209

209

Net weight, approx .

kg

5 .1

5 .1

5 .9

5 .1

5 .1

5 .1

5 .1

5 .2

5 .2

5 .2

5 .2

5 .2

4 .7

5 .2

5 .2

Quintix

®

Model

224-1

x

1)

124-1

x

1)

64-1

x

1)

613-1

x

1)

513-1

x

1)

313-1

x

1)

213-1

x

1)

6102-1

x

1)

5102-1

x

1)

3102-1

x

1)

2102-1

x

1)

1102-1

x

1)

Weighing capacity

220

120

60

610

510

310

210

6100

5100

3100

2100

1100

Readability

mg

0 .1

0 .1

0 .1

1

1

1

1

10

10

10

10

10

Repeatability  

(standard deviation)

mg

0 .1

0 .1

0 .1

1

1

1

1

10

10

10

10

10

Linearity deviation

mg

0 .1

0 .1

0 .1

2

2

2

2

20

20

20

30

30

Sensitivity drift 

b10 to +30°C

± ppm/K 1 .5

1 .5

1 .5

3

3

3

3

3

3

3

4

4

Typical stabilization time

s

2

2

2

1

1

1

1

1

1

1

1 .5

1 .5

isoCAL: 

–  Temperature change 

–  Time interval


h


1 .5 

4


1 .5 

4


1 .5 

4


6


6


6


6


6


6


6


6


6

Display result (depending  

on the set filter level)

s

0 .2

0 .2

0 .2

0 .1/0 .2 0 .1/0 .2 0 .1/0 .2 0 .1/0 .2

0 .1/0 .2

0 .1/0 .2

0 .1/0 .2

0 .1/0 .2

0 .1/0 .2

Weighing pan size

mm

d

 90

d

 90

d

 90

d

 120

d

 120

d

 120

d

 120

d

 180

d

 180

d

 180

d

 180

d

 180

Weighing chamber height*

mm

209

209

209

209

209

209

209

Net weight, approx .

kg

4 .9

4 .9

4 .9

4 .9

4 .9

4 .9

4 .9

5 .2

5 .2

5 .2

4 .7

4 .7

1

)  Possible terms for country-specific models:


x = S: 

Standard balances without country-specific additions


x = SAR:  Standard balances with country-specific additions for Argentina


x = SJP:  Standard balances with country-specific additions for Japan


x = SKR:  Standard balances with country-specific additions for South Korea

*  Upper edge of the weighing pan to the lower edge of the upper draft shield panel

Содержание Practum

Страница 1: ...98648 019 43 User Manual Secura Quintix Practum Laboratory Balances 98648 019 43...

Страница 2: ......

Страница 3: ...tifier Secura only 35 6 2 8 USB Port 36 6 2 9 Display Brightness 38 6 2 10 Acoustic signal 38 6 2 11 More Settings 39 7 Weighing 41 7 1 Mass Unit Conversion 42 7 2 SQmin Minimum Weighing Secura only 4...

Страница 4: ...ded This symbol identifies hazards that can result in moderate or mild injuries if not avoided This symbol identifies hazards associated with the risk of material damage 1 2 Symbols The following symb...

Страница 5: ...ond action 3 Indicates an item in a list Conventions for this user manual The figures in this manual are based on standard balances Some displays and printouts shown in the figures may differ from tho...

Страница 6: ...erials are present Make sure that the voltage rating printed on the AC adaptor is identical to your local mains voltage 2 2 Installation Information Do not operate the balance if its housing or AC ada...

Страница 7: ...o trip Observe the additional safety and danger information in the following chapters 2 3 Intended Use This high resolution balance is designed and intended for use only in laboratories and indoor are...

Страница 8: ...sk 9 Menu access switch locks various functions and units when balances are verified 3 Leveling feet 10 USB port for mini AB 4 Touch screen 11 DC jack 5 Level indicator Quintix and Practum models 12 S...

Страница 9: ...ed Care and maintenance y Save the box and all parts of the packaging for any future transport During shipment please do not leave cables plugged in The following parts are included in the equipment s...

Страница 10: ...the balance Note Use both hands to hold the top struts of the draft shield Move the side doors right to the back Turn the draft shield lock to locked Put the shield plate 2 shield disk 3 pan support 4...

Страница 11: ...ls into the draft shield guide all the way to the front 3 Then replace the draft shield cover In doing so the draft shield cover must lock into position Balance with No Draft Shield t Install the foll...

Страница 12: ...following negative influences Heat heater or direct sunlight Drafts from open windows AC systems and doors Vibrations during weighing Heavy traffic areas personnel Excessive moisture Electromagnetic f...

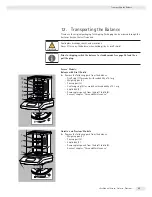
Страница 13: ...tances in the Lab Avoid glass breakage shocks and vibrations Never lift or carry the balance when holding it by its draft shield t Hold the balance under the housing lift it up carefully and carry it...

Страница 14: ...try code e g EU Illustration from left to right YEPS01 PS4 Power supply with connection cable China CN South Africa ZA Australia AU India IN USA and Japan US JP Europe EU United Kingdom UK YEPS01 PS5...

Страница 15: ...is no suitable AC adapter available Do not use the AC adapter Contact Sartorius Service t Only use original Sartorius AC adapters t Connect the angle plug 2 to the device s power supply socket operat...

Страница 16: ...e settings window appears t Touch the language you would like to select such as Deutsch t Touch l to confirm y The display changes immediately to the desired language y The Installation settings windo...

Страница 17: ...hours before noon are displayed with AM and the hours after noon are displayed with PM t Touch l to confirm y The current time is displayed t If the time is displayed correctly touch l to confirm t T...

Страница 18: ...e side and not on the weighing pan side Placing the balance on the weighing pan side may lead to measurement inaccuracies and damage to the balance t Attach a wire or similar to the sample and hang it...

Страница 19: ...ctum 4 9 Anti theft Locking Device t A Kensington key lock cable can be installed at the fastening point on the back of the balance if required t The balance can also be secured in place at the instal...

Страница 20: ...e balance needs to be leveled a corresponding message appears on the display see page 21 The balance must be regularly calibrated and adjusted to ensure correct weighing results see page 73 The displa...

Страница 21: ...ecura models the balance s position is checked with sensors Instructions on the display guide the user when leveling the balance 0 00 Max 2100 g d 0 01 g LEVEL y When LEVEL appears in red at the top l...

Страница 22: ...the circular marking The figure shows which leveling foot should be twisted in which direction Generally both feet must be adjusted in order to position the air bubble exactly in the center of the cir...

Страница 23: ...Min and the verification scale interval e appear on verified balances 3 Warning symbol for calculated values negative gross values or values that are smaller than the minimum initial weight SQmin 4 Cu...

Страница 24: ...ch as Mixing 2 Application selection area symbols for all available applications see List of Applications in the Menu on page 26 3 Function area 4 Back run the most recent application 5 Setup menu acc...

Страница 25: ...number is deleted Then enter the correct number t To delete the entire value select C t To confirm the entry select l 5 3 4 Text and Character Input Secura only A keyboard will appear whenever you hav...

Страница 26: ...t Select a symbol to start that particular application Max 2100 g d 0 01 g 0 00 Reference 10 0 y The desired application appears on the display 5 3 6 List of Applications in the Menu The menu provides...

Страница 27: ...lected factor is saved to protected memory Unstable condition see page 64 Use this application with moving samples such as live animals and for weighing in unstable environments A measurement cycle is...

Страница 28: ...Calibration Adjustment Weighing y The Settings Setup menu appear Settings Printout Date and time Device information Calibration Adjustment Weighing t To scroll through the menu place a finger on the...

Страница 29: ...eutsch German Fran ais French Espa ol Spanish Italiano Italian Japanese P Russian Chinese Polski Polish Portugu s Portuguese Korean Turkish Hungarian Setting the Language The display text is given in...

Страница 30: ...h l Date format menu option t Choose how the date is displayed and printed DD MMM YYYY Displayed in order of day month and then year MMM DD YYYY Displayed in order of month day and then year YYYY MM D...

Страница 31: ...mperature values are exceeded isoCAL can be started manually Automatic isoCAL is switched on Calibration adjustment starts automatically when predefined time intervals or temperature values are exceed...

Страница 32: ...functions are disabled immediately Printout Startup and saving in applications Displays Information about red marking of display element LEVEL isoCAL or SQmin Weight value displayed in gray with a bla...

Страница 33: ...der Stability signal t Choose whether stability is shown with High accuracy Medium accuracy or Fast on the display The balance stability is displayed as soon as the weighing result is constant within...

Страница 34: ...s for the Manual print ISO GLP printout Secura and Quintix only Activate this option when an ISO GLP compliant printout is required Tare after print Activate this option to automatically tare the bala...

Страница 35: ...der of the GLP printout t To activate the additional ID select t enter the desired device ID and confirm with l Batch ID function menu option The batch ID L ID is queried one time at the start of the...

Страница 36: ...SBI PC xBPI Secura and Quintix only Driver for PC required CDC Virtual Com Port The data is output via xBPI protocol through a virtual serial interface See page 83 onwards for more on the driver and x...

Страница 37: ...ue factory setting Transmits the output with ID value and unit across several lines if necessary Numerical value only Outputs numerical value only in one line without ID and unit date value or net tar...

Страница 38: ...is deactivated RS 232 Configuration menu option This option can be selected by going to Device Protocol and choosing the USB RS 232 SBI setting t Select the desired setting for the RS 232 interface Ba...

Страница 39: ...rd protection leave the entry blank Contact the Sartorius Service Center if you forget the password Reset settings menu option Reset all balance settings to the factory default settings here t When th...

Страница 40: ...nction to lock or unlock the menu t Hold down the Menu key for longer than 10 seconds t Confirm with Lock Accessing the menu or unlocking it again t Hold down the Menu key for longer than 10 seconds t...

Страница 41: ...ero point Tare t Place an empty container on the balance if weighing with containers t Select D to tare the balance The balance displays zero again after being tared The tared value is subtracted from...

Страница 42: ...e units The currently selected unit is marked e g g The most recently selected units automatically appear at the top of the list Units which are rarely or never used are shown further down the list Th...

Страница 43: ...6200 oz Troy ounces 0 03215074700 ozt Hong Kong tael 0 02671725000 tlh Singapore tael 0 02645544638 tls Taiwanese tael 0 02666666000 tlt Grain 15 43235835000 GN Pennyweight 0 64301493100 dwt Milligram...

Страница 44: ...ed minimum sample quantity and load this to your balance using the guidelines of your QA system He will document this setting via a Weighing module test as per USP certificate in which the measurement...

Страница 45: ...ettings for individual identifiers can be configured in the system settings under Identifier see Identifier Secura only on page 35 The GLP printout can be activated in the system settings under Print...

Страница 46: ...You want to weigh several components of a formula in one container t Select the Menu key in any application t Select the Mixing symbol in the menu Max 2100 g d 0 01 g 0 00 Component 1 y The Mixing ap...

Страница 47: ...nent 1 Net y The weight value is displayed t To save the component select v Max 2100 g d 0 01 g 0 00 Component 2 END Net1 y The component is saved and the balance is automatically tared t Place the ne...

Страница 48: ...Printing Results Prerequisites For printouts a printer e g Sartorius YDP40 or PC must be connected and configured see USB Port on page 79 In the Mixing settings window the Print component option must...

Страница 49: ...rinter must be connected and configured see USB Port on page 79 t Select the Menu key in any application t Select the Statistics symbol in the menu Max 2100 g d 0 01 g 0 00 Component 1 y The Statistic...

Страница 50: ...omponent from the weighing pan and place the next component on the balance t To save the component select v t Continue this procedure with additional components y The weight values of the saved compon...

Страница 51: ...read Difference between maximum and minimum t To print the intermediate result select a y The analysis is printed on the connected printer as it appears in the report n x s sRel etc A sample printout...

Страница 52: ...individual components in different containers print out the results and check the total weight at any time t Select the Menu key in any application t Select the Components symbol in the menu Max 2100...

Страница 53: ...e weight value is displayed t To save the component select v t Remove the load from the balance t Place the container for the second component on the weighing pan t Select D to tare t Place the second...

Страница 54: ...Results Prerequisites For printouts a Sartorius printer YDP40 or PC must be connected and configured see USB Port on page 79 Max 2100 g d 0 01 g 14 32 Component 1 Net y If a printer is connected an ad...

Страница 55: ...e in liquid Buoyancy Wa Wa Wfl fl Prerequisites A Sartorius density determination kit is required for this function for analytical balances YDK03 for precision balances YDK04 Mount the density determi...

Страница 56: ...ermination kit t Fill the beaker in the density determination kit with the buoyancy liquid Ensure that the sample holder is sufficiently immersed in the liquid in order to hold the sample later t If d...

Страница 57: ...mple Max 220 g d 0 0001 g 4 4787 Weight in medium END Net y The weighing display shows the step Weight in medium t To save the weight value select v Max 220 g d 0 0001 g 11 86 END y The balance calcul...

Страница 58: ...99582 0 99579 0 99576 0 99573 0 99570 30 0 99567 0 99564 0 99561 0 99558 0 99555 0 99552 0 99549 0 99546 0 99543 0 99540 Density Values of Ethanol at Temperature T in C T C 0 0 0 1 0 2 0 3 0 4 0 5 0...

Страница 59: ...n appears The reference percentage is displayed under Reference e g 10 0 Reference 10 0 t To change the reference percentage select the gray button Percentage Reference Accuracy 10 0 50 0 100 0 0 0 0...

Страница 60: ...w Max 2100 g d 0 01 g 10 0 END Reference weight 14 32 y The display shows the reference percentage The weight of the reference sample is displayed under Reference weight t Remove the reference sample...

Страница 61: ...he weight of the sample is displayed Net t To change back to viewing the percentage select the Net button again t Place additional samples on the weighing pan if any to calculate their percentages bas...

Страница 62: ...to multiplication by reciprocal value 1 0 06237 i e 16 03335 Set the factor to 16 03335 in the application t Select the Menu key in any application t Select the Conversion symbol in the menu Max 2100...

Страница 63: ...to multiply their weights by the entered factor Res t To view the measured individual weight of the sample select the Res button on the weighing display Max 2100 g d 0 01 g 5 08 END Factor 16 03335 Ne...

Страница 64: ...measurements is displayed under Measurements Measurements 5 t To set the number of measurements and other settings select the gray button Unstable condition Measurements Start 5 10 20 Instability Auto...

Страница 65: ...pecified number of measurements is carried out The average is calculated and displayed t To view the current weight value select the button on the weighing display Max 2100 g d 0 01 g 338 84 END Net M...

Страница 66: ...0 00 y The Checkweighing application appears The set thresholds are displayed under Min and Max Min g 0 00 Max g 0 00 t To set the thresholds select the gray button Checkweighing Min Max 0 00 00 0 00...

Страница 67: ...e falls within the thresholds Yellow The weight value is too low Green The weight value is OK and falls within the specified range Red The weight value is too high t Add the sample to the weighing pan...

Страница 68: ...g d 0 01 g 0 00 y The Peak hold application appears t To define the setting for calculating the peak hold select the gray button Peak hold Apply Without stability At stability y The Peak hold setting...

Страница 69: ...eight value is displayed G t To change back to viewing the peak hold max value select the G or possibly Net button again t Remove the sample from the weighing pan y In the Hold display mode the balanc...

Страница 70: ...rs The piece count of the reference sample is displayed under Reference Reference pcs 5 t To set the reference sample quantity select the gray button Counting Reference Accuracy 5 10 20 Normal 10fold...

Страница 71: ...lays changes and shows the piece count The average piece weight is shown on the weighing display Update automatically setting y If the balance is performing the automatic reference sample update Updat...

Страница 72: ...splay 4 95 Max 2100 g d 0 01 g END Piece weight 0 1834 Net y The total weight of the sample is displayed Net t To change back to viewing the piece count select the Net button again t To exit the funct...

Страница 73: ...at the balance setup location This can be performed automatically or manually or for Practum models of accuracy class k using an external weight When and How Often To achieve the highest accuracy poss...

Страница 74: ...ion function Calibrate balance CAL Extern CAL Intern y The Calibrate balance window appears t Select CAL Intern y Calibration begins The internal weight is automatically placed on the balance in the h...

Страница 75: ...ce CAL Extern CAL Intern y The Calibrate balance window appears t Select CAL Extern y Practum models Calibration values appear on the display t Select the value of your calibration weight y A message...

Страница 76: ...adjustment or the preset time interval has been exceeded the red isoCAL button appears on the display y If the isoCAL function is set to Automatic the calibration adjustment process starts automatical...

Страница 77: ...tem settings see Printout on page 34 t Activate ISO GLP compliant printouts Go to the Printout menu select Manual with stability and then under Manual print set the ISO GLP printout option to On t Set...

Страница 78: ...A ID Inv Nr 11 L ID CH01 09 Nov 2013 02 50 pm S ID Tablette 4321 N 10 9 g T 5 6 g G 16 5 g 09 Nov 2013 02 50 pm Name y A sample ISO GLP printout for external calibration adjustment can be seen below...

Страница 79: ...owing connections can be established with peripheral devices Mini B PC SBI PC xBPI PC spreadsheet format PC text format Off Printer YDP20 0CE Second display YRD03Z USB RS 232 SBI USB RS 232 xBPI Off P...

Страница 80: ...e supplied USB connection cable t To access the system settings of the balance select i Setup in the menu Device Protocol PC spreadsheet format PC text format PC xBPI Off t To access the PC spreadshee...

Страница 81: ...xample Additional Data Transmission Settings on the PC Keyboard Set to EN USA To ensure that the data is imported correctly from the balance using the spreadsheet or text program the Office program in...

Страница 82: ...Empty none t Configure the typographical quotation marks for OpenOffice Calc In Calc go to Tools Autocorrect Options Custom Quotes and set the following Simple quotes At the beginning of a word empty...

Страница 83: ...ce A USB driver does not need to be installed if the PC is connected to a network and has administrator rights authorization to install updates The driver is installed automatically on the PC in this...

Страница 84: ...rsion of the PC t Start the installation program InstallDriver exe t Follow the instructions from the installation program y Function test Once the driver is installed operating modes PC SBI and PC xB...

Страница 85: ...32 xBPI Off Mini A RS 232 9 pin Sartorius order no YCC03 D09 3 Serial device t Connect the peripheral device to the balance via Sartorius connection cable YCC03 D09 RS 232 9 pin assigned as per PC t D...

Страница 86: ...lance stability If the automatic data output is activated in the Device Configuration it starts immediately after the balance is turned on 10 3 2 Data Output Formats You can output the values with or...

Страница 87: ...ion 1 2 3 4 5 6 7 8 9 10 11 12 13 14 15 16 1 1 1 2 5 5 g CR LF 1 2 3 5 6 1 g CR LF Position 1 Plus minus or space Position 2 10 Space or weight value with decimal point leading zeros are output as spa...

Страница 88: ...e 1 2 3 4 5 6 7 8 9 10 11 12 13 14 15 16 17 18 19 20 21 22 N 1 2 3 5 6 g CR LF N 1 2 3 5 6 1 g CR LF Special Outputs 1 2 3 4 5 6 7 8 9 10 11 12 13 14 15 16 17 18 19 20 21 22 S t a t CR LF H i g h L o...

Страница 89: ...via the data interface can send control commands to the balance to control its functions Formats for Control Commands Syntax Format 1 Esc CR LF Format 2 Esc _ CR LF Esc Escape Command character Numbe...

Страница 90: ...table 1 ESC N Filter Very unstable conditions 1 ESC O Lock keys 1 ESC Q Acoustic signal 1 ESC R Unlock keys 1 ESC S Restart 1 ESC Z Internal calibration adjustment Depending on menu and model 1 ESC U...

Страница 91: ...nic level indicator v Only when a weight value larger than zero is the value saved in the memory if the value can be saved e g value larger than SQmin w Only when an application can be started i e onl...

Страница 92: ...ht that is too heavy is placed on the balance during external calibration Leveling Error Messages Leveling The balance must be leveled for balances with electronic level indicators only Balance Mainte...

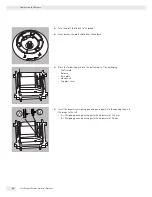
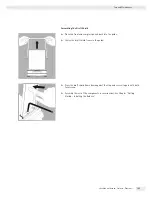
Страница 93: ...dby mode see page 96 and then pull the plug Secura Models Balance with Draft Shield t Remove the following parts from the balance Draft ring 1 for models with readability of 0 1 mg Weighing pan 2 Pan...

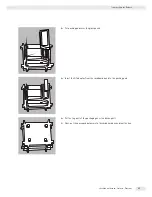
Страница 94: ...nce t Place the following parts into the bottom part of the packaging Draft shield Balance Base plate Side panels Top glass cover t Insert the respective weighing pan and pan support into the opening...

Страница 95: ...tix Practum t Put packing pads over the glass panels t Insert the AC adaptor from the cardboard box into the packing pad t Put the top part of the packaging over the device parts t Next put the packag...

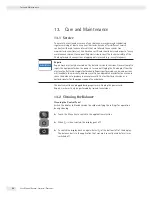
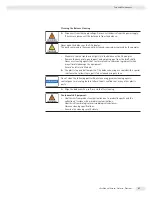
Страница 96: ...s turned on Unplug the AC adaptor from the electrical outlet mains supply beforehand Repairs performed by untrained persons will invalidate the warranty and may result in considerable hazards for the...

Страница 97: ...vents or abrasive ingredients which may ultimately damage the equipment Secura and Quintix Models t The plastic top and bottom parts of the balance housing are coated with a special substance that all...

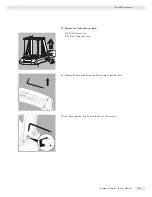
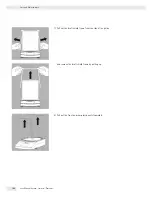
Страница 98: ...de panels 1 Pull the side panels towards the rear stop and lift them up carefully 2 Pull the side panels out towards the back B Remove the top glass cover 1 Holding it by its rear edge pull the draft...

Страница 99: ...ual Secura Quintix Practum C Remove the front and rear glass 4 Lift the frame cover 5 Pull the frame cover out t Remove the Torx key up from the draft shield under the cover 6 Turn the key approx two...

Страница 100: ...nd Maintenance User Manual Secura Quintix Practum 7 Pull out the draft shield frame from the side of the guide and remove the draft shield frame by pulling up 8 Pull out the front and rear glass panel...

Страница 101: ...he front and rear glass panels back into the guide t Center the draft shield frame in the guide t Press the draft shield frame down against the stop and secure it again with both Torx screws t Assembl...

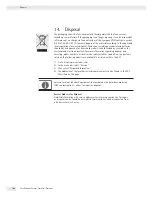
Страница 102: ...electronic devices For more information regarding disposal and recycling please contact our local service representatives In addition the partners listed on the following website are available to assi...

Страница 103: ...ordance with EN 61326 1 IEC 61326 1 Electrical equipment for measurement control and laboratory use EMC requirements Part 1 General requirements Interference resistance Suitable for use in industrial...

Страница 104: ...ause harmful interference to radio or television reception which can be determined by turning the equipment off and on the user is encouraged to try to correct the interference by one or more of the f...

Страница 105: ...ht approx kg 5 1 5 1 5 9 5 1 5 1 5 1 5 1 5 2 5 2 5 2 5 2 5 2 4 7 5 2 5 2 Quintix Model 224 1 x 1 124 1 x 1 64 1 x 1 613 1 x 1 513 1 x 1 313 1 x 1 213 1 x 1 6102 1 x 1 5102 1 x 1 3102 1 x 1 2102 1 x 1...

Страница 106: ...10 10 10 10 10 Linearity deviation mg 2 2 2 1 2 2 30 30 30 30 30 Sensitivity drift between 10 to 30 C ppm K 2 2 2 3 3 3 4 4 4 4 4 Typical stabilization time s 2 2 2 1 1 1 1 5 1 5 1 5 1 5 1 5 Weighing...

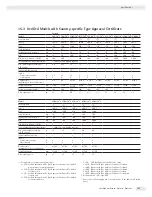
Страница 107: ...pe 3 SQP C SQP C SQP C SQP C SQP C Max g 2 100 1 100 610 6 100 3 100 Scale interval d mg 10 10 10 100 100 Verification scale interval e mg 100 100 100 100 100 Min mg 500 500 500 5 000 5 000 Min only f...

Страница 108: ...an size mm d 90 d 90 d 90 d 120 d 120 d 120 d 120 d 180 d 180 Weighing chamber height mm 209 209 209 209 209 209 209 Net weight approx kg 4 9 4 9 4 9 4 9 4 9 4 9 4 9 5 2 5 2 Quintix Model 3102 1x1 210...

Страница 109: ...ale interval e mg 100 100 1 000 1 000 1 000 1 000 Min g 0 5 0 5 5 5 50 50 Min only for Models 1OIN g 5 5 50 50 50 50 Tare equalization range subtractive 100 from max weighing capacity Typical stabiliz...

Страница 110: ...type 64 Proof Line knob weight 50 g OIML Class E2 with DAkkS certificate YCW452 AC 02 Calibration weight for lab balance type 124 Proof Line knob weight 100 g OIML Class E2 with DAkkS certificate YCW5...

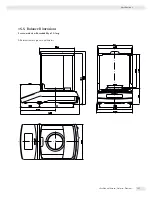
Страница 111: ...111 Specifications User Manual Secura Quintix Practum 15 5 Balance Dimensions Secura models with readability of 0 1 mg All dimensions are given in millimeters...

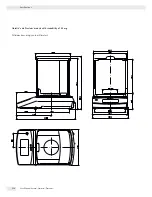
Страница 112: ...112 Specifications User Manual Secura Quintix Practum Quintix and Practum models with readability of 0 1 mg All dimensions are given in millimeters...

Страница 113: ...113 Specifications User Manual Secura Quintix Practum Models with readability of 1 mg All dimensions are given in millimeters...

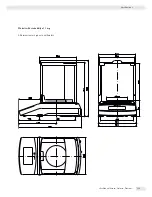
Страница 114: ...l Secura Quintix Practum Secura All models with a readability of 10 mg Quintix Models 6102 5102 3102 2102 1C 2102 1O 1102 1C 1102 1O 612 1C 612 1O Practum Models 1102 1O 2102 1O 3102 612 1O All dimens...

Страница 115: ...cifications User Manual Secura Quintix Practum Models with a readability of 100 mg Quintix Models 2102 1S 1102 1S 612 1S 412 Practum Models 2102 1S 1102 1S 612 1S 412 All dimensions are given in milli...

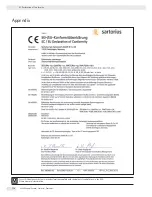
Страница 116: ...tions User Manual Secura Quintix Practum For verified balances the conformity declaration supplied with the balance is valid for use in the EEA Please retain this declaration EC Declaration of Conform...

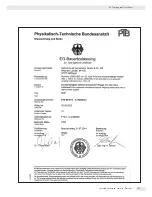
Страница 117: ...117 Specifications User Manual Secura Quintix Practum EC Type approval Certificate...

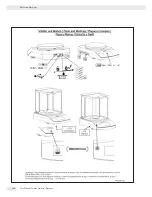
Страница 118: ...118 Specifications User Manual Secura Quintix Practum Plates and Markings...

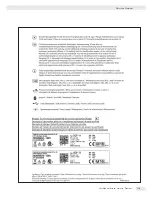
Страница 119: ...119 Specifications User Manual Secura Quintix Practum Plates and Markings...

Страница 120: ...RY USE Certified to US Standards Laboratory Scales Practum Quintix and Secura Models AAAAAAABBBB CDDD rated 15 Vdc 3 W max High Resolution Laboratory Scale Series models Quintix and Secura rated 15 Vd...

Страница 121: ...8 DQD 507 Rev 2016 02 18 Page 2 APPLICABLE REQUIREMENTS CAN CSA C22 2 No 61010 1 04 Safety Requirements for Electrical Equipment for Measurement Control and Laboratory Use Part 1 General Requirements...

Страница 122: ...ct Date Description 70130821 2017 04 28 CSA c us report update 2497246 for modifying the external AC Adapter detail of Laboratory Scales Practum Quintix and Secura Models AAAAAAABBBB CDDD and High Res...

Страница 123: ...used to facilitate legibility in these instructions and always simultaneously denote the other gender as well Copyright notice This instruction manual including all of its components is protected by...

Отзывы: