background image

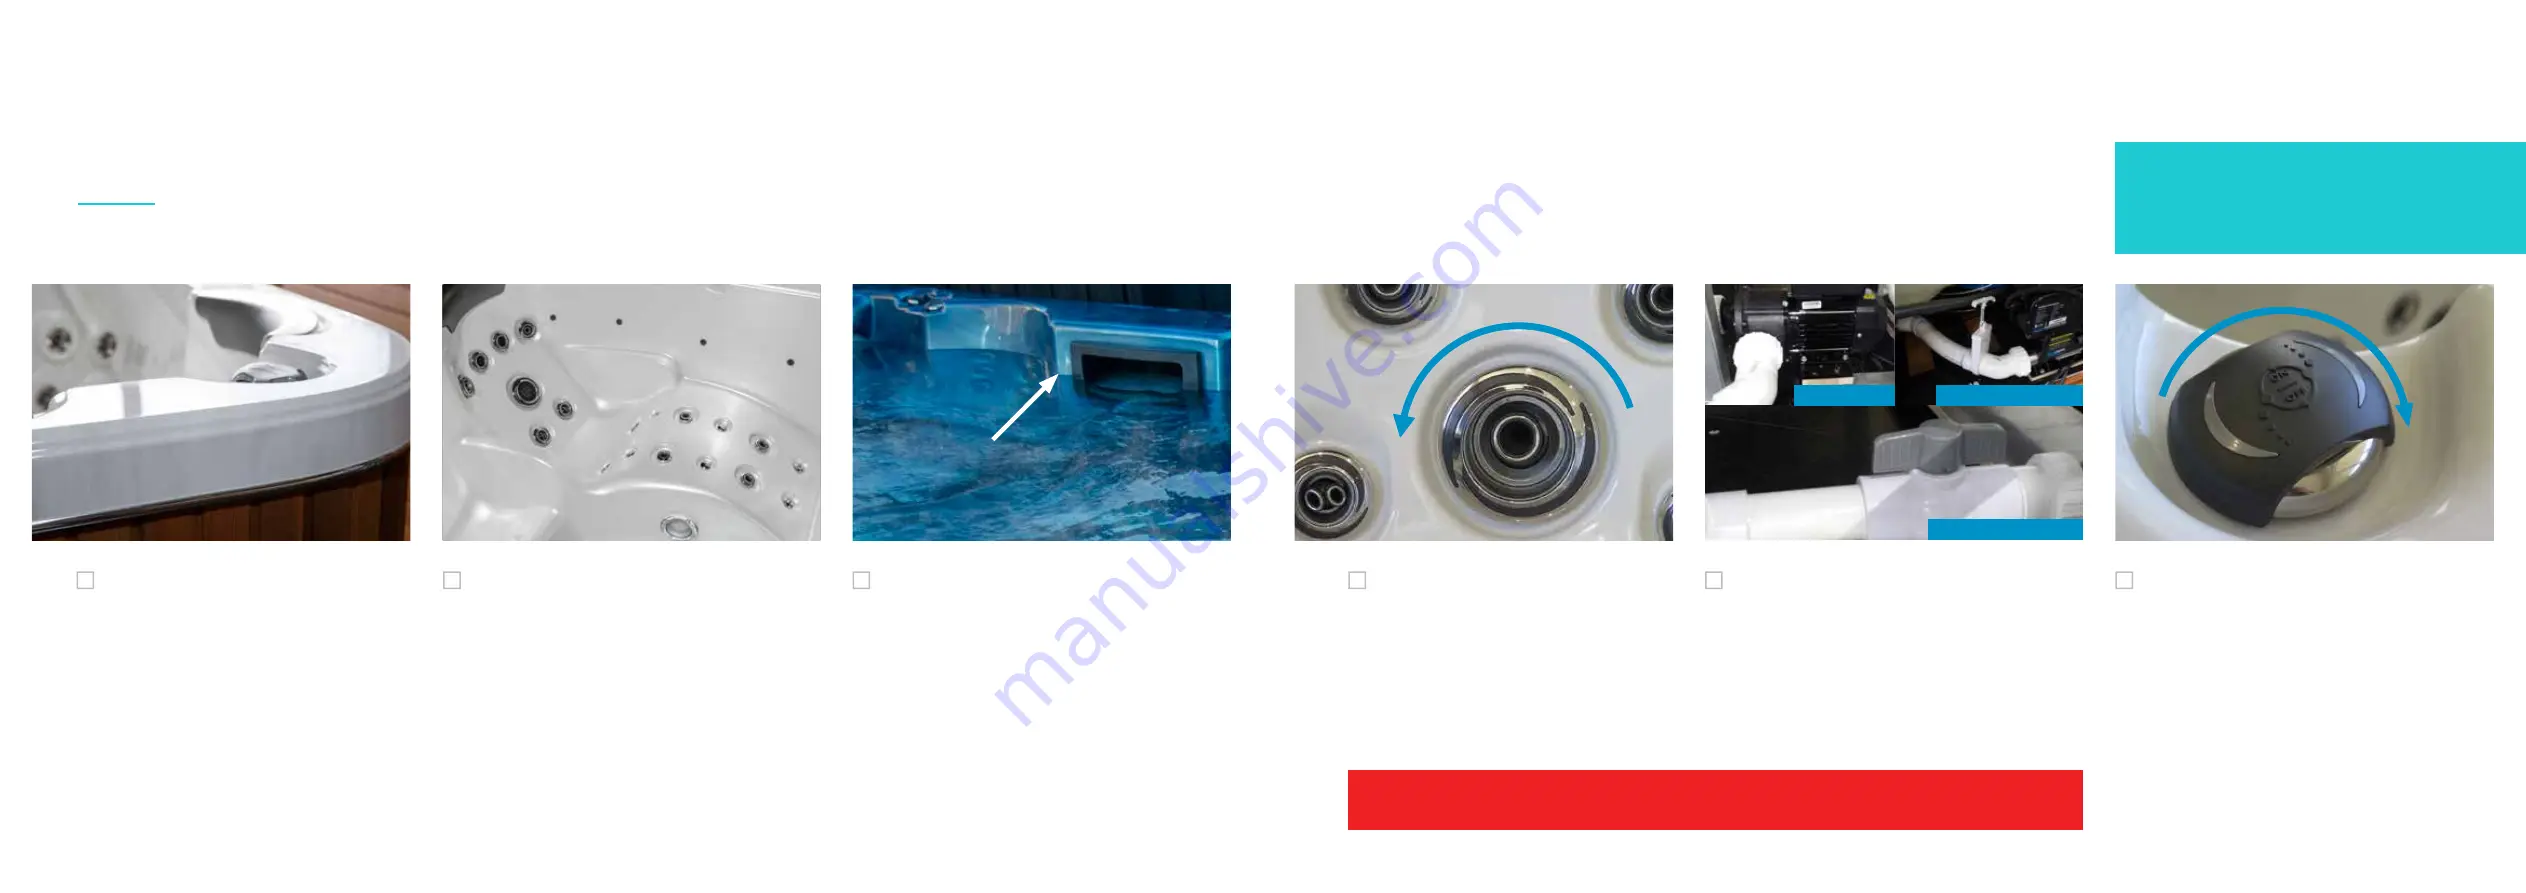
Pump connection

Release valve open (gate)

Release valve open (inline)

 slide filter face upwards

unwrap your new spa 

what do I do first?

  Inspect for damage

Carefully unwrap your spa and thoroughly inspect  

it for any damage. If you notice any transit damage  

to your product, please photograph the damage,  

keep all paperwork/labels and contact the dealer  

from which the spa was purchased immediately.

  Rotate jets

Rotate all jets to the ‘on’ position.


  Wipe out excess water

Your Sapphire Spa has been thoroughly factory  

tested during the manufacturing process to ensure maximum 

reliability and long term satisfaction. Wipe out any excess 

water from the spa that may have drained from the plumbing 

after testing and make sure the spa  

is clean prior to filling. 

  Check pump connection and release valves

Prior to filling your spa, remove the side panels where 

the engine compartment and control equipment are 

situated. Ensure all your pump connections are tight 

and release valves are  

open as they may have shifted during transit.

  Remove filter tray & cartridges

Slide filter face upwards, then remove filter  

tray cover & filter cartridges before filling  

(2 x cartridges in spa pools / 4 x cartridges  

in swim spas)

  Check air controls

Ensure all air controls on the topside of your  

spa are turned to the ‘off’ position. Failure  

to turn off the air controls will extend your  

heat up time dramatically.

Warning: It is important that home owners comply with state and council regulations which are in place to improve 

safety outcomes. Additional information can be obtained from your local council or please visit spasa.com.au

VIDEO INSTRUCTIONS

Visit the mySpa@Home support page  

sapphirespas.com.au/myspa-at-home  

for video instructions. 

Owners Manual  

|


7

6


|

  Owners Manual

Содержание myHotTub

Страница 1: ...Spaownersmanual ...

Страница 2: ... maintenance 12 Acrylic surface cleaning 14 General maintenance 16 Draining your spa 18 Safety information 20 Important notice 20 Trouble shooting error codes 21 Welcome 2 Step 1 Inspection 4 Step 2 Electrical 6 Step 3 Filling your spa 8 Step 4 Controlling your spa 10 Step 5 Heat up 11 Welcome Contents Please take the time to read the entire manual before operating your spa This manual holds vital...

Страница 3: ... your spa everything you need to know as you re installing your spa including technical information for your tradies ENJOY your spa we know all you want to do is jump in nobody wants to read the manual As part of the Sapphire Family we re here to guide you every step of the way with simple instructions practical videos as you enjoy your new spa at home Tips Tricks we understand nothing ever goes t...

Страница 4: ...n and release valves Prior to filling your spa remove the side panels where the engine compartment and control equipment are situated Ensure all your pump connections are tight and release valves are open as they may have shifted during transit Remove filter tray cartridges Slide filter face upwards then remove filter tray cover filter cartridges before filling 2 x cartridges in spa pools 4 x cart...

Страница 5: ...d as cord is 4 5MTS in length from the control box Check the drain valve Ensure the drain valve of the spa pool is closed Please note all drain valves are external excluding myHotTub as above inside cabinet hose spa pool equipment access remove these screws with an allen key where applicable remove the raised joiner strips which hold panels in place where applicable removable side panel extends up...

Страница 6: ...en inline swim spa prior to filling swim spa equipment access Check the drain valve Ensure the drain valve on the outside of the spa cabinet is closed Check pump connection and release valves Prior to filling your spa remove the side panels where the engine compartment and control equipment are situated Ensure all your pump connections are tight and release valves are open as they may have shifted...

Страница 7: ...5mm 1 of wire insulation from the end of each wire Route mains cable through one of the two snap out holes provided and secure the cable with a gland to provide adequate cable strain relief Tighten gland with use of a tool to ensure supply line anchorage point cannot be removed by hand Push the wires into the correct terminals as labelled Refer wiring guide below or on the sticker inside the termi...

Страница 8: ...pipe work with water and minimise the chance of air pockets forming in the plumbing during the filling process Initiate water priming sequence Every time the power is turned on the SV controller will initiate a water priming sequence on start up During priming sequence the filtration pump will run for up to 20 seconds at a time in an attempt to purge air from the plumbing The keypad display will s...

Страница 9: ...e and add chemicals as necessary heating up your spa VIDEO INSTRUCTIONS Visit the mySpa Home support page sapphirespas com au myspa at home for video instructions turn on your spa powering it up ONCE THE SV SYSTEM HAS PRIMED IT BEGINS NORMAL OPERATION Set the date time and temperature Refer to your Quick Reference Guide supplied for basic operation of your particular touchpad SV2 SV3 SV4 smartTOUC...

Страница 10: ...f cartridge that requires cleaning Locate cartridges Locate the 2 x filter cartridges in the base of the filter box Note Swimspas have 4 x filter cartridges lower 2 cartridges screw into the base of the filter box then 2 top cartridges twist onto the top of these Remove debris with hose Use a garden hose to apply a water stream at an angle downwards to make sure all debris and foreign matter is di...

Страница 11: ... may have a detrimental effect on the surface and possibly void warranty Dirt sand Avoid allowing dirt and sand caused by bathers entering the spa simply by placing a mat or footbath in the entry areas of the spa This will assist in the easier maintenance of the acrylic surface Cedar cabinets If you have chosen a cedar cabinet for your spa you can rest easy knowing it has been engineered and desig...

Страница 12: ...ndry dish washing detergents abrasives alcohol based products or harsh household cleaners These can actually remove some of the top coat and cause premature vinyl failure Rotate foam inserts if you notice any sagging or water pooling It is important that you make specific times to give your spa the once over probably every 3 to 4 months The following is a guideline that you may like to follow Disc...

Страница 13: ...w through the valve to empty the spa The spa water will drain out through gravity feed only so this may take several hours Ensure you run the water to an approved discharge area It is advisable if you wish to discharge water on the garden or grass that you do not treat the spa for several days beforehand so chemical build up will not harm the area Once the spa is emptied push the threaded sections...

Страница 14: ... in use Not only is this a safety precaution but it is designed to lock in the heat and make sure your spa isn t running over its regular heating schedule Keep your chemicals balanced Unbalanced water can cause a build up of grime and scale inside your heater element causing it to malfunction Keep your filters clean Clogged or dirty filters will reduce the circulation of your spa water causing und...

Страница 15: ...efore the error condition will be cleared Heartbeat LED All SV model spa packs feature a red flashing heartbeat LED light The heartbeat LED is located on the front right hand side of the spa pack itself installed underneath spa skirt The heartbeat LED flashes to indicate the current health status of the spa pack When the spa pack is functioning correctly with no errors to report the heartbeat LED ...

Страница 16: ...izer Adjust pH or alkalinity range Run jet pump s Drain and refill the spa Water odour Excessive organics in water Improper sanitization Low pH Shock spa with sanitizer Add sanitizer Adjust pH to rec range Problem Probable causes Solutions Cloudy water Dirty filters Excessive oils organic matter Improper sanitization Suspended particles organic matter Overused or old water Clean filters Shock spa ...

Страница 17: ... of actual product we hope this owners manual has helped you get to know your new spa for more information visit Welcome to our Family TAB ON OUR WEBSITE for tips tricks on spa usage maintenance if you have any queries about anything stated in this manual please contact your local store sapphirespas com au sapphirespas nz ...

Отзывы: