− 17 −
3-6. Adjust Specifications
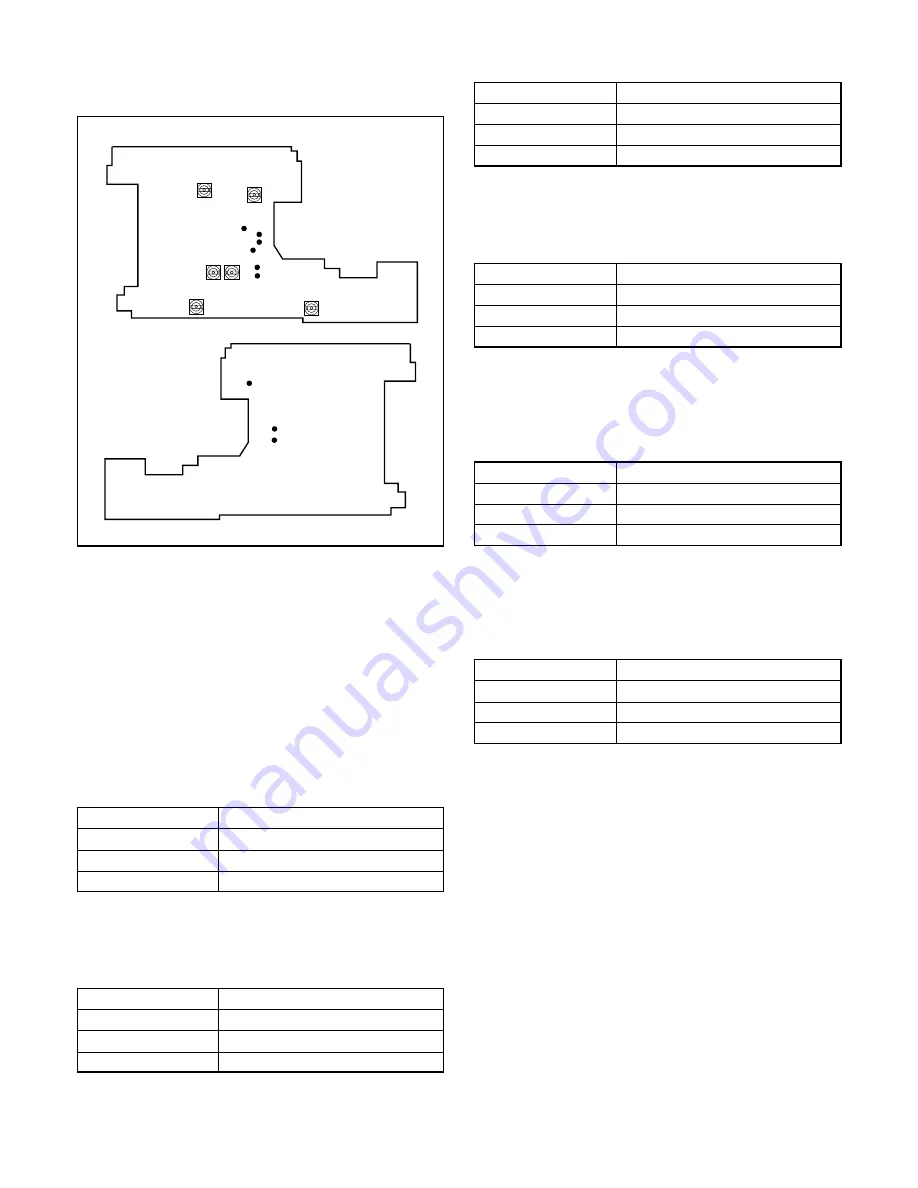
[PW1 board (Side A/B)]
Note:
1. Voltage adjustment is necessary to repair in the PW1 board
and replace the parts.
2. Power voltage set about +3.0 V.
Preparation:
1. Connect CN103 on the CA2 board and CN502 on the PW1
board with extension cord.
2. Open the barrier switch.
3. Set the view mode, and turn on the LCD.
4. Carry out initialization and display the through image on the
LCD screen.
1. IC501 Oscillation Frequency Adjustment
Adjustment method:
1. Adjust with VR501 to 200
±
1 kHz.
2. 5.0 V (D) Voltage Adjustment
Adjustment method:
1. Adjust with VR503 to 5.10
±
0.05 V.
3. 3.3 V (D) Voltage Adjustment
Adjustment method:
1.Adjust with VR502 to 3.30
±
0.03 V.
4. 12.4 V (L) Voltage Adjustment 1
Adjustment method:
1. Set the play mode.
2. Adjust with VR505 to 12.40
±
0.05 V.
5. 12.4 V (L) Voltage Adjustment 2
Adjustment method:
1. Set the view mode, and turn on the LCD.
2. Adjust with VR504 to 12.40
±
0.05 V.
6. 5.8 V (L) Voltage Adjustment
Adjustment method:
1. Adjust with VR506 to 5.80
±
0.05 V.
7. CCD Defect Detect Adjustment
Adjustment method:
1. Set the camera mode, and turn on the power switch to open
the lens cover.
2. Double-click on the DscCalV123b.
3. Select CCD Defect on the LCD “Test”, and click the “Yes”.
4. After the adjustment is completed, OK will display.
5. Close the lens cover.
Measuring Point
ADJ. Location
Measuring Equipment
ADJ. Value
CL512
Frequency counter
VR501
200
±
1 kHz
Measuring Point
ADJ. Location
Measuring Equipment
ADJ. Value
CL533 or CL553 or CL519
Digital voltmeter
VR502
3.30
±
0.03 V
Measuring Point
ADJ. Location
Measuring Equipment
ADJ. Value
CL515
Digital voltmeter
VR503
5.10
±
0.05 V
Measuring Point
ADJ. Location
Measuring Equipment
ADJ. Value
CL524 or CL554
Digital voltmeter
VR505
12.40
±
0.05 V
Measuring Point
ADJ. Location
Measuring Equipment
ADJ. Value
CL524 or CL554
Digital voltmeter
VR504
12.40
±
0.05 V
Measuring Point
ADJ. Location
Measuring Equipment
ADJ. Value
CL530 or CL536
Digital voltmeter
VR506
5.80
±
0.05 V
VR503
VR505
VR504
VR506
VR502
VR501
CL515
CL536
CL530
CL524
CL554
CL519
CL512
CL553
CL533
Содержание VPC-X360
Страница 29: ...OVERALL WIRING ...


