– 18 –
1
2
3
31
32
33
34
35
36
37
38
B
A
B
A
c
b
a
d
A
A
B
B
C
C
19
A
A
B
B
C
D
C
D
4
5
5
6
7
8
9
10
11
12
13
14
15
15
16
17
18
20
21
21
21
22
22
23
24
25
26
27
28
29
30
30
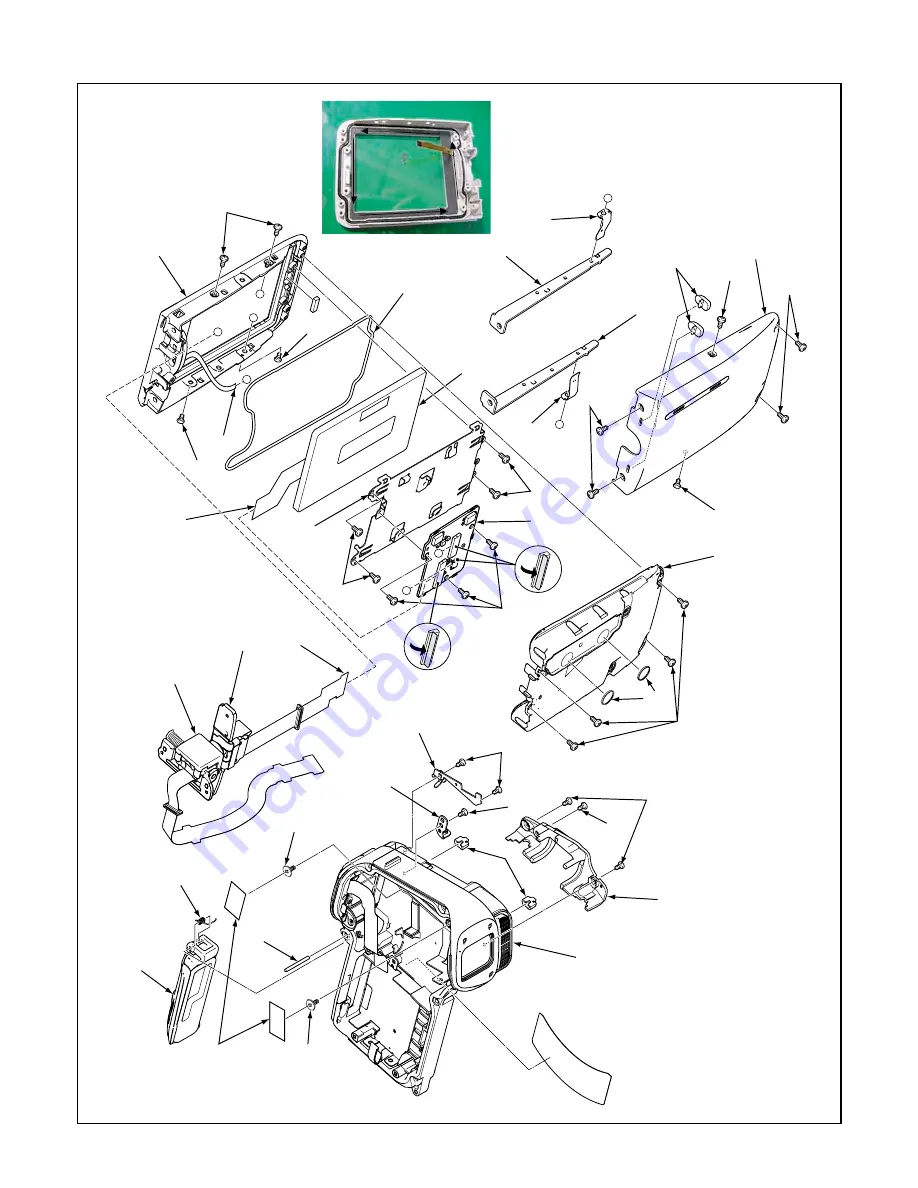
2-4. REMOVAL OF LCD AND VF1 BOARD
When assembling,
tighten the screws order.
A
→
B
→
C
When assembling,
tighten the screws order.
a
→
b
→
c
→
d
When assembling,
tighten the screws order.
A
→
B
3
4
2
1
Installing the gasket LCD (step 36)
Install from directly above in the order of
the numbers so that the FPC is not twisted.
Содержание VPC-CA65EXBL
Страница 20: ... 20 2 5 BOARD LOCATION PW1 board CA1 board CP1 board ST1 board VF1 board ...
Страница 27: ...27 MEMO ...
Страница 29: ...29 1 1 2 3 3 4 5 5 6 6 7 7 8 8 9 ACCESSORIES ...
Страница 60: ...July 07 SANYO Electric Co Ltd Osaka Japan Printed in Japan ...


