background image

-

 3

 -

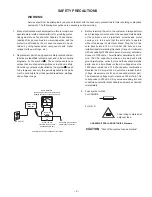
WARNING

Do not use solder containing lead.

This product has been manufactured using lead-free

solder in order to help preserve the environment.

Because of this, be sure to use lead-free solder when

carrying out repair work, and never use solder

containing lead.

Lead-free solder has a melting point that is 30 - 40°C (86 -

104°F) higher than solder containing lead, and moreover it

does not contain lead which attaches easily to other metals.

As a result, it does not melt as easily as solder containing

lead, and soldering will be more difficult even if the

temperature of the soldering iron is increased.

The extra difficulty in soldering means that soldering time

will increase and damage to the components or the circuit

board may easily occur.

Because of this, you should use a soldering iron and

solder that satisfy the following conditions when carrying out

repair work.

Soldering iron

Use a soldering iron which is 70 W or equivalent, and

which lets you adjust the tip temperature up to 450°C

(842°F). It should also have as good temperature recovery

characteristics as possible.

Set the temperature to 350°C (662°F) or less for chip

components, to 380°C (716°F) for lead wires and similar,

and to 420°C (788°F) when installing and removing shield

plates.

The tip of the soldering iron should have a C-cut shape or

a driver shape so that it can contact the circuit board as flat

or in a line as much as possible.

Solder

Use solder with the metal content and composition ratio by

weight given in the table below. Do not use solders which

do not meet these conditions.

Lead-free solder is available for purchase as a service tool.

Use the following part number when ordering:

Part name:

 Lead-free solder with resin (0.5 mm dia., 500 g)

Part number:

 VJ8-0270

 Metal content         Tin (Sn)        Silver (Ag)    Copper (Cu)

Composition
ratio by weight

96.5%              3.0%              0.5%

Note:

If replacing existing solder containing lead with lead-free

solder in the soldered parts of products that have been

manufactured up until now, remove all of the existing solder

at those parts before applying the lead-free solder.

Содержание VMC-L2017P

Страница 1: ...ed to be replaced use only the part designated in the parts List Do not deviate from the specified resistance wattage and voltage ratings 3 Before returning the set to the customer always perform an AC leakage current check on the exposed metallic parts of the cabinet such as terminals screwheads metal overlays etc to be sure that the set is safe to operate without the danger of electrical shock P...

Страница 2: ...ivalent and which lets you adjust the tip temperature up to 450 C 842 F It should also have as good temperature recovery characteristics as possible Set the temperature to 350 C 662 F or less for chip components to 380 C 716 F for lead wires and similar and to 420 C 788 F when installing and removing shield plates The tip of the soldering iron should have a C cut shape or a driver shape so that it...

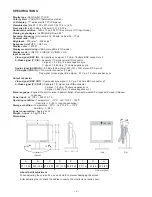
Страница 3: ...e sync Audio signal AUDIO IN 6 0 dBs 400 mVrms 2W 1W 1W stereo RCA pin x 2 VGA signal VGA IN VGA monitor connector 15 pin Red signal Green signal Blue signal 0 7 Vp p 75 ohms positive sync Output connector Video signal BNC OUT Composite sync signal 1 0 Vp p 75 ohms BNC connector x 2 S Video signal Y C OUT Separate Y C signal mini DIN connector Y signal 1 0 Vp p 75 ohms negative sync C signal 0 286...

Страница 4: ...d lamp 7 Remove the assy chassis shield 8 Remove the assy LCD 9 Remove the glass protection 10 Assy cover P front 11 Remove the four screws 12 Remove the screw 13 Remove the two screws 14 Remove the IP board 15 Remove the MAIN board 16 Remove the screw 17 Remove the assy board P IR 18 Remove the assy board P function 4 3 5 6 7 8 9 10 1 2 BOARD LOCATION MAIN board Assy LCD IP board IR board FUNCTIO...

Страница 5: ...e Bulletin issue is in practice The process of working need to be prepare on Service Bulletin As the visual sample shown after disassembling the set refer to SET disassemble remove the Micom in the exist IC202 Socket and replace new Micom Use appropriate JIG or any sharp tool and place in the both corners to assist in removing Be aware If the socket cause any damage after replacement the monitor w...

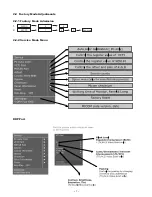
Страница 6: ... 7 2 2 Factory Mode Adjustments 2 2 1 Factory Mode Admission 1 2 4 MENU 6 1 MUTE 8 2 Power on 2 2 2 Service Mode Menu DDP Part ...

Страница 7: ... 8 MSTAR Part Adjust PC DTV Auto Color ...

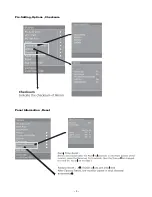
Страница 8: ... 9 Pre Setting Options Checksum Panel Information Reset ...

Отзывы: