EDITING
Tape copy
Please refer to page 25 on how to connect the camcorder.
1
Connect the camcorder to a VC R.
2
Load the recorded tape into the camcorder. Set the
erasure-prevention switch so that the tape cannot be
recorded on. (See page 10.)
3
Set the camcorder
POWER
switch to
"PLAYER".
4
Turn on the VC R and load the tape for recording.
5
Set the VC R to external input mode, then set it to
recording pause mode.
6
Press the
PLAY
button on the camcorder, to start
playback.
7
Start recording on the VC R.
8
When finished, stop recording on the VC R, then press
the
STOP
button on the camcorder.
�Notes:
•When copying a tape, the picture and sound will not
be as good as on the original tape.
•During editing-operations, it is recommended to
connect the camcorder to an AC outlet with the AC
adaptor /charger.
On-screen display
When the camcorder is connected to a TV receiver, the
indications appearing in the viewfinder can be displayed
on the TV screen by pressing the
DATA ON SCREEN
button. Pressing this button again will cancel the
on-screen display. Please refer to pages 25 - 26 on how
to connect the camcorder.
�Note:
If the on-screen display is activated during tape
copy, it will be recorded on the tape along with
the picture and sound.
LANC
terminal
The symbol@ identifies the LANC (Local Application
Control Bus System) terminal. If you are using an edit
controller or a computer for special editing functions, the
external equipment is connected to the LANC terminal to
precisely control all the tape transport functions of your
camcorder. Please refer to the concerned equipment
instruction manual for detailed operation.
DATA
ON SCREEN
m+o
21
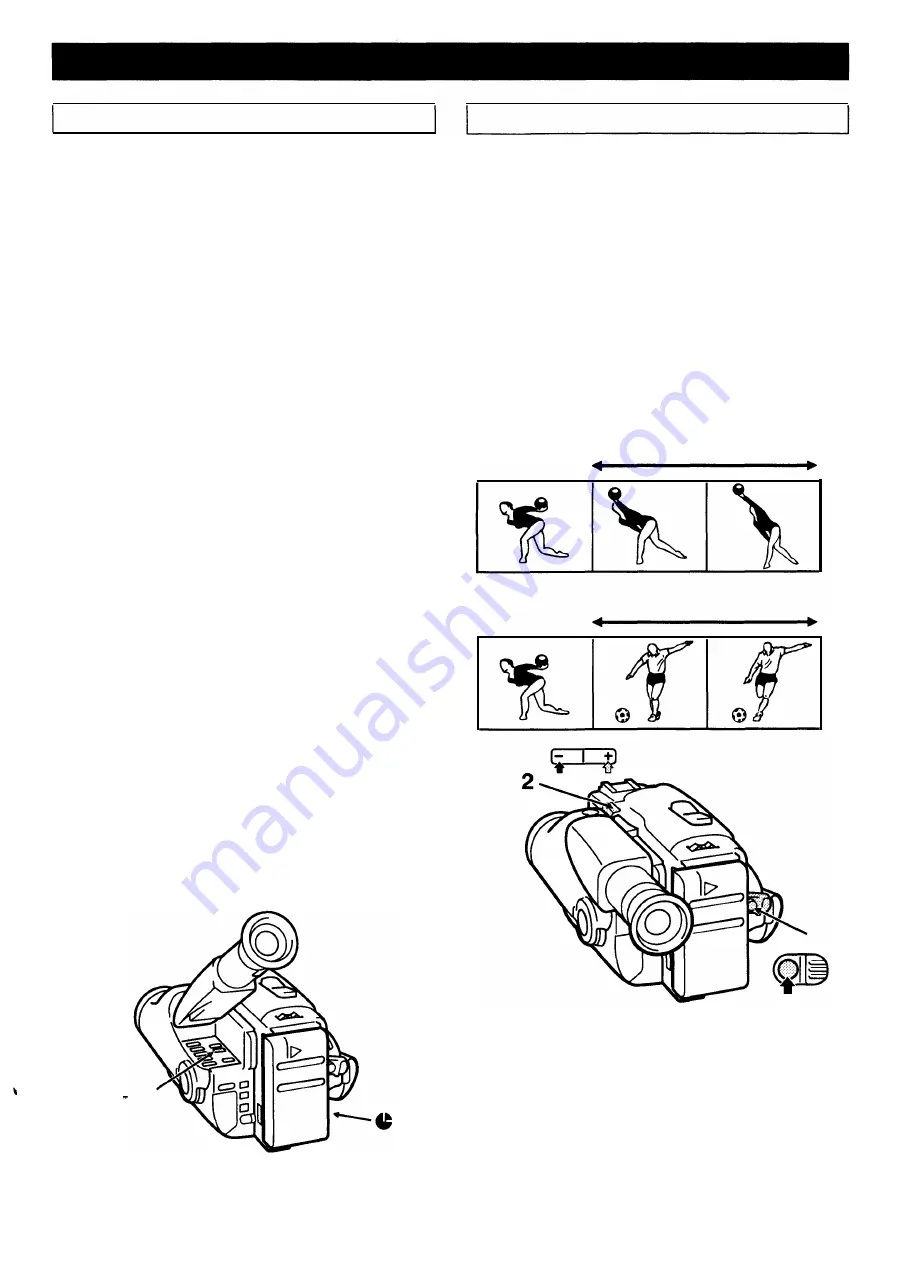
Transition recording
If at the end of a recording, some unwanted pictures and
sound have been recorded, they can be eliminated by
replacing them with newly recorded pictures and sound.
Example:
To replace unwanted pictures (A) by new
pictures ( B).
1
Set the camcorder to recording pause mode.
2
Press and hold the
SCENE or-)
button
until the beginning of the unwanted pictures. When the
button is released the camcorder will go back to
recording pause mode.
3
Press the
REC START/STOP
button to start recording
the new pictures.
�Note:
At playback, during scene search operations,
white bars will appear at that position.
A
B
3


