


OPERATING INSTRUCTIONS
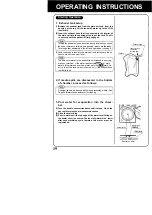
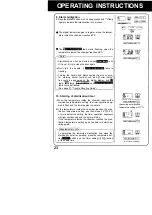
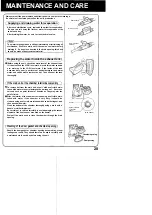
7. Close the door.
# Turn the door gently clockwise with grasping the
handle and until the arm comes to rest against the
arm stopper.
# Even if the [ifcmmjyjfl f'
a s n e s
> continue to turn the
handle until it becomes tight.
# Connect the I
wire connectorP
die switch button
if the handle to the
on the lower panel.
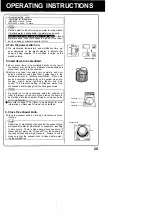
Confirm lighting of [iQQQy[«] and stopping of
IETHBI
Hants flashing.
r~( Notes)
:
•If you stop turning the handle as soon as the l§i»MlMi'il»l
flashes, there is a danger that steam may leak during the
sterilization process.
•The sterilization process can not be started unless Q^
IE693 is lit.
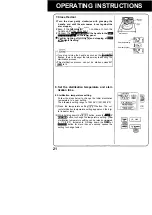
8. Set the sterilization temperature and steri-
lization time.
# Sterilization temperature setting
Follow the steps below to change the initial sterilization
temperature to a new setting.
The allowable setting range is 105-126°C (221-258.8°F)
(1)Press the temperature setting | j g g H button. The cur-
rent sterilization temperature setting appears on the digi-
tal indicator lamp.
(2)While holding down the||3jfi|i| button, press the
raraiwifli button to change the temperature setting.
sterilization temperature setting can be raised or lowered
in 1°C(1.8°F) increments. Holding down the QMlfil or
button for more than one second causes the
setting to change faster.)
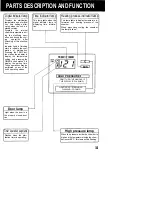
Arm stopper
Door lamp flashing
Door lamp lights
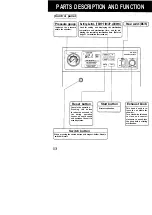
TEMP./TIMER
\ HIGH PRESSURE
(RESET)
21