3
31
TIMER REC SET
3
Press the [
] or [
] button to change
the "STOP" time from “--:--” to “**:--”,
then press the [
] button.
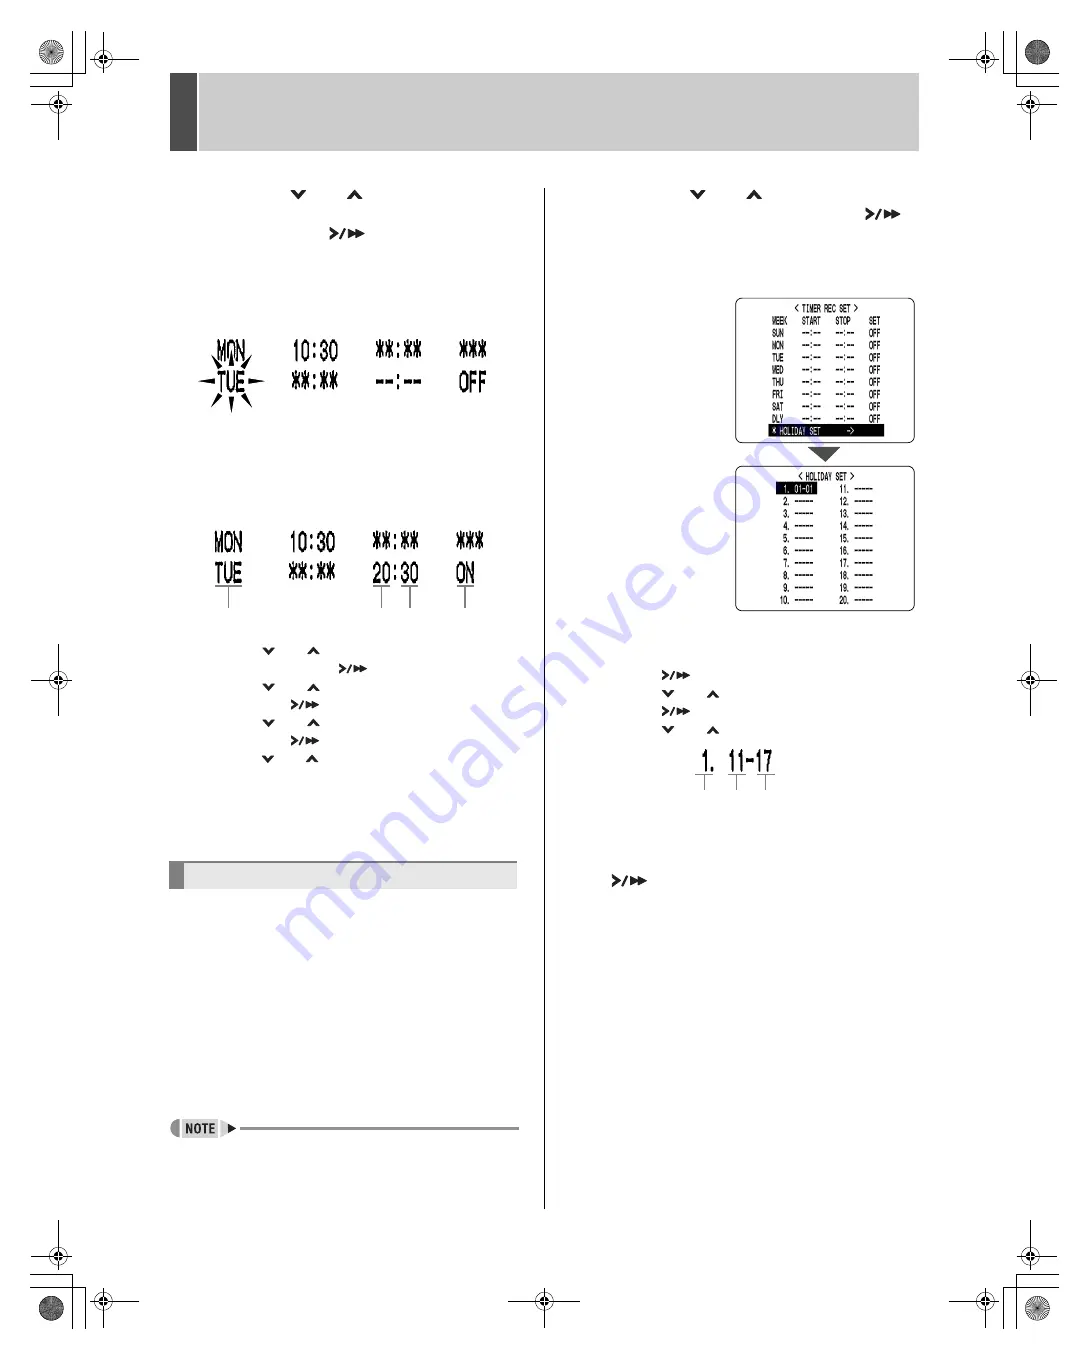
The “DLY” item on the 8th line automatically changes to
“TUE” (the day after the day set on the 7th line), and
flashes. Items that don’t need to be set are displayed as
asterisks (*).
4
Set the time at which to stop recording,
by setting the day in the “WEEK”
column, entering the “STOP” time and
changing “OFF” to “ON”.
(1) Press the [
] or [
] button to change “TUE” to
“WED”, then press the [
] button.
(2) Press the [
] or [
] button to change “--” to “20”,
then press the [
] button.
(3) Press the [
] or [
] button to change “--” to “30”,
then press the [
] button.
(4) Press the [
] or [
] button to change “OFF” to “ON”.
5
Press the [EXIT/OSD] button.
The display returns to the normal screen.
You can set specific dates as holidays, to have the timer
recording operation for Sunday used on those days.
Dates such as national holidays and company off days
should be set as holidays when you want those dates to
have the same security as Sundays.
[Setting conditions]
Be sure to set “START” and “STOP” times for Sunday
(“SUN”) in the <TIMER REC SET> screen, and to set “ON”
for that day. (
J
P.29)
Example: To set November 17 as a holiday
z
You can set up to 20 days as holidays.
1
Press the [
] or [
] button to select
“HOLIDAY SET”, then press the [
]
button.
The <HOLIDAY SET> screen appears, with the cursor
positioned on “1”.
2
Set the month and day in item No. 1.
(1) Press the [
] button to make “--“ (the month) flash.
(2) Press the [
] or [
] button to set “--“ to “11”.
(3) Press the [
] button to make “--“ (the day) flash.
(4) Press the [
] or [
] button to set “--“ to “17”.
3
After entering the setting, press the
[
] button.
The cursor moves to “2”.
4
Use the same procedure to set other
holidays as needed.
5
Press the [EXIT/OSD] button.
The display returns to the normal screen.
Setting holidays
(1)
(2) (3)
(4)
(No.) (the
month)
(the day)
e_dsr_m800.book Page 31 Friday, January 31, 2003 5:45 PM


