background image

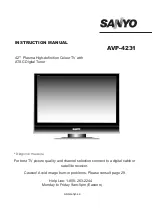
42" Plasma HDTV Screen

RF Antenna Input Jacks: Digital and Analog

Built-in Digital and Analog Tuners

Receivable Formats:  ATSC Digital Tuner for Terrestrial 
Broadcasts and non-scrambled (ClearQAM) broadcasts,
NTSC Analog Tuner for VHF / UHF or CATV

Receives 181 Analog Channels (VHF 2~13 and UHF 14~69;
Cable TV 1, 14~125); and 99 Digital Channels

Automatic Channel Search 

Channel Scan Memory 

3-D Y/C Digital Comb Filter (for better picture detail)

V-Chip for Movies and TV Guidelines Rating Limits 
(Parental Control)

Closed-Captioning: Analog EIA-608B and Digital EIA-708B

Audio Modes: TV—Main and Sub
NTSC—Stereo, Mono, and SAP

Tone

Picture Rotation (Screen Saver)

White Pattern (Panel Repair)

Audio Format: 

Dolby

®

Digital 5.1 for TV and Analog for NTSC

Front Speakers 6 x 12 cm (two)

Detachable TV Stand (Feet)

Trilingual Menu Options

Factory Preset Adjustments for Picture / Sound

Picture Shape: PIX1, PIX2, PIX3, and PIX4

Sleep Timer (3 hours)

HDMI (High-Definition Multimedia Interface) Input with
HDCP (High-bandwidth Digital Content Protection) 

RF Antenna Input Jacks: Digital and Analog

Component Video Input (Two Sets)

Rear Composite AV Input 

S-Video Input 

Optical Digital Audio Out

Fixed Analog Audio Out 

XDS (Extended Data Services) Displays Station Call Letters,
Title of Show, and Ratings when Broadcast

32-Key Remote Control

FEATURES

SPECIFICATIONS

Screen Size:

42 inches (Measured Diagonally)

Panel Type:

Plasma HDTV Display

Aspect Ratio

16:9

Display area:

934 mm (W) x 532 mm (H)

Resolution:

1024 x 768 pixels

Color System:

ATSC / NTSC

Scanning Format: 

720p (RF signals are converted to 720p)

RF Antenna Input:

Analog–UHF / VHF / CATV 75 ohm 
Digital–75 ohm 

Power Requirement:

Source: AC 120V, 60Hz

Power Consumption:

351 Watts (Maximum)

Sound:

Two Speakers, size: 6x12cm

Amplifier:

Built-in with 5.0W/ch

Jacks and Connectors:

Video 1 Input:

Composite  Video and Audio L / R 
S-Video

Video 2 Input:

Component (Y/ Pb / Pr) with Audio L/R Input

Video 3 Input:

Component (Y/ Pb / Pr) with Audio L/R Input

Digital Audio Output:

Dolby® Digital (Optical) 

Analog Audio Output: Audio L / R 

HDMI Input:

19-pin connector 
(Picture /Sound with HDCP)

Service Input Jacks: For Production use only

Size and Weight (approximately):

Horizontal Dim. (Width): 47.5 in. (1205.8 mm) 
Vertical Dim. (Height):

28.2 in. (715.2 mm)

Depth Dim. (Thickness):  9.8 in. (248.3 mm)
Weight: 

84.1 lbs. (38.2 Kg)

Environmental Considerations

Operating Temperature: 32°F ~ 140°F (0°C ~ 60°C)
Humidity:

20 ~ 80%

Storage Temperature:

-4°F ~ 158°F (-20°C ~ 70°C)

Humidity:

5 ~ 95 %

Specifications are subject to change without notice.

CAUTION: FCC Regulations state that improper modifications or

unauthorized changes to this unit may void the
user’s authority to operate the unit.

Trademarks Information:

Manufactured under license from Dolby Laboratories.

Dolby

” 

and the double-D symbol are trademarks of Dolby

Laboratories.

Contains iType™ from Monotype Imaging, Inc.

4

Need help? 

Visit our Web site at  

www.sanyoctv.com

or Call 

1-800-877-5032

with a double “Z” is a registered trademark of

Sanyo Manufacturing Corporation.

Содержание DP42746

Страница 1: ... has determined that this product meets the ENERGY STAR guidelines for energy efficiency As Real As It Gets Read this manual before assembling or using this product Need assistance Visit our website at www sanyoctv com or Call toll free 1 800 877 5032 We can Help Importado Por Comercializadora México Americana S DE R L DE C V Nextengo No 78 Col Santa Cruz Acayucan Del Azcapotzalco México D F C P 0...

Страница 2: ... some protection against voltage surges and built up static charges In the U S Selec tion 810 21 of the National Electrical Code provides information with respect to proper grounding of the mast and supporting structure grounding of the lead in wire to an antenna discharge unit size of grounding conductors location of antenna discharge unit connection to grounding electrodes and requirements for t...

Страница 3: ...ction 7 Install Batteries 8 Connect AC Power Cord 8 All Channel Search 8 Analog Antenna Signal Selection Optional 8 Top and Back Panels 9 Choose Your Connection 10 Digital AV Connections Connecting External Equipment to HDMI Input 11 Connect STB or DVD with DVI Output to HDMI Input 12 Connecting Digital Audio Output to a Multi Channel Receiver 12 Use the Component Jacks to Connect a DVD Player or ...

Страница 4: ... Type Plasma HDTV Display Aspect Ratio 16 9 Display area 934 mm W x 532 mm H Resolution 1024 x 768 pixels Color System ATSC NTSC Scanning Format 720p RF signals are converted to 720p RF Antenna Input Analog UHF VHF CATV 75 ohm Digital 75 ohm Power Requirement Source AC 120V 60Hz Power Consumption 351 Watts Maximum Sound Two Speakers size 6x12cm Amplifier Built in with 5 0W ch Jacks and Connectors ...

Страница 5: ...household aerosol sprays cleaning agents solvents and polishes will cause perma nent damage to the fine surface 1 Unplug the power cord before cleaning the Plasma DTV 2 Gently wipe the screen and cabinet with dry soft cloth The screen is likely to be damaged if it is not maintained properly Do not use hard objects like a hard cloth or paper Do not use solvents or abrasives NOTES Never spray liquid...

Страница 6: ...n and other elec tronic devices POSITIONING PRECAUTIONS Place this Plasma DTV as indicated here Failure to do so may result in a fire hazard Allowing the proper amount of space at the top sides and rear of the Plasma DTV cabinet is critical for proper air circulation and cooling of the unit The dimensions shown here indicate the minimum space required If the Plasma DTV is to be built into a compar...

Страница 7: ...TV receives HD signals from an antenna Digital signals from a Set top Box STB are received through the Component In jacks This DTV can receive ANY resolution being broadcast HDTV EDTV or SDTV However ALL resolutions are converted to 1080i for display DIGITAL RF ANTENNA PLASMA TV BACK FIRST THINGS FIRST Required Initial Setup OR VCR BACK VCR BACK PLASMA DTV BACK OR PLASMA DTV BACK PLASMA DTV BACK N...

Страница 8: ...ber 2 4ALL CHANNEL SEARCH IMPORTANT NOTE Spent or dis charged batteries must be recycled or disposed of properly in compliance with all applicable laws For detailed information contact your local County Solid Waste Authority 2INSTALL BATTERIES Install two AAA Batteries not included so that the and marks on the batteries match the and marks inside the Remote To review the remote control functions g...

Страница 9: ...PAGE 7 Connect an RF antenna or Analog cable system to this jack S Video Input VIDEO1 PAGE 14 To enhance video detail use the S Video jacks instead of the Video jacks if available on your external equipment S Video connection will override connection to the Video input jack VIDEO1 Analog Audio Out L R Jacks PAGE 15 Connect external audio equipment here Audio Video Input VIDEO1 PAGE 14 Connect anal...

Страница 10: ...MPOSITE VIDEO OR S VIDEO IN 14 DIGITAL AUDIO OUT Only available when received as part of a Digital RF signal or HDMI signal OPTICAL DIGITAL CABLE 12 ANALOG AUDIO OUT JACKS 15 AUDIO CABLE White and Red connectors S VIDEO CABLE Analog Signal Compatible External Cables Needed Go to Connections Equipment Not Supplied Page COMPOSITE VIDEO CABLE Yellow White and Red connectors MULTI CHANNEL RECEIVER DVD...

Страница 11: ...external equip ment follow this procedure when connecting cables and powering on your equipment 1 Switch off DTV and external equipment before con necting cable Cable is not supplied 2 Connect the external equipment s high bandwidth HDMI Output to the DTV s HDMI Input 3 The DTV must be turned on first press POWER Then turn on your external equipment 4 Press INPUT to select HDMI to view a digital p...

Страница 12: ...DVI device is connected Position your DTV at least 2 feet from stereo speakers The magnets in the speakers may affect the picture quality Dolby Digital Audio provides 5 1 channels of surround sound five full range channels 5 and one low frequency effect channel 1 A fiber optics cable is used to carry the 5 1 surround sound for low noise signal transfer BACK VIEW OF DTV OPTICAL DIGITAL CABLE 1 Usin...

Страница 13: ...ice such as a Digital Satellite Receiver COMPONENT JACKS 1 What you will need for connections Component Video Cable 1 Audio Cable 1 VIDEO2 and VIDEO3 jacks have identical functions Com patible video devices can be connected to either set of jacks Press the INPUT key after connecting the cables to select the Video 2 or Video 3 input signal There is NO need to tune to a blank channel No Signal will ...

Страница 14: ... view the VCR program What you will need for connections Audio Video Cable 1 S Video Cable 1 S VIDEO JACK 2 2 1 Press the INPUT key after connecting cables to access the Video 1 input There is NO need to tune to a blank channel No Signal will appear randomly on the screen when no signal is detected at the VIDEO1 video jack REMOTE CONTROL 4 3 USING THE ANALOG VIDEO1 JACKS TO CONNECT A VCR OR OTHER ...

Страница 15: ...ternal equipment NOTE Do not connect external speakers directly to the DTV 1 REMOTE CONTROL 2 TYPICAL HOME THEATER CONNECTIONS Position your DTV at least 2 feet from stereo speakers The magnets in the speakers may affect the picture quality Switch off DTV and external equipment before connecting cables Cables are not supplied 15 Need help Visit our Web site at www sanyoctv com or Call 1 800 877 50...

Страница 16: ...nnel 6 For Analog Cable channels above 100 press and hold the 1 key until C1 appears then press the other two numbers Info Key Press to display the Digital and Analog Full Banner information press again to remove the display Digital Full Banner display Contains a two part Channel Number Major and Minor and Tuner ID If available the following is also included Station ID Program Title V Guide Progra...

Страница 17: ...again to restore This key will not mute sound from the audio out jacks Enter Key Press this key to select an option from the menu system when required Cursor up down keys Press these keys to move the cursor up and down within the menu Cursor left right keys Press these keys to move the cursor left and right within the menu Exit Key Press this key to exit from the menu system Volume VOL Keys Press ...

Страница 18: ...o Yes Analog Antenna Signal Cable VHF UHF Channel Scan Memory Delete Add Digital Caption Font Size Font Style Background Color Foreground Color Background Opacity Foreground Opacity Picture Sound Auto Manual Menu Language English Español Français Color Tint Contrast Brightness Sharpness Tone 1 Press the MENU key to display the Main menu 2 Use the CURSOR keys to highlight green the All Channel Sear...

Страница 19: ...n Digital Add On Search Press ENTER 4 Use the CURSOR key to select Yes Press ENTER NOTES Turn your Antenna and repeat these steps for each direction in which there are transmitting towers Go to www antennaweb org and type in your zip code to obtain specific tower and antenna information NOTE If the DTV is switched off by pressing the POWER key or unplugging the AC during Digital Add On Search all ...

Страница 20: ... the channel number 4 Press the ENTER key to add the channel The display will change to Added When you have fin ished adding and or deleting channels press the EXIT key to return to normal TV viewing CHANNEL SCAN MEMORY Channel Scan Memory is a list of active channels that you can scan through using the Channel Scan CH up CH down keys This list can be customized by delet ing and or adding channels...

Страница 21: ...ill not respond to these adjustments however upconverted analog captions may respond to some options 1 Press the TUNER key to select the Digital Tuner 2 Press the MENU key to display the Main menu 3 Use the CURSOR keys to highlight green the Digital Caption Press ENTER 4 Use the CURSOR keys to highlight green an option Press ENTER 5 Use the CURSOR or keys to select the desired effect 6 When you ha...

Страница 22: ...elected option A lock will appear beside the selected rating option indicating it is blocked 7 When you have finished making adjustments press the EXIT key to return to normal TV viewing V GUIDE RATINGS AT A GLANCE MPAA Movie RATING BLOCKED RATINGS Lock symbol TV RATING You can block portions of a TV rating by choosing one or more of the Content ratings D L S V By blocking just the L S content rat...

Страница 23: ...n little or no violence no strong language or sexual dialogue or situations PARENTAL GUIDANCE SUGGESTED Program contains material that may be unsuitable for younger children Material contains one or more for the following moderate violence V some sexual situations S infrequent coarse language L or some suggestive dialogue D PARENTS STRONGLY CAUTIONED Some material is unsuit able for children under...

Страница 24: ...ey to return to normal TV viewing 1 Press the MENU key to display the Main menu 2 Use the CURSOR keys to highlight green Picture Sound Press ENTER 3 Use the CURSOR keys to highlight Auto factory preset settings or Manual Press ENTER MANUAL ADJUSTMENTS 4 Use the CURSOR keys to select the option you want to adjust 5 Then use the CURSOR keys to make an adjustment 6 When you have finished making adjus...

Страница 25: ... REPAIR Use this feature to repair the Plasma screen If an afterimage occurs use the White Pattern feature immediately to repair the panel The more severe the after image the longer the curing process may take It may be impossible to repair all cases of afterimage burn The sooner you remove a still picture and activate White Pattern the more likely it is that the panel can be repaired NOTE Afterim...

Страница 26: ...7 24 No Signal message appears on screen Check Audio Video connections Check external equipment connections Check external equipment setting Check antenna connection Press INPUT key Switch on external equipment Turn antenna install signal booster Set external equipment output connec tions to match input connections 11 15 Pixilation of Digital image Press INFO key and check signal strength Turn ant...

Страница 27: ...T AND THE RESPECTIVE COST OF TRANSPORTATION THIS GUARANTEE WILL BE NULL AND VOID IN THE FOLLOWING CIRCUMSTANCES WHEN PRODUCT HAS BEEN USED IN A DIFFERENT CONDITION THAN ITS NORMAL USE WHEN PRODUCT HASN T BEEN OPERATING CORRECTLY ACCORDING TO THE INSTRUCTIONS IN THIS MANUAL WHEN PRODUCT HAS BEEN CHANGED OR REPAIRED BY PERSONS NOT AUTHORIZED FROM THE MANUFACTURER IMPORTER OR MERCHANT RESPONSIBLE RES...

Страница 28: ...ants this product to be free from defects in material and workmanship under normal use and conditions Should replacement be nec essary under this warranty for any reason due to manufacturing defect or malfunction during the first year from date of original purchase Sanyo Manufacturing Corporation will provide a new Plasma TV via exchange at the retailer For customer assistance whether during or ou...

Страница 29: ...giendo la Conexión 37 Conexiones Digitales AV Conectando Equipo Externo a la Entrada HDMI 38 Conectando STB o un DVD con Salida DVI a la Entrada HDMI 39 Conectando las Salidas de Audio Digital al Receptor Multi Canal 39 Usando los Conectores Componente para Conectar un Reproductor de DVD u otro Equipo Digital 40 CONEXIONES ANÁLOGAS AV Usando los Conectores de Video1 Análogo para Conectar un Video ...

Страница 30: ...ltaje o cargas electrostáticas En la sección 810 21 del código nacional eléctrico de lo Estados Unidos se menciona información con respecto a la manera adecuada de instalar el sistema de tierra al mástil principal aterrizaje del cableado para la unidad de descarga de la antena tamaño de los con ductores de tierra localización de la unidad de descarga de la antena conexión a los electrodos de tierr...

Страница 31: ...a de Plasma Razón de Aspecto 16 9 Área desplegada 934 mm W x 532 mm H Resolución 1024 x 768 pixels Sistema de Color ATSC NTSC Formato de Rastreo 720p las señales RF son convertidas a 720p Entrada Antena RF Analógica UHF VHF CATV 75 Ohms Digital 75 Ohms Requerimientos de Potencia Fuente 120VAC 60Hz Consumo de Potencia 351 Watts Máximo Sonido Dos Bocinas tamaño 6 x12cm Amplificador Integrado de 5Wat...

Страница 32: ...apropiadamente Muchos sprays en aerosol caseros limpiadores solventes y cremas para pulir pueden causar un daño permanente a la fina superficie del DTV 1 Desconecte el Cordón de Potencia antes de limpiar la DTV 2 Limpie gentilmente la superficie de la pantalla y el gabinete con un trapo suave y limpio La pantalla pudiera ser dañada si no se le da manten imiento adecuado No utilice objetos duros co...

Страница 33: ...ros artículos eléctricos Coloque la TV de Plasma como se indica aquí De lo contrario existe la posibilidad de Fuego Permitir el sufi ciente espacio en la parte de arriba los lados y la parte posterior del gabinete es crítico para una adecuada ven tilación de la unidad y así permitir su enfriamiento Las dimensiones indicadas aquí muestran el mínimo espacio requerido Si laTV va a ser instalada en un...

Страница 34: ... usted mueve la TV a otro lugar presione la tecla de RESET dos veces después de conectar la señal y encender la TV CABLE ANALÓGICA ANTENA DE RF RECEPTOR DE SATÉLITE ANALÓGICA VCR Conexión de Antena Digital de RF DTV Conecte la antena de RF al conector de Antena Digital El sintonizador Digital en esta DTV recibe señales de Alta Definición de la Antena Cualquier otra señal Digital es recibida a trav...

Страница 35: ...CANALES NOTA IMPORTANTE Las baterías descargadas deben de ser recicladas o deshechadas adecuadamente de acuerdo con los reglamentos aplica bles Para más información contacte a sus Autoridades Locales para el manejo de Deshechos Sólidos 2INSTALE DOS AAA LAS BATERÍAS Instale dos baterías tipo AAA como se muestra Ase gurándose que las marcas de concuerden con los signos de las baterías y con las marc...

Страница 36: ...a este conector como se muestra Conexiones de servicio Para uso en producción exclusivamente Entrada Analógica de Antena UHF VHF CATV PÁGINA 34 Conecte una Antena de RF Cable o Receptor de Satélite a este conector como se muestra Entrada S Video Video 1 PÁGINA 41 Para resaltar el detalle de Video conecte un cable de S Video a la entrada del mismo nombre en lugar de utilizar el conector de video co...

Страница 37: ... EDTV o SDTV Conexión separada de audio as requerida CABLE VIDEO COMPONENTE Conector Verde Azul y Rojo ENTRADAS VIDEO COMPUESTO O S VIDEO 41 SALIDA ÓPTICA DE AUDIO DIGITAL Solo disponible cuando se recibe como parte de la señal de Digital RF o señal de HDMI CABLE ÓPTICO DIGITAL 39 SALIDA DE AUDIO ANALÓGICA 42 CABLE DE AUDIO Conector Blanco y Rojo CABLE S VIDEO Señal de Equipo Externo Compatible Ca...

Страница 38: ...NPUT para selec cionar HDMI y ver un programa digital Si la configuración de pines HDMI de la televisión es diferente de la configuración de su Caja Receptora usted necesitara usar un adaptador Presione la tecla INPUT después de conectar los cables para tener acceso las entradas AV No hay necesidad de sintonizar un canal vació CABLE HDMI Inserte con cuidado el cable a la terminal TV HDMI 2 CONTROL...

Страница 39: ... un canal vació Debido a que los conectores de Audio de VIDEO3 están siendo usados los conectores de video de VIDEO3 no pueden ser usados cuando un dis positivo DVI esta conectado Con una conexión DVI asegúrese de conectar la salida de audio a la entrada de audio VIDEO3 de la TV Coloque sus bocinas estereofónicos al menos 2 pies alejados de su DTV Los magnetos de los bocinas podrían afectar la cal...

Страница 40: ...e la tecla INPUT para seleccionar Video 3 para observar el programa DVD Lo que necesitara para sus conexiones Cable de Video Componentes 1 Cable de Audio 1 Los conectores VIDEO2 y VIDEO3 tienen funciones idénticas Cualquier equipo compatible de video puede ser conectado a cualquier grupo de conectores Presione la tecla INPUT después de conectar los cables para tener acceso las entradas AV No hay n...

Страница 41: ...para observar el pro grama VCR Presione la tecla INPUT después de conectar los cables para tener acceso las entradas VIDEO 1 No hay necesidad de sintonizar un canal vació El Mensaje No señal aparecerá aleatoriamente en la pantalla cuando no se detecte señal en las entradas de VIDEO1 Coloque sus bocinas estereofónicos al menos 2 pies alejados de su DTV Los magnetos de los bocinas podrían afectar la...

Страница 42: ...N TEATRO EN CASA CONEXIONES ANALÓGICAS AV 1 Conecte la salida de audio R L de la DTV a la entrada R L del amplificador estereofónico 2 Presione la tecla POWER para encender la DTV Encienda también el equipo externo NOTA NO conecte bocinas externos directamente a la DTV Coloque sus bocinas estereofónicos al menos 2 pies alejados de su DTV Los magnetos de los bocinas podrían afectar la calidad de la...

Страница 43: ...o presione 0 y después 6 para seleccionar el canal 6 Para canales analógicos arriba de 100 presione y sostenga la tecla 1 hasta que aparezca C1 Tecla de INFO Presione para desplegar la informa ción titular completa Digital o Analógica presione de nuevo para quitar el desplegado de Imagen Titular completo Digital Contiene una numeración virtual de canales formada de 2 partes Mayor y Menor Si esta d...

Страница 44: ...g itales y canales analógicos NOTA La tecla de TUNER esta inactiva cuando una entrada externa es seleccionada Video 1 Video 2 Video 3 o HDMI Tecla de Caption Presione para seleccionar cap tación de subtítulos Analógicos o Digitales Los modos de Captación Analógica son CC1 CC4 Quikcap y apagado Los modos de Captación Dig itales son Digital CC1 CC6 Quikcap y apagado Teclas Canales CH Presione arriba...

Страница 45: ...alla mostrará una flecha roja la izquierda a la derecha que parpadea tantas veces como usted presione la tecla VOL Tecla de RESET Presione dos veces para restable cer los ajustes de fábrica La DTV automáticamente comenzará la búsqueda de canales y limpiara todos los ajustes personalizados NOTA La función de RESET incluye una búsqueda de canales Los canales que estén en la memoria de la TV serán bo...

Страница 46: ...de cable instalado NOTAS Durante la Búsqueda de Canales toda la base de datos en memoria es borrada y una nueva lista de canales es creada Para recibir Canales de Cable Digital se debe de llevar a cabo una Búsqueda de Canales de Cable Digitales Para agregar nuevos canales a la memoria use la función Búsqueda de Canales Digitales que se muestra en la pagina 48 OPCIONES DE MENÚ Busqueda de todos los...

Страница 47: ... Por lo tanto cuando usted busque canales digitales ClearQAM la base de datos de la antena digital serán borrados Usted solo podrá recibir aquellos canales ClearQAM que sean provistos por su com pañía de cable Las compañías de cable rearreglan los canales virtuales según la pro gramación cambie lo cual puede causar que el programa que usted esta viendo sea movido a otro canal El siguiente mensaje ...

Страница 48: ...os canales o bien agregar canales cuando las torres trans misoras están en lugares opuestos a su localización 1 Presione la tecla TUNER para seleccionar canales digitales 2 Presione la tecla MENU para exhibir la menú principal 3 Use las teclas CURSOR para resaltar verde Búsqueda de Canales Digitales Presione ENTER 4 Use la tecla CURSOR para seleccionar Si Presione ENTER NOTAS Reoriente su antena y...

Страница 49: ... que no aparecen en la lista de la Memoria de Barrido de Canales Para agregar canales a la Memoria de Barrido de Canales 3 Use las teclas numéricas 0 9 para seleccionar el número del canal deseado Bajo el número del canal aparecerá Agregar 4 Presione la tecla ENTER para agregar el canal La pantalla cambiará a Agregado Cuando se ha terminado de agregar o eliminar canales presione la tecla EXIT para...

Страница 50: ...ns Análogos generalmente no responden a estos ajustes sin embargo captions análogos sin convertir pudieran responder a algunas de las opciones 1 Presione la tecla TUNER para seleccionar canales digitales 2 Presione la tecla de MENÚ para desplegar en menú principal 3 Use las teclas de CURSOR para resaltar verde la Caption DTV Presione ENTER 4 Use las teclas de CURSOR para resaltar verde una opción ...

Страница 51: ...clasificación de la TV o las clasificaciones de los contenidos Junto a la opción seleccionada aparecerá un cuadrado verde 6 Presione la tecla ENTER para bloquear o desblo quear la opción seleccionada Un símbolo de candado aparecerá a un lado de la opción selec cionada indicando que esta clasificación esta bloqueada 7 Cuando se han terminado de hacer los ajustes pre sione la tecla de EXIT para regr...

Страница 52: ...uden incluir fantasía y violencía FV ligera o violencía en comedía AUDIENCÍA GENERAL La mayoría de los padres encuentran estos programas adecuados para todas las edades Estos pro gramas tiene poca ninguna violencía no hay lenguaje fuerte o poco ningún tipo frecuente diálogo o contenido sexual SE SUGIERE GUÍA POR PARTE DE LOS PADRES Este pro grama contiene material que los padres pueden encontrar a...

Страница 53: ...bir la menú principal 2 Use las teclas CURSOR para resaltar verde Imagen Sonido Presione ENTER 3 Use las teclas CURSOR para resaltar verde de Auto las configuraciones de fábrica o Manual Presione ENTER AJUSTE EL MANUAL 4 Use las teclas de CURSOR para seleccionar la opción que se quiera ajustar 5 Entonces use las teclas de CURSOR para hacer el ajuste 6 Cuando se termine de hacer los ajustes presion...

Страница 54: ...nces tomara mas tiempo el proceso Es imposible reparar todos los casos de este tipo Entre mas rápido se quite la imagen fija de la pantalla y se active la imagen blanca las posibilidades de poder reparar el panel son mas altas NOTA El defecto de imagen posterior o pantalla quemada no esta cubierto bajo la garantía Si una imagen fan tasma se presenta inmediatamente utilice la característica de imag...

Страница 55: ...nalógico 44 50 No se muestra la imagen en la pantalla completa Cheque la Relación de Aspecto de la transmisión Presione la tecla de PIX SHAPE para expandir o acercar la imagen 45 Pixelación de la Imagen Digital Presione INFO y cheque el nivel de la señal Gire la antena Instale un amplificador de senal Instale una antena Digital Externa 34 43 Recepción pobre de Imagen Sonido Observando Análogo Cheq...

Страница 56: ...ija el Control Remoto al frente de la TV 35 43 El gabinete de la DTV hace ruidos Esta es una condición normal de los gabinetes de plástico durante el calentamiento o el enfriamiento Debido al nivel de calidad con el que construimos nue stros productos muy pocos defectos son realmente problemas relacionados con su televisor Muchos prob lemas pueden ser relacionados simplemente son conexiones de cab...

Страница 57: ...LA REPARACIÓN ASÍ COMO GASTOS DE TRANSPORTACIÓN RESPECTIVOS ESTA GARANTIA SERA NULA EN LOS SIGUIENTES CASOS CUANDO EL PRODUCTO SE HUBIESE UTILIZADO EN CONDICIONES DISTINTAS A LAS NORMALES CUANDO EL PRODUCTO NO HUBIESE SIDO OPERADO DE ACUERDO CON EL INSTRUCTIVO DE USO QUE SE LE ACOMPAÑA CUANDO EL PRODUCTO HUBIESE SIDO ALTERADO O REPARADO POR PERSONAS NO AUTORIZADAS POR EL FABRICANTE NACIONAL IMPORT...

Страница 58: ...g Corporation garantiza que este producto esta libre de defectos en materiales y mano de obra bajo condiciones normales de uso El reemplazo solo será necesario bajo esta garantía por cualquier razón debido a defecto de manufactura o mal funcionamiento durante el primer año a partir de la fecha de compra original Sanyo Manufacturing Corporation proveerá de una TV de Plasma nueva vía intercambio al ...

Страница 59: ...YX6 A 42 J3TZ GXBD This manual printed with Soy Ink ...

Отзывы: