background image

6901-002051 08

16

1

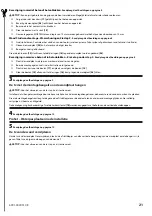
Consulte el gráfi co en la página 5

Instalación de las placas de sujeción

Antes de comenzar, enrosque manualmente los tornillos en los encastres roscados de la parte posterior del televisor a fi n de determinar 
el diámetro correcto de los tornillos (M4, M6 o M8). Verifi que que las roscas sean adecuadas para fi jar las placas al televisor. Si encuentra 
resistencia, deténgase de inmediato y contáctese con el servicio de atención al cliente.

 PRECAUCIÓN: 

Evite lesiones físicas y daños materiales. Utilice la combinación más corta de tornillo y espaciador según las 

necesidades. Utilizar tornillos demasiado largos puede dañar los componentes internos del televisor.

1-1 Para televisores con parte posterior plana o libre de obstrucciones. 

Asegúrese de que las placas de sujeción queden niveladas en la parte posterior del televisor y centradas vertical

m

ente. Si necesita 

m

ás espacio para 

cables, concavidades o protuberancias, consulte una opción de instalación (1-2, 1-3 ó 1-4) que utilice separadores.

1-2 Para televisores con parte posterior irregular o con obstrucciones. 

Asegúrese de que las placas de sujeción queden niveladas en la parte posterior del televisor. Se ilustran las confi guraciones estándar. Si desea 
infor

m

ación sobre aplicaciones especiales o si tiene dudas sobre la selección de piezas, contáctese con el servicio de atención al cliente.

A. Deter

m

ine la longitud de espaciador que deberá utilizar ([13]  o [14]). Pase las arandelas de soporte [12] por las ranuras correspondientes y por los 

orifi cios de las placas de sujeción [01] y [02]. Fije el espaciador requerido a la arandela de soporte.

Consulte el gráfi co en la página 7

Montaje sobre paredSi necesita ayuda para deter

m

inar la ubicación de la placa 

m

ural, utilice la herra

m

ienta HeightFinder disponible en sanus.co

m

.

Montaje sobre 

m

ontantes de 

m

adera.  

Consulte el gráfi co en la página 7

 PRECAUCIÓN: 

El uso indebido podría reducir la capacidad de retención de los tornillos. Para evitar lesiones y daños 

m

ateriales:


Ù

No ajuste en exceso los tornillos 

[15]


Ù

El material que recubre la pared no debe exceder los 16 mm (5/8 pulgada).


Ù

Los orifi cios DEBEN realizarse con una mecha de 5,5 mm (7/32 pulgada) de diámetro hasta una profundidad de 75 mm (3 pulgadas).

Montaje sobre concreto 

m

acizo o sobre bloques de hor

m

igón   

Consulte el gráfi co en la página 8

 PRECAUCIÓN:

 El uso indebido podría reducir la capacidad de retención de los tornillos. Para evitar lesiones y daños 

m

ateriales:


Ù

Cerciórese de que los anclajes 

[17]

 queden nivelados respecto de la superfi cie de hormigón.


Ù

Instale la placa mural 

[03]

 directamente sobre la superfi cie de hormigón.


Ù

Nunca perfore el cemento que une los bloques.


Ù

No ajuste en exceso los tornillos 

[15]

.


Ù

Los orifi cios DEBEN realizarse con una mecha de 10 mm (3/8 pulgada) de diámetro hasta una profundidad de 75 mm (3 pulgadas).

INSTRUCCIONES IMPORTANTES DE SEGURIDAD – CONSERVE ESTAS INSTRUCCIONES – LEA TODO EL MANUAL ANTES DE UTILIZAR ESTE PRODUCTO

Especifi caciones


Ù

Peso máximo admitido —

NO LO EXCEDA

—:  68 kg (150 lbs). Incluye televisor y accesorios.


Ù

Inclinación: -10° to +8.5°

 PRECAUCIÓN:


Evite lesiones físicas y daños materiales. 


Ù

No utilice este producto para ningún otro propósito que no sea el explícitamente especifi cado por el fabricante. 


Ù

La pared debe soportar cinco veces el peso del monitor y el soporte juntos. 


Ù

Este producto no está diseñado para ser instalado en paredes con montantes metálicos.


Ù

Si no entiende las instrucciones o si tiene dudas acerca de la seguridad de la instalación, del ensamblado o del uso del producto, 
contáctese con el Servicio de Atención a Clientes del fabricante o llame a un técnico califi cado. 


Ù

El fabricante no se responsabiliza por ningún daño o lesión resultante del montaje incorrecto o el uso indebido.

Piezas y Materiales Su

m

inistrados. Consulte el gráfi co en la página 4.

Antes de iniciar el ensamblaje, comprobar que se encuentran incluidas y en buenas condiciones todas las piezas. Si falta o está deteriorada 
alguna pieza, no devuelva el artículo a su concesionario; póngase en contacto con el servicio de atención al cliente. ¡No utilice nunca piezas 
deterioradas!

NOTA: 

No habrá que utilizar todo el material.

Español

Содержание VisionMount VMPl50A

Страница 1: ...NUS 6436 City West Parkway Eden Prairie MN 55344 USA 2013 Milestone AV Technologies a Duchossois Group Company All rights reserved Sanus is a division of Milestone All other brand names or marks are used for identification purposes and are trademarks of their respective owners sanus com We are here to help Please contact Customer Service with any questions VMPL50A Instruction Manual Installation v...

Страница 2: ...o en español página 16 17 Polski Jak używać tej instrukcji W celu uzyskania najlepszych rezultatów korzystając z tej instrukcji należy zwrócić uwagę zarówno na tekst jak i na ilustracje Przeciąć wzdłuż przerywanych linii w celu dopasowania języka do ilustracji OR Wybrać jedną pozycję lub drugą OPT Ta pozycja jest opcjonalna Tekst w języku polskim na stronach 30 31 Português Como usar este manual P...

Страница 3: ... product is not designed for use in metal stud walls Ù If you do not understand these instructions or have doubts about the safety of the installation assembly or use of this product contact manufacturer Customer Service or call a qualified contractor Ù Manufacturer is not responsible for damage or injury caused by incorrect assembly or use IMPORTANT SAFETY INSTRUCTIONS SAVE THESE INSTRUCTIONS PLE...

Страница 4: ...em to your dealer contact Customer Service Never use damaged parts NOTE M4 M6 or M8 describes the diameter mm describes the length of screws that are labeled M x mm Not all hardware included will be used 5 5 mm 7 32 in 10 mm 3 8 in 13 mm 1 2 in M4 x 12mm 04 x 4 01 x 1 02 x 1 03 x 1 M4 x 30mm 05 x 4 M6 x 14mm 06 x 4 M8 x 16mm 08 x 4 12 x 4 16 x 4 17 x 4 M6 x 40mm 07 x 4 M8 x 40mm 09 x 4 M4 10 x 4 1...

Страница 5: ... service CAUTION Avoid potential personal injuries and property damage Use the shortest screw and spacer combination to accommodate your needs Using hardware that is too long may damage your monitor s internal components 1 1For TV s with a flat unobstructed back M4 M6 M8 04 06 08 10 11 Ensure the brackets are level on the back of the TV and the directional arrow at the bottom of each bracket is po...

Страница 6: ...rectional arrow at the bottom of each bracket is pointing upward Standard configurations are shown For special applications or if you are uncertain about your hardware selection contact Customer Service 12 12 13 14 12 01 02 01 02 Push the shoulder washer 12 through the appropriate slots and holes of the brackets 01 and 02 Snap the required spacer 13 or 14 onto the shoulder washer 01 02 ...

Страница 7: ... illustrated CAUTION Improper use could reduce the holding power of the lag bolt To avoid potential injuries or property damage pilot holes MUST be drilled to a depth of 75 mm 3 in using a 5 5 mm 7 32 in diameter drill bit Level wall plate 03 and mark hole locations CAUTION Improper use could reduce the holding power of the lag bolt To avoid potential injuries or property damage pilot holes MUST b...

Страница 8: ... injuries or property damage be sure the anchors 17 seat flush with the concrete surface Tighten the lag bolts 15 only until the washers 16 are pulled firmly against the wall plate 03 CAUTION Improper use could reduce the holding power of the lag bolt To avoid potential injuries or property damage DO NOT over tighten the lag bolts 15 03 16 15 Level wall plate and mark the hole locations CAUTION Av...

Страница 9: ...embly by fitting the top hooks of the mounting brackets over the top edge of the wall mount Swing the mounting brackets down until the spring loaded locking tabs slip over and fully engage the bottom edge of the wall mount You will hear an audible CLICK Tilt tension can be adjusted with the vertical bracket knobs by hand or using the hex key 18 18 ...

Страница 10: ...t Level ProSet Post Installation Leveling To remove the TV from the wall plate flip the locking tabs of each vertical bracket away from the wall plate to release the brackets then lift the TV up and out from the wall CAUTION You will need assistance with this step 18 ...

Страница 11: ...6901 002051 08 11 ...

Страница 12: ... rubrique Height Finder Installation sur des murs avec montants de bois Voir l illustration de la page 7 ATTENTION Une utilisation inadéquate peut réduire la force de rétention du boulon tire fond Afin d éviter tout dommage matériel ou blessure Ne pas trop serrer les boulons tire fond 15 L épaisseur du matériau de revêtement de mur ne doit pas excéder 16 mm 5 8 in Les avant trous DOIVENT être perc...

Страница 13: ...ez des avant trous tel qu illustré Insérez d abord les douilles à expansion des boulons tire fond 17 puis insérez ensuite les boulons tire fond 15 Serrez les boulons tire fond 15 jusqu à ce que les rondelles 16 s appuient fermement sur la plaque murale 03 3 Voir l illustration de la page 9 Suspendre le téléviseur avec les supports de montage sur laplaque murale ATTENTION Vous aurez besoin de quelq...

Страница 14: ...te Gewindegänge für die Befestigung der Anschlussplatten am Fernseher vorhanden sind Falls Sie aufWiderstand stoßen brechen Sie die Montage unverzüglich ab und rufen Sie den Kundendienst an VORSICHT Vermeiden SieVerletzungen und Sachschäden Verwenden Sie die kürzeste Schrauben Abstandshalter Kombination die unter den gegebenen Montagebedingungen möglich ist DieVerwendung von zu langen Schrauben ka...

Страница 15: ...e Wandplatte aus und markieren Sie die Stellen für die Bohrlöcher Ù Bohren Sie Vorbohrungen wie in der Abbildung dargestellt Ù Führen Sie Ankerschraubendübel 17 ein und schrauben Sie dann die Ankerschrauben 15 hinein Ù Ziehen Sie die Ankerschrauben 15 nur so weit an bis die Unterlegscheiben 16 fest an der Wandplatte 03 anliegen 3 Siehe Abbildungen auf Seite 9 Aufhängen des Fernsehgeräts an der Wan...

Страница 16: ...ateriales Ù No ajuste en exceso los tornillos 15 Ù El material que recubre la pared no debe exceder los 16 mm 5 8 pulgada Ù Los orificios DEBEN realizarse con una mecha de 5 5 mm 7 32 pulgada de diámetro hasta una profundidad de 75 mm 3 pulgadas Montaje sobre concreto macizo o sobre bloques de hormigón Consulte el gráfico en la página 8 PRECAUCIÓN El uso indebido podría reducir la capacidad de ret...

Страница 17: ...laca mural 03 3 Consulte el gráfico en la página 9 Cuelgue el televisor con las placas de sujeción adosadas en laplaca mural PRECAUCIÓN Necesitará ayuda en este paso Cuelgue el televisor con las placas de sujeción adosadas pasando los ganchos superiores de las placas de sujeción por el borde superior de la placa mural Empuje el televisor hacia la pared hasta que las lengüetas de bloqueo se deslice...

Страница 18: ...gem com parafuso na madeira Consulte a ilustração na página 7 ATENÇÃO O uso incorreto pode reduzir a potência de fixação do parafuso interfragmentário Para evitar possíveis ferimentos ou dano à propriedade Ù Não aperte demais os parafusos interfragmentários 15 Ù Qualquer material que cubra a parede não deve exceder 16 mm 5 8 pol Ù Os furos piloto DEVEM ser perfurados até uma profundidade de 75 mm ...

Страница 19: ...vele a placa na parede e marque os locais de furo Ù Perfure os furos piloto como ilustrado Ù Insira âncoras de parafusos interfragmentários 17 e em seguida insira os parafusos interfragmentários 15 Ù Aperte os parafusos interfragmentários 15 somente até as arruelas 16 serem puxadas firmemente contra a placa da parede 03 3 Consulte a ilustração na página 9 Pendure a TV com os Suportes de montagem n...

Страница 20: ...de wandplaat zie Height Finder op sanus com Montage aan een houten drager Raadpleeg de afbeeldingen op pagina 7 LET OP Een onjuist gebruik kan de grip van de bout verminderen Mogelijk letsel of materiële schade voorkomen Ù Draai de bouten niet te strak 15 Ù Materialen die de muur bedekken mogen niet dikker zijn dan 16 mm Ù De montagegaten MOETEN tot een diepte van 75 mm worden geboord met behulp v...

Страница 21: ... wandplaat waterpas en markeer de locaties van de gaten Ù Boor de montagegaten zoals in de illustratie wordt getoond Ù Plaats de ankers voor de bouten 17 en plaats vervolgens de bouten 15 Ù Draai de bouten 15 alleen vast tot de ringen 16 stevig tegen de wandplaat 03 zitten 3Raadpleeg de afbeeldingen op pagina 9 De tv met de montagebeugels aan de wandplaat hangen LET OP Voor het uitvoeren van deze ...

Страница 22: ...io potrebbe ridurre la capacità di tenuta dei tirafondi Per evitare la possibilità di danni alle cose o lesioni alle persone Ù Non serrare eccessivamente i tirafondi 15 Ù Lo spessore di qualsiasi materiale che copre la parete non deve eccedere i 16 mm 5 8 poll Ù I fori guida DEVONO essere praticati a una profondità di 75 mm 3 poll con una punta per trapano dal diametro di 5 5 mm 7 32 poll Montaggi...

Страница 23: ...lo la piastra a muro e contrassegnare le posizioni dei fori Ù Praticare i fori guida come illustrato Ù Inserire i tasselli dei tirafondi 17 quindi i tirafondi 15 Ù Serrare i tirafondi 15 solo fino a quando le rondelle 16 non sono tirate fermamente contro la piastra a muro 03 3 Si veda la grafica a pagina 9 Appendere il televisore con le staffe di montaggio sulla piastra a muro ATTENZIONE Per quest...

Страница 24: ... sivulla 7 HUOMAUTUS virheellinen käyttö saattaa vähentää pitovoima viive pultti Voit välttää mahdolliset vammat tai omaisuusvahinkoja Ù Älä kiristä liikaa jäljessä pultit 15 Ù Kaikki materiaali kattaa seinä saa olla enintään 16 mm 5 8 tuumaa Ù Reiät porataan ja 75 mm 3 tuumaa käyttäen 5 5 mm 7 32 tuumaa halkaisija poranterä TÄRKEITÄ TURVAOHJEITA SÄÄSTÄ NÄMÄ OHJEET LUE KOKO KÄYTTÖOHJE ENNEN TÄMÄN ...

Страница 25: ...ilen Asennus Katso varoittaa vaiheessa 2 Katso kuva sivulla 8 Ù Taso seinälevy ja merkitse reiän paikat Ù Poraa kuvan Ù Aseta viive pultti ankkurit 17 ja aseta viive pultit 15 Ù Kiristä viive pultit 15 ainoastaan kunnes aluslevyt 16 vedetään tiukasti levyssä 03 3 Katso kuva sivulla 9 Ripusta TV Asennustelineet päälle Wall Plate HUOMAUTUS Tarvitset apua tässä vaiheessa Asenna TV pidikettä sovittama...

Страница 26: ... Montering på träregel Se bilder på sidan 7 FÖRSIKTIGT Olämplig användning kan minska träskruvens hålleffekt För att undvika risker för personskador och materiella skador Ù Skruva inte åt träskruvarna för hårt 15 Ù Material som täcker väggen får inte överstiga 16 mm Ù Pilothålen MÅSTE borras till ett djup av 75 mm med en 5 5 mm borrspets VIKTIGA SÄKERHETSANVISNINGAR SPARA DESSA ANVISNINGAR LÄS HEL...

Страница 27: ...k Se Försiktighetsåtgärder i steg 2 Se bilder på sidan 8 Ù Se till att väggplattan är rak och markera hålplatserna Ù Borra styrhål enligt bilden Ù Sätt i träskruvsförankringarna 17 och sedan träskruvarna 15 Ù Dra endast åt träskruvarna 15 tills brickorna 16 pressas mot väggplattan 03 3 Se bilder på sidan 9 Häng tv n med fästen på väggplattan FÖRSIKTIGT Du kommer att behöva hjälp under den här dele...

Страница 28: ... на стр 7 ПРЕДУПРЕЖДЕНИЕ Неправильное использование может уменьшить прочность соединения болта Во избежание возможных травм или повреждения оборудования Ù Не прилагайте чрезмерные усилия для затягивания болтов 15 Ù Толщина материала покрывающего стену не должна превышать 16 мм 5 8 дюйма Ù С помощью сверла диаметром 5 5 мм 7 32 дюйма ДОЛЖНЫ быть просверлены направляющие отверстия глубиной 75 мм 3 д...

Страница 29: ...ных блоков см предостережения шага 2 см иллюстрацию на стр 8 Ù Выровняйте стеновую пластину и отметьте расположение отверстий Ù Просверлите направляющие как показано на рисунке Ù Установите дюбели 17 после чего установите болты 15 Ù Затягивайте болты 15 только до тех пор пока шайбы 16 3 см иллюстрацию на стр 9 Крепление телевизора с монтажными кронштейнами к настенной пластине ПРЕДУПРЕЖДЕНИЕ Для в...

Страница 30: ...aścianieAbyuzyskaćpomocwokreśleniupołożenianapłycieściennej patrzHeightFindernastroniesanus com Montaż na słupach patrz ilustracja na stronie 7 PRZESTROGA Nieprawidłowe użycie zmniejszyć może siłę śrub kotwiczących Aby uniknąć groźby obrażeń i uszkodzenia sprzętu Ù Wkrętów montażowych 15 nie należy dokręcać za mocno Ù Grubość materiału stanowiącego pokrycie ściany nie może przekraczać 16 mm 5 8 ca...

Страница 31: ...rzestroga w kroku 2 patrz ilustracja na stronie 8 Ù Wyrównać płytę ścienną i zaznaczyć na niej miejsca na otwory Ù Wywiercić otwory prowadzące Ù Włożyć kotwy 17 a następnie umieścić w nich wkręty 15 Ù Wkręty montażowe dokręcić 15 tylko do momentu aż podkładki 16 będą dobrze przylegać do płyty ściennej 03 3 patrz ilustracja na stronie 9 Zawieś telewizor z uchwytami montażowymi na płycie ściennej PR...

Страница 32: ...r Výškoměr na webových stránkách sanus com Montáž na dřevěný nosník viz vyobrazení na str 7 VÝSTRAHA Nesprávné použití by mohlo snížit únosnost kotevního šroubu Abyste předešli možným úrazům nebo věcným škodám Ù Neutahujte kotevní šrouby 15 příliš velkou silou Ù Jakýkoli materiál pokrývající stěnu nesmí být silnější než 16 mm Ù Vodicí otvory MUSÍ být vyvrtány do hloubky 75 mm 3 palce vrtákem o prů...

Страница 33: ...ení na str 8 Ù Vyrovnejte nástěnnou desku a označte si umístění otvorů Ù Podle ilustrace vyvrtejte vodicí otvory Ù Vložte zakotvení 17 kotevních šroubů a poté kotevní šrouby 15 Ù Utahujte kotevní šrouby 15 jen do té míry než se podložky 16 pevně přitisknou k nástěnné desce 03 3 viz vyobrazení na str 9 Zavěste televizor s montážními držáky na nástěnnou desku VÝSTRAHA K tomuto kroku budete potřebova...

Страница 34: ...ルダワッシャーに留めます 27ページの図を参照 ウォールプレートの取り付け位置を決めるには sanus comのHeight Finder 高さ検索機能 をご利用く ださい 木製スタッ ドへの取り付け 7ページの図を参照 注意 適切に使用しないと ラグボルトでしっかりと支えることができません ケガや製品の破損を避けるには 次の点に注意します Ù ラグボルト 15 を締めすぎないようにします Ù 壁面を覆う材料が16 mmを超えないようにします Ù パイロッ ト穴は 5 5 mm径のドリルビッ トを使って 75 mmの深さの穴にします 重要 上記の安全指示書を保管しておいてください 本製品を使用する前に 説明書の内容をよくお読みください 仕様 Ù 耐荷重 超過しないようにしてください 68 kg 150 lbs はテレビと付属品を含みます Ù チルト 10 to 8 5 注意 ケガや壁面の破...

Страница 35: ...ャー 16 が壁面プレート 03 にしっかりと取り付けられるまで ラグボルト 15 を締めます コンク リートとコンク リートブロックへの取り付け 手順2の 注意 を参照してく ださい 8ページの図を参照 Ù ウォールプレートを水平にして 穴の位置に印を付けます Ù 図のようにパイロッ ト穴を開けます Ù 插ラグボルトアンカー 17 を差し込み 次にラグボルトを差し込みます 15 Ù ワッシャー 15 がウォールプレート 03 にしっかりと取り付けられるまで ラグボルト 16 を締めます 3 9ページの図を参照 マウントブラケッ トを使って テレビをウォールプレートに掛けます 注意 この手順には誰かの手を借りる必要があります マウントブラケッ トの上のフックをウォールマウントの上部に掛けて テレビとブラケッ トアセンブリーを取り付けます スプリングの付いたロッキングタブが滑り込み ウォール...

Страница 36: ... 将必需的隔圈扣入台阶垫圈 2 参见第 7 页图表 墙壁安装如需帮助确定壁板的位置 请参考 sanus com 网站上的 Height Finder 木龙骨安装 参见第 7 页图表 注意 不当使用可能减少方头螺栓的保持力 要避免潜在人身伤害或财产损毁 Ù 请勿过度紧固方头螺栓 15 Ù 墙上覆盖的任何东西不能超过 16 mm 5 8 in Ù 使用直径 5 5 mm 7 32 in 的钻头打钻导孔 深度必须达到 75 mm 3 in 重要安全说明 保存这些说明 请先完整阅读手册 规格 Ù 承重能力 请勿超过 68 kg 150 lbs 包括电视和所有配件 Ù 竖向摆动 10 to 8 5 注意 避免潜在人身伤害和财产损毁 Ù 请勿将此产品用于制造商明确指定以外的其他目的 Ù 墙壁的承重力必须至少达到显示器和墙壁支架总重量的五倍 Ù 本产品不适用于金属龙骨墙 Ù 如您不理解这些说明 或对本产...

Страница 37: ...边螺柱取景 Ù 一级隔墙板 03 个和马克孔位置 Ù 按照图示打钻导孔 Ù 紧固方头螺栓 16 直到垫圈 03 牢牢固定在壁板 15 上 实体混凝土和混凝土砌块墙上的安装 参考步骤 2 的注意事项 参见第 8 页图表 Ù 将壁板放置水平并标注孔位 Ù 按照图示打钻导孔 Ù 插入方头螺栓锚具 17 然后插入方头螺栓 15 Ù 紧固方头螺栓 15 直到垫圈 16 牢牢固定在壁板 03 上 3 参见第 9 页图表 将电视和安装托架挂在墙壁托板上 注意 您需要帮助来完成此步骤 将安装托架的顶板钩安到墙壁支架的顶边缘上以安装电视 托架 组件 将安装托架向下旋转 直到弹簧式锁定片滑出并完全地接合到 墙壁支架的底边缘 您会听到 咔嗒 声 可用手或六角键 18 通过垂直托架手柄调节倾斜拉力 4 参见第 10 页图表 ProSet 安装后校平 5 参见第 10 页图表 从墙壁上拆卸电视 要从壁板上拆卸电视 ...

Страница 38: ... van de informatie die in dit document is opgenomen Italiano Milestone AV Technologies e le sue società affiliate e controllate congiuntamente denominate Milestone si propongono di redigere il presente manuale in modo preciso e completo Milestone tuttavia non rilascia alcuna garanzia che le informazioni ivi contenute coprano tutti i dettagli le condizioni o le modifiche né che lo stesso preveda tu...

Отзывы: