background image

2

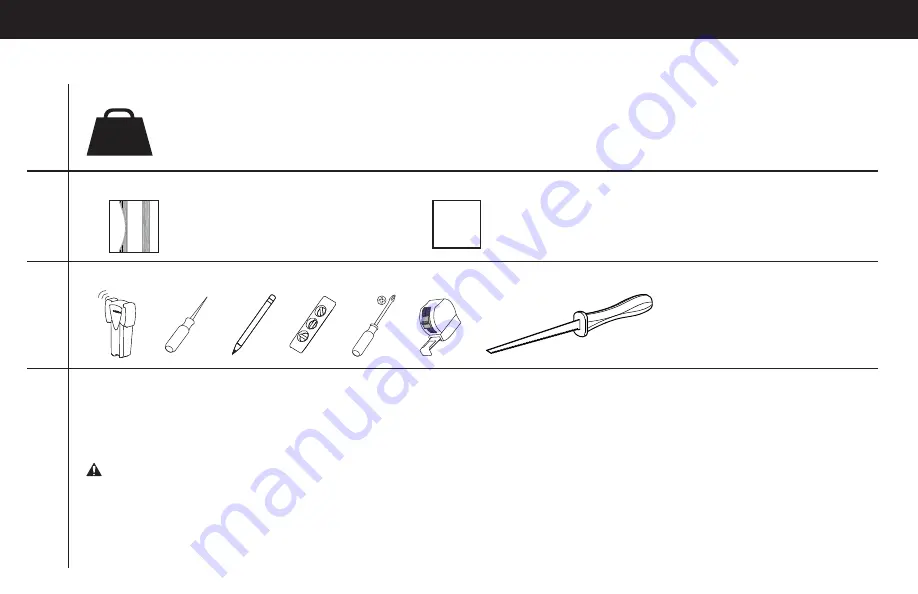
Will your accessories weigh 

more

 than 50 lb (22.7 kg)?

No — Perfect!

Yes — This product is NOT compatible. Visit Sanus.com or call 1-800-359-5520 [UK: 0800 056 2853] to fi nd a compatible product.

50 lb

(22.7


kg) 

IMPORTANT SAFETY INSTRUCTIONS – SAVE THESE INSTRUCTIONS – PLEASE READ ENTIRE MANUAL PRIOR TO USE

Ready to begin?

Please read through these instructions completely to be sure you’re comfortable with this easy install process.

If you do not understand these instructions or have doubts about the safety of the installation, assembly or use of this product, contact 
Customer Service at 1-800-359-5520 [UK: 0800 056 2853].


CAUTION: 

Avoid potential personal injuries and property damage! 


Do not use this product for any purpose not explicitly specifi ed by manufacturer.


Manufacturer is not responsible for damage or injury caused by incorrect assembly or use.

Do you have all of the tools needed?

Before getting started, let’s make sure this product is perfect for you!

1

2

3

4

What is your wall made of?

Unsure?  Call 1-800-359-5520 [UK: 0800 056 2853]

Perfect!

?

Drywall with studs 
spaced a minimum of 
16 in. (406 mm) apart.

Содержание SA808

Страница 1: ...SA808 INSTRUCTION MANUAL We ll Make It Stress Free If you have any questions along the way just give us a call 1 800 359 5520 We re ready to help Scan for easy install video san us 447 ...

Страница 2: ...these instructions or have doubts about the safety of the installation assembly or use of this product contact Customer Service at 1 800 359 5520 UK 0800 056 2853 CAUTION Avoid potential personal injuries and property damage Do not use this product for any purpose not explicitly specified by manufacturer Manufacturer is not responsible for damage or injury caused by incorrect assembly or use Do you...

Страница 3: ... verify all parts are included and undamaged If any parts are missing or damaged do not return the damaged item to your dealer contact Customer Service Never use damaged parts Supplied Parts Template 01 02 04 05 03 Housing ECO Mini Bracket Cable Grommet Elastic Velcro Strap STEP 1 Parts STEP 2 Parts STEP 3 Parts ...

Страница 4: ... studs using an edge to edge stud finder Verify the edges of the studs using an awl or thin nail Mark the inner edges of the studs with pencil 2 The open area on the left of the template 01 should line up the the inner edge of the left stud This will allow space for the placement of a power box on the right side of the housing 02 Level the template 01 and use a pencil to mark the open area of the ...

Страница 5: ...ctric Shock Hazard Avoid potential serious injuries or death Ensure there are no electrical wires behind the wall before cutting or drilling into the surface WARNING Explosion and Fire Hazard Avoid potential serious injuries or death Ensure there are no gas lines behind the wall before cutting or drilling into the surface 4 Install wires and cables ...

Страница 6: ... 2 STEP 2 Install Housing 1 Break out the sections of the housing 02 that are required to install the power and cable outlets that are needed 2 Thread the elastic velcro strap into the housing 02 03 02 02 ...

Страница 7: ...ough the hole in the bottom of the housing 02 and the rubber cable grommet 04 Fit the cable grommet 04 into the hole 4 Using a screwdriver turn the screws in the corners of the housing 02 These will raise the locking tabs in the rear of the housing 02 to secure it to the wall Tighten only until secure Do not over tighten screws 03 04 02 02 02 ...

Страница 8: ...chased separately with the SA808 Optional 1 To use the ECO Mini purchased separately in the SA808 first remove feet 2 Fit the ECO Mini into the ECO Mini bracket 05 supplied with the SA808 2 STEP 3 Install Components 05 ...

Страница 9: ...tall Components cont 3 Use two of the screws from the feet to secure the ECO Mini in the bracket 05 4 Slide the ECO Mini and bracket 05 into the top of the housing 02 Lock the bracket 05 into the housing 02 by sliding it towards the corner until you feel it catch 05 05 02 ...

Страница 10: ...10 STEP 3 Install Components cont 5 6 5 Use the elastic velcro strap 03 to attach components to the housing 02 6 Power the ECO Mini with the power cord supplied with the ECO Mini 02 03 ...

Страница 11: ...h or above most small wall plates To access the SA808 after installation disconnect all cables and wires from the TV then either slide or remove the arm or TV mount from the wall plate IMPORTANT Check your TV owner s manual to see if there are any special requirements for mounting or removing your TV ...

Страница 12: ...12 Dimensions 5 83 in 148 0 mm 7 80 in 198 1 mm 13 80 in 350 5 mm 11 80 in 299 8 mm 4 00 in 101 6 mm 125 ...

Страница 13: ...13 ...

Страница 14: ...installation assembly or use of this product contact Customer Service at 1 800 359 5520 UK 0800 056 2853 CAUTION Avoid potential personal injuries and property damage Do not use this product for any purpose not explicitly specified by manufacturer Manufacturer is not responsible for damage or injury caused by incorrect assembly or use Supplied Parts see page 3 WARNING This product contains small it...

Страница 15: ...h Ensure there are no gas lines behind the wall before cutting or drilling into the surface 4 Install wires and cables STEP 2 Install Housing see page 6 1 Break out the sections of the housing 02 that are required to install the power and cable outlets that are needed 2 Thread the elastic velcro strap into the housing 02 3 Mount a power outlet if needed to the housing 02 Slide cables and additiona...

Страница 16: ...he housing 02 6 Power the ECO Mini with the power cord supplied with the ECO Mini Positioning see page 11 The SA808 can be installed behind most large wall plates of wall mounts or underneath or above most small wall plates To access the SA808 after installation disconnect all cables and wires from the TV then either slide or remove the arm or TV mount from the wall plate IMPORTANT Check your TV o...

Страница 17: ...17 ESPAÑOL ...

Страница 18: ...e makes no representation of warranty expressed or implied regarding the information contained herein Milestone assumes no responsibility for accuracy completeness or sufficiency of the information contained in this document 2013 Milestone AV Technologies a Duchossois Group Company All rights reserved Sanus is a division of Milestone All other brand names or marks are used for identification purpos...

Отзывы: