background image


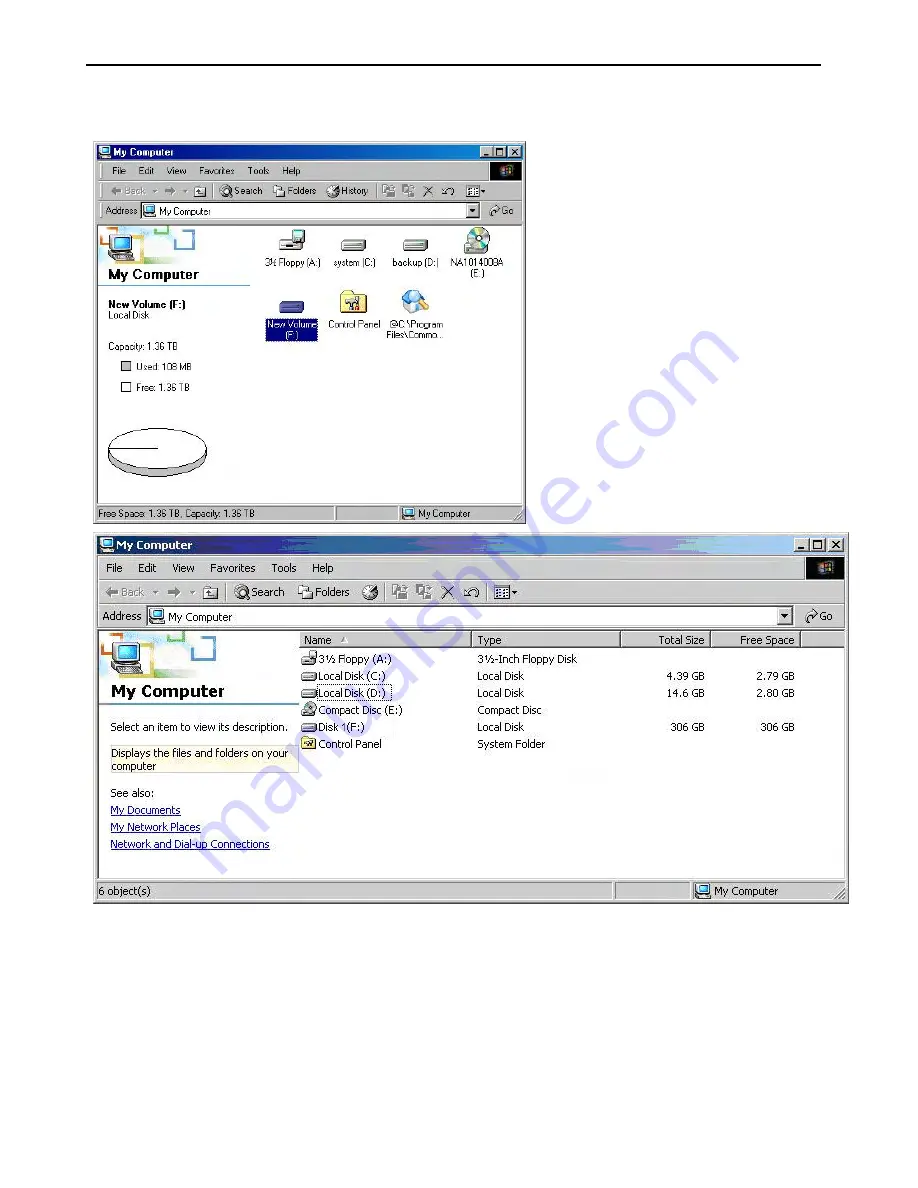
Repeat the above procedure if there are any other partitions. Close the Data Management window by clicking on 
the small boxed “X” in the top right corner of the window. Click on the “My Computer” icon on the Desktop. The 
new drives will be display and properly named. The new disks are now available for use. 


4.2  ALLOCATING PARTITION ON WINDOWS XP AND SERVER 2003 

(32/64BITS) 

Before creating any partitions, disk drive mode must be selected using the DIP switch on the back panel. Turn on 
the computer and open the Control Panel window (located at: Start > Control Panel). 

1.  Double-click on 

Administrative Tools

Содержание TOWERRAID TR8U

Страница 1: ...DETAILED USER S MANUAL v1 0 TOWERRAID TR8U B TR8U...

Страница 2: ...lectrical shock Please consult your product distributor or the closest support center Do not handle the product near a heat source or expose them to direct flame or heat Never place the product in clo...

Страница 3: ...o G5 Power Macintosh eMac iMac PowerBook G4 iBook G4 Windows 2000 XP Vista Server 2003 Mac OS X 10 3 or higher operation system with latest service pack installed An available USB port 1 5 PRODUCT CON...

Страница 4: ...in malfunctions or damage 2 2 INSTALLING HARD DISK DRIVE Please refer below procedure to complete the HDD installation 1 Open the front hard drive panel of the unit 2 Remove the hard drive trays by p...

Страница 5: ...m in place by pushing the tray handles in 5 Close the front hard drive panel 2 3 POWER ON OFF Power ON Push the power switch located in the front to switch on the power Power OFF Push and hold power s...

Страница 6: ...e back panel Please refer to the diagrams Standard Drive Mode It is a JBOD mode where the unit will access each hard drive individually The number of Hard Drive avalible to computer equal to the numbe...

Страница 7: ...perate in manual on and off Press once on the power button power will turn on Hold power button for more than 3 seconds power will turn off In AUTO POWER MODE operating SANS DIGITAL TR8U B TR8U will a...

Страница 8: ...2 Click on the Safely Remove Hardware 3 Select USB Mass Storage Device click on on Stop 4 Select USB Device click OK 5 Click on Close to finish...

Страница 9: ...WARNING To assure no data will be lost always follow the unplug procedure Fail to do so will result in data lost...

Страница 10: ...e creating any partitions disk drive mode must be selected using the DIP switch on the back panel Turn on the computer and open the Control Panel window located at Start Settings Control Panel 1 Doubl...

Страница 11: ...age to view the disk drives 4 Right click on each Unallocated partition and select Create Partition from the pop up menu 5 Click Next to create a partition on a basic disk 6 Select the partition type...

Страница 12: ...e than click Next 7 Assign the drive letter or path you want to create click Next 8 Click Format this partition with the following settings and Perform a Quick Format setup the File system to use Allo...

Страница 13: ...n in the Disk Management window will change to Formatting The percentage complete will be displayed Depending upon the size of the partition the format process may take several minutes When completed...

Страница 14: ...n the Desktop The new drives will be display and properly named The new disks are now available for use 4 2 ALLOCATING PARTITION ON WINDOWS XP AND SERVER 2003 32 64BITS Before creating any partitions...

Страница 15: ...2 Double click on Computer Management 3 Select Disk Management under Storage to view the disk drives 4 Right click on each Unallocated partition and select New Partition from the pop up menu...

Страница 16: ...5 Click Next to create a partition on a basic disk 6 Select the partition type you want to create click Next 7 Specify the partition size you want to create click Next...

Страница 17: ...he drive letter or path you want to create click Next 9 Click Format this partition with the following settings and Perform a quick format select the File system Allocation unit size Volume label and...

Страница 18: ...e several minutes When completed the status will change to Healthy and the name and drive letter will be updated Once the disk reports Healthy it appears to the computer and ready to use Repeat the ab...

Страница 19: ...titions disk drive mode must first be created using the DIP switch on the rear panel Once the sets have been created allow the system to load Windows Once Windows is running open the Computer Manageme...

Страница 20: ...2 Select Disk Management under Storage to view the disk drives 3 Right click on each Unallocated partition and select New Simple Volume from the pop up menu...

Страница 21: ...4 Click Next to create a simple volume 5 Select the Simple volume size you want to create click Next...

Страница 22: ...want to create click Next 7 Click Format this volume with the following settings and Perform a quick format select the File system Allocation unit size Volume label click Next 8 When the New Simple Vo...

Страница 23: ...will change to Healthy and the name and drive letter will be updated Once the disk reports Healthy it appears to the computer and ready to use Repeat the above procedure if there are any other partit...

Страница 24: ...4 4 ALLOCATING PARTITION ON MACINTOSH OS X 1 Click Go click on Utilities 2 Double click Disk Utility...

Страница 25: ...3 In the windows on the left Select the newly added Storage 4 In the windows on the right click Partition to go to partition window...

Страница 26: ...5 Select Volumes Scheme 6 Enter Volumes Information such as Name and Format click Partition...

Страница 27: ...7 Confirm to partition the disk by click Partition 8 The newly formatted disk with the Volume name will display on the windows in the left...

Страница 28: ...9 Repeat the above procedure as needed for any other disks 10 Close the Disk Utility window upon completion 11 The new disks will appear on the desktop and ready for use...

Страница 29: ...mmended 4 When format in the Windows 2000 XP Vista Server 2003 the dialog box appear Unfinished formatting Windows 2000 XP Vista Server 2003 can not format HDD over 32GB by FAT32 Please format by NTFS...

Страница 30: ...In Sample 2 no data can be read from any disk...

Отзывы: