background image

GB-42

Prepar
ation

Connec

tions

Initial 

Setup

U

sing 

the 
Fea

tur

es

U

sing 

the 
Fea

tur

es


via 
USB 

por
t

H

in

ts 

and 
Tips

, Specifica

tion 


and 

Saf

et

W

ar

nings

Safety Warnings

Read all the instructions carefully before using the unit 

• 

and keep them for future reference.
Retain the manual. If you pass the unit onto a third 

• 

party make sure to include this manual.
Check that the voltage marked on the rating label 

• 

matches your mains voltage.

Damage

Please inspect the unit for damage after unpacking. 

• 

Do not continue to operate the unit if you are in any 

• 

doubt about it working normally, or if it is damaged 
in any way - switch off, withdraw the mains plug and 
consult your dealer.

Location of Unit

The unit must be placed on a flat stable surface and 

• 

should not be subjected to vibrations.
Do not place the unit on sloped or unstable surfaces as 

• 

the unit may fall off or tip over.
The mains socket must be located near the unit and 

• 

should be easily accessible.
This unit is designed for indoor use only.

• 

Temperature

Avoid extreme degrees of temperature, either hot or 

• 

cold. Place the unit well away from heat sources such 
as radiators or gas/electric fires.
Avoid exposure to direct sunlight and other sources of 

• 

heat.

Naked Flames

Never place any type of candle or naked flame on the 

• 

top of or near the unit.

Moisture

To reduce the risk of fire, electric shock or product 

• 

damage, do not expose this unit to rain, moisture, 
dripping or splashing. No objects filled with liquids, 
such as vases, should be placed on the unit.

If you spill any liquid into the unit, it can cause serious 

• 

damage. Switch it off at the mains immediately. 
Withdraw the mains plug and consult your dealer.

Ventilation

To prevent the risk of electric shock or fire hazard 

• 

due to overheating, ensure that curtains and other 
materials do not obstruct the ventilation vents.

Do not install or place this unit in a bookcase, built-in 

• 

cabinet or in another confined space. Ensure the unit is 
well ventilated. 

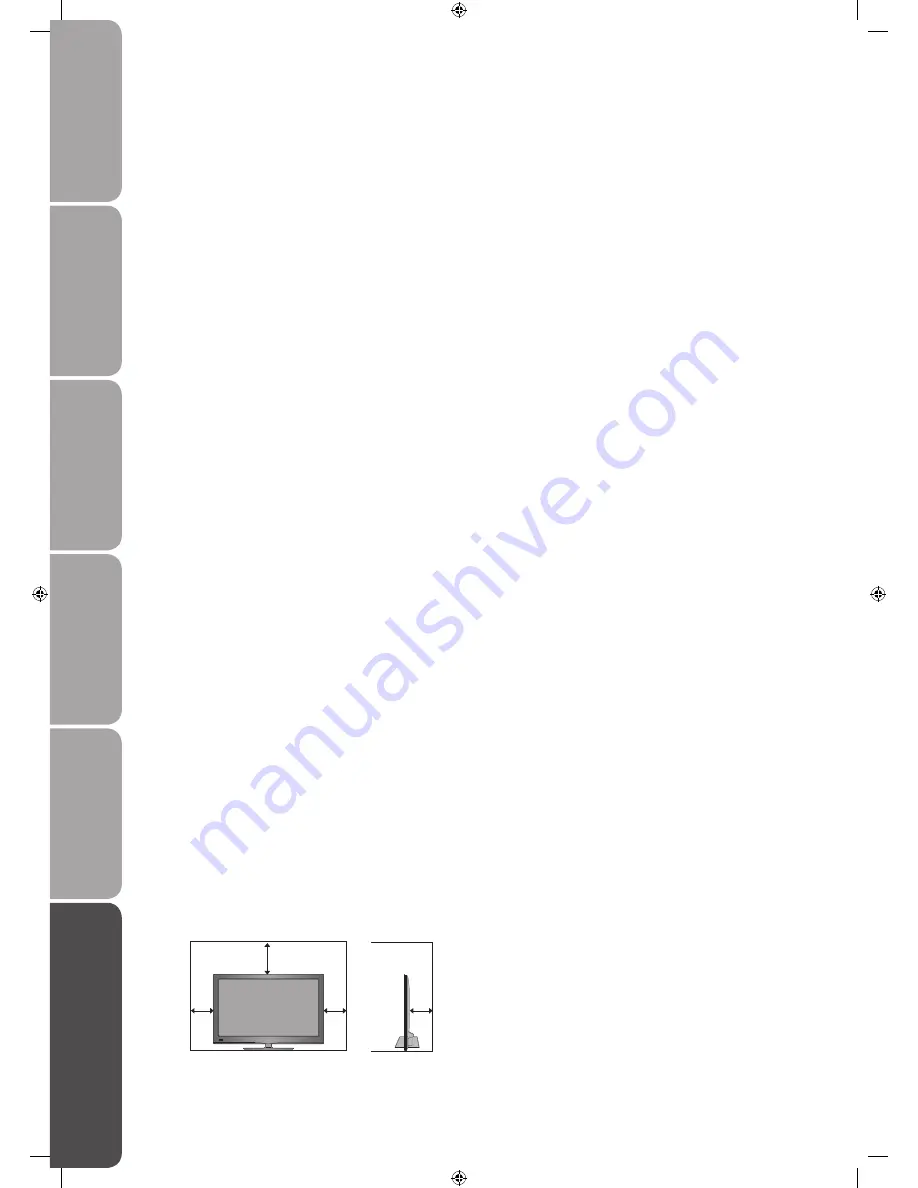
Make sure that there is a gap of at least 10 cm on both 

• 

sides and a gap of 20 cm at the top.

Safety

Always disconnect the unit from the mains supply 

• 

before connecting/disconnecting other devices or 
moving the unit.
Unplug the unit from the mains socket during a 

• 

lightning storm.

Mains Cable 

Make sure the unit or unit stand is not resting on top of 

• 

the mains cable, as the weight of the unit may damage 
the mains cable and create a safety hazard. 
If the mains cable is damaged it must be replaced 

• 

by the manufacturer, its service agent, or similarly 
qualified persons in order to avoid a hazard.

Interference

Do not place the unit on or near appliances which may 

• 

cause electromagnetic interference. If you do, it may 
adversely affect the operating performance of the unit, 
and cause a distorted picture or sound.

Optimum viewing

View the unit in moderate light to prevent eye strain. It 

• 

is recommended to watch the unit from a distance  
3-7 times that of the screen height.

LCD screen

The LCD screen is manufactured using high-precision 

• 

technology. However, some tiny black points and/
or bright points (red, blue or green in colour) may 
constantly appear on the LCD screen. These points 
are generated in the manufacturing process and are 
normal.

Screen Burn

A characteristic of Plasma and LCD TV Panels is that 

• 

displaying the same image for a long time may cause 
a permanent after-image to remain on the screen. This 
is called screen burn. Most pictures shown on the unit 
will be constantly moving and fill the screen.
Examples of images that you need to watch out for are 

• 

as follows (this is not an all-inclusive list):


1.  Black Bars:

 If black bars appear at the left/right or 

top/bottom of the screen, it is recommended to 
change the format so that the picture fills the entire 
screen.
 

2.  TV Channel Logos:

 e.g. Shopping channel logos 

and pricing displays - especially if they are bright 
and stationary. Moving or low-contrast graphics are 
less likely to cause ageing of the screen.
 

3.  Time Displays


4.  Teletext: 

Do not view a stationary page for long 

periods of time.
 

5.  TV Menus


6.  Pause Mode: 

Do not leave the screen in pause 

mode for long periods of time, e.g. When watching 
videos.

To prevent screen burn if viewing any of the above for 

• 

long periods of time, reduce contrast and brightness 
when viewing. Once burn-in occurs it will never 
disappear completely. 

10 cm

10 cm

20 cm

10 cm

Содержание S32LDIB10

Страница 1: ...ejkilZk fe DXelXc I X p g C 9XZbc k C KM J C 9...

Страница 2: ......

Страница 3: ...13 Initial Setup 14 Turning the TV On for the First Time 14 Selecting the Input Source 16 Channel Selection 17 Presetting Favourite Channel List 1 2 3 4 17 Favourite Channel Selection 17 Display Chann...

Страница 4: ...Electronic Programme Guide DTV Mode 33 Switch On Off EPG 33 View a Programme 34 Using the Features via USB Port 35 Picture 35 Music 35 Video 36 Maintenance 38 Hints and Tips 38 Display Modes 40 YPbPr...

Страница 5: ...tips to help you resolve any issues Read all the safety instructions carefully before use and keep this instruction manual for future reference Unpacking the TV Remove all packaging from the TV Retai...

Страница 6: ...n the front of the TV at any time because the screen could crack Disconnect all cables connected to the TV 1 Lay the TV down on a flat surface with the back side 2 facing up Please make sure to place...

Страница 7: ...h on the I O POWER ON OFF switch to turn the TV to standby off mode 4 Touch Control Panel Touch the touch control panel once to activate it indicators on the touch control panel will illuminate and th...

Страница 8: ...provided 5 Y PB PR Connect to a DVD player Digital Set Top Box or other AV devices with component YPbPr video and audio output sockets by using the component adapter cable provided 6 HDMI1 2 3 Connect...

Страница 9: ...rty Only use the battery type indicated in this manual When the batteries are exhausted the remote will not function Replace both batteries at the same time with new ones Do not install new batteries...

Страница 10: ...14 Menu Display the OSD On Screen Display setup menu 15 EPG Display the EPG Electronic Programme Guide For digital TV programmes in TV mode 16 Allows you to navigate the OSD setup menu and adjust the...

Страница 11: ...the Teletext function For analogue TV programmes in TV mode 26 Reveal Reveal hidden information such as the answer to a quiz in Teletext For analogue TV programmes in TV mode 27 Cancel To cancel the t...

Страница 12: ...I input sockets please make sure the correct input source is selected corresponding to your connected HDMI input socket When you connect to the output of an HD ready player blu ray disc player game co...

Страница 13: ...nal AV 1 device s component output sockets Connect the included audio adapter cable and an AV cable to the TV s AUDIO L R input socket to the external AV device s 2 component audio sockets Audio Left...

Страница 14: ...e Connect the AV cable to the audio video sockets of the external AV device 3 Plug the connected devices into the mains socket before switching on the 4 I O POWER ON OFF switch at the bottom of the TV...

Страница 15: ...coaxial cable not included Connecting a USB Storage Device USB Cable not included Adapter Portable Hard Disk USB Switch off the TV before connecting any USB storage device 1 Connect your USB storage...

Страница 16: ...rol panel will illuminate and then press the touch sensitive control on the touch control panel or press the button on the remote control directly to turn the TV on The red LED indicator will flash fo...

Страница 17: ...e to select Shop Mode Press the 11 OK button to confirm the setting or press the Menu button to return to the previous menu Press the 9 buttons to highlight Use Mode and then press the OK button or th...

Страница 18: ...Press the 1 Source button to display the input source list Press the 2 buttons to select the input source that you want TV AV Component SCART VGA HDMI1 HDMI2 HDMI3 DMP Press the 3 OK button to confirm...

Страница 19: ...d then press the RED button to select between Favourite List 1 2 3 4 Press the GREEN button to add the channel in the Favourite List Press the GREEN button again to delete the channel from the Favouri...

Страница 20: ...en light and dark levels in the picture for Personal mode Saturation Adjusts the richness of colour for Personal mode Sharpness Adjusts the level of crispness in the edges between light and dark areas...

Страница 21: ...ack bars will appear on both the left and right of the screen Zoom This selection will allow you to zoom in the picture without any alteration while filling the entire screen However the top and botto...

Страница 22: ...ent low to high frequency Press the a OK button or the button to enter the Equalizer menu Press the b buttons to select the options and then press the buttons to adjust the setting Digital Sound Out P...

Страница 23: ...guage Allows you to select your desired on screen menu language Press the 1 Menu button to display the main menu Press the buttons to select the Function menu and then press the OK button or the butto...

Страница 24: ...or the button to enter the Function menu Press the 2 buttons to select OSD Setting and then press the OK button or the button to enter OSD Setting Back Adjust Select Back Press the 3 buttons to selec...

Страница 25: ...Hard of Hearing to show information for the hearing impaired in some programmes For digital channels only if available Press the 4 Menu button to return back to the previous menu Press the 5 Exit but...

Страница 26: ...reenwich Mean Time which is received with the broadcast signal and the time is set automatically by a digital signal Auto Sync Select On to output the time information from digital signal in DTV mode...

Страница 27: ...enter Factory Reset Version Info Allows you to view the software version of the TV Press the 1 Menu button to display the main menu Press the buttons to select the Function menu and then press the OK...

Страница 28: ...therefore if the signal has incorrect information this function will not operate This TV is programmed to remember which option it was last set to even if you switch the TV off When a locked programm...

Страница 29: ...o unblock Press the 5 Menu button to return to the previous menu Press the 6 Exit button to exit the menu You must enter the password before entering the 2 Parental menu Press the 0 9 buttons to enter...

Страница 30: ...er Display current channel number Name Display current channel name Frequency Display the current tuned frequency Bandwidth Select bandwidth Start Search Press the button to start searching Press the...

Страница 31: ...ttons to select the country where you will operate the TV and then press the OK button to confirm Press the 3 buttons to select Country and then press the OK button or the button to enter the Country...

Страница 32: ...s Rename b Press the GREEN button to rename the selected channel A keyboard screen will pop up Press the buttons to select the characters to represent the station name and then press the OK button to...

Страница 33: ...to access the 2 content that has been encrypted Flip the Common Access Module to another side and try again if you feel resistance Switch the TV on 3 To remove the Common Access Module Before you remo...

Страница 34: ...age search while watching TV While viewing teletext press the Cancel button to return to TV viewing the teletext page number will remain on the top left of the screen You can enter a teletext page num...

Страница 35: ...displayed Subtitles will vanish while the digital teletext is displayed Teletext within Digital Service In DTV mode press the 1 CH List button to display the Channel List Press the buttons and then pr...

Страница 36: ...o confirm A tick will appear next to your selection Press the 3 button to highlight the subtype menu Press the 4 buttons to select the programme subtype Press the OK button to confirm A tick will appe...

Страница 37: ...menu Alternative You may press the DMP button to enter DMP menu directly Press the 2 buttons to select Picture and then press the OK button to confirm Press the 3 buttons to select the folder and then...

Страница 38: ...s the 2 buttons to select Video and then press the OK button to confirm Press the 3 buttons to select the folder and then press the OK button to enter the folder Press the OK button to play the select...

Страница 39: ...fication and Safety Warnings Press the 6 Exit button again to exit the menu File formats supported MPEG1 dat MPEG2 mpg MPEG4 mpg File with resolution above 720p will not be displayed 1 1 00 00 03 00 0...

Страница 40: ...o see if there are any objects between the TV and the remote control causing an obstruction Ensure that you are pointing the remote control directly at the TV Ensure that the batteries are installed w...

Страница 41: ...nnels It happens sometimes if you have a weak signal Usually it just means you ll need to rescan your digital box or TV Don t worry it easy to do And once you ve done it you should get all the Freevie...

Страница 42: ...720 50 4 3 16 9 Dot to Dot 60 1080I 1920 x 1080 50 4 3 16 9 Dot to Dot 60 4 3 16 9 Dot to Dot 1080P 1920 x 1080 50 4 3 16 9 Dot to Dot 60 4 3 16 9 Dot to Dot VGA Mode Please check the display settings...

Страница 43: ...ls vertical Television System PAL I BG DK SECAM L BG DK Brightness 450 cd m2 Contrast Ratio 1000 1 Inputs Output SCART 1 HDMI 3 VGA 1 PC AUDIO 1 YPbPr 3 5mm 1 COMMON INTERFACE 1 USB 1 VIDEO IN 3 5mm 1...

Страница 44: ...disconnect the unit from the mains supply before connecting disconnecting other devices or moving the unit Unplug the unit from the mains socket during a lightning storm Mains Cable Make sure the unit...

Страница 45: ...as been swallowed Please dispose of batteries correctly by following the guidance in this manual Supervision Children should be supervised to ensure that they do not play with the unit and the remote...

Страница 46: ...re harmful to the environment To preserve our environment dispose of used batteries according to your local laws or regulations Do not dispose of batteries with normal household waste For more informa...

Страница 47: ......

Страница 48: ......

Отзывы: