- 2 -
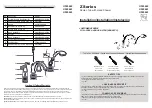
1. Cap
2. Screw
3. Lever
4. Cover
5. Cartridge Holder
6. Lever Holder
7. Ceramic Cartridge
8. Unit Body
9. Seat Packing
10. Rubber Packing
11. Metal Washer
12. Lock Nut
13. Restrictor Holder
14. Flow Restrictor
15. Connection Nut
16. Rubber Packing
17. Spout
18. O-Ring
19. Shower Head
20. O-Ring
21. Aerator
22. Net Filter
23. Decompression Unit
24. Net Filter
25. Shower Body
26. Copper Supply Pipe
General Description
K 8 7 7 - B W
1
2
3
4
5
6
7
9
10
11
12
26
8
P A R T S L I S T
The structure shown is an illustration.
Please use this structure for better understanding.
M A I N T E N A N C E
Do not use abrasive or chemical cleaners (including chlorine bleach) to clean faucets
as they may dull the luster and attack the chrome or special decorative finishes.
Use ONLY soap and water, then wipe dry with clean cloth or towel.
While cleaning the bathroom tile, the faucet should be protected from any splattering
of cleaner. Acids and cleaning fluids will discolor or remove chrome plating.
Care and Cleaning of Chrome and Special Finishes
F L U S H I N G I N S T R U C T I O N S
T R O U B L E S H O O T I N G
IMPORTANT!
: Pipe chips, sand, stones and other solid found in new and
renovated plumbing can damage the cealing of the cartridge and
cause leaks to avoid damage,
DO NOT TURN ON SUPPLY VALVES until instructed below.
1. After installing and connecting your new faucet, turn on in the full cold position
(handle pointing to the right) and turn on the cold supply for 15 seconds.
2. Without closing the handle, turn to the full hot position (handle pointing to the
left) and turn on the hot supply for 15 seconds.
3. Close the handle, then using a towel unscrew the aerator from the end of the
spout and clean the aerator.
4. Using a towel replace the aerator and check the system for leaks.
- 7 -
17
16
24
20
21
22
23
19
25
15
14
13
18
TO CORRECT REVERSED HOT AND COLD POSITIONS :
1. Shut off both stop valves. Then, open faucet handles to relieve water pressure
that complete water shut-off has been accomplished.
2. Loosen nut and remove copper supply pipes. Re-connect each copper pipes
into different supply stop valves. (Excessive bending will cause leaking and
damage to the pipes.) Then, tighten each nuts to compress the copper pipe.
(Don’t forget to put compression ring with copper pipe.)
3. Re-installing and connecting, turn on both cold and hot supply.
4. Turn on in the full position, make sure that the each positions keeps correct way
& make sure any water leakage.


