background image

11

Charging the battery

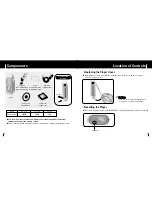
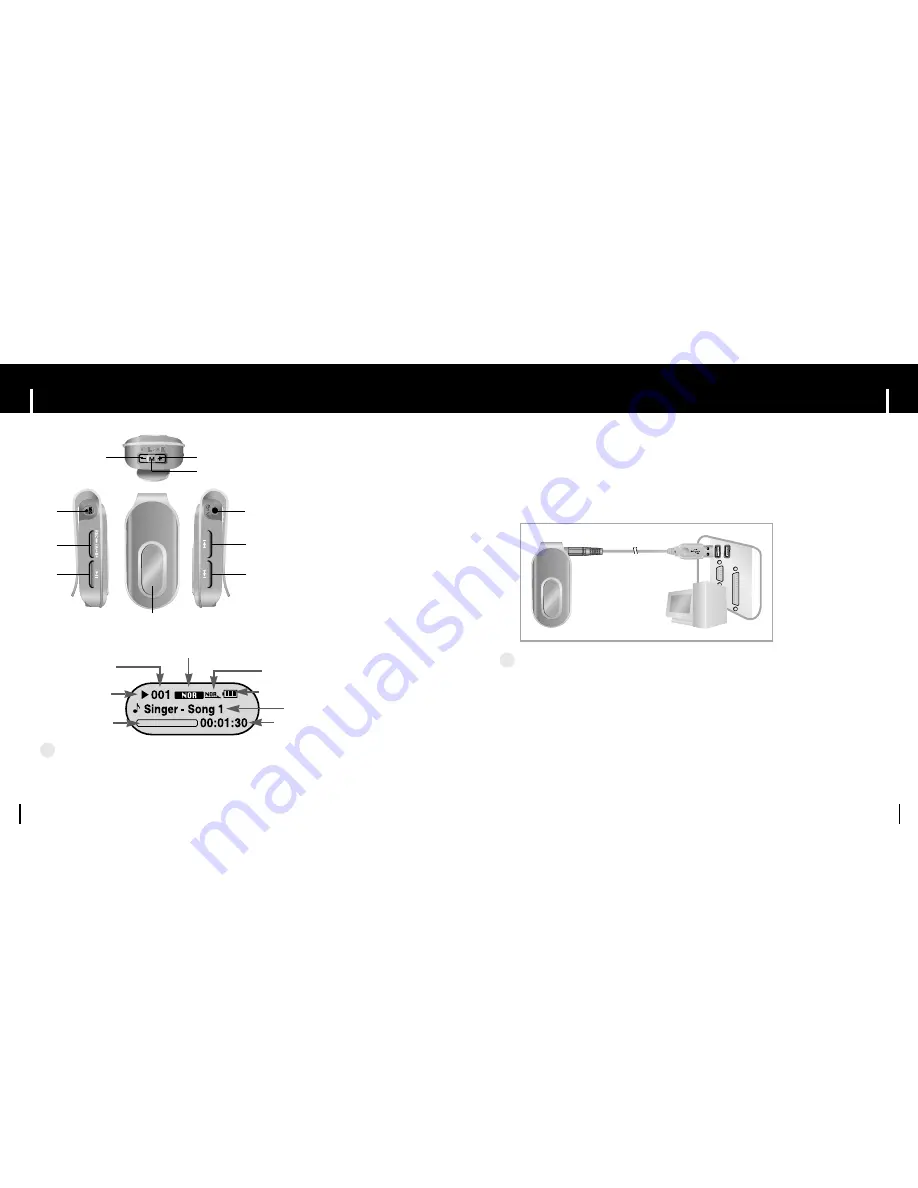
Components

10

I

Display

1

Volume Control

2

Menu/Navigation Button

3

USB Cable Connection Port, Earphone Port

4

Skip Track/Speed Search Button

5

Skip Track/Speed Search Button

6

Display

7

Microphone

8

(Long) Record Button, 

(Brief) Loop Repeating Button

9

Power On/Off/

Play/Pause Button

Title (Track Title and Artist)

Play/Stop/Pause Indicator

Track Progress Indicator

Track Number

Remaining Battery Power Indicator

Play Mode

Equalizer, SRS Indicator

Playtime Indicator

2

1

1

7

3

4

5

6

8

9

Connect the USB cable to the USB port on your computer.

Connect the other end of the USB cable to the USB Cable Connection Port on
top of the player.

When recharging is complete, “Fully Charged” is shown in the display window.

Battery recharge time in normal operation is approximately 2 hours and 30 minutes.

USB Cable

C

C

C

C

a

a

a

a

u

u

u

u

tt

tt

ii

ii

o

o

o

o

n

n

n

n

- When using the rechargeable battery for the first time or after several months of non-use, fully charge

it first.

- To avoid the risk of fire, do not charge longer than 12 hours.
- Overcharging will reduce the battery life.
- The rechargeable battery is a consumable item and its capacity will decrease gradually.
- To prolong the life of your battery, use the fully charged battery until it is completely discharged, and

then fully charge it again before use. If you charge the battery and it is not completely drained, the 
battery operating time will decrease. In this case, fully cycle (fully charge and then fully discharge) the
battery several times.

- If you connect the player through a USB hub, the connection may be unstable. Please connect the

player to the computer directly.

N

N

N

N

o

o

o

o

tt

tt

e

e

e

e

- The screen pictures are for illustration purposes only. The actual screen may differ.

Содержание YP-F1 V

Страница 1: ...AH68 01755L Rev 2 0 Samsung Electronics America Inc 400 Valley Road Suite 201 Mount Arlington NJ 07856 1 800 SAMSUNG 1 800 726 7864 www samsung com ...

Страница 2: ...loading Files 20 Disconnecting the USB Cable 21 Transferring music files using Windows Media 22 Installing Music Studio 24 Using Music Studio 25 To View Help on Music Studio 29 I Connection Procedures Loop Repeating 35 MENU Options 36 Using Navigation 37 Setting Playlist 40 Setting the Advanced Functions 41 Selecting the Play Mode 42 Sound Settings 43 Display Settings 45 Language Settings 47 FM Ra...

Страница 3: ...es while driving an automobile or riding a bicycle It s not only dangerous but also against the law To avoid an accident do not turn up the volume of the earphones too high while walking Protect Your Ears Do not turn up the volume too high Doctors warn against prolonged exposure to high volume Stop using the device or turn the volume down if you have ringing in your ears Take care so that the earp...

Страница 4: ... Windows Explorer FM Reception Listening to an FM program is made easy with Auto Search and Frequency Memory functions SRS WOW Surround Sound The 3D surround SRS feature adds spaciousness to the sound USB 2 0 Support Maximum data speed transfer of 18Mbps Upgradable You can upgrade the built in programs when available Please check the home page www samsung com for upgrades Built In Rechargeable Li ...

Страница 5: ...00785A Earphones Black AH30 00074D White AH30 00075D User Manual AH68 01755L Necklace Connecting the Necklace I Replacing the Player Cover Open the groove on the cover with your fingertips take off the cover and put on another cover of your desired color I Resetting the Player Take off the Player Cover and press the RESET Hole using a pointed object such as a safety clip RESET Hole C C C Ca a a au...

Страница 6: ...is approximately 2 hours and 30 minutes USB Cable C C C Ca a a au u u ut t t ti i i io o o on n n n When using the rechargeable battery for the first time or after several months of non use fully charge it first To avoid the risk of fire do not charge longer than 12 hours Overcharging will reduce the battery life The rechargeable battery is a consumable item and its capacity will decrease graduall...

Страница 7: ...in Administrator Account main user for Windows 2000 or XP Otherwise installation will not be completed Windows ME 2000 and XP can recognize the driver without installing the provided program However you must install the program in order to format the player and upgrade firmware If the YP F1 program has not been installed in Windows 98 SE then it will not communicate with your removable disc You mu...

Страница 8: ...nd of the USB cable to the USB Cable Connection Port on top of the player If you disconnect the USB cable from your PC while implementing a command or initializing during USB driver installation your Player may not function correctly 3 The USB driver is installed with a message saying that it is searching for a new device You may not see the display screen during installation Go to the Device Mana...

Страница 9: ... USB driver reconnect the USB cable after rebooting your system I If an error occurs during installation of the USB driver 1 Check the device manager Windows 98SE Control Panel System Device Manager Windows 2000 XP Control Panel System Hardware Device Manager 2 Check if there is a device listed with an exclamation point or a question mark displayed as unknown device or USB device 3 Double click on...

Страница 10: ... not installed Make sure to install the USB driver file first I Formatting the Player on your PC 1 Select the removable disc icon and click the right mouse button to select Format 2 Press the Start button All saved files will be formatted You can change the name of removable disc by selecting Volume label C C C Ca a a au u u ut t t ti i i io o o on n n n By formatting all previously preset menus w...

Страница 11: ...s Explorer 3 Select the file to save and drag and drop it into the removable disc icon Files will appear In numerical alphabetical order If you change the name of music files in Windows Explorer to 001 002 music files will be played in the order of number indicated C C C Ca a a au u u ut t t ti i i io o o on n n n The Transferring message will appear during file download or upload Disconnecting th...

Страница 12: ...Secure WMA Files 1 Connect the player to PC 2 Run the Windows Media Player10 Select Start Programs Windows Media Player in the desktop 3 Select Sync 4 When the Sync window appears select the file on your PC you want to transfer to the player using Windows Explorer Drag and drop the file to the left Sync List window 6 You can check the transferred file in the right window 5 Press the Start Sync but...

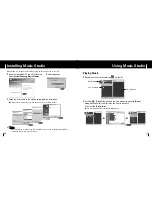
Страница 13: ...enables you to play back music files on your PC 2 Click the Open Files button in the main window to open the Open dialog box and select the music files you want to play back Then click the Open button The Selected files are automatically played back I Playing Music 1 Double click the Music Studio icon on your PC Main Window Play List Window File List Window Music Studio does not transfer any files...

Страница 14: ...lbum List button in the Play List Window The Album List Window appears 5 Drag and drop the selected music files into the Play List Window 4 After creating the New Album click the To HDD Mode button in the File List Window to select music files stored in your computer Continued To change the Name and image for an Album click the Properties button in the Play List Window After bringing up the Album ...

Страница 15: ...e Gracenote logo and symbol Gracenote CDDB logo and Powered by Gracenote logo are the registered trademarks of Gracenote Music Recognition Service and MRS are the registered service trademarks of Gracenote 3 After selecting the tracks to be converted click with the right mouse button to choose the file format The tracks are converted into the selected format I Converting Music File Formats 1 Doubl...

Страница 16: ... e If the file name is not displayed correctly move to Settings Language ID3 Tag and then change the language setting WMA files can only be played as music files with a compression rate of 48Kbps 192Kbps The power off time can be set in the menu See page 49 I Turning Power On and Off Power On Press and hold the button to turn on the power Power Off Press and hold the button to turn off the power I...

Страница 17: ...ou want to listen to Release the button to resume play normally I To Search for Specific Parts During Play Press the button briefly during playback to play the next track Press the button briefly within 5 seconds after playback starts to move to and play the previous track Press the button briefly after 5 seconds to play the current track from the beginning I To Change Tracks During Play Press the...

Страница 18: ... o o ot t t te e e e The minimum allowed period of time for Loop Repeat is 4 seconds Loop Repeat is automatically released if you Speed Search with the button Loop Repeating 34 34 34 Listening to FM Radio 34 I Searching Stored Frequencies I Deleting Stored Frequencies 1After moving to the PRESET number you want to delete press the A B button 2 After selecting YES with the button press the M Key Th...

Страница 19: ...he playlist 3 Press the button The selected file will be played You can easily search for files or switch modes using the Navigation function 36 36 36 MENU Options 36 Press and hold the M key to switch to the Menu mode Use to move and press the M key briefly to select the menu you want Press and hold the M key again to exit the MENU mode Music Playlist FM Radio Navigation Exit N N N No o o ot t t ...

Страница 20: ...ted folder will be played Playing Folder 1 Press the M key during folder playback to move to the Navigation mode Exiting Folder Play 38 38 38 Using Navigation 38 I Changing Mode 1 Press the M key in the Voice mode 2 Use the button to move to the upper folder You can change the mode in the following method Ex To change from the Voice mode to the Music mode 3 Use to move to the music file you want a...

Страница 21: ...e Sound Effect Display FM Radio Time FM Radio Time File System Return 40 40 40 Setting Playlist 40 I Setting Playlist I Playing Playlist 1 Select Playlist from the menu The playlist you set will be displayed 2 Move to the file you want to play and press the button mark appears and the selected file will be played Move to the file you want in Navigation mode and press the M key The selected file wi...

Страница 22: ...e preset sound I Bass Booster Bass Booster On Off Normal Rock User EQ Return Classic Jazz Press and hold the M key Select Settings Sound Effect N N N No o o ot t t te e e e is a trademark of SRS Labs Inc WOW technology is incorporated under license from SRS labs Inc Please adjust the volume to a suitable level as the volume may increase in the SRS setting This unit supports sampling frequencies of...

Страница 23: ...ound Use to adjust SRS from 0 to 10 TruBass A bass boost feature that adds fullness to the sound Use to adjust TruBass from 0 to 10 Focus You can enjoy clearer tone during playback Use to set Focus and then press the M key High Middle Low Optimum Optimize the SRS function according to the device connected to the main unit Use to move to the connected device and then press the M key Earphone Headph...

Страница 24: ...upported languages can be changed or added Press and hold the M key Select Settings Language 46 46 46 Display Settings 46 I Screen Saver Use to set Screen Saver You can set Screen Saver to Clock Screen Saver1 or Screen Saver2 When the LCD light is turned off the Screen Saver screen blinks When you make a recording the Recording Screen Saver appears regardless of the set screen saver Clock Screen S...

Страница 25: ...Settings FM Radio I Auto Preset If you select Auto Preset frequencies within the range of 87 5MHz to 108 0MHz are automatically selected and stored Frequencies are automatically stored starting from 1 I FM Region Use to select the FM region Other Countries Search FM frequencies between 87 50MHz to 108 00MHz in increments of 50 KHz Korea U S Search FM frequencies between 87 5MHz to 108 0MHz in incr...

Страница 26: ...n formatting the built in memory Delete Confirm Cancel Format Format Cancel 50 50 50 Time Settings 50 I Time Set Select the Time Set to set the current time If you have selected Clock for Screen Saver you can view the current time on the screen when the Screen Saver is set Use to set the clock time and then press the button to move to the next stage When the time setting is complete move to OK by ...

Страница 27: ...Playback will resume from the point it was previously stopped Off Playback will resume from the beginning of the file track that was playing when stopped Resume On Off I Default Vol Use to set the default volume to a level between 0 and 30 If the power is turned on again after having adjusted the volume to a level above the default volume for example 20 music is played at the default volume level ...

Страница 28: ...op 4 Run Setup exe and follow the instructions on the screen for installation If previous version of firmware updater has been installed on your PC overwrite the firmware files bootmanager sb resource bin StmpSys sb UsbMsc sb in C Program Files Samsung YP F1 folder 6 Connect the YP F1 to your PC with the USB cable 7 Check the current version and click the Start button of the Firmware Updater progr...

Страница 29: ...erating system limits the number of files you can save Please save your music files by creating a subfolder Check if the memory is full Open the cover of the player and press the RESET hole LCD display is invisible Check that the LCD Time setting Buttons on the player does not work Open the cover of the player and press the RESET hole 56 56 56 56 MENU Table 56 Music Play Mode Sound Effect Display ...

Страница 30: ... saved in it Play Time is not displayed correctly during playback Check to see if the file is a VBR Variable Bit Rate file LCD display is dark Check the Contrast setting The file name and Tag information are not displayed correctly Select Settings Language ID3 Tag from the menu and change the Language setting There is a file saved in the player but No File appears in the screen After checking whet...

Страница 31: ...1 This license is limited to private non commercial use by end user consumers for licensed contents No rights are granted for commercial use The license does not cover any product unit other than this product unit and the license does not extend to any unli censed product unit or process conforming to ISO IEC 11172 3 or ISO IEC 13818 3 used or sold in combination with this product unit The license...

Страница 32: ...on able protection against harmful interference in a residential installation This equipment generates uses and can radiate radio frquency energy and if not installed and used in accordance with the instructions may cause harmful interference to radio communications However there is no guarantee that interference will not occur in a particular installation FCC Any changes or modifications not expr...

Страница 33: ...arried out by non Samsung Centers and warranty coverage will not be valid for any repairs or damage caused by such repairs 4 Repair or replacement under the terms of this warranty does not give right to extension to or a new starting of the period of warranty Repair or direct replacement under the terms of this warranty may be fulfilled with functionally equivalent service exchange units 5 The war...

Страница 34: ...BY SAMSUNG AND CAUSING THE ALLEGED DAMAGE WITHOUT LIMITING THE FOREGOING PURCHASER ASSUMES ALL RISK AND LIABILITY FOR LOSS DAMAGE OR INJURY TO PURCHASER AND PURCHASER S PROPERTY AND TO OTHERS AND THEIR PROPERTY ARISING OUT OF THE USE MISUSE OR INABILITY TO USE THIS PRODUCT SOLD BY SAMSUNG NOT CAUSED DIRECTLY BY THE NEGLIGENCE OF SAMSUNG THIS LIMITED WARRANTY SHALL NOT EXTEND TO ANYONE OTHER THAN T...

Отзывы: