background image

Other settings

69

Other settings

File No

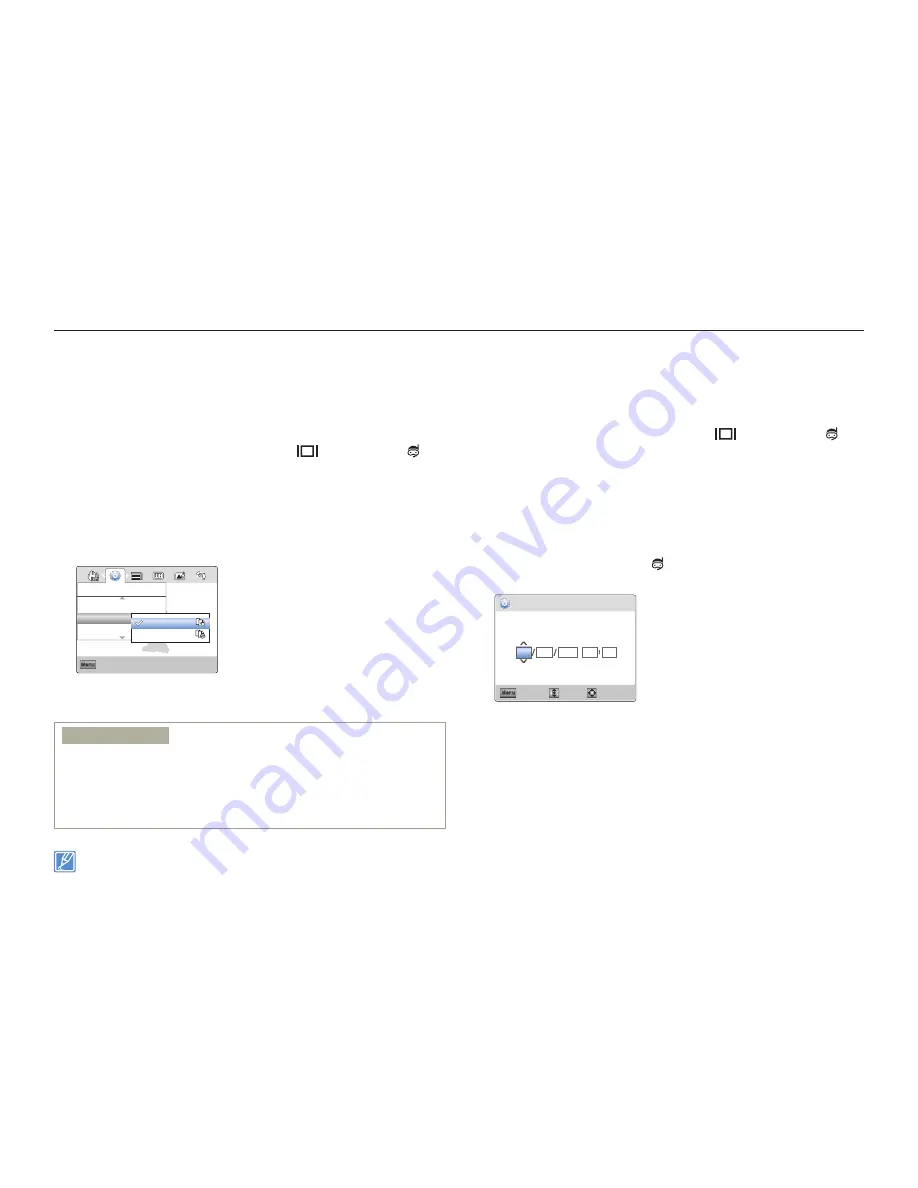
The product assigns file numbers to recorded files in the order they 
were recorded. Use File No. to continue or reset the current file 
number sequence.

Press the [

MENU

] button 

J

 [

Display

 (


)/

Underwater

 (   )] 

button 

J


Settings

.

Press the [

Zoom

 (

T

 / 

W

)] button 

J


File No


J

 [

OK (REC)

] button. 

Select the desired submenu item with the [

Zoom

 (

T

 / 

W

)] button 

J

 [

OK (REC)

] button. 

Exit

Menu

Storage Info
File No
Date/Time Set

Settings

Series
Reset

Press the [

MENU

] button to exit the menu.

Submenu items

Series

:


Assigns file numbers in sequence even if you replace the memory 
card with another one, format the card, or delete all files. The file 
number is reset when a new folder is created.

Reset

:


Resets the file number to 0001 when you format the memory 
card, delete all files, or insert a new memory card.

When you set 

File No

 to 

Series

, each file is assigned a different number 

to avoid duplicating file names. This is convenient when you want to 
manage your files on a PC. 

Date/Time Set

Set the current date and time so the product can record them 
correctly.

Press the [

MENU

] button 

J

 [

Display

 (


)/

Underwater

 (   )] 

button 

J


Settings

.

Press the [

Zoom

 (

T

 / 

W

)] button 

J


Date/Time Set


J

 [

OK (REC)

button.

Set each date or time value by pressing the [

Zoom

 (

T

 / 

W

)]


buttons.

Press the [

Underwater 

(   )] button after you set each date or 

time value. The cursor moves to the next value.

Date/Time Set

Move

OK

Cancel

Menu

Day Month Year

Hr

Min

JAN

01

00

00

2012

After setting minute, press the [

OK (REC)

] button.

The product exits the date/time screen.

Содержание W300 HD Sports Camcorder

Страница 1: ... HMX W300RP HMX W300YP HMX W350BP HMX W350RP HMX W350YP www samsung com register USER MANUAL For video recording use a memory card that supports faster write speeds Recommended Memory Card 4MB s Class 4 or above ...

Страница 2: ...is not guaranteed The product is shock proof to a height of 2m about 6 56 ft Samsung is not responsible for any malfunction or damage caused by your mishandling Carefully read and understand cautions on underwater recording before use Because of natural oxidation the sealing performance of rubber gaskets deteriorates as time goes by As a result the water proof performance may be degraded Check the...

Страница 3: ...placement Do not open or close the memory card HDMI jack cover or USB plug cover with wet or dirt sand covered hands Also avoid opening the covers near water It may introduce water or other foreign substances into the product Use the underwater mode to ensure the optimal condition for under water recording page 40 Close the memory card HDMI jack cover and USB plug cover Make sure they click when y...

Страница 4: ...ater flows such as in rapids or under waterfalls The strong water pressure may impair the water proof performance or cause a malfunction Do not place the product near sand Sand can enter the speaker and microphone Do not expose to direct sunlight for a long time The product can overheat Do not poke the speaker or microphone of the product with any sharp object Water proof performance will be degra...

Страница 5: ...emove salt or other foreign substances between around the buttons Do not use chemicals to clean the product including soap neutral detergent or alcohol You can damage the product s water proof capability This product is designed to drain well The water drains through the small holes around the buttons on the product Do not use a device such as a hair dryer to dry the product The water proof perfor...

Страница 6: ...sung Product Please read this user manual carefully before you use the product and keep it handy for future reference Should your product fail to operate correctly refer to Troubleshooting pages 87 95 This User Manual covers the HMX W300 and HMX W350 models Illustrations of model HMX W300 are used in this user manual Although some features of HMX W300 and HMX W350 are different they operate in the...

Страница 7: ...ng etiquette Do not record videos and photos of people without their authorisation or consent Do not record videos and photos in forbidden recording places Do not record videos and photos in private places Notes regarding trademarks All the trade names and registered trademarks mentioned in this manual or other documentation provided with your Samsung product are trademarks or registered trademark...

Страница 8: ... of the product to malfunction Do not dispose of the product in a fire Fire can cause the battery to explode Never use cleaning fluid or similar chemicals to clean the product Do not spray cleaners directly on the product Doing so may pose a fire hazard Keep memory cards out of the reach of children If the memory card is swallowed by a child consult a physician immediately If the product produces ...

Страница 9: ...sonal injury Don t disassemble or attempt to repair the USB plug or the product There is a risk of fire or electric shock Do not place heavy objects on the USB plug Heavy objects can cause the plug to break or disconnect from the product Do not open and close the memory card cover or USB plug cover near or in the water Do not open or close the cover with wet hands Either action may cause an electr...

Страница 10: ...or a long time where the temperature is very high High temperatures can cause the product to malfunction and the battery to explode or burst into flame Do not expose the product to soot or steam Thick soot or steam could damage the product case or cause the product to malfunction Do not use the product near dense exhaust gas generated by gasoline or diesel engines or near a corrosive gas such as h...

Страница 11: ...ed accessories only Using products from other manufacturers may cause overheating fire explosion electric shock or personal injuries caused by abnormal operation Place the product on a stable surface that is well ventilated Keep important data separately Samsung is not responsible for data loss Manufacturers of unauthorised accessories compatible with this product are responsible for their own pro...

Страница 12: ...UTTON 30 SWITCHING THE INFORMATION DISPLAY MODE 32 USING THE FLOATING BUMPER HMX W350 ONLY 32 USING THE WEARABLE BAND CHEST BAND ARM BAND HMX W350 ONLY 32 USING THE STRAP 33 SELECTING THE OSD LANGUAGE 33 Basic recording playback 34 Basic recording 35 RECORDING VIDEOS 35 CAPTURING PHOTOS DURING VIDEO RECORDING 37 TAGGING GREAT MOMENTS WHILE RECORDING MY CLIP FUNCTION 38 RECORDING PHOTOS 39 RECORDIN...

Страница 13: ...e 73 Video Out 73 Format 74 Default Set 75 Language 75 Using with other devices 76 Connecting to a TV 77 CONNECTING TO A HIGH DEFINITION TV WITH HDMI 77 VIEWING ON A TV SCREEN 77 Using with a Windows computer 78 WHAT YOU CAN DO WITH A WINDOWS COMPUTER 78 USING THE Intelli studio PROGRAMME 79 USING AS A REMOVABLE STORAGE DEVICE 84 Appendixes 86 Troubleshooting 87 WARNING INDICATORS AND MESSAGES 87 ...

Страница 14: ...this product 2 Charge the battery fully page 22 The battery is fully charged when the CHG charging indicator light turns green The product comes with the battery installed No additional battery is required Charge the product s internal battery via the USB connection STEP 2 Record with your product Built in USB plug Power button MENU button OK REC button Zoom T W button My Clip button Share button ...

Страница 15: ... Press the Power button 2 Press the Mode button to set the video recording mode 3 Press the OK REC button To stop recording press the OK REC button again 0 00 00 579Min Pause Capture Recording photos You can take photos and store them in the storage media Set the desired resolution before recording 1 Press the Power button 2 Press the Mode button to set the photo recording mode 3 Frame the subject...

Страница 16: ... Save recorded videos or photos Using the Intelli studio programme built into your product you can import videos photos into your computer and edit or share the videos photos with your friends and family For details see pages 78 83 Importing videos photos from the product to your PC and viewing them on your PC screen 1 Start the Intelli studio programme by connecting the built in USB plug of the p...

Страница 17: ...world by uploading videos and photos directly to a web site with a single click Click Share J Upload on the Intelli studio browser page 82 STEP 5 Delete videos or photos If the product s storage media is full you cannot record new videos or photos Save videos and photos to your computer and then delete the videos or photos you ve saved to your computer from the product s storage media Then you can...

Страница 18: ...ECTING A MEMORY CARD NOT SUPPLIED 25 SELECTING A SUITABLE MEMORY CARD NOT SUPPLIED 26 RECORDABLE TIME AND CAPACITY 28 Basic operation of the product 29 TURNING YOUR PRODUCT ON OFF 29 SETTING THE DATE TIME FOR THE FIRST TIME 29 SETTING THE OPERATION MODES 30 USING THE ZOOM T W DISPLAY UNDERWATER OK REC BUTTON 30 SWITCHING THE INFORMATION DISPLAY MODE 32 USING THE FLOATING BUMPER HMX W350 ONLY 32 US...

Страница 19: ... your accessories Strap Quick start guide USB extension cable HMX W350 only Floating bumper HMX W350 only Chest band HMX W350 only Product holder Arm band HMX W350 only The exact appearance of each item may vary by model The contents may vary depending on the sales region A memory card is not included See page 26 for memory cards compatible with your product You can purchase parts and accessories ...

Страница 20: ...6 5 4 3 2 9 7 14 15 1 LCD screen 2 Zoom T W button 3 OK REC button 4 Display button 5 Mode button 6 MENU button 7 My Clip button 8 Power button 9 Underwater button 10 Playback Photo capture button 11 Share Pause button 12 Delete button 13 CHG Charging indicator 14 Strap hook 15 Internal speaker ...

Страница 21: ...se lever Built in USB plug 5 Water proof seal Built in USB plug 6 Built in USB plug 7 Built in USB open lever 8 Tripod receptacle 9 HDMI jack 10 Memory card slot 11 RESET button 12 Water proof seal Memory card HDMI jack 13 Open Close lever Memory card HDMI jack 14 Cover Memory card HDMI jack Be careful not to cover the internal microphone and lens while recording ...

Страница 22: ...JAN 2012 00 00 Date Time The settings of functions marked with a are lost when the product turns off The on screen indicators are based on a micro SDHC memory card with a 32GB capacity The screen above is an example and may differ from the actual display For warning indicators and messages see pages 87 89 The illustrated items above and their positions may be changed without notice to improve perf...

Страница 23: ...able photos Operating status photo capturing Storage media memory card Battery information remaining charge level Right of the LCD screen Indicator Meaning Digital Zoom bar Bottom of the LCD screen Indicator Meaning Photo Resolution White Balance Smart Filter Back Light Face Detection Anti Shake DIS 01 JAN 2012 00 00 Date Time The settings of functions marked with a are lost when the product turns...

Страница 24: ...ck mode Video Resolution X W W X X Operating status playback pause search slow motion playback 0 00 00 0 00 55 Time code elapsed time recorded time Erase protection Share mark Battery information remaining battery level My Clip 100 0001 File name file number Centre of the LCD screen Indicator Meaning Previous skip Rewind Forward skip Fast Forward Volume up down Playback Pause X Reverse forward slo...

Страница 25: ...he LCD screen Indicator Meaning Photo playback mode Photo Resolution Slide show 1 10 Current photo Number of total recorded photos Erase protection Battery information remaining battery level 100 0001 File name file number Centre of the LCD screen Indicator Meaning Previous Next photo Playback zoom Bottom of the LCD screen Indicator Meaning Button guide 01 JAN 2012 00 00 Recorded date time The on ...

Страница 26: ...s green 4 When the charging is completed detach the USB plug from the PC and then push in the built in USB plug 5 Slide and close the Open Close lever in the direction of the arrow to close the built in USB plug cover as show in the figure Do not force the built in USB plug Depending on your computer environment you can attach a USB extension cable HMX W350 only to the product s USB plug and your ...

Страница 27: ...ery level display The battery level display shows the amount of power remaining in the battery Battery level indicator State Message Fully charged 25 50 used 50 75 used 75 95 used 95 98 used Exhausted flickers The product will be forced to turn off after 3 minutes Charge the battery as soon as possible After 3 seconds the product turns off Low Battery The figures above are based on a fully charged...

Страница 28: ...ithium ion battery is small sized and has a high capacity Low ambient temperature below 10ºC 50ºF may shorten its usage time and affect its function Be careful not to completely discharge the battery When fully discharged a battery damages its internal cells The battery may be prone to leakage when fully discharged If the battery is not used for a long time fully charge the battery and then using ...

Страница 29: ...t a memory card 1 Press the power button to turn off the product and then slide the Open Close lever in the direction of the arrow and open the memory card cover as shown in the figure above 2 Gently push the memory card to eject it 3 Close the cover and then slide the Open Close lever in the direction of the arrow as show in the figure To avoid the data loss turn off the product by pressing the P...

Страница 30: ... operation such as formatting deleting recording and playback may cause data loss If you modify the name of a file or folder stored in the memory card with your PC your product may not recognise the modified file The micro memory card does not support any data recovery mode Therefore care should be taken to prevent the memory card from being damaged while recording We recommend that you power off ...

Страница 31: ... the product forcibly stores the video on the low speed memory card and displays a warning Low speed card Please record at a lower resolution If you are unavoidably using a low speed memory card the resolution of the recording may be lower than the set value page 53 The higher the resolution and quality the more memory the product uses Using the memory card adaptor This product uses micro SD micro...

Страница 32: ...9 9 999 9 999 640x480 3 700 7 240 9 999 9 999 9 999 9 999 9 999 Unit Approximate number of images 1GB ⴊ 1 000 000 000 bytes Actual formatted capacity may be less as the internal firmware uses a portion of the memory Your recordable time and capacity and recordable number of photos may differ from the figures in the tables depending on your subject and actual recording conditions The higher the res...

Страница 33: ...uct for the first time 1 Press the Power button to turn on the product When you turn on your product for the first time the Date Time Set screen appears Date Time Set Move OK Day Month Year Hr Min JAN 01 00 00 2012 2 Set each date or time value by pressing the Zoom T W buttons To move left or right press the Display or Underwater button 3 After setting minute press the OK REC button The product ex...

Страница 34: ...ayback mode Mode Mode indicator Functions Video recording mode To record videos Photo recording mode To record photos Playback mode To play back videos or photos USING THE ZOOM T W DISPLAY UNDERWATER OK REC BUTTON The functions of the Zoom T W Display Underwater OK REC buttons vary according to the operation mode you are using The following tables list the buttons and functions they perform in eac...

Страница 35: ...rt stop page 35 Photo capturing page 39 Playback mode Button Video playback mode Single view Photo playback mode Single view T lncreases the volume page 44 W Decreases the volume page 44 Search playback RPS Reverse Playback Search rate x2Jx4Jx8Jx16 page 44 Previous skip playback page 44 Reverse slow motion playback page 44 Previous image page 48 Search playback FPS Forward Playback Search rate x2J...

Страница 36: ...hocks USING THE WEARABLE BAND CHEST BAND ARM BAND HMX W350 ONLY When you enjoy outdoor sports activities such as skiing or skydiving the included wearable arm band or chest band lets you bring the product with you To use insert the product with the floating bumper into the product holder attach the chest band or arm band to the holder and then strap the arm band or chest band around your arm or ch...

Страница 37: ...ater button to select Settings The settings menu appears Exit Menu Storage Info File No Date Time Set Settings 3 Press the Zoom T W button to select Language and then press the OK REC button Exit Menu Format Default Set Language Settings English ǎᨕ Français Deutsch 4 Press the Zoom T W button to select the desired OSD language and then press the OK REC button 5 To exit press the MENU button The pr...

Страница 38: ...GGING GREAT MOMENTS WHILE RECORDING MY CLIP FUNCTION 38 RECORDING PHOTOS 39 RECORDING WITH EASE FOR BEGINNERS SMART AUTO 40 USING UNDERWATER MODE 40 ZOOMING 41 Basic playback 42 CHANGING THE PLAYBACK MODE 42 PLAYING BACK VIDEOS 43 PLAYING BACK MY CLIP 45 TAGGING GREAT MOMENTS DURING PLAYBACK 46 CAPTURING PHOTOS WHILE PLAYING BACK VIDEO 47 VIEWING PHOTOS 48 ZOOMING DURING PHOTO PLAYBACK 49 ...

Страница 39: ...on The recording indicator appears and recording starts 0 00 00 Pause Capture 579Min 3 To stop recording press the OK REC button again Recording Pause Resume The product allows you to pause temporarily while recording a video With this function you can record separate scenes as a single video Press the Share button to pause while recording Press it again to resume 0 00 00 Pause Capture 579Min 0 01...

Страница 40: ...f the product Make sure that the microphone is not blocked Before recording an important video test the recording function to see if there any problems with the audio or video recording For various functions available during recording see pages 53 58 You can adjust the brightness of the LCD screen in the menu options Adjusting the LCD screen does not affect the image being recorded page 70 When yo...

Страница 41: ...00 00 Pause Capture 579Min 2 While recording the video frame the scene you want to photograph and then press the Playback button This product records the photo image without a shutter sound You can capture up to 5 photos during video recording Video keeps recording even while you take photos Pause Capture 579Min 3 To stop recording press the OK REC button again Photos are captured in the video rec...

Страница 42: ...My Clip 0 00 07 Pause Capture 579Min 3 To stop recording press the OK REC button again Understanding My Clip function During a video recording My Clip You can extract and play back the scenes tagged as My Clip from a video page 45 My Clip My Clip The product can tag up to 20 moments as My Clip while recording a video When you use the My Clip function the product tags the scene so that it starts 3 ...

Страница 43: ... product or remove the memory card while it is accessing the storage media Doing so may damage the storage media or the data in the storage media The recordable number of photos varies depending on the recording conditions and the photo resolution page 28 Audio is not recorded when you take photos For the on screen display information see page 19 You can adjust the brightness of the LCD screen in ...

Страница 44: ...rtrait When you set the Smart Filter function the product records in the basic settings The product may not select the correct scene depending on shooting conditions such as product shake lighting and distance to the subject The product may not detect the portrait mode depending on the orientation or the brightness of faces When you set Face Detection to On the Portrait mode can be activated in Sm...

Страница 45: ... W Press the Zoom W button wide angle The subject appears smaller and further away The smallest zoom ratio is the subject s original size in the zoom out W Wide angle T Telephoto Note that the image quality decreases when you use the digital zoom The image quality may deteriorate depending on how much you zoom in on the subject Frequent use of the zoom function consumes more power The minimum foca...

Страница 46: ...ay options based on the standby mode you used the last time You can display video or photo thumbnails using the Play Mode menu page 59 Video playback mode Photo playback mode MENU button J Play Mode J Video or Photo 0 00 55 Play Mode Menu 1 10 Play Mode Menu 1 10 Photo recording mode Video recording mode STBY 579Min 9999 Switch playback modes You can switch the playback mode to the video or photo ...

Страница 47: ...pear briefly They reappear when you press the OK REC button If you play back a video tagged as My Clip the My Clip icon on the LCD screen appears The colour of the My Clip icon is changed to yellow at the scenes tagged as My Clip for 8 seconds Multi View 0 00 00 0 00 55 100 0001 Capture 3 To return to thumbnail index view while playing back use the Share button Do not power off or eject the memory...

Страница 48: ...ng playback press the Display button to locate the starting point of the current file Pressing the Display button repeatedly skips files in the reverse direction Press the Display button within 3 seconds of the starting point of the current file to skip back to the previous file Slow motion playback 1 During pause press the Display Underwater button to make the video go reverse forward slowly Mult...

Страница 49: ... the playback mode page 30 1 Set Play Mode to Video page 59 0 00 55 Play Mode Menu 1 10 My Clip Play 2 Press the Zoom T W Display Underwater button to select the video tagged with the My Clip symbol and then press the My Clip button The product plays back the tagged scenes sequentially Multi View 0 00 00 0 00 55 100 0001 3 To return to thumbnail index view while playing back use the Share button ...

Страница 50: ... Underwater button to select the desired video and then press the OK REC button 3 Press the My Clip button at each great moment during playback The product tags the scene as My Clip 4 To return to thumbnail index view while playing back use the Share button When you use the My Clip function the product tags the scene so that it starts 3 seconds before you pressed the My Clip button and ends five s...

Страница 51: ...to select the video you want and then press the OK REC button The selected video is played back Multi View 0 00 00 0 00 55 100 0001 Capture 3 Press the Playback button when the video scene you want to capture as a photo appears The captured photo is recorded in JPEG format 4 To return to thumbnail index view while playing back use the Share button Photos are captured in the resolution of the video...

Страница 52: ...e on screen indicators appear briefly They reappear when you press the OK REC button To view the previous next file press the Display Underwater button Multi View 1 10 100 0001 3 To return to the thumbnail index view use the Share button Do not power off the product or eject the memory card during photo playback Doing so may damage the recorded data Loading time may vary depending on the size and ...

Страница 53: ...View 1 10 100 0001 2 Adjust the magnification with the OK REC button The screen is framed and the image is magnified starting from the centre of the image You can zoom in from x1 3 to x2 0 Exit 1 10 100 0001 x1 5 3 Press the Zoom T W Display Underwater button to view the area you want on the magnified photo 4 To cancel use the Share button Photos recorded on other devices or those edited on a PC c...

Страница 54: ... HANDLING MENUS 51 MENU ITEMS 52 Advanced recording 53 Video Resolution 53 Photo Resolution 53 White Balance 54 Smart Filter 55 Back Light 56 Face Detection 57 Anti Shake DIS 58 Advanced playback 59 Play Mode 59 Delete 60 Protect 61 Delete My Clip 62 Share Mark 63 Smart BGM 64 Smart BGM Option 64 Slide Show 66 File Info 66 ...

Страница 55: ...tion function is used here as an example Exit Menu 1080 25p 720 25p Video Resolution 3 Press the Zoom T W button to select the desired option and then press the OK REC button Exit Menu 1080 25p 720 25p Video Resolution 4 To exit the menu press the MENU button While you are using certain menu items some other menu items cannot be used at the same time or may be greyed out For more information see T...

Страница 56: ...s Available X Not Available Operation mode Items Video Photo Default value Page Thumbnail view Single view Thumbnail view Single view Play Mode X X Video 59 Delete 60 Protect 61 Delete My Clip X X 62 Share Mark X X 63 Smart BGM X X X Off 64 Smart BGM Option X X X The Flea Waltz 64 Slide Show X X 66 File Info 66 Settings 68 75 Menu options and default values may be changed without prior notice MENU...

Страница 57: ...t the higher resolution there is less space to record videos in the memory The recording times depend on the resolution of a video to be recorded page 28 Photo Resolution You can select the resolution of the photo to be recorded Press the Mode button to set the photo recording mode page 30 1 Press the MENU button J Display Underwater button J Photo Resolution 2 Select the desired submenu item with...

Страница 58: ...ng to outdoor lighting conditions Cloudy Use when recording in the shade or cloudy weather Fluorescent Use when recording under white fluorescent lights Tungsten Use when recording under halogen lamps andincandescent lights A subject can be recorded under various types of lighting conditions indoors natural fluorescent candlelight etc Because the colour temperature is different depending on the li...

Страница 59: ...d strong vignette effect of lomo cameras Fish Eye Distort close objects to imitate the visual effect of a fish eye lens Retro R R This mode gives the image a reddish brown look Classic CL CL This mode changes the image to black and white Negative N N This mode reverses the colours creating a negative image Dazzle This mode creates a brighter image by increasing colour saturation Noir This mode cre...

Страница 60: ...W button J OK REC button Exit Menu Off On Back Light 3 Press the MENU button to exit the menu Submenu items Off Disables the function On Backlight compensation brightens the subject Cases where you would typically use the Back Light function The subject is in front of a window The person you want to record is wearing white or shiny clothes and is placed against a bright background The person s fac...

Страница 61: ...n J Display Underwater button J Face Detection 2 Select the desired submenu item with the Zoom T W button J OK REC button Exit Menu Off On Face Detection 3 Press the MENU button to exit the menu Submenu items Off Disables the function On Detects faces automatically and sets the optimal recording values Example of the Face detection mode When you set the Face detection mode to On the face detection...

Страница 62: ...nu Submenu items Off Disables the function On The Anti Shake DIS function is enabled to compensate for shaking Use the Anti Shake function in the following cases When recording while walking or in a moving car When recording with the zoom function When recording subjects of a small size Gross product shake may not be entirely corrected even if Anti Shake DIS is On Firmly hold the product with both...

Страница 63: ...e MENU button J Play Mode 0 00 55 Play Mode Menu 1 10 2 Select the desired submenu item with the Zoom T W button J OK REC button Exit Menu Video Photo Play Mode Submenu items Video Your product displays videos in the thumbnail index view Photo Your product displays photos in the thumbnail index view Videos and photos thumbnail index view 0 00 55 Play Mode Menu 1 10 Video Photo Play Mode Menu 1 10 ...

Страница 64: ... for those that are protected If you selected Select Files the product deletes the files you selected Submenu items Select Files Deletes selected videos or photos All Files Deletes all videos or photos Deleting files by using the Delete button Select the file to be deleted on the thumbnail view and then press the Delete button If you select Multiple follow Step 3 and 4 Deleted images cannot be rec...

Страница 65: ... or All Off go to Step 4 3 Press the Zoom T W Display Underwater buttons and then the OK REC button to select each file you want to protect A indicator appears on the files you selected After you have selected all the files you want to protect press the MENU button Protect Protect Menu Cancel 1 10 4 Select Yes with the Display Underwater OK REC button If you selected All On the indicator appears o...

Страница 66: ...4 3 Press the Zoom T W Display Underwater buttons and then the OK REC button to select videos tagged as My Clip The garbage can icon appears on the selected videos Press the MENU button to delete all tags from the videos Delete My Clip Delete Menu Cancel 1 10 4 Select Yes with the Display Underwater OK REC button If you selected All Files the product deletes My Clip tags from all files except for ...

Страница 67: ...selected all the files you want to share mark press the MENU button Share Mark Mark Menu Cancel 1 10 4 Select Yes with the Display Underwater OK REC button If you selected All On the indicator appears on all files If you selected All Off the indicator disappears from all share marked files If you selected Select Files the indicator appears on the files you selected for share mark Submenu items Sel...

Страница 68: ...nction Smart BGM Option You can play back a video with background music The Smart BGM Option lets you select the music that will play Insert a memory card page 25 Press the Playback button to set playback mode page 30 Set Play Mode to Video page 59 1 Press the Zoom T W Display Underwater button to select the desired video and then press the OK REC button 2 Press the MENU button J Display Underwate...

Страница 69: ... memory card You can delete the external songs from Manage BGM in the Smart BGM screen or from the BGM folder in the memory card In the case of the product sold in Europe you should save external songs as follows 1 Follows steps 1 3 as the figure on the left 2 Change the external song s name select a location to save it click Convert Yes The BGM folder is automatically created in the selected loca...

Страница 70: ...the interval you select You can choose 1sec or 3sec Music You can turn the internal background music on or off This product has 4 default background melodies stored in the boot up flash memory If the music is on when the slide show starts the 4 melodies will play back in shuffle mode File Info You can see the image information for photos and videos Insert a memory card page 25 Press the Playback b...

Страница 71: ...ttings Other settings 68 SETTING MENU ITEMS 68 Storage Info 68 File No 69 Date Time Set 69 Date Time Display 70 LCD Brightness 70 Auto LCD Off 71 Beep Sound 71 Shutter Sound 72 Auto Power Off 72 PC Software 73 Video Out 73 Format 74 Default Set 75 Language 75 ...

Страница 72: ...used memory space available memory space and available recordable time Insert a memory card page 25 1 Press the MENU button J Display Underwater button J Settings 2 Press the Zoom T W button J Storage Info J OK REC button Used memory space memory space available for use and the available recordable time appears Note that the storage info values depend on the currently selected video resolution Exi...

Страница 73: ... is reset when a new folder is created Reset Resets the file number to 0001 when you format the memory card delete all files or insert a new memory card When you set File No to Series each file is assigned a different number to avoid duplicating file names This is convenient when you want to manage your files on a PC Date Time Set Set the current date and time so the product can record them correc...

Страница 74: ...o the option you selected Submenu items Off Current date time information is not displayed Date Displays the current date Time Displays the current time Date Time Displays the current date and time The date time will read 01 JAN 2012 00 00 in the following case When the internal battery is depleted LCD Brightness You can adjust the brightness of the LCD screen to compensate for ambient lighting co...

Страница 75: ... LCD screen dims you can press any button on the product to return the LCD screen s brightness to normal The Auto LCD Off function is disabled in the following situation If you have connected the built in USB plug of the product to a PC Beep Sound You can set the beep sound on or off If you hear a beep sound when operating the menu settings the setting is turned on 1 Press the MENU button J Displa...

Страница 76: ...n This setting turns off the product if there is no operation for five minutes 1 Press the MENU button J Display Underwater button J Settings 2 Press the Zoom T W button J Auto Power Off J OK REC button 3 Select the desired submenu item with the Zoom T W button J OK REC button Exit Menu Beep Sound Shutter Sound Auto Power Off Settings Off 5 Min 4 Press the MENU button to exit the menu Submenu item...

Страница 77: ...uct to your PC The PC Software function is compatible with Windows operating systems only Video Out TV colour systems differ depending on the country or region Set the video output signal according to the TV colour system of the connected video equipment 1 Press the MENU button J Display Underwater button J Settings 2 Press the Zoom T W button J Video Out J OK REC button 3 Select the desired subme...

Страница 78: ...n Do not remove the storage media or perform any other operation such as turning off the power during formatting Also be sure the battery is sufficiently charged The storage media can be corrupted if the battery becomes exhausted during formatting If the storage media becomes corrupted format it again Do not format the storage media on a PC or other device Make sure to format the storage media on ...

Страница 79: ...ng values are initialised to the factory default After resetting the product reset Date Time Set page 29 Do not turn off the power while Initialising the settings The Default Set function does not affect the files recorded on the storage media Language You can select a language in which to display the menu and messages 1 Press the MENU button J Display Underwater button J Settings 2 Press the Zoom...

Страница 80: ... TV or computer Connecting to a TV 77 CONNECTING TO A HIGH DEFINITION TV WITH HDMI 77 VIEWING ON A TV SCREEN 77 Using with a Windows computer 78 WHAT YOU CAN DO WITH A WINDOWS COMPUTER 78 USING THE Intelli studio PROGRAMME 79 USING AS A REMOVABLE STORAGE DEVICE 84 ...

Страница 81: ...input or source 4 When you connect the product to a TV the LCD screen of the product turns off and the images recorded by the product appear in thumbnail view on the TV For videos and photos playback see pages 43 48 VIEWING ON A TV SCREEN Image appearance depends on the TV screen aspect ratio Recording ratio Appearance on Wide Screen 16 9 TV Appearance on 4 3 TV Images recorded in a 16 9 ratio Ima...

Страница 82: ...ok Intel Core2 Duo 2 2GHz or AMD Athlon X2 Dual Core 2 6GHz or higher is recommended RAM 1GB or higher is recommended Video Card NVIDIA GeForce 8500 or higher ATI Radeon HD 2600 series or higher Display 1024 x 768 16 bit colour or higher 1280 x 1024 32 bit colour recommended USB USB 2 0 Direct X DirectX 9 0c or higher System requirements mentioned above are recommendations Even on a system that sa...

Страница 83: ...low these steps 1 Click the Safely Remove Hardware icon on the taskbar 2 Select USB Mass Storage Device and then click Stop 3 If the Stop a Hardware device window appears click OK 4 Disconnect the product s built in USB plug from the PC Make sure you insert the USB plug into the USB port with the plug oriented in the correct direction When the built in USB plug is connected turning the product on ...

Страница 84: ... selected folder on the device View files as thumbnails or on a map Browse folders in the connected device Browse folders stored on your computer Move to the previous or next folder Print files view files on a map store files in Contents Manager register faces or refresh content manager If you install Intelli studio on your PC the programme will launch more quickly To install the programme select ...

Страница 85: ...video or photo you want double click to play back Playback starts and the controls appear Intelli studio supports the following file formats Video formats MP4 Video H 264 Audio AAC WMV WMV 7 8 9 Photo formats JPG GIF BMP PNG TIFF Step 4 Editing videos or photos You can edit the videos or photos in various ways with various functions Change Size Fine Tuning Image Effect Insert Frame etc Before edit...

Страница 86: ...an choose YouTube twitter Flickr Facebook Picasa E mail or another web site you want to use for your on line photo or video management 4 Click Upload to start uploading A pop up window appears The window will either ask you to enter your ID and password or ask you to click OK to continue to the web site you have selected 5 Enter your ID and the password to access Access to the web site contents ca...

Страница 87: ...r videos to YouTube If you want to upload directly without showing a pop up sharing window check Intelli studio does not pop a list of share marked files from the connected device You can use the Share button only while Intelli studio is running As part of the uploading process the videos you marked are converted into a format playable by YouTube before actually uploading Time spent uploading may ...

Страница 88: ...olders Photos Videos Setting folder System folder 5 Select the desired folder or files to copy then drag and drop them into the destination folder The folder or files are copied from the storage media to the PC If the Removable Disk window does not appear confirm the connection page 79 or perform steps 1 to 3 again If the removable disk does not appear automatically open the removable disk folder ...

Страница 89: ...iven in the following order 100VIDEO 101VIDEO etc The maximum number of folders is 999 The product can create a maximum of 9 999 files in a storage media Photo file 2 As with video files the file number used in the file name automatically increases when you create a new photo file Photos have a SAM_ JPG name format The folder names are given in the following order 100PHOTO 101PHOTO etc File format...

Страница 90: ... Troubleshooting 87 WARNING INDICATORS AND MESSAGES 87 SYMPTOMS AND SOLUTIONS 90 Additional information 96 MAINTENANCE 96 USING YOUR PRODUCT ABROAD 97 HOW TO USE ARM BAND BASED ON LEFT ARM USE HMX W350 ONLY 98 HOW TO USE CHEST BAND HMX W350 ONLY 99 GLOSSARY 100 Specifications 101 ...

Страница 91: ...oduct to a PC using the built in USB plug Storage media Message Icon Meaning Action Insert Card There is no memory card inserted in the memory card slot Insert a memory card Card Full There is not enough space to record on the memory card Delete unnecessary files from the memory card Back up files to a PC or another storage media and then delete unneeded files Replace the memory card with another ...

Страница 92: ...d video at a lower resolution Replace memory card with a faster card Recording Message Icon Meaning Action Write Error A problem has occurred while the product was writing data to the storage media Turn the product s power off and on for data recovery If a file is not recovered use the product to format the storage media after backing up important files to a PC or another storage media The number ...

Страница 93: ...to back up important files before formatting File number is full Cannot take a photo The folder and file number have reached their maximum number You cannot record additional photos Set File No to Reset and format the storage media Remember to back up important files before formatting Playback Message Icon Meaning Action Read Error A problem has occurred while the product was reading data from the...

Страница 94: ...g it on Press the RESET button page 17 The battery discharges quickly The temperature is too low The battery is not fully charged Charge the battery again The battery has reached the end of its lifespan and cannot be recharged Contact your local Samsung dealer Display Symptom Explanation Solution The TV screen or LCD display has distorted images or has stripes at the top bottom or on the left righ...

Страница 95: ...a Back up important files on your PC and format the storage media or delete unnecessary files If you make recordings or delete files frequently the performance of the storage media deteriorates If this occurs format the storage media again If you use a memory card with a low write speed the product automatically stops recording videos and displays a message on the LCD screen When recording a subje...

Страница 96: ...25 If you use a memory card formatted on a computer format it again directly on your product page 74 Image cannot be deleted You cannot delete a protected image Release protection of the image using the Protect function page 61 You cannot format the memory card The memory card is not supported on your product or the card has some problems The data file name is not indicated correctly The file may ...

Страница 97: ... your product Check memory card compatibility page 26 The skip or search function does not work properly If the temperature inside the product is too high it cannot function properly Turn the product off wait for a few minutes and turn it on again Playback on other devices TV Symptom Explanation Solution You cannot view the image on or hear the sound from the connected device Make sure that the co...

Страница 98: ...elli studio is not Mac OS compliant Set PC Software to On in the Settings menu The Intelli studio programme may not run automatically If this occurs access My Computer or Windows Explorer open the drive that corresponds to your product find Intelli studio and then run IStudio exe Your computer is not playing back videos images or sound located on your product properly Video playback or sound may s...

Страница 99: ...or the buttons do not operate normally Press the RESET button to reset the product The product turns off The Reset function does not affect the recorded images and user settings RESET button Menu items that cannot be used at the same time Symptom Explanation Solution Menu items are grayed out You cannot select greyed items in the current recording playback mode If you have not inserted a memory ca...

Страница 100: ...ens gently with a soft cloth If necessary wipe gently with lens paper or tissue Mould may form if the lens is not cleaned regularly If the lens looks dim turn off the product and leave it off for about 1 hour LCD screen To prolong its service life do not rub the LCD screen with a coarse cloth Be aware of the following LCD screen phenomena They are not malfunctions When you use the product the surf...

Страница 101: ... off and leave the product in a dry area for 1 2 hours before using it Use the product only after dew condensation has completely disappeared USING YOUR PRODUCT ABROAD Each country or region has its own electric and video colour systems Before using your product abroad check the following items On TV colour systems Your product is an PAL based product When playing back or copying the PAL formatted...

Страница 102: ...through the left ring viewed from the rear side of the holder as shown below and fasten it 2 Adjust the anti slip ring as shown below to prevent getting loose After the 1st step Anti slip ring 3 Insert and loop the other end of the strip from behind the holder ring and fasten the velcro Loosen the band enough before wearing and adjust it to fit appropriately ...

Страница 103: ...event getting loose Anti slip ring Putting on the Chest Band right arm first 1 Loosen the chest band and shoulder band enough before putting on 2 Buckle the right shoulder band with the chest band to connect each other and then put it on your right arm Check if the chest band is unbuckled before putting on 3 Buckle the left shoulder band with the chest band to connect each other 4 Buckle up the ch...

Страница 104: ...larger the lens aperture and the greater the amount of light that reaches the product s sensor Generally smaller F numbers provide brighter images MPEG 4 AVC H 264 MPEG 4 AVC H 264 defines the latest video coding format standardised by the ISO IEC and the ITU T in 2003 Compared with the conventional MPEG 2 format MPEG 4 AVC H 264 has more than twice the efficiency Your product employs MPEG 4 AVC H...

Страница 105: ...type connector micro HDMI USB output Built in USB General Dust proof Water proof specification Max 5 m underwater IEC IP68 Power source 3 7V Using Lithium Ion battery Power source type Lithium Ion battery Power consumption Recording 2 1W LCD On 720 25p 2 4W LCD On 1080 25p Operating temperature 0 C 40 C Operating humidity 10 80 Storage temperature 20 C 60 C Storage media Memory card micro SD micro...

Страница 106: ...om TRINIDAD TOBAGO 1 800 SAMSUNG 726 7864 www samsung com VENEZUELA 0 800 100 5303 www samsung com Europe AUSTRIA 0810 SAMSUNG 7267864 0 07 min www samsung com BELGIUM 02 201 24 18 www samsung com be Dutch www samsung com be_fr French Region Country Contact Centre Web Site Europe BOSNIA 051 133 1999 www samsung com BULGARIA 07001 33 11 normal tariff www samsung com CROATIA 062 SAMSUNG 062 726 786 ...

Страница 107: ...327 527 www samsung com MALAYSIA 1800 88 9999 www samsung com my Region Country Contact Centre Web Site Asia Pacific PHILIPPINES 1 800 10 SAMSUNG 726 7864 for PLDT 1 800 3 SAMSUNG 726 7864 for Digitel 1 800 8 SAMSUNG 726 7864 for Globe 02 5805777 www samsung com ph SINGAPORE 1800 SAMSUNG 726 7864 www samsung com THAILAND 1800 29 3232 02 689 3232 www samsung com th TAIWAN 0800 329 999 0266 026 066 ...

Страница 108: ...nvironmentally safe recycling Business users should contact their supplier and check the terms and conditions of the purchase contract This product and its electronic accessories should not be mixed with other commercial wastes for disposal Correct disposal of batteries in this product Applicable in the European Union and other European countries with separate battery return systems This marking o...

Страница 109: ...se the 6 hazardous materials Cadmium Cd Lead Pb Mercury Hg Hexavalent Chromium Cr 6 Poly Brominated Biphenyls PBBs Poly Brominated Diphenyl Ethers PBDEs in our products Samsung Electronics Co Ltd 129 Samsung Ro Yeongtong Gu Suwon Si Gyeonggi Do 443 742 Korea Samsung Electronics Euro QA Lab Blackbushe Business Park Saxony Way Yateley Hampshire GU46 6GG UK ...

Отзывы: