background image

12

13

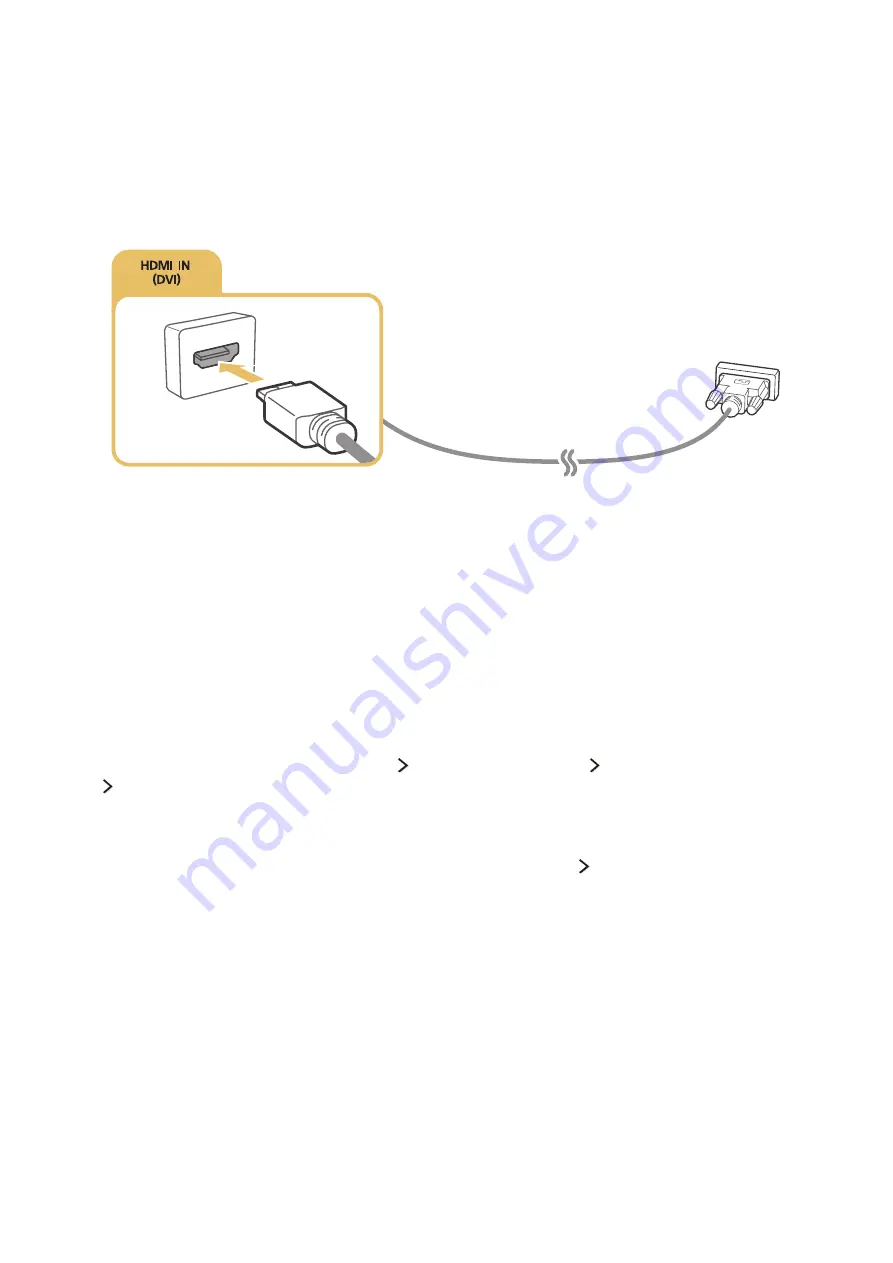
Connecting with an HDMI-to-DVI cable

If the graphics adapter of your TV does not support the HDMI interface, connect the computer to the 
TV with a DVI (Digital Visual Interactive)-to-HDMI cable. Note that the HDMI-to-DVI connection is 
only supported by the HDMI (DVI) port and does not transmit audio. To listen to the computer sound, 
connect external speakers to the audio output connector of the computer.

Connect the HDMI-to-DVI cable to the HDMI (DVI) port of the TV and the DVI output port of the 
computer as shown in the image below.


"

Set 

Edit Device Type

 to 

DVI PC

 for a computer connected with a HDMI-to-DVI cable, and 

PC

 for a 

computer connected with HDMI cable. Also, set 

Edit Device Type

 to 

DVI Devices

 for an A/V device with a 

HDMI-to-DVI cable.


"

For the resolutions supported by the TV, refer to "Read Before Connecting a Computer (Supported 
Resolutions)
."

Connecting through your home network

You can quickly access and play photo, video, and music files stored on a computer on the TV.

1. 

Connect the TV and the computer to the same router or AP. Once you connect them to the same 

router or AP, a home network is configured.

2. 

On the computer, select [Control Panel]   [Network and Internet]   [Network and Sharing Centre] 

 [Change advanced sharing settings], and select [Choose media streaming options...] to activate 

media streaming.

3. 

From the list, set the TV to [Allowed].

4. 

Launch Windows Media Player on a computer. Select [Settings]   [Library Management] and add 

the location where photo, video, and music files are saved to play them on the TV.


"

Alternatively, you can move the files to the default folder specified by Windows Media Player, and then play 
or view them on the TV.

Содержание UE40LS001

Страница 1: ...E MANUAL Thank you for purchasing this Samsung product To receive more complete service please register your product at www samsung com register Model______________ Serial No ______________ ...

Страница 2: ...e 13 Connecting through your home network Using Screen Mirroring 15 Connecting mobile devices without a wireless router Wi Fi Direct 15 Connecting a mobile device via Samsung Smart View 2 0 Changing the input signal with external devices Connection Notes 17 Connection notes for HDMI 17 Connection notes for audio devices 18 Connection notes for computers 18 Connection notes for mobile devices Remot...

Страница 3: ...nt 40 Read before playing media content 41 Functions on the media content list screen 42 Buttons and functions available while viewing photos 43 Buttons and functions available while viewing videos 45 Buttons and functions available while playing music TV Viewing Viewing Digital Broadcast Information at a Glance 46 Using the guide 47 Checking current programme info 47 Changing the broadcast signal...

Страница 4: ...ure mode settings Adjusting the Sound Quality 77 Choosing a sound mode 78 Applying sound effects Using the Sound Support Functions 79 Selecting speakers 79 Specifying the TV s installation type 79 Listening to TV sound through a Samsung Bluetooth audio device 80 Listening to the TV through Bluetooth devices 81 Enabling digital audio output 82 Resetting all sound settings System and Support Setting...

Страница 5: ...sting the picture I Can t Hear the Sound Clearly 108 Testing the sound There Is a Problem with the Broadcast My Computer Won t Connect I Can t Connect to the Internet Data Service The Schedule Recording Timeshift Function Isn t Working Anynet HDMI CEC Isn t Working I Have Trouble Launching Using Apps My File Won t Play I Want to Reset the TV Other Issues Precautions and Notes Before Using the Reco...

Страница 6: ...g up a wireless Internet connection Read Before Connecting a Computer Supported Resolutions 135 For the UE40LS001 models 137 For the UE32LS001 models 139 For the UE24LS001 models Supported Resolutions for Video Signals 141 For the UE40LS001 models 142 For the UE32LS001 models 143 For the UE24LS001 models Read Before Using Bluetooth Devices 144 Restrictions on using Bluetooth Licence Glossary ...

Страница 7: ...n on your remote control When you start Smart Hub for the first time you must configure the Smart Hub setting Follow the instructions on the screen to configure the required settings and complete the setup TV Apps Speaker Photos Time Using Smart Hub Enjoy the multiple functions provided by Smart Hub on a curtain mode For more information refer to Smart Hub ...

Страница 8: ... Samsung Smart Control The pointer on the screen moves in the direction you moved the Samsung Smart Control Move the pointer to one of the following icons on the screen and then press the button Allows you to adjust the volume or select speakers Displays the channel list Displays the Electronic Programme Guide EPG ...

Страница 9: ... Settings Eco Solution Your TV s menu may differ from the image above depending on the model Pairing the TV to the Samsung Smart Control When you turn on the TV for the first time the Samsung Smart Control pairs to the TV automatically If the Smart Control does not pair to the TV automatically point it at the remote control sensor of the TV then press the and buttons on the Samsung Smart Control s...

Страница 10: ... s menu may differ from the image above depending on the model Rearranging or deleting channels menu More Broadcasting Edit Channel Change Number or Delete You can rearrange the order of channels or delete channels To change the order of a channel select it and then select Change Number To delete a channel select it and then select Delete Certain channels are not available depending on the channel...

Страница 11: ...nector as shown in the image below An antenna connection is not necessary if you connect a cable box or satellite receiver It is best to connect the both connectors using a Multi Switch or DiSEqC Switch etc and to set Aerial Connection Type to Dual Oscillator A connection method may differ with the models DVB T2 system may not be available in specific geographical areas ...

Страница 12: ...assword settings before attempting to connect 1 The TV automatically displays a list of available wireless networks 2 Select a network If the network you want doesn t appear in the list select Add Network and then enter the network s SSID name manually 3 If your network is security enabled enter the password If your network is not security enabled the TV will bypass the on screen keyboard and atte...

Страница 13: ...tically Checking the internet connection status menu More Network Network Status Try Now Network Network Status Network Settings Wi Fi Direct Multimedia Device Manager Screen Mirroring Device Name TV Samsung Your TV s menu may differ from the image above depending on the model View the current network and Internet status Changing the name of the TV on a network menu More Network Device Name Try No...

Страница 14: ...led on the router Then unplug the router and plug it back in 2 Enter the correct password if required 3 If the problem persists contact your Internet Service Provider Unable to connect to the network 1 Check all IP Settings 2 Enter the correct password if required 3 If the problem persists contact your Internet Service Provider Connected to a local network but not to the Internet 1 Make sure that ...

Страница 15: ...I Cable High Speed HDMI Cable with Ethernet Connect the HDMI cable to the HDMI input connector of the TV and the HDMI output connector of the device as shown in the image below Set Edit Device Type to DVI PC for a computer connected with a HDMI to DVI cable and PC for a computer connected with HDMI cable Also set Edit Device Type to DVI Devices for an A V device with a HDMI to DVI cable ...

Страница 16: ... with an HDMI ARC cable ARC Audio Return Channel lets the TV output digital sound to an audio device and input digital sound from the same audio device through one HDMI cable ARC is only available through the HDMI ARC port and only when the TV is connected to an ARC enabled AV receiver Connect an HDMI cable to the HDMI ARC input connector of the TV and the HDMI output connector of the device as sh...

Страница 17: ...cal connector Connect the optical cable to digital audio output connector of the TV and the digital audio input connector of the device as shown in the image below Connecting with headphones Connect the headphones to the headphone output connector of the TV as shown in the image below Certain models do not have the headphone output connector ...

Страница 18: ...work Connecting through the HDMI port For an HDMI connection we recommend one of the following HDMI cable types High Speed HDMI Cable High Speed HDMI Cable with Ethernet Connect the HDMI cable to the HDMI input connector of the TV and the HDMI output connector of the device as shown in the image below Set Edit Device Type to DVI PC for a computer connected with a HDMI to DVI cable and PC for a com...

Страница 19: ...with a HDMI to DVI cable For the resolutions supported by the TV refer to Read Before Connecting a Computer Supported Resolutions Connecting through your home network You can quickly access and play photo video and music files stored on a computer on the TV 1 Connect the TV and the computer to the same router or AP Once you connect them to the same router or AP a home network is configured 2 On th...

Страница 20: ...ile device All previously allowed mobile devices will automatically connect without needing approval If you select Deny the device cannot connect To change the connection status of a denied device select menu More Network Multimedia Device Manager select the device and select Allow Try Now Connecting by automatically allowing the connection 1 Select menu More Network Screen Mirroring You can also ...

Страница 21: ...nu More Network Multimedia Device Manager When you place the mobile device closer to the TV with Wi Fi Direct activated the connection allowance confirmation window appears on the left bottom of the screen so that you can easily connect it Managing the connection status of previously connected mobile devices 1 Select menu More Network Multimedia Device Manager The TV displays a list of devices tha...

Страница 22: ...vices as DVI Devices Edit Name You can rename devices connected to the TV to facilitate identifying external sources Information Displays information about the connected devices Anynet HDMI CEC Displays a list of Anynet HDMI CEC compliant devices that are connected to the TV This option is only available when Anynet HDMI CEC is set to On Remove USB Device Removes a USB device connected to the TV D...

Страница 23: ...y the IEEE For the UE40LS001 models Try a cable shorter than 3m to get the best UHD viewing quality Many computer graphics adaptors do not have HDMI ports but have DVI ports instead If your computer graphics adaptor has a DVI port use an HDMI to DVI cable to connect the computer to the TV For more information refer to Connecting with an HDMI to DVI cable Connection notes for audio devices An unusu...

Страница 24: ...es To use the Screen Mirroring function the mobile device must support a mirroring function such as AllShare Cast or Screen Mirroring To check whether your mobile device supports the mirroring function please visit the mobile device manufacturer s website To use Wi Fi Direct the mobile device must support the Wi Fi Direct function Please check if your mobile device supports Wi Fi Direct The mobile...

Страница 25: ...About the Samsung Smart Control ...

Страница 26: ...hold this button to launch Guide while you are watching the TV Returns to the previous menu or channel Press and hold to exit the currently running function on the TV s screen Launches Smart Hub applications Controls the content when you are playing movies or music or viewing pictures 123 Displays numeric buttons content control button and other function buttons on the screen so that you can run a...

Страница 27: ... speakers Displays the channel list Displays the Electronic Programme Guide EPG Operating the TV with the directional buttons and the Enter button Press the and buttons to move the pointer focus or cursor in the direction you want or change a setting shown on the focused item Press the Enter button to select an item or run a focused item Press and hold the Enter button to view the Guide while watc...

Страница 28: ... switch to that channel Select PRE CH to return to the previous channel OK Selects or runs a focused item Controls the item when you are playing a video photo or music file or watching a recorded programme You can also use the buttons to control the content on an external device TTX MIX Alternately selects Teletext ON Double Mix or OFF Allows you to select the speakers that will play the TV s audi...

Страница 29: ...ptions specific to the feature in use Move Number Pad to the Right Move Number Pad to the Left Moves the number pad to the left or right The On Screen Remote buttons may vary depending on the TV model region external devices and the TV functions you are using To change the order of the menu options on the first row select a menu option to move press and hold the Enter button and then select the di...

Страница 30: ...mote control without any additional setup Refer to Using Anynet HDMI CEC for more information Certain external devices connected to the TV may not support the universal remote feature Setting up the universal remote control 1 Connect the external device to control with the universal remote control to the HDMI port on the TV and then turn on the external device 2 Press the source button on your rem...

Страница 31: ...aphical areas 1 Place the Bluetooth keyboard into standby status 2 Select menu More System Device Manager Keyboard Settings Add Bluetooth Keyboard The TV automatically scans for available keyboards Try Now If your keyboard was not detected position the keyboard close to the TV and then select Refresh The TV scans for available keyboards again 3 Select the Bluetooth keyboard from the scan list and ...

Страница 32: ...annel List F8 key Mutes the sound F9 F10 key Adjusts the volume F11 F12 key Changes the channel Changing keyboard settings Select menu More System Device Manager Keyboard Settings Keyboard Options Try Now Keyboard Language Displays the languages you can use on your keyboard and lets you select a language Keyboard type Displays a list of keyboard types and lets you select a type that matches the Ke...

Страница 33: ...standby status 2 Select menu More System Device Manager Mouse Settings Add Bluetooth Mouse Try Now 3 Select the Bluetooth mouse from the scanned list and then select Pair and connect This pairs the Bluetooth mouse to the TV Using a mouse You can use a pointer to control the TV in the same way you use a pointer on a computer Selecting and running an item Left click the mouse Scrolling the TV menu o...

Страница 34: ...luetooth gamepad to play games This function is not available on certain models in specific geographical areas If the TV fails to find your Bluetooth gamepad place it closer to the TV and then select Refresh For more information on pairing refer to the Bluetooth gamepad s operating manual Entering Text using the On Screen QWERTY Keypad Using additional functions Select on the QWERTY keyboard scree...

Страница 35: ...ain Mode When you set up Smart Hub completely you can use the following panels When the video signal is not perceived a curtain mode is displayed in monochrome TV You can exit curtain mode and then view the broadcasts Apps You can download and play apps Speaker You can play songs saved on your mobile device by using Bluetooth function Photos You can play a slideshow with the photos saved on a USB ...

Страница 36: ...t connection your ISP the Samsung server and the Apps service If Smart Hub continues to have problems after completing the test contact your Internet Service Provider or a Samsung Service Centre Resetting Smart Hub menu More Smart Hub Reset Smart Hub Try Now You can remove the Samsung accounts saved in the TV and everything linked to them including apps Some of the Smart Hub services are for pay s...

Страница 37: ...ount by following the on screen instructions Once a Samsung account is created you are automatically signed in to your Samsung account If you want to review the Terms and Conditions select View Details If you want your account to be protected select Profile image selection and password entry High security in the field below the password field If you want the TV to log you in to your account automa...

Страница 38: ...in method refer to Changing and adding information to a Samsung account Linking your Samsung account to external service accounts You can automatically log in to the linked apps accounts when you log into your Samsung account by linking your Samsung account to an external service accounts To use Link Service Accounts you must first log into your Samsung account Linking or disconnecting a service a...

Страница 39: ...your Samsung account Change Your Profile Image Selecting a Samsung Account sign in method Turning auto login on or off Entering Basic User Information Subscribing to the Samsung e Newsletter Deleting a Samsung account from the TV menu More Smart Hub Samsung Account Remove Accounts from TV You can remove a Samsung account and password information from your TV The account information for any externa...

Страница 40: ...gory such as Most Popular or What s New on the top of the screen and then select an app in the genre you selected You install and run the apps arranged by genres such as What s New Most Popular To use this feature the TV must be connected to the Internet When Smart Hub is launched for the first time the default apps are automatically installed The default apps may differ with the region Managing D...

Страница 41: ...ot run the app installed on the USB device on a PC or another TV Launching an app You can launch an app by selecting an app on the Apps screen The icons below appear in the selected apps and indicate the following The app is installed on a USB device The app has a password The app is installed Enabling automatic apps updates menu More Smart Hub App Auto Update To update apps automatically set App ...

Страница 42: ...s Select Options Update Apps on the Apps screen The TV searches for the app updates and then displays a list You can update some apps or all apps Rearranging apps Select Options on the Apps screen and then select Sort By to sort the apps by date time or others Rating purchased apps You can set the star score by using the or button on the detailed information screen Using other app features and fun...

Страница 43: ...p the search screen Enter a search term and then select Done Select an item from the search results to load the corresponding page Index Brings up the index screen Select a topic from the list to navigate to the relevant page Recent pages Displays a list of previously read pages Select a page The e Manual jumps to the selected page Accessing the associated menu screen from an e Manual topic page T...

Страница 44: ...r menu bars automatically after a period of inactivity or resets all user settings The bookmarks and browsing histories that you made will not be reset Home Page Sets the homepage when you launch the web browser Search Engine Searches for information that you entered and display the result web pages Privacy Security Prevents you from accessing inappropriate web pages or sets not to save the browsi...

Страница 45: ...evice on a playback screen the connection message appears Select Allow to play music files Using the Photos Panel Photos You can play a slideshow with photos saved on a USB storage device Connect a USB device to the TV When you stop the slideshow the screen returns to the Photos panel You can only use JPG and JPEG format photos to play a slideshow If you want to view the photos saved on a USB devi...

Страница 46: ...l You can play music files directly in the Speaker panel by using Bluetooth You cannot play media content if the content or the storage device is not supported by the TV For more information refer to Read Before Playing Photo Video or Music Files Backup important files before connecting a USB device Samsung is not responsible for damaged or lost files If you connect a storage device that has only ...

Страница 47: ...the content list The sorting methods change depending on the type of content you have selected This function is not available when Filter By is set to All Delete Deletes the recorded media content from the media content list This function is only available when Filter is set to Recorded Play Selected Plays the selected media content from the media content list This function is not available when F...

Страница 48: ...deshow speed Slideshow Effect Applies transition effects for the slide show Rotate and Zoom Zooms in by up to a factor of 4 Rotates the photo Background Music Plays background music while the TV displays photos The music files must be saved in the same USB device as the photo file When background music plays the music icon appears on the screen Using the music icon you can pause the current music ...

Страница 49: ...ans the paused video one frame at a time by pressing the button Slow Motion Plays the video in slow playback speed 1 8 1 4 1 2 by pressing the button Rewind Fast Forward Rewinds or fast forwards the video To increase the rewind or fast forward speed up to 3 times faster than normal select the button repeatedly To restore normal playback speed press the button Previous Next Plays the previous or ne...

Страница 50: ...ing subtitle font size or adjusting subtitle synchronisation Rotate Rotates the video Picture Mode Changes the Picture Mode setting Sound Mode Changes the Sound Mode setting Speaker List Gives you a choice of speakers to play the video sound through Audio Language Selects a audio language This function is only available when the video supports multi track sound Information Displays detailed inform...

Страница 51: ...c file Press the button once starts the current music file from the beginning Press the button to play the next music file Repeat Plays the current music file repeatedly or all music files in the same folder repeatedly Shuffle Plays the music files in random order Speaker List Gives you a choice of speakers to play the music through Picture Off Plays the music files only with the screen off ...

Страница 52: ...uide screen by the selected filter Schedule Manager Displays the schedule manager For information about the schedule manager refer to Setting Up a Schedule Viewing Edit Favourite Channels Allows you to set a channel that you select in the Guide as a favourite View Details Displays detailed information about a selected programme The programme information may differ with the broadcast signal and may...

Страница 53: ... certain programmes For more information on Schedule Recording refer to Recording Programmes For more information on Schedule Viewing refer to Setting Up a Schedule Viewing Changing the broadcast signal menu More Broadcasting Aerial Try Now You can choose your preferred method of receiving digital broadcasts This function is not needed if your TV is connected to a cable or satellite box Checking d...

Страница 54: ...n select the button on the On Screen Remote Using the instant and schedule recording options from the guide To start instant recording of a current programme select that programme from the Guide and then select Record To start a schedule recording of a programme that will air in the future select that programme from the Guide press and hold the Enter button select View Details and then select Sche...

Страница 55: ...e buttons on the remote control while recording a programme Pause Play Press the or button on the remote control to pause the recording screen or resume the paused recording screen When the recording is paused you can use the following functions However no audio is heard while the recording is paused Step Press the 123 button on the Samsung Smart Control and then select the button to scan through ...

Страница 56: ...ions available while playing a recording Press the Enter button The following buttons appear To hide the buttons press the button Buttons that appear are different depending on the file being played Pause Play Pauses the file recorded programme or resumes playing the file if paused When the video is paused you can use the following functions However no audio is heard while the video is paused Step...

Страница 57: ...e supported picture sizes differ with the video Subtitle Settings Subtitle Turns the subtitles on or off Subtitle Language Changes the language Picture Mode Changes the picture mode Sound Mode Changes the sound mode Speaker List Allows you to select the speakers to play the audio through This function is only available when you have a home theatre or receiver connected to the TV Audio Language All...

Страница 58: ...he selected viewing mode This function is unavailable if Filter is set to All Delete Deletes the selected files except for locked files This function is unavailable if Filter is set to All Play Selected Plays the selected files Select files from the file list and then select Play If the viewing mode is set to Folder view you can select the files included in the same folder only Change the viewing ...

Страница 59: ...er button Select Schedule Viewing on the pop up menu that appears The programme is scheduled for viewing The Guide screen re appears The Programme Info Screen Press the Enter button while you are watching the TV The programme Info window appears Press the or button to move to a programme you would like to view and then press the Enter button Select that appears on the programme Info window The pro...

Страница 60: ... Broadcasting function Read all precautions before using the Timeshift function For more information refer to Before Using the Recording and Timeshift Functions This function is only available on certain models in specific geographical areas To activate the Timeshift function while watching TV press the Enter button and then select on the programme Info window The TV displays a progress bar and th...

Страница 61: ...button Slow Playback Press the 123 button on the Samsung Smart Control and then select the or button to play current programme back at 1 2 the normal speed On the standard remote control press the or button Rewind Fast Forward Press the 123 button on the Samsung Smart Control and then select the or button to speed up rewind or fast forward to maximum speed in 7 steps On the standard remote control...

Страница 62: ...Sort Sorts the list by Channel Number or by Name Digital channels only Genre Sorts the list so that it includes channels of a selected genre only However Genre can only be used channels contain the genre information Check the network and make sure the TV is connected to the Internet Your TV needs to be connected to the Internet in order to receive the channel s genre information Edit Channel Lists...

Страница 63: ... the following An analogue channel A favourite channel A locked channel Registering and removing channels Removing registered channels You can remove a registered channel or all channels from the channel index To remove a channel select it and then select Delete To remove all channels select Options Select All and then select Delete ...

Страница 64: ...n is only available for digital channels Aerial Allows you to choose between Terrestrial Cable or Satellite This function is only available on certain models in specific geographical areas Category Displays the channels stored in a selected category Edit Favourites Sets favourite channels For more information refer to Creating a Personal Favourites List Rename channel Renames analogue channels The...

Страница 65: ...g channels You can lock or unlock channels Select channels from the Edit Channel screen and then select Lock or Unlock at the bottom of the screen When the password entry window appears enter the password Changing channel numbers menu More Broadcasting Edit Channel Number You can change the channel numbers Set Edit Channel Number to Enable This function is only available on certain models in speci...

Страница 66: ... Select Change Fav on the screen to select a favourites list 3 Select Add on the screen The TV adds the channels you selected to the favourites list you chose Viewing and selecting channels on Favourites lists only menu More Broadcasting Channel List You can flip through only the favourite list channels and select a channel using the channel up down buttons 1 Press the button A favourites list app...

Страница 67: ... if you have registered one or more channels to at least one favourites list Rename Favourites Rename an existing favourite channels list For more information refer to Renaming a favourites list This option is available only if you have registered one or more channels to at least one favourites list Sort Sort the list ordered by Number or Name This option is only available for digital channels Aer...

Страница 68: ...e new location for the channels Press the Enter button to set the channels into their new location Renaming a favourites list Select Edit Favourites Options Rename Favourites Select the favourites list you want to rename Enter a new name using the on screen keyboard that appears and then select Done Select OK Copying channels from one favourites list to another Select Edit Favourites Change Fav to...

Страница 69: ...title Subtitle Mode Sets the subtitle mode Subtitle Language Sets the subtitle language The TV cannot control or modify DVD or Blu ray subtitles To control DVD or Blu ray subtitles use the subtitle feature of the DVD or Blu ray player and the player s remote control Selecting the broadcasting subtitle language menu More System Accessibility Subtitle You can select the default subtitle language The...

Страница 70: ... user runtime interaction technology and is being applied to various fields including Video On Demand VOD Interactive TV ITV Electronic Commerce EC tele education teleconferencing digital libraries and network games Scanning for available channels menu More Broadcasting Auto Tuning Auto Tuning Try Now Try Now When you turn this on for the first time you need to enter the PIN number in the pop up w...

Страница 71: ...can use the Audio Stream for the Audio Description AD which is sent along with the Main audio from the broadcaster Adjust the audio description volume using Volume This function is only available on digital channels Audio Description Turns the audio description function on or off Volume Adjusts the audio description volume Genre Selection menu More Broadcasting Genre Selection You can turn the cha...

Страница 72: ...e TV s screen may differ with the geographical area Tuning broadcast signals manually Try Now menu More Broadcasting Channel Settings Manual Tuning When you turn on this function for the first time you need to enter the PIN number on the pop up window Select the channel type of manual tuning and then complete the setup This function is only available on certain models in specific geographical area...

Страница 73: ...nd full of noise fine tune the signal to clear up the picture This function is only available for analogue broadcasts Transferring channel list menu More Broadcasting Channel Settings Transfer Channel List You can import or export the channel list to a USB storage Import from USB Imports channel list from a USB storage Export to USB Exports channel list saved in the TV to a USB storage This functi...

Страница 74: ...tion is only available on certain models in specific geographical areas Showing common interface menu menu More Broadcasting Common Interface You can view information about common interfaces CI Menu Enables the user to select from the CAM provided menu Select the CI menu based on the menu PC Card CAM video transcoding Configures the setting to transcode the video codec from the CAM automatically T...

Страница 75: ...t makes the picture difficult to see Standard Is the default mode suitable for most environments Natural Reduces eye strain Movie Darkens the screen reduces glare and relieves eye fatigue Use this mode while viewing the TV in a darkened room or watching a movie Entertain Sharpens images for a more dynamic viewing experience When the Input source is set to PC Standard and Entertain modes are only a...

Страница 76: ...tio of green to red Increase the green value to saturate the greens and the red value to saturate the reds The TV saves the adjusted values for the current input source and picture mode and applies these values each time you select the same input source and picture mode The Colour and Tint G R settings cannot be adjusted when the TV is connected to a computer via an HDMI to DVI cable Applying the ...

Страница 77: ...ows you to restore the default values for Colour Space You can configure the Colour function only when Colour Space is set to Custom White Balance Try Now Adjusts the colour temperature of the picture to make white objects look white and the overall picture appear natural 2 Point Allows you to adjust red green and blue luminosity with the offset menu and brightness with the gain menu Reset allows ...

Страница 78: ...to Dynamic Colour Tone is only available when the TV is connected to a computer via an HDMI to DVI cable Digital Clean View Try Now Reduces static and ghosting caused by a weak signal When you select Auto Visualisation it displays the signal strength on the bottom of the screen Green indicates the best possible signal This function is available for analogue channels only MPEG Noise Filter Try Now ...

Страница 79: ... more information refer to Supported Resolutions for each of UHD Input Signals For the UE40LS001 models Film Mode Try Now Optimises the picture quality for movies This function is only available when the input signal is TV AV or HDMI 1080i This function is not available on certain models in specific geographical areas Auto Motion Plus Removes blurring and judder from scenes with rapid movement If ...

Страница 80: ...annel Selects the PIP channel Size Sets the PIP window size Position Sets the PIP window position Sound Select Selects the audio source PIP cannot be used while Smart Hub is active Playing a game or using the karaoke function on the main screen can result in lower PIP picture quality The PIP function is only available under the following conditions 1 The main screen s source is a HDMI connection 2...

Страница 81: ... Sets the picture size to the basic 4 3 mode Do not watch TV in 4 3 mode for an extended period of time This action may cause black bars to appear and rest for a while at the top bottom left and right sides of the screen Note that this information is not presented on the Warranty You can also quickly access this function by pressing the menu button Supported picture sizes differ with the input sig...

Страница 82: ...ding on the Picture Size Adjusting the picture position menu More Picture Picture Size Zoom Position Try Now Magnifies or shrinks 16 9 pictures vertically and or horizontally A magnified or shrunk picture can be moved left right up and down This function is only available when Picture Size is set to Zoom or Custom However you cannot change the picture position when the TV is tuned to a digital cha...

Страница 83: ...ion by pressing the menu button Standard Is the default mode suitable for most environments Music Emphasises music instead of voices Movie Provides the best sound for movies Clear Voice Emphasises voices Amplify Increases the overall intensity of high frequency sound to help hearing impaired listeners This function is not available when you are listening to audio through external speakers ...

Страница 84: ...Now Experience home theatre like surround sound through your headphones Balance Try Now Allows you to adjust the sound settings of the left and right speakers for a better sound balance To restore the defaults select Reset Equaliser Try Now Allows you to adjust the loudness of specific frequency ranges to control the richness of the sound To restore the defaults select Reset This function is not a...

Страница 85: ... connect Samsung Bluetooth audio devices to the TV They must be paired using the TV s Bluetooth function For more information on pairing refer to the Samsung Bluetooth audio device s operating manual Add New Device Adds a new device to the list of paired devices If Add New Device is set to Off the connection signals from new devices are ignored Samsung Audio Device List Displays a list of paired S...

Страница 86: ...can activate deactivate i e pair unpair the Bluetooth device or remove it from the list If the TV fails to find a headphone place the headphone closer to the TV and then select Refresh When you turn on a paired Bluetooth device the TV detects it automatically and then displays a pop up window Use this pop up window to activate deactivate the Bluetooth device Multi output Audio Allows you to listen...

Страница 87: ...ume can be adjusted between 0 db and 10 db However this volume range may differ with the broadcast signal For the MPEG HE AAC broadcast signal the volume can be adjusted between 0 db and 10 db HDMI Audio Format Sets the audio input signal format suitable for the external device connected to the TV s HDMI port Audio Format Try Now Selects the digital audio output S PDIF format The available formats...

Страница 88: ...io mode instead The HD audio signals available on the TV are not available on external audio players connected via HDMI Bluetooth or Wi Fi networks Auto Volume Try Now Automatically adjusts the TV s volume level when you change channels video sources or content so that the volume level remains the same for all sources Auto Volume can modify the volume up to 12 dB to equalise the sound Normal can a...

Страница 89: ...ital broadcast info menu More System Time Clock Clock Mode Try Now You can make the TV automatically download time information from a digital channel and set the current time To activate this function set Clock Mode to Auto If the TV is connected to a set top box or satellite box using HDMI connectors you must set the current time manually This function works only when the TV s antenna jack is con...

Страница 90: ...nction is only available when the Clock Mode is set to Auto GMT Selects your time zone When Country is set to others you can use this function If the clock is wrong in auto mode menu More System Time Clock Time Offset Try Now You can offset the clock in 1 hour increments by as much as 12 hours if the TV fails to display the correct automatically set time for whatever reason Time Offset adjusts the...

Страница 91: ... configurations On Timer 1 2 and 3 On Timer is only available when Clock has already been set Setup If you select Manual you can highlight and select each day to select the specific days that you want On Timer to turn on the TV Time Volume Source From the list select a signal source for the TV to use when it turns on If you want to play content saved in a USB device or content from an HDMI source ...

Страница 92: ...nly one image file on the USB device Folders with long names cannot be selected Make sure to use different folder names for multiple USB devices Use a USB memory stick or multi card reader On Timer may not work with certain battery powered USB devices MP3 players or PMPs because the TV may take too long to recognise the device Turning off the TV using the off timer menu More System Time Off Timer ...

Страница 93: ...n Eco Sensor Try Now Automatically adjusts the brightness level of the TV according to the ambient light level to reduce power consumption If the Eco Sensor has adjusted the screen s brightness level you can select the Min Backlight to manually adjust the minimum screen brightness When the Eco Sensor is set to On the screen is darker than usual No Signal Power Off Try Now Allows you to select a ti...

Страница 94: ...d identifies Anynet HDMI CEC compatible external devices that are connected to the TV Using Anynet HDMI CEC Selecting an external device After connecting external devices to the TV select menu More System Anynet HDMI CEC Search for Devices The TV displays a list of Anynet HDMI CEC compliant devices that you can set up as Anynet HDMI CEC enabled devices i e devices that can be controlled with the T...

Страница 95: ...Devices with the TV Remote Using the Universal Remote Anynet cannot be used to control external devices that do not support HDMI CEC Anynet devices must be connected to the TV with an HDMI cable Note that some HDMI cables may not support Anynet HDMI CEC The TV remote control may not work under certain circumstances If this occurs select the Anynet device again Anynet HDMI CEC works only with exter...

Страница 96: ... until the update is complete The TV turns off and on automatically after completing the software update All video and audio settings return to the default settings after a software update Updating the TV automatically menu More Support Software Update Auto Update Try Now If the TV is connected to the Internet you can have the TV s software update itself automatically while you are watching the TV...

Страница 97: ...SB device When it finds the software the Update Request pop up appears 4 Select OK The TV updates the software turns off and then turns back on automatically DO NOT turn off the TV s power until the upgrade is complete The TV will turn off and on automatically after completing the software upgrade All video and audio settings return to the default settings after a software upgrade Protecting the T...

Страница 98: ...stem Smart Security Settings Try Now You can scan your TV against viruses or activate additional security functions for example the network security function Antivirus Monitors the TV in real time to prevent viruses from infecting the TV Network Security Protects the TV from hacking to minimise a leaks of private information Camera Permits the cameras connected to the TV to be used Microphone Perm...

Страница 99: ...transparency menu More System Accessibility Menu Transparency Try Now You can adjust the menu s transparency Setting High Contrast to On automatically switches the menu display mode to opaque You cannot manually change the Menu Transparency settings White text on black background high contrast menu More System Accessibility High Contrast Try Now You can change major service screens to white text o...

Страница 100: ...menu language Choose a language from the list Setting up a password menu More System Change PIN Try Now You can set a Personal Identification Number PIN to lock channels reset the TV and change TV settings The PIN input window appears Enter a PIN Enter it again to confirm it The default PIN is 0000 for France Italy 1111 If you forget your PIN you can reset it with your remote control With the TV t...

Страница 101: ...e mode to optimise the TV s settings for playing video games with a gaming console such as a PlayStation or Xbox The game mode is not available for normal TV viewing The screen may shake somewhat When the Game Mode is enabled Picture Mode and Sound Mode are switched to Game automatically To use a different external device first disconnect the game console and disable the Game Mode Richer colours a...

Страница 102: ...appears when the TV starts up This function is not available when Samsung Instant On is set to On Enabling the TV to boot faster menu More System General Samsung Instant On Try Now You can set Samsung Instant On to On so that the TV boots up faster When Samsung Instant On is set to On the use history of the apps that you used on the TV may be stored in the TV Even if the Samsung Instant On functio...

Страница 103: ...the TV to the factory settings menu More Support Self Diagnosis Reset Try Now You can restore all TV settings excluding the Internet and network settings to the factory defaults 1 Select Reset The security PIN entry window appears 2 Enter the security PIN and select Yes All settings are then reset The TV turns off and on again automatically and displays the Setup screen For more information on Set...

Страница 104: ...ic geographical areas Some broadcasting may not support the HbbTV To use HbbTV download install and run HbbTV Widget from SAMSUNG APPS then follow the instructions on the screen HbbTV is turned off by default To use HbbTV go to menu More System Data Service and set it Enable Depending on the country HbbTV is not available when Timeshift is running or when a recorded video is being played back An a...

Страница 105: ... disconnect a CI or CI Card We recommend that you insert the CI or CI Card viewing card before you mount the TV on the wall because it may be difficult and dangerous to do this when it is on the wall Connecting the CI or CI Card via COMMON INTERFACE slot Connect the CI or CI Card to the COMMON INTERFACE slot as shown in the image below ...

Страница 106: ... to the TV follow these steps 1 Insert the CI CARD Adapter into the two holes on the product 1 Please locate the two holes at the back of the TV next to the COMMON INTERFACE slot 2 Connect the CI CARD Adapter to the COMMON INTERFACE slot on the product 2 Connecting the CI or CI Card Connect the CI or CI Card to the COMMON INTERFACE slot as shown in the image below ...

Страница 107: ... service provider When the configuration of channel information has finished the message Updating Completed is displayed indicating the channel list is updated You must obtain a CI or CI CARD from a local cable service provider When removing the CI or CI CARD carefully pull it out with your hands since dropping the CI or CI CARD may cause damage to it Insert the CI or CI CARD in the direction mark...

Страница 108: ...hat there are several secondary pages that follow automatically To undo press it again Colour buttons red green yellow blue If the FASTEXT system is used by the broadcasting company the different topics on a Teletext page are colour coded and can be selected by coloured buttons Press the colour corresponding to the topic of your choice A new colour coded page appears Items can be selected in the s...

Страница 109: ...Typical Teletext page Part Contents A Selected page number B Broadcasting channel identity C Current page number or search indications D Date and time E Text F Status information FASTEXT information ...

Страница 110: ...agree to the service agreement before using this feature A Samsung Electronics technician will then diagnose repair and update your TV remotely This option requires an Internet connection What Does Remote Service Do Samsung Remote Support service offers you one on one support with a Samsung Technician who can remotely Diagnose your TV Adjust the TV settings for you Perform a factory reset your TV ...

Страница 111: ... the PIN screen appears provide the PIN number to the agent The agent accesses your TV Finding the contact information for service menu More Support Contact Samsung You can view the address of the Samsung website the call centre phone number your TV s model number your TV s software version the Smart Hub info and other information you may need to get service support from a Samsung call agent or th...

Страница 112: ...ess Sharpness Colour and Tint G R settings Ghosting Blurring or Juddering If you notice ghosting or blurring on the screen use the Auto Motion Plus function menu More Picture Picture Options Auto Motion Plus to resolve the issue Unwanted Powering Off If your Samsung TV appears to turn off by itself try disabling some of the TV s energy efficiency functions See if Sleep Timer menu More System Time ...

Страница 113: ...rogrammes and action movies A weak or bad quality signal can cause picture distortions This is not an issue with the TV Mobile phones used close to the TV within 1m may cause noise in analogue and digital channels The colour is poor or the picture is not bright enough Go to the Picture menu and then adjust the Picture Mode Brightness Sharpness and Colour settings See if Energy Saving menu More Sys...

Страница 114: ...l device check the device s audio output option For example you may need to change your cable box s audio option to HDMI if the box connected to your TV is using an HDMI cable To listen to the computer sound connect the external speaker to the computer s audio output connector If your TV has a headphone jack make sure there is nothing plugged into it Reboot the connected device by disconnecting an...

Страница 115: ...itioned correctly and the all the connections are secure There are no subtitles with digital channels Go to Subtitle menu More System Accessibility Subtitle and change the Subtitle Mode Some channels may not have subtitle data The picture is distorted The compression of the video content may cause picture distortions This is especially true with fast moving pictures from sports programmes and acti...

Страница 116: ... If you are using an HDMI to DVI cable a separate audio cable is required I Can t Connect to the Internet The problem Try this The wireless network connection failed Confirm your wireless modem router is on and connected to the Internet The software update over the Internet has failed Check the network connection status menu More Network Network Status If the TV is not connected to a network conne...

Страница 117: ...d other interactions between the viewer and the TV station Generally you will need to set up an account with the broadcaster and log in to the account in order to enjoy the interactive services they offer Note that interactive services are only available when your TV is connected to the Internet In addition T Commerce requires that you have a certificate Copy your certificate from the computer to ...

Страница 118: ...e Connecting to Anynet device or Disconnecting from Anynet device appears on the screen You cannot use the remote control when you are configuring Anynet or switching to a viewing mode Use the remote control after the TV has completed the Anynet configuration or has switched to a viewing mode The Anynet device won t play You cannot use the play function when Setup is in progress The connected devi...

Страница 119: ...oblem Try this Some files can t be played This problem may occur with high bitrate files Most files can be played back but you might experience problems with high bitrate files I Want to Reset the TV Reset Path Description Reset Settings menu More Support Self Diagnosis Reset Reset Picture Sound Channel Smart Hub and all other settings except for the network settings default settings Resetting Sma...

Страница 120: ...e aspect ratios different from your TV Adjust the picture size options on your external device or set the TV to full screen The Mode Not Supported message appears The output resolution of the attached device is not supported by the TV Check the TV s supported resolutions and adjust the external device s output resolution accordingly The Subtitles item in the TV menu is greyed out You cannot select...

Страница 121: ...e TV to a wall we recommend using cables with 90 degree connectors There are small particles on the TV s bezel This is part of the product s design and is not a defect The PIP menu is not available PIP functionality is only available when you are viewing video from an HDMI source on the main screen A POP TV s internal banner ad appears on the screen Change the Use Mode menu More Support Use Mode t...

Страница 122: ... supported USB memory sticks are not supported The total recording capacity may differ with the amount of available hard drive space and the recording quality level Schedule Recording requires at least 100MB of free space on the USB storage device Recording will stop if the available storage space falls below 50MB while recording is in progress If the available storage space falls below 500MB whil...

Страница 123: ...drives are not supported USB memory sticks or flash drives are not supported The total recording capacity may differ with the amount of available hard drive space and the recording quality level If the available storage space falls below 500MB while both the Schedule Recording and Timeshift functions are in progress only the recording will stop The maximum amount of time available for the Timeshif...

Страница 124: ... If HDMI UHD Color is set to Off Frame rate fps Colour Depth Chroma Sampling RGB 4 4 4 YCbCr 4 4 4 YCbCr 4 2 2 YCbCr 4 2 0 50 60 8 bit O If HDMI UHD Color is set to On Frame rate fps Colour Depth Chroma Sampling RGB 4 4 4 YCbCr 4 4 4 YCbCr 4 2 2 YCbCr 4 2 0 8 bit O O O O 50 60 10 bit O O 12 bit O O For the UE40LS001 models make sure to connect to the HDMI IN STB DVI port of the TV Although the HDM...

Страница 125: ...s may be provided in English only and available content may differ with the area For more information about applications visit the applicable service provider s website An unstable Internet connection may cause delays or interruptions In addition applications may terminate automatically depending on the network environment If this occurs check your Internet connection and try again Application ser...

Страница 126: ...supported With websites that have scrollable windows scrolling a window can result in corrupted characters ActiveX is not supported Certain options are not accessible in Link Browsing mode Switch to Pointer Browsing to activate those options Only a limited number of fonts are supported Certain symbols and characters may not be displayed properly The response to remote commands and the resulting on...

Страница 127: ...web browser depending on the certain models in specific geographical areas The web browser supports mp3 audio files only If the Clock menu More System Time Clock has not been set the browsing history will not be saved The browsing history is saved from latest to oldest with the oldest entries being overwritten first Depending on the types of video audio codecs supported it might not be possible to...

Страница 128: ...er Certain digital cameras and audio devices may not be compatible with the TV If there are multiple USB devices connected to the TV the TV might not be able to recognise some or all the devices USB devices that use high power input should be connect the USB 5V 1A port The TV supports the FAT exFAT and NTFS file systems After sorting files in the Folder view mode the TV can display up to 1000 file...

Страница 129: ...D sub or txt SubStation Alpha ssa Advanced SubStation Alpha ass Powerdivx psb SMPTE TT Text xml Supported internal subtitles Name Container Xsub AVI SubStation Alpha MKV Advanced SubStation Alpha MKV SubRip MKV VobSub MKV MPEG 4 Timed text MP4 TTML in smooth streaming MP4 SMPTE TT Text MP4 SMPTE TT PNG MP4 ...

Страница 130: ...at Codec Note mp3 MPEG MPEG1 Audio Layer 3 m4a mpa aac MPEG4 AAC flac FLAC FLAC Supports up to 2 channels ogg OGG Vorbis Supports up to 2 channels wma WMA WMA Supports up to 10 Pro 5 1 channels WMA lossless audio is not supported Supports up to the M2 profile wav wav wav mid midi midi midi Supports type 0 and type 1 Seek is not supported Supports USB device only ape ape ape aif aiff AIFF AIFF m4a ...

Страница 131: ...ov AVI MKV DivX 3 11 4 5 6 3gp vro ASF MP4 MPEG4 SP ASP 60 Dolby Digital LPCM mpg mpeg ts 3GP MOV FLV Window Media Video v9 VC1 ADPCM IMA MS AAC HE AAC tp trp VRO VOB MPEG2 1920x1080 20 WMA Dolby Digital Plus mov flv PS TS MPEG1 MPEG MP3 DTS Core LBR vob svi SVAF Microsoft MPEG 4 v1 v2 v3 G 711 A Law μ Law m2ts mts Window Media Video v7 WMV1 v8 WMV2 30 divx H 263 Sorrenson VP6 VP8 1920x1080 90 web...

Страница 132: ...Level 4 1 does not support FMO ASO RS H 264 UHD is supported up to Level 5 1 HEVC FHD is supported up to Level 4 1 and HEVC UHD is supported up to Level 5 1 VC1 AP L4 is not supported All video codecs excluding WMV v7 v8 MSMPEG4 v3 MVC and VP6 Below 1280x720 60 frame max Above 1280x720 30 frame max GMC 2 or above is not supported Supports SVAF Top Bottom Side by Side and Left Right view sequence t...

Страница 133: ... MVC mp4 mov AVI MKV DivX 3 11 4 5 6 3gp vro ASF MP4 MPEG4 SP ASP 60 Dolby Digital LPCM mpg mpeg ts 3GP MOV FLV Window Media Video v9 VC1 ADPCM IMA MS AAC HE AAC tp trp VRO VOB MPEG2 1920x1080 20 WMA Dolby Digital Plus mov flv PS TS MPEG1 MPEG MP3 DTS Core LBR vob svi SVAF Microsoft MPEG 4 v1 v2 v3 G 711 A Law μ Law m2ts mts Window Media Video v7 WMV1 v8 WMV2 30 divx H 263 Sorrenson VP6 webm WebM ...

Страница 134: ...P4 TS containers Video decoders H 264 is supported up to Level 4 1 does not support FMO ASO RS VC1 AP L4 is not supported All video codecs excluding WMV v7 v8 MSMPEG4 v3 MVC and VP6 Below 1280x720 60 frame max Above 1280x720 30 frame max GMC 2 or above is not supported Supports SVAF Top Bottom Side by Side and Left Right view sequence type 2ES only Supports BD MVC specs only Audio decoders WMA 10 ...

Страница 135: ... 640x480 8 wmv mp4 mov AVI MKV H 264 BP MP HP Dolby Digital LPCM 3gp vro ASF MP4 DivX 3 11 4 5 6 ADPCM IMA MS AAC mpg mpeg ts 3GP MOV MPEG4 SP ASP 1920x1080 MAX 30 30 HE AAC WMA tp trp mov FLV VRO Window Media Video v9 VC1 Dolby Digital Plus MPEG MP3 flv vob VOB PS MPEG2 DTS Core LBR G 711 A Law μ Law svi divx TS MPEG1 webm WebM VP8 1920x1080 6 30 20 Vorbis ...

Страница 136: ...ay smoothly because of data transmission speeds Some USB digital camera devices may not be compatible with the player The menu display is delayed when transmitting at or higher than 10Mbps Video Decoders Supports up to H 264 Level 4 1 does not support FMO ASO RS VC1 AP L4 is not supported GMC 2 or above is not supported Audio Decoders WMA is supported up to 10 Pro 5 1 channels Supports up to the M...

Страница 137: ...icture quality PIP is not supported in UHD source 1 Tuner model MAIN TV PIP DTV ATV HDMI DTV X X ATV X X This function is dependent on the specific model and area 2 Tuner model MAIN TV PIP DTV ATV HDMI DTV ATV X X This function is dependent on the specific model and area Flexible CI Not supported 2 Scrambled Channel Tuner 1 Tuner 2 Compatibility Watch Pay Watch Pay X Watch Pay Watch Free Watch Fre...

Страница 138: ...n because the 3840 x 2160p screen size is fixed and cannot be changed Input signal Picture size Digital channel 720p 1080i 1080p 16 9 Zoom Custom 4 3 Digital channel 3840 x 2160p 16 9 Zoom Custom Digital channel 4096 x 2160p 16 9 Zoom Custom HDMI 720p 16 9 Zoom Custom 4 3 HDMI 1080i 1080p 16 9 Zoom Custom 4 3 HDMI 3840 x 2160p 16 9 Zoom Custom HDMI 4096 x 2160p 16 9 Zoom Custom For the UE32LS001 m...

Страница 139: ...0i 1080p Component 1080i 1080p HDMI 720p 1080i 1080p Screen Fit ATV EXT AV DTV 576i p 720p 1080i 1080p Component 480i p 576i p 720p 1080i 1080p HDMI 480i p 576i p 720p 1080i 1080p Custom Installing an anti theft lock An anti theft lock is a physical device that can be used to protect the TV against theft Look for the lock slot on the back of the TV The slot has a icon next to it To use the lock wr...

Страница 140: ...he result is usually interference and or a communications failure Most wireless networks have an optional security system To enable a wireless network s security system you need to create a password using characters and numbers This password is then needed to connect to a security enabled AP Wireless security protocols The TV only supports the following wireless network security protocols Authenti...

Страница 141: ...840 x 2160 at 60 Hz Choosing a resolution not included in the tables can result in a blank screen or just the power indicator turning on Refer to the user manual of your graphics card for compatible resolutions IBM Resolution Dots x lines Display format Horizontal frequency KHz Vertical frequency Hz Clock frequency MHz Polarity horizontal vertical 720 x 400 70 Hz 31 469 70 087 28 322 MAC Resolutio...

Страница 142: ...600 75 Hz 46 875 75 000 49 500 1024 x 768 60 Hz 48 363 60 004 65 000 1024 x 768 70 Hz 56 476 70 069 75 000 1024 x 768 75 Hz 60 023 75 029 78 750 1152 x 864 75 Hz 67 500 75 000 108 000 1280 x 720 60 Hz 45 000 60 000 74 250 1280 x 800 60 Hz 49 702 59 810 83 500 1280 x 1024 60 Hz 63 981 60 020 108 000 1280 x 1024 75 Hz 79 976 75 025 135 000 1366 x 768 60 Hz 47 712 59 790 85 500 1440 x 900 60 Hz 55 93...

Страница 143: ...result in a blank screen or just the power indicator turning on Refer to the user manual of your graphics card for compatible resolutions IBM Resolution Dots x lines Display format Horizontal frequency KHz Vertical frequency Hz Clock frequency MHz Polarity horizontal vertical 720 x 400 70 Hz 31 469 70 087 28 322 MAC Resolution Dots x lines Display format Horizontal frequency KHz Vertical frequency...

Страница 144: ...600 75 Hz 46 875 75 000 49 500 1024 x 768 60 Hz 48 363 60 004 65 000 1024 x 768 70 Hz 56 476 70 069 75 000 1024 x 768 75 Hz 60 023 75 029 78 750 1152 x 864 75 Hz 67 500 75 000 108 000 1280 x 720 60 Hz 45 000 60 000 74 250 1280 x 800 60 Hz 49 702 59 810 83 500 1280 x 1024 60 Hz 63 981 60 020 108 000 1280 x 1024 75 Hz 79 976 75 025 135 000 1366 x 768 60 Hz 47 712 59 790 85 500 1440 x 900 60 Hz 55 93...

Страница 145: ...erly referring to the user guide of the computer or its graphic card IBM Resolution Dots x lines Display format Horizontal frequency KHz Vertical frequency Hz Clock frequency MHz Polarity horizontal vertical 720 x 400 70 Hz 31 469 70 087 28 322 MAC Resolution Dots x lines Display format Horizontal frequency KHz Vertical frequency Hz Clock frequency MHz Polarity horizontal vertical 640 x 480 67 Hz ...

Страница 146: ...175 640 x 480 72 Hz 37 861 72 809 31 500 640 x 480 75 Hz 37 500 75 000 31 500 800 x 600 60 Hz 37 879 60 317 40 000 800 x 600 72 Hz 48 077 72 188 50 000 800 x 600 75 Hz 46 875 75 000 49 500 1024 x 768 60 Hz 48 363 60 004 65 000 1024 x 768 70 Hz 56 476 70 069 75 000 1024 x 768 75 Hz 60 023 75 029 78 750 1280 x 720 60 Hz 45 000 60 000 74 250 1366 x 768 60 Hz 47 712 59 790 85 500 ...

Страница 147: ...x 1080 24 Hz 27 000 24 000 74 250 1920 x 1080 25 Hz 28 125 25 000 74 250 1920 x 1080 30 Hz 33 750 30 000 74 250 1920 x 1080 50 Hz 56 250 50 000 148 500 1920 x 1080 60 Hz 67 500 60 000 148 500 3840 x 2160 24 Hz 54 000 24 000 297 000 3840 x 2160 25 Hz 56 250 25 000 297 000 3840 x 2160 30 Hz 67 500 30 000 297 000 3840 x 2160 50 Hz 112 500 50 000 594 000 3840 x 2160 60 Hz 135 000 60 000 594 000 4096 x...

Страница 148: ...3 750 60 000 74 250 1920 x 1080i 50 Hz 28 125 50 000 74 250 1920 x 1080 60 Hz 67 500 60 000 148 500 1920 x 1080 50 Hz 56 250 50 000 148 500 1920 x 1080 30 Hz 33 750 30 000 74 250 1920 x 1080 25 Hz 28 125 25 000 74 250 1920 x 1080 24 Hz 27 000 24 000 74 250 DVI Resolution Dots x lines Display format Horizontal frequency KHz Vertical frequency Hz Clock frequency MHz Polarity horizontal vertical 720 ...

Страница 149: ...000 27 000 720 x 480 60 Hz 31 469 59 940 27 000 720 x 576 50 Hz 31 250 50 000 27 000 1280 x 720 60 Hz 45 000 60 000 74 250 1280 x 720 50 Hz 37 500 50 000 74 250 1920 x 1080i 60 Hz 33 750 60 000 74 250 1920 x 1080i 50 Hz 28 125 50 000 74 250 1920 x 1080 60 Hz 67 500 60 000 148 500 1920 x 1080 50 Hz 56 250 50 000 148 500 1920 x 1080 30 Hz 33 750 30 000 74 250 1920 x 1080 25 Hz 28 125 25 000 74 250 1...

Страница 150: ...environment Lip sync errors may occur The TV and Bluetooth Devices may disconnect depending on the distance between them A Bluetooth device may hum or malfunction When a part of your body is in contact with the receiving transmitting system of the Bluetooth device or the TV When the device is subject to electrical variation from obstructions caused by a wall corner or office partitioning When the ...

Страница 151: ... multi language subtitles multiple audio tracks chapters smooth FF RW etc streamed to your device For DTS patents see http patents dts com Manufactured under license from DTS Inc DTS the Symbol DTS in combination with the Symbol DTS Premium Sound 5 1 DTS Digital Surround DTS Express and DTS Neo2 5 are registered trademarks or trademarks of DTS Inc in the United States and or other countries ⓒ DTS ...

Страница 152: ...ents 6 396 546 5 940 073 6 239 794 issued to Rovi Corporation and or its subsidiaries Disclaimer Rovi Corporation and or its subsidiaries and related affiliates are not in any way liable for the accuracy or availability of the programme schedule information or other data in the Rovi Guide system and cannot guarantee service availability in your area In no event shall Rovi Corporation and or its re...

Страница 153: ...start to finish and then scans the remaining 240 lines for a total of 480 lines General differences between 480i and 480p are as follows 480i 480p Horizontal Frequency 15 75Khz 31 5Khz FPS 30 60 Lines on Screen 480 480 ARC Audio Return Channel ARC lets the TV output digital sound to an audio device and input digital sound from the same audio device through one HDMI cable However ARC is only availa...

Страница 154: ...ic IP address enter the IP address subnet mask gateway and DNS values manually when setting up the network connection To get the IP address subnet mask gateway and DNS values contact your Internet Service Provider ISP If the network requires a static IP address use an ADSL modem that supports DHCP ADSL modems that support DHCP also allow static IP addresses Bluetooth Bluetooth is a short distance ...

Отзывы: