background image

34

English

Basic Features

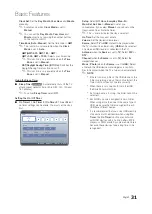
Common Interface


CI Menu

: This enables the user to select from the CAM-

provided menu. Select the CI Menu based on the menu 
PC Card.


Application Info

: View information on the CAM inserted 

into the CI slot and on the “CI or CI+ CARD” which is 
inserted into the CAM. You can install the CAM anytime 
whether the TV is on or off.

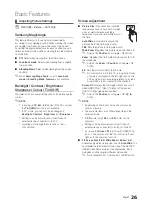
1. 

Purchase a CI CAM module at your nearest dealer or by 
phone.

2. 

Firmly insert the “CI or CI+ CARD” into the CAM in the 
direction of the arrow.

3. 

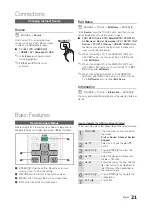
Insert the CAM with the “CI or CI+ CARD” into the 
common interface slot, in the direction of the arrow so 
that it aligns parallel with the slot.

4. 

Check if you can see a picture on a scrambled signal 
channel.


¦

Picture In Picture (PIP)


O

MENU

m


System


PIP


ENTER

E

PIP 

t

You can watch the TV tuner and one external video source 
simultaneously. 

PIP

 (Picture-in-Picture) does not function in 

the same mode. 


NOTE


x

For PIP sound, refer to the 

Sound Select


instructions.


x

If you turn the TV off while watching in 

PIP

 mode, the 

PIP window will disappear.


x

You may notice that the picture in the PIP window 
becomes slightly unnatural when you use the main 
screen to view a game or karaoke.


x

While 

Program Rating Lock

 is in operation, the PIP 

function cannot be used.


x

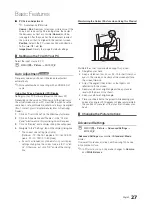
PIP settings

Main picture

Sub picture

Component, HDMI1/DVI, 
HDMI2, PC

TV


PIP (Off / On)

: Activate or deactivate the PIP function.


Channel

: Select the channel for the sub-screen.


Size (

Õ

 / 

Ã

)

: Select a size for the sub-picture.


Position (

Ã

 / 

 / 

 / 

œ

)

: Select a position for the 

sub-picture.


Sound Select (Main / Sub)

: You can choose the 

desired sound (

Main / Sub

) in 

PIP

 mode.

Support Menu


O

MENU

m


Support


ENTER

E

Self Diagnosis


Self Diagnosis

 might take few seconds, this is part of 

the normal operation of the TV


Picture Test (Yes / No)

: Use to check for picture 

problems. 

Yes

: If the test pattern does not appear or there is 

noise in the test pattern, select 

Yes

. There may be a 

problem with the TV. Contact Samsung’s Call Centre for 
assistance.

No

: If the test pattern is properly displayed, select 

No

There may be a problem with your external equipment. 
Please check your connections. If the problem persists, 
refer to the external device’s user manual.


Sound Test (Yes / No)

: Use the built-in melody sound to 

check for sound problems. 


If you hear no sound from the TV’s speakers, 
before performing the sound test, make sure 

Speaker Select

 is set to 

TV Speaker

 in the 

Sound

 menu.


The melody will be heard during the test even if 

Speaker Select

 is set to 

External Speaker

 or the 

sound is muted by pressing the 

MUTE

 button.

Yes

: If you can hear sound only from one speaker or not 

at all during the sound test, select 

Yes

. There may be a 

problem with the TV. Contact Samsung’s Call Centre for 
assistance.

No

: If you can hear sound from the speakers, select 

No

There may be a problem with your external equipment. 
Please check your connections. If the problem persists, 
refer to the external device’s user manual.
Содержание SyncMaster T20A350

Страница 1: ... TV MONITOR MFM TV user manual Thank you for purchasing this Samsung product To receive more complete service please register your product at www samsung com register imagine the possibilities TA350 TA550 ...

Страница 2: ... be improved by reconfiguring TV setting or not Still image warning Avoid displaying still images like jpeg picture files or still image element like TV programme logo panorama or 4 3 image format stock or news bar at screen bottom etc on the screen Constant displaying of still picture can cause ghosting of screen which will affect image quality To reduce risk of this effect please follow below re...

Страница 3: ...Connecting to a COMMON INTERFACE slot 19 Connecting to an Audio Device 20 Connecting to a PC 21 Changing the Input Source Basic Features 21 21 How to Navigate Menus 22 Using the INFO button Now Next guide 22 Using the Channel Menu 24 Channel Menu 25 Picture Menu 29 Sound Menu 30 System Menu 34 Support Menu Advanced Features 36 36 Using the My Downloads 41 Anynet HDMI CEC Other Information 45 45 In...

Страница 4: ...nd maintenance has been included with this product Power Related The following images are for your reference and may differ depending on models and countries Warning Avoid using a damaged power cord or plug or a loose power outlet y y Otherwise it may result in electric shock or fire Avoid connecting multiple electric appliances to a single wall outlet y y Otherwise it may result in fire due to ov...

Страница 5: ...he power button on the product Installation Related Warning Avoid placing burning candles mosquitorepellentor cigarettes on the product y y Otherwise it may result in fire Ask an installation engineer or relevant company to install the product onto the wall y y Otherwise it may result in injury y y Make sure to use the specified wall mount Avoid installing the product in a badly ventilated locatio...

Страница 6: ... let the product drop while moving it y y This may result in a problem with the product or injury Do not place the product face down on the floor y y This may damage the panel of the product When installing the product on a console or shelf make sure that the front of the product does not protrude out of the console or shelf y y Otherwise this may cause the product to fall off and result in a malf...

Страница 7: ...ng agent when cleaning the product This may result in the exterior being deformed or the print being removed If you can t get the product clean with just the supplied cloth use a soft damp cloth with a monitor exclusive cleansing agent and wipe the product with it y y If no monitor exclusive cleansing agent is available dilute a cleansing agent with water at a ratio of 1 10 before cleaning the pro...

Страница 8: ...ay result in electric shock or fire Avoid moving the product by pulling the power cord or antenna cable y y Otherwise it may result in electric shock fire or a problem with the product due to damage to the cable GAS When a gas leak occurs do not touch the product or the power plug and ventilate immediately y y A spark may result in an explosion or fire y y During a thunder or lighting storm do not...

Страница 9: ...as leaving your home unplug the power cord from the wall outlet y y Otherwise it may cause dust accumulation and result in fire caused by overheating or short circuit or result in an electric shock Set the appropriate resolution and frequency for the product y y Otherwise it may result in eye strain Avoid turning the product upside down or move the product holding only the stand y y This may cause...

Страница 10: ...ery in a location that children or infants cannot reach y y If children have had the battery in their mouths consult your doctor immediately When replacing the batteries insert them with right polarity y y Otherwise the battery may become damaged or it may cause fire personal injury or damage due to leakage of the internal liquid Use only specified standard batteries Do not use new and used batter...

Страница 11: ...s when you open the box CAUTION INSERT SECURELY LEST SHOULD BE DETACHED IN SET y y Remote Control Batteries AAA x 2 y y Warranty Card Safety Guide Not available in some locations y y Cleaning Cloth y y Power Cord y y User Manual y y Quick Setup Guide y y D sub Cable y y Stereo Cable y y AV Component Adapter y y SCART Adapter y y Cable Holder y y Stand Connector Screws 2ea y y Stand Base y y CI Car...

Страница 12: ...t and place the product onto the cloth so that the front of the product is facing downwards Push the assembled stand into the main body in the direction of the arrow as shown in the figure Firmly fasten the stand using the screws Caution If the height of B A on one side is different from the other side unfasten the screws adjust the heights and re assemble Avoid lifting the product holding only th...

Страница 13: ...he remote control MENU Displays an on screen menu the OSD on screen display of your TV s features Y Adjusts the volume In the OSD use the Y buttons as you would use the and buttons on the remote control z Changes the channels In the OSD use the z buttons as you would use the and buttons on the remote control P Power Turns the TV on or off Speakers Standby mode Do not leave your TV in standby mode ...

Страница 14: ...splays information on the TV screen Exits the menu Have direct access to channels Adjusts the volume Alternately select Teletext ON Double Mix or OFF Displays the main on screen menu Quickly select frequently used functions Displays the Content Home which includes Watch TV p 22 My Downloads p 36 and Source p 21 Returns to the previous menu Move the cursor and select an item Confirm the setting The...

Страница 15: ...e 3 Selecting a country Press the u or d button then press the ENTERE button Select the appropriate country After selecting the country in the Country menu some models may proceed with an additional option to setup the pin number When you input the PIN number 0 0 0 0 is not available 4 Setting the Clock Mode Set the Clock Mode automatically or manually 5 Selecting an antenna Press the or button th...

Страница 16: ... output use an HDMI DVI and audio cables x x The picture may not display normally if at all or the audio may not work if an external device that uses an older version of HDMI mode is connected to the TV If such a problem occurs ask the manufacturer of the external device about the HDMI version and if out of date request an upgrade x x Be sure to purchase a certified HDMI cable Otherwise the pictur...

Страница 17: ...G SD Video and Audio only When connecting to AV IN the colour of the AV IN VIDEO jack green will not match the video cable yellow To obtain the best picture quality the Component connection is recommended over the A V connection PR PB Y AUDIO OUT COMPONENT OUT EXT AUDIO OUT R AUDIO L R AUDIO L VIDEO OUT W R R B G R W Y W R R B G R W Y W R R B G R W Y VCR DVD VCR DVD Blu ray player Red Red White Wh...

Страница 18: ...insert the CI or CI CARD some channels will display the message Scrambled Signal y y The pairing information containing a telephone number the CI or CI CARD ID the Host ID and other information will be displayed in about 2 3 minutes If an error message is displayed please contact your service provider y y When the configuration of channel information has finished the message Updating Completed is ...

Страница 19: ... the TV will send 5 1 CH sound to the home theatre receiver When the source is a digital component such as a DVD Blu ray player cable box STB Set Top Box satellite receiver and is connected to the TV via HDMI only 2 CH audio will be heard from the home theatre receiver If you want to hear 5 1 CH audio connect the digital audio out jack from your DVD Blu ray player cable box STB satellite receiver ...

Страница 20: ...Hz 48 077 72 188 50 000 800 x 600 75Hz 46 875 75 000 49 500 1024 x 768 60Hz 48 363 60 004 65 000 1024 x 768 70Hz 56 476 70 069 75 000 1024 x 768 75Hz 60 023 75 029 78 750 20 1600 x 900 60Hz 60 000 60 000 108 000 20 22 23 24 27 MAC 1152 x 870 75Hz 68 681 75 062 100 000 VESA DMT 1152 x 864 75Hz 67 500 75 000 108 000 1280 x 800 60Hz 49 702 59 810 83 500 1280 x 960 60Hz 60 000 60 000 108 000 1280 x 10...

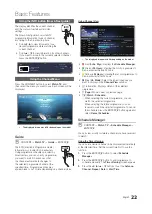
Страница 21: ...ess ENTERE to complete the configuration 7 EXIT e Press EXIT Changing the Input Source Source O O SOURCE Source Use to select TV or an external input sources such as a DVD Blu ray player cable box STB satellite receiver TV Ext PC HDMI1 DVI HDMI2 AV Component USB In the Source connected inputs will be highlighted TV Ext and PC always stay activated Edit Name O O SOURCE TOOLS Edit Name ENTERE In the...

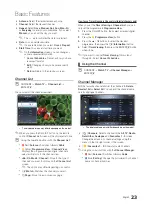
Страница 22: ...lected programme y y k Page Move to next or previous page y y E Watch Schedule When selecting the current programme you can watch the selected programme When selecting the future programme you can reserve to watch the selected programme To cancel the schedule press the ENTERE button again and select Cancel Schedules Schedule Manager O O CONTENT Watch TV Schedule Manager ENTERE You can view modify ...

Страница 23: ... page How to use Timer Viewing in Channel List digital channels only When you set the Timer Viewing in Channel List you can only set the programme in Programme View 1 Press the CH LIST button then select a desired digital channel 2 Press the Programme View button 3 Press the u d buttons to select the desired programme then press the E Information button 4 Select Timer Viewing then press the ENTERE...

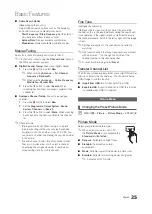
Страница 24: ...on y y Delete You can delete a channel to display the channels you want y y Deselect All Select All Select all the channels or deselect all the selected channels in the channel manager Channel Menu Retuning Channels O O MENUm Channel ENTERE Antenna Air Cable t Before your television can begin memorizing the available channels you must specify the type of signal source that is connected to the TV C...

Страница 25: ...on number in this mode x x C aerial channel mode S cable channel mode These two modes allow you to select a channel by entering the assigned number for each aerial broadcasting station or cable channel Fine Tune analogue channels only If the reception is clear you do not have to fine tune the channel as this is done automatically during the search and store operation If the signal is weak or disto...

Страница 26: ...st of the time Auto Wide Automatically adjusts the picture size to the 16 9 aspect ratio 16 9 Sets the picture to 16 9 wide mode Wide Zoom Magnifies the picture size more than 4 3 Adjusts the Position by using u d buttons Zoom Magnifies the 16 9 wide pictures vertically to fit the screen size Adjusts the Zoom or Position by using u d button 4 3 Sets the picture to basic 4 3 mode Do not watch in 4 ...

Страница 27: ...alog box will appear 3 Click on Display and a display dialog box will appear 4 Navigate to the Settings tab on the display dialog box x x The correct size setting resolution Optimum 19 1360 X 768 pixels 20 1600 X 900 pixels 22 27 1920 X 1080 pixels x x If a vertical frequency option exists on your display settings dialog box the correct value is 60 or 60 Hz Otherwise just click OK and exit the dia...

Страница 28: ...de is Dynamic Settings can be adjusted and stored for each external device connected to an input on the TV Digital Noise Filter Off Low Medium High Auto Auto Visualisation If the broadcast signal received by your TV is weak you can activate the Digital Noise Filter feature to reduce any static and ghosting that may appear on the screen When the signal is weak try other options until the best pictu...

Страница 29: ...of specific bandwidth frequencies Reset Resets the equalizer to its default settings Sound Systems Etc O O MENUm Sound ENTERE Broadcast Audio Options Audio Language digital channels only Change the default value for audio languages The available language may differ depending on the broadcast Audio Format digital channels only When sound is emitted from both the main speaker and the audio receiver ...

Страница 30: ... External Speaker x x TV Speaker Off External Speaker On When Speaker Select is set to TV Speaker x x TV Speaker On External Speaker On If there is no video signal both speakers will be mute Auto Volume Off Normal Night To equalize the volume level on each channel set to Normal Night This mode provides an improved sound experience compared to Normal mode making almost no noise It is useful at nigh...

Страница 31: ...et the hour and minute Volume Set the desired volume level Source Select TV or USB content to be played when the TV is turned on automatically USB can be selected only when a USB device is connected to the TV Antenna when the Source is set to TV Select ATV or DTV Channel when the Source is set to TV Select the desired channel Music Photo when the Source is set to USB Select a folder in the USB dev...

Страница 32: ... screen always before changing the channels Spain only You can block TV programs by set up rating in Program Rating Lock as the Children Youth or Adult Sweden only Change PIN The Change PIN screen will appear Choose any 4 digits for your PIN and enter them Change your personal ID number required to set up the TV Re enter the same 4 digits When the Confirm screen disappears your PIN has been memori...

Страница 33: ...d by the user the screen saver is activated to prevent the formation of ghost images on the screen General Max Power Saving Off On Turn off PC monitor when PC is not used for certain length of time to reduce power consumption Available only PC mode Game Mode Off On When connecting to a game console such as PlayStation or Xbox you can enjoy a more realistic gaming experience by selecting game mode ...

Страница 34: ...vate the PIP function Channel Select the channel for the sub screen Size Õ Ã Select a size for the sub picture Position à œ Select a position for the sub picture Sound Select Main Sub You can choose the desired sound Main Sub in PIP mode Support Menu O O MENUm Support ENTERE Self Diagnosis Self Diagnosis might take few seconds this is part of the normal operation of the TV Picture Test Yes No Use ...

Страница 35: ...down your settings so that you can easily reset them after the upgrade By Channel Upgrade the software using the broadcasting signal If the function is selected during the software transmission period software will be automatically searched and downloaded The time required to download the software is determined by the signal status Alternative Software backup If there is an issue with the new firm...

Страница 36: ...e maximum supported JPEG resolution is 15360X8640 pixels x x For unsupported or corrupted files the Not Supported File Format message is displayed x x If the files are sorted by Basic View up to 1000 files can be displayed in each folder x x MP3 files with DRM that have been downloaded from a non free site cannot be played Digital Rights Management DRM is a technology that supports the creation di...

Страница 37: ...deo playback you can search using l and r button You can use REW and μ FF buttons during playback In this mode you can enjoy movie clips contained on a Game but you cannot play the Game itself y y Supported Subtitle Formats Name File extension Format MPEG 4 time based text ttxt XML SAMI smi HTML SubRip srt string based SubViewer sub string based Micro DVD sub or txt string based Information Displa...

Страница 38: ...920x1080 24 25 30 30 H 264 1920x1080 6 30 25 ts tp trp TS MPEG2 1920x1080 24 25 30 30 AC3 AAC MP3 DD HE AAC H 264 1920x1080 6 30 25 VC1 1920x1080 6 30 25 Other Restrictions NOTE x x If there are problems with the contents of a codec the codec will not be supported x x If the information for a Container is incorrect and the file is in error the Container will not be able to play correctly x x Sound...

Страница 39: ...ess the TOOLS button and select Play Selected Contents You can select or deselect all music pressing the Select All Deselect All Photos Viewing a Photo or Slide Show 1 Press the u d l r button to select the desired photo in the file list 2 Press the ENTERE button When a selected photo is displayed press the ENTERE button to start the slide show During the slide show all files in the file list will...

Страница 40: ...u can select a specific language if the subtitle file contains multiple languages Subtitle Setting You can play the video with Subtitles This function only works if the subtitles are the same file name as the video Audio You can enjoy video in one of supported languages as required The function is only enabled when stream type files which support multiple audio formats are played Start Slide Show ...

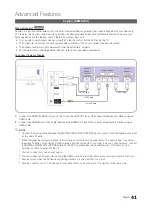
Страница 41: ...jack of the home theatre and the HDMI OUT jack of the corresponding Anynet device using an HDMI cable NOTE x x Connect the Optical cable between the DIGITAL AUDIO OUT OPTICAL jack on your TV and the Digital Audio Input on the Home Theatre x x When following the connection above the Optical jack only outputs 2 channel audio You will only hear sound from the Home Theatre s Front Left and Right speak...

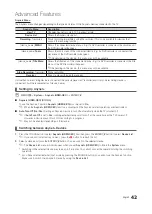
Страница 42: ... recording device is connected it will be represented as device_name Setting Up Anynet O O MENUm System Anynet HDMI CEC ENTERE Anynet HDMI CEC Off On To use the Anynet Function Anynet HDMI CEC must be set to On When the Anynet HDMI CEC function is disabled all the Anynet related operations are deactivated Auto Turn Off No Yes Setting an Anynet Device to turn off automatically when the TV is turned...

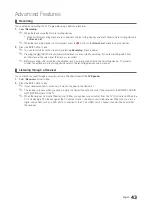
Страница 43: ...the antenna jack is properly connected to the recording device To properly connect an antenna to a recording device refer to the recording device s users manual Listening through a Receiver You can listen to sound through a receiver i e Home Theatre instead of the TV Speaker 1 Select Receiver and set to On 2 Press the EXIT button to exit If your receiver supports audio only it may not appear in th...

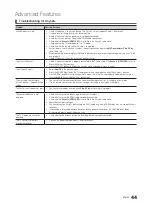
Страница 44: ...menu Press the SOURCE button on the TV remote control and select a device other than Anynet devices Press P and PRE CH to change the TV mode Note that the channel button operates only when a tuner embedded Anynet device is not connected The message Connecting to Anynet device appears on the screen You cannot use the remote control when you are configuring Anynet or switching to a view mode Use the...

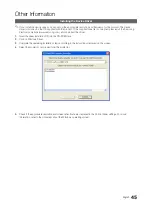
Страница 45: ...lectronics website www samsung com and download the driver 1 Insert the driver installation CD into the CD ROM drive 2 Click on Windows Driver 3 Complete the remaining installation steps according to the instructions displayed on the screen 4 Select the model of your product from the model list 5 Check if the appropriate resolution and screen refresh rate are displayed in the Control Panel setting...

Страница 46: ... broadcasting company the different topics on a Teletext page are colour coded and can be selected by pressing the coloured buttons Press the colour corresponding to the topic of your choice A new colour coded page is displayed Items can be selected in the same way To display the previous or next page press the corresponding coloured button 6 0 mode Selects the Teletext mode LIST FLOF If pressed d...

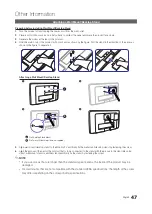
Страница 47: ... Mount Desktop Stand 1 2 3 4 5 Align wall mount desktop stand to the Monitor TV and firmly fix the wall mount desktop stand by fastening the screw 6 Align the groove of the part of the product that is to be connected to the stand with the groove in the stand desk top stand wall mount stand or another stand and firmly fix the stand by fastening the screw NOTE x x If you use screws that are longer t...

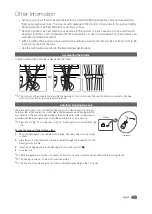
Страница 48: ... and the specifications are subject to change without prior notice to improve the performance Anti theft Kensington Lock The Kensington Lock is not supplied by Samsung It is a device used to physically fix the system when using it in a public place The appearance and locking method may differ from the illustration depending on the manufacturer Refer to the manual provided with the Kensington Lock ...

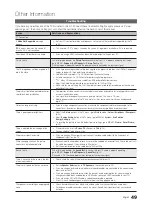
Страница 49: ...ng a component connection make sure the component cables are connected to the correct jacks Incorrect or loose connections may cause colour problems or a blank screen There is poor colour or brightness Adjust the Picture options in the TV menu go to Picture mode Colour Brightness Sharpness p 26 Adjust Energy Saving option in the TV menu go to MENU System Eco Solution Energy Saving p 32 Try resetti...

Страница 50: ...is positioned correctly The picture is distorted macro block error small block dots pixelization Compression of video contents may cause picture distortion especially with fast moving pictures such as sports and action movies A low signal can cause picture distortion This is not a TV issue Others The picture won t display in full screen HD channels will have black bars on either side of the screen...

Страница 51: ...he message Scramble signal or Weak Signal No Signal appears If you are using a CAM CARD CI CI check that it is installed into the common interface slot If there is still a problem pull the CAM CARD out of the TV and insert it into the slot again You turned the TV off 45 minutes ago and it turned on again It is normal The TV operates the OTA Over The Aerial function itself to upgrade firmware downl...

Страница 52: ...his Product Waste Electrical Electronic Equipment Applicable in the European Union and other European countries with separate collection systems This marking on the product accessories or literature indicates that the product and its electronic accessories e g charger headset USB cable should not be disposed of with other household waste at the end of their working life To prevent possible harm to...

Страница 53: ... 214 2 mm 487 8 387 3 214 2 mm 523 9 413 5 239 1 mm 555 7 431 9 239 2 mm 578 6 444 6 239 2 mm Weight Without Stand 3 1 kg 2 8 kg 3 6 kg 3 6 kg 4 2 kg With Stand 3 4 kg 3 1 kg 4 2 kg 4 2 kg 4 8 kg Model Name T22A550 T23A550 T24A550 T27A550 Screen Size Diagonal 21 5 inches 54 cm 23 inches 58 cm 24 inches 61 cm 27 inches 68 cm Display Resolution 1920 x 1080 60Hz Sound Output 3W 2 5W 2 Dimensions WxHx...

Страница 54: ...41 Headphones 19 Home Theatre 41 I Installation Space 2 Installation Related 5 Installing the Device Driver 45 L Language 33 Licence 52 M Menu Transparency 33 Music 39 My Downloads 36 N Navigate 21 Now Next guide 22 O On Timer 31 Off Timer 32 Optimal resolution 20 P Photos 39 Picture Options 28 Picture Size 26 PIP Picture in Picture 34 Plug Play 15 Power Indicator 13 Power Related 4 R Receiver 42 ...

Страница 55: ...CEDONIA 023 207 777 MONTENEGRO 020 405 888 NETHERLANDS 0900 SAMSUNG 0900 7267864 0 10 Min www samsung com NORWAY 815 56 480 www samsung com POLAND 0 801 1SAMSUNG 172678 48 22 607 93 33 www samsung com PORTUGAL 808 20 SAMSUNG 808 20 7267 www samsung com ROMANIA From landline 08010 SAMSUNG 7267864 From landline mobile 40 21 206 01 10 www samsung com SERBIA 0700 Samsung 0700 726 7864 www samsung com ...

Отзывы: