background image

11

Before Using the Product

 Before Using the Product

 Caution

Installation and Safety 
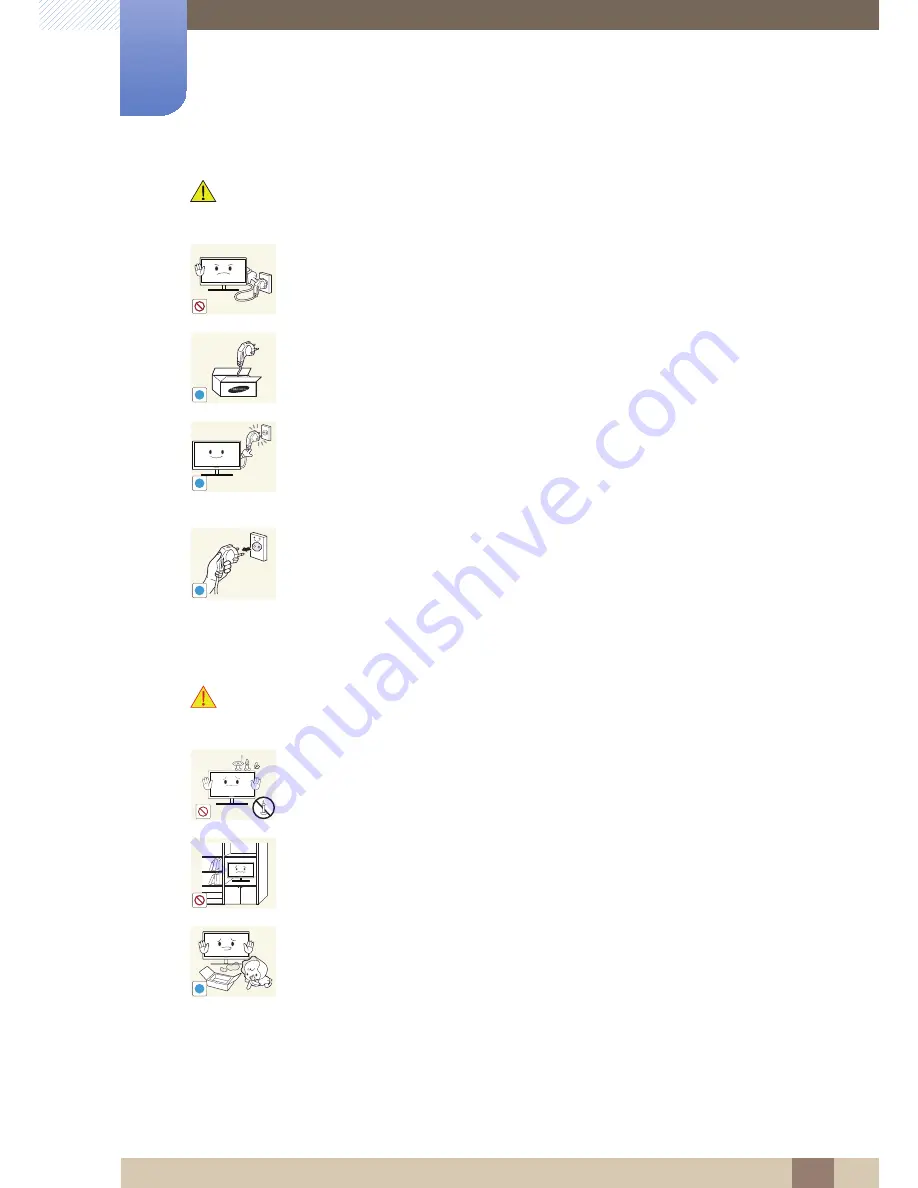
 Warning

Do not unplug the power cord when the product is in use.

z

The product may become damaged by an electric shock.

Do not use the power cord for products other than authorized products supplied 

by Samsung. 

z

An electric shock or fire may result.

Keep the power socket where the power cord is connected unobstructed. 

z

If any problem occurs in the product, unplug the power cable to completely 

cut the power to the product. 

Power to the product cannot be completely cut off with the power button. 

Hold the plug when disconnecting the power cord from the power socket. 

z

An electric shock or fire may result.

DO NOT PLACE CANDLES, INSECT REPELLANTS OR CIGARETTES ON TOP 

OF THE PRODUCT. DO NOT INSTALL THE PRODUCT NEAR HEAT SOURCES.

z

Otherwise, a fire may result.

Avoid installing the product in a narrow space with bad ventilation, such as a 

bookshelf or wall closet.

z

Otherwise, a fire may result due to an increased internal temperature.

Keep the plastic packaging bag for the product in a place that cannot be reached 

by children.

z

Children may suffocate.

!

!

!

!

Содержание SyncMaster S24B350T

Страница 1: ...ser manual SyncMaster S22B350T The color and the appearance may differ depending on the product and the specifications are subject to change without prior notice to improve the performance BN46 00229A 00 ...

Страница 2: ...y 17 Correct posture to use the product PREPARATIONS 18 Checking the Contents 18 Removing the Packaging 19 Checking the Components 20 Parts 20 Frontal Buttons 22 Reverse Side 23 Installation 23 Attaching the Stand 24 Adjusting the Product Tilt 24 Anti theft Lock CONNECTING AND USING A SOURCE DEVICE 25 Before Connecting 25 Pre connection Checkpoints 25 Connecting the Power 26 Connecting and Using a...

Страница 3: ...C Bright 38 Coarse 38 Adjusting Coarse 39 Fine 39 Adjusting Fine 40 Response Time 40 Configuring Response Time 41 HDMI Black Level 41 Configuring the HDMI Black Level Settings CONFIGURING TINT 42 SAMSUNG MAGIC Color 42 Configuring SAMSUNG MAGIC Color 43 Red 43 Configuring Red 44 Green 44 Configuring Green 45 Blue 45 Configuring Blue 46 Color Tone 46 Configuring the Color Tone Settings 47 Gamma 47 ...

Страница 4: ...TUP AND RESET 51 Reset 51 Initializing Settings Reset 52 Language 52 Changing the Language 53 Eco Saving 53 Configuring Eco Saving 54 Off Timer On Off 54 Configuring Off Timer On Off 55 Off Timer Setting 55 Configuring Off Timer Setting 56 PC AV Mode 56 Configuring PC AV Mode 57 Key Repeat Time 57 Configuring Key Repeat Time 58 Customized Key 58 Configuring Customized Key 59 Auto Source 59 Configu...

Страница 5: ...Tune 63 Installing the Software 64 Removing the Software 65 MultiScreen 65 Installing the Software 66 Removing the Software TROUBLESHOOTI NG GUIDE 67 Requirements Before Contacting Samsung Customer Service Center 67 Testing the Product 67 Checking the Resolution and Frequency 67 Check the following 69 Q A SPECIFICATIONS 71 General 73 PowerSaver 74 Standard Signal Mode Table APPENDIX 76 Contact SAM...

Страница 6: ...Responsibility for the Pay Service Cost to Customers 81 Not a product defect 81 A Product damage caused by customer s fault 81 Others 82 Correct Disposal 82 Correct Disposal of This Product Waste Electrical Electronic Equipment 83 Terminology ...

Страница 7: ...ymbols for safety precautions z An administration fee may be charged if either a an engineer is called out at your request and there is no defect in the product i e where you have failed to read this user manual b you bring the unit to a repair center and there is no defect in the product i e where you have failed to read this user manual z The amount of such administration charge will be advised ...

Страница 8: ...ble by the plug and do not touch the cable with wet hands Otherwise an electric shock may result 3 Wipe the monitor screen using a clean soft and dry cloth z Do not apply a cleaning agent that contains alcohol solvent or surfactant to the monitor z Do not spray water or detergent directly on the product 4 Wet a soft and dry cloth in water and wring thoroughly to clean the exterior of the monitor 5...

Страница 9: ...the product Be sure to allow the amount of space as shown below or greater when installing the product The exterior may differ depending on the product Precautions for storage Be sure to contact Samsung Customer Service Center page 76 if the inside of the monitor needs cleaning Service fee will be charged 10 cm 3 93 inches 10 cm 3 93 inches 10 cm 3 93 inches 10 cm 3 93 inches 10 cm 3 93 inches ...

Страница 10: ...et hands z Otherwise an electric shock may result Insert the power plug all the way in so it is not loose z An unstable connection may cause a fire Ensure you connect the power plug to a grounded power socket type 1 insulated devices only z An electric shock or injury may result Do not bend or pull the power cord with force Do not weigh the power cord down with a heavy object z A damaged power cor...

Страница 11: ...to completely cut the power to the product Power to the product cannot be completely cut off with the power button Hold the plug when disconnecting the power cord from the power socket z An electric shock or fire may result DO NOT PLACE CANDLES INSECT REPELLANTS OR CIGARETTES ON TOP OF THE PRODUCT DO NOT INSTALL THE PRODUCT NEAR HEAT SOURCES z Otherwise a fire may result Avoid installing the produ...

Страница 12: ...z Otherwise the product lifespan may be reduced or a fire may result Do not install the product within the reach of young children z The product may fall and injure children Edible oil such as soybean oil can damage or deform the product Do not install the product in a kitchen or near a kitchen counter Take care not to drop the product when moving it z Otherwise product failure or personal injury ...

Страница 13: ...ur own z An electric shock or fire may result z Contact Samsung Customer Service Center page 76 for repair Before you move the product be sure to turn off the power switch and remove all the cables connected to the product including the power cord and the antenna cable z Otherwise the power cord may be damaged and a fire or electric shock may result If the product generates a strange noise a burni...

Страница 14: ...rwise the cable may be damaged and product failure an electric shock or fire may result If a gas leakage is found do not touch the product or power plug Also ventilate the area immediately z Sparks can cause an explosion or fire z During a lightning or thunderstorm do not touch the power cord or antenna cable Do not lift or move the product by pulling the power cord or any cable z Otherwise the ca...

Страница 15: ...ung Customer Service Center page 76 z Product failure an electric shock or fire may result Leaving the screen fixed on a stationary image for an extended period of time may cause afterimage burn in or defective pixels z If you are not going to use the product for an extended period of time activate power saving mode or a moving picture screen saver Disconnect the power cord from the power socket i...

Страница 16: ...in a well ventilated area Looking at the screen too close for an extended period of time can deteriorate your eyesight Do not hold the monitor upside down or move it by holding the stand z The product may fall and break or cause a personal injury Do not use humidifiers or stoves around the product z An electric shock or fire may result Rest your eyes for more than 5 minutes for every 1 hour of pro...

Страница 17: ... may result Use the product in the correct posture as follows z Straighten your back z Allow a distance of 45 to 50cm between your eye and the screen and look slightly downward at the screen Keep your eyes directly in front of the screen z Adjust the angle so light does not reflect on the screen z Keep your forearms perpendicular to your upper arms and level with the back of your hands z Keep your...

Страница 18: ...e careful not to damage the product when you open the packaging with a sharp instrument 2 Remove the styrofoam from the product 3 Check the components and remove the styrofoam and plastic bag This image is for reference only 4 Store the box in a dry area so that it can be used when moving the product in the future ...

Страница 19: ...g z The appearance of the components and items sold separately may differ from the image shown Components Components may vary depending on the country Quick setup guide Warranty card Not available in some locations User manual Power cable DC power adapter D SUB cable optional HDMI DVI cable optional HDMI cable optional Stand Stand Connector ...

Страница 20: ...ess the button for 10 seconds Disable To unlock the locked OSD control press the button for more than 10 seconds If the OSD control is locked z Brightness and Contrast Bright can be adjusted and INFORMATION can be viewed z The Customized Key function can be used by pressing the button The Customized Key function specified before the OSD control was locked is available even when the OSD control is ...

Страница 21: ...f the screen Press the button to automatically adjust the screen settings z Changing the resolution in Display Properties will activate the Auto Adjustment function z This function is only available in Analog mode Turn the screen on or off Key Guide When a control button on the product is pressed the Key Guide will be displayed before the onscreen menu opens The guide shows the function of the but...

Страница 22: ...may differ from what is shown Specifications are subject to change without notice to improve quality Port Ports Connect to the DC power adapter Connect to a PC using the D SUB cable Connects to a source device using an HDMI cable or HDMI DVI cable DC RGB IN HDMI IN DC RGB IN HDMI IN ...

Страница 23: ...rection shown by the figure Check if the Stand Connector is firmly connected Turn the connecting screw at the bottom of the stand fully so that it is completely fixed Place a soft cloth over the table to protect the product and place the product onto the cloth so that the front of the product is facing downwards Hold the main body of the product with your hand as shown by the figure Push the assem...

Страница 24: ...locking device for details The lock device is sold separately The color and shape of parts may differ from what is shown Specifications are subject to change without notice to improve quality To lock an anti theft locking device 1 Fix the cable of your anti theft locking device to a heavy object such as a desk 2 Put one end of the cable through the loop on the other end 3 Insert the locking device...

Страница 25: ...differ from device to device z Do not connect the power cable until all connections are completed Connecting the power cable during connection may damage the product z Check the types of ports at the back of the product you want to connect 2 2 Connecting the Power z Connect the power adapter to DC jack on the rear of the product Connect the power cord to the adapter and wall socket The input volta...

Страница 26: ...C 2 Connect the DC power adapter to the product and a power socket Next turn on the power switch on the PC For details refer to 2 2 Connecting the Power 3 Press to change the input source to Analog Connection Using the HDMI Cable Do not connect the power cable before connecting all other cables Ensure you connect a source device first before connecting the power cable 1 Connect the HDMI cable to t...

Страница 27: ...u connect a source device first before connecting the power cable 1 Connect the HDMI DVI cable to the HDMI port on the back of the product and the DVI port on the PC 2 Connect the DC power adapter to the product and a power socket Next turn on the power switch on the PC For details refer to 2 2 Connecting the Power 3 Press the button to change the input source to HDMI HDMI DC RGB IN HDMI IN ...

Страница 28: ...e product z If the file provided is faulty visit the Samsung homepage http www samsung com and download the file 1 Insert the user manual CD provided with the product into the CD ROM drive 2 Click Windows Driver 3 Follow the instructions given on the screen to proceed with installation 4 Select your product model from the list of models 5 Go to Display Properties and check that the resolution and ...

Страница 29: ...solution to the optimum value 1 Press to move to the language you want and press 2 To hide the information message press z If the optimum resolution is not selected the message will appear up to three times for a specified time even when the product is turned off and on again z The optimum resolution can also be selected in Control Panel on your PC The optimal resolution for this monitor is as fol...

Страница 30: ...n Using a PC z Adjust the resolution and refresh rate in Control Panel on your PC to obtain optimum picture quality z The picture quality of TFT LCDs may degrade if the optimum resolution is not selected Changing the Resolution on Windows XP Go to Control Panel Display Settings and change the resolution 1 2 3 ...

Страница 31: ...Connecting and Using a Source Device 2 2 Connecting and Using a Source Device Changing the Resolution on Windows Vista Go to Control Panel Personalization Display Settings and change the resolution 1 2 3 4 ...

Страница 32: ...32 Connecting and Using a Source Device 2 2 Connecting and Using a Source Device Changing the Resolution on Windows 7 Go to Control Panel Display Screen Resolution and change the resolution 1 2 3 4 ...

Страница 33: ... available if Eco Saving is set to On 3 1 1 Configuring Brightness 1 Press any button on the front of the product to display the Key Guide Next press to display the corresponding menu screen 2 Press to move to Picture and press on the product 3 Press to move to Brightness and press on the product The following screen will appear 4 Adjust the Brightness using the buttons SAMSUNG MAGIC MENU Custom F...

Страница 34: ... Color is in Full or Intelligent mode 3 2 1 Configuring Contrast 1 Press any button on the front of the product to display the Key Guide Next press to display the corresponding menu screen 2 Press to move to Picture and press on the product 3 Press to move to Contrast and press on the product The following screen will appear 4 Adjust the Contrast using the buttons SAMSUNG MAGIC SAMSUNG MAGIC MENU ...

Страница 35: ...ull or Intelligent mode 3 3 1 Configuring Sharpness 1 Press any button on the front of the product to display the Key Guide Next press to display the corresponding menu screen 2 Press to move to Picture and press on the product 3 Press to move to Sharpness and press on the product The following screen will appear 4 Adjust the Sharpness using the buttons SAMSUNG MAGIC SAMSUNG MAGIC MENU Custom Fast...

Страница 36: ...re quality suitable for editing documents or using Internet z Game Obtain a picture quality suitable for playing games that involve many graphic effects and dynamic movements z Cinema Obtain the brightness and sharpness of TVs suitable for enjoying video and DVD content z Dynamic Contrast Obtain balanced brightness through automatic contrast adjustment When the external input is connected through ...

Страница 37: ... view a sharper image than in Standard mode z Standard Select this mode when the surroundings are bright This also provides a sharp image z Movie Select this mode when the surroundings are dark This will save power and reduce eye fatigue z Custom Select this mode when you want to adjust the image according to your preferences 4 Press to move to the option you want and press 5 The selected option w...

Страница 38: ...f the product to display the Key Guide Next press to display the corresponding menu screen 2 Press to move to Picture and press on the product 3 Press to move to Coarse and press on the product The following screen will appear 4 Adjust the Coarse using the buttons MENU Custom Faster PICTURE SAMSUNG MAGIC Bright Brightness Contrast Sharpness Coarse Fine Response Time AUTO ...

Страница 39: ...he front of the product to display the Key Guide Next press to display the corresponding menu screen 2 Press to move to Picture and press on the product 3 Press to move to Fine and press on the product The following screen will appear 4 Adjust the Fine using the buttons MENU Custom Faster PICTURE SAMSUNG MAGIC Bright Brightness Contrast Sharpness Coarse Fine Response Time AUTO ...

Страница 40: ...duct 3 7 1 Configuring Response Time 1 Press any button on the front of the product to display the Key Guide Next press to display the corresponding menu screen 2 Press to move to Picture and press on the product 3 Press to move to Response Time and press on the product The following screen will appear 4 Press to move to the option you want and press 5 The selected option will be applied MENU Cust...

Страница 41: ...any button on the front of the product to display the Key Guide Next press to display the corresponding menu screen 2 Press to move to Picture and press on the product 3 Press to move to HDMI Black Level and press on the product The following screen will appear z Normal Select this mode when there is no contrast ratio degradation z Low Select this mode to reduce the black level and increase the wh...

Страница 42: ...to display the corresponding menu screen 2 Press to move to COLOR and press on the product 3 Press to move to Color and press on the product The following screen will appear z Off Disable Color z Demo Compare normal screen mode with Color mode z Full Obtain a vivid picture quality for all areas including the flesh colors in the picture z Intelligent Improve the chroma for all areas except the fles...

Страница 43: ...lligent mode 4 2 1 Configuring Red 1 Press any button on the front of the product to display the Key Guide Next press to display the corresponding menu screen 2 Press to move to COLOR and press on the product 3 Press to move to Red and press on the product The following screen will appear 4 Adjust the Red using the buttons SAMSUNG MAGIC MENU COLOR SAMSUNG MAGIC Color Off Red Green Blue Color Tone ...

Страница 44: ...ligent mode 4 3 1 Configuring Green 1 Press any button on the front of the product to display the Key Guide Next press to display the corresponding menu screen 2 Press to move to COLOR and press on the product 3 Press to move to Green and press on the product The following screen will appear 4 Adjust the Green using the buttons SAMSUNG MAGIC MENU COLOR SAMSUNG MAGIC Color Red Green Blue Color Tone...

Страница 45: ...lligent mode 4 4 1 Configuring Blue 1 Press any button on the front of the product to display the Key Guide Next press to display the corresponding menu screen 2 Press to move to COLOR and press on the product 3 Press to move to Blue and press on the product The following screen will appear 4 Adjust the Blue using the buttons SAMSUNG MAGIC MENU COLOR SAMSUNG MAGIC Color Mode1 Normal Off Red Green ...

Страница 46: ...ool 2 Set the color temperature to be cooler than Cool 1 z Cool 1 Set the color temperature to be cooler than Normal mode z Normal Display the standard color tone z Warm 1 Set the color temperature to be warmer than Normal mode z Warm 2 Set the color temperature to be warmer than Warm 1 z Custom Customize the color tone When the external input is connected through HDMI and PC AV Mode is set to AV ...

Страница 47: ... the Key Guide Next press to display the corresponding menu screen 2 Press to move to COLOR and press on the product 3 Press to move to Gamma and press on the product The following screen will appear 4 Press to move to the option you want and press 5 The selected option will be applied MENU COLOR SAMSUNG MAGIC Color ֻҖ Normal Off Mode1 Mode2 Mode3 Red Green Blue Color Tone Gamma AUTO ...

Страница 48: ...izontal position in 0 6 levels 5 1 1 Configuring H Position V Position 1 Press any button on the front of the product to display the Key Guide Next press to display the corresponding menu screen 2 Press to move to SIZE POSITION and press on the product 3 Press to move to H Position or V Position and press The following screen will appear 4 Press to configure H Position or V Position MENU Auto SIZE...

Страница 49: ... Display the picture with an aspect ratio of 4 3 Suitable for videos and standard broadcasts z 16 9 Sets the picture to 16 9 wide mode z Screen Fit Display the picture with the original aspect ratio without cutting off Changing the screen size is available when the following conditions are satisfied z An output device is connected using the HDMI HDMI DVI cable z The input signal is 480p 576p 720p ...

Страница 50: ... the front of the product to display the Key Guide Next press to display the corresponding menu screen 2 Press to move to SIZE POSITION and press on the product 3 Press to move to Menu H Position or Menu V Position and press The following screen will appear 4 Press to configure Menu H Position or Menu V Position MENU XWR SIZE POSITION H Position V Position Image Size Menu H Position Menu V Positio...

Страница 51: ...to display the corresponding menu screen 2 Press to move to SETUP RESET and press on the product 3 Press to move to Reset and press on the product The following screen will appear 4 Press to move to the option you want and press 5 The selected option will be applied MENU SETUP RESET Off QJOLVK Off Acceleration Reset Language Eco Saving Off Timer On Off Off Timer Setting PC AV Mode Key Repeat Time ...

Страница 52: ...e Key Guide Next press to display the corresponding menu screen 2 Press to move to SETUP RESET and press on the product 3 Press to move to Language and press on the product The following screen will appear 4 Press to move to the language you want and press 5 The selected option will be applied MENU ଥࢿ ଥࢿ 3 ɼ ܖ ـ HXWVFK QJOLVK VSDxRO UDQoDLV WDOLDQR 0DJ DU 3ROVNL 3RUWXJXrV ƧNJLjLjǁƿǀ 6YHQVND 7 UNoH ଞ ...

Страница 53: ...ng menu screen 2 Press to move to SETUP RESET and press on the product 3 Press to move to Eco Saving and press on the product The following screen will appear z 75 Change the monitor power consumption to 75 of the default level z 50 Change the monitor power consumption to 50 of the default level z Off Deactivate the Eco Saving function 4 Press to move to the option you want and press 5 The selecte...

Страница 54: ...T and press on the product 3 Press to move to Off Timer On Off and press on the product The following screen will appear z Off Deactivate the off timer so that the product does not power off automatically z On Activate the off timer so that the product powers off automatically 4 Press to move to the option you want and press 5 The selected option will be applied MENU QJOLVK Off SETUP RESET Acceler...

Страница 55: ...screen 2 Press to move to SETUP RESET and press on the product 3 Press to move to Off Timer Setting and press on the product The following screen will appear 4 Press to configure Off Timer Setting For products for the market in Europe the Off Timer On Off is set to automatically activate 4 hours after the product powers on This is done in accordance with power supply regulations If you do not want...

Страница 56: ... the On Screen Display OSD You can select PC or AV 6 6 1 Configuring PC AV Mode 1 Press any button on the front of the product to display the Key Guide Next press to display the corresponding menu screen 2 Press to move to SETUP RESET and press on the product 3 Press to move to PC AV Mode and press on the product The following screen will appear 4 Press to move to the option you want and press 5 T...

Страница 57: ...o SETUP RESET and press on the product 3 Press to move to Key Repeat Time and press on the product The following screen will appear z Acceleration 1 sec or 2 sec can be selected If No Repeat is selected a command responds only once when a button is pressed 4 Press to move to the option you want and press 5 The selected option will be applied MENU English Off On SETUP RESET 5HVHW DQJXDJH FR 6DYLQJ ...

Страница 58: ...ponding menu screen 2 Press to move to SETUP RESET and press on the product 3 Press to move to Customized Key and press on the product The following screen will appear z Bright Eco Saving Image Size 4 Press to move to the option you want and press 5 The selected option will be applied MENU 20 sec On SETUP RESET FFHOHUDWLRQ 2Q XVWRPL HG H XWR 6RXUFH LVSOD 7LPH 0HQX 7UDQVSDUHQF Eco Saving Image Size...

Страница 59: ... screen 2 Press to move to SETUP RESET and press on the product 3 Press to move to Auto Source and press on the product The following screen will appear z Auto The input source is automatically recognized z Manual Manually select an input source 4 Press to move to the option you want and press 5 The selected option will be applied MENU Eco Saving On SETUP RESET XVWRPL HG H XWR 6RXUFH LVSOD 7LPH 0H...

Страница 60: ...uring Display Time 1 Press any button on the front of the product to display the Key Guide Next press to display the corresponding menu screen 2 Press to move to SETUP RESET and press on the product 3 Press to move to Display Time and press on the product The following screen will appear 4 Press to move to the option you want and press 5 The selected option will be applied MENU FR 6DYLQJ 0DQXDO SE...

Страница 61: ...ey Guide Next press to display the corresponding menu screen 2 Press to move to SETUP RESET and press on the product 3 Press to move to Menu Transparency and press on the product The following screen will appear 4 Press to move to the option you want and press 5 The selected option will be applied MENU Eco Saving Manual 20 sec SETUP RESET XVWRPL HG H XWR 6RXUFH LVSOD 7LPH 0HQX 7UDQVSDUHQF Off On A...

Страница 62: ...s any button on the front of the product to display the Key Guide Next press to display the corresponding menu screen 2 Press to move to INFORMATION The current input source frequency and resolution will appear The displayed menu items may vary depending on the model MENU SETUP RESET Analog kHz Hz NP x Optimal Mode x Hz PICTURE COLOR SIZE POSITION INFORMATION AUTO EXIT ...

Страница 63: ...on does not appear on the main screen find and double click the MagicTune setup file on the CD ROM 3 Select the installation language and click Next 4 Complete the remaining software installation steps according to the instructions displayed on the screen z The software may not work properly if you do not restart the computer after the installation z The MagicTune icon may not appear depending on ...

Страница 64: ...lick the Add or Remove Programs icon in the Control Panel 3 In the Add Remove window find and select MagicTune so that it is highlighted 4 Click Change or Remove Programs to remove the software 5 Select Yes to start removing MagicTune 6 Wait until a message box appears informing you that the software has been removed completely For technical support the FAQ frequently asked questions or informatio...

Страница 65: ...nstallation z The software may not work properly if you do not restart the computer after the installation z The MultiScreen icon may not appear depending on the computer system and the product specifications z If the shortcut icon does not appear press the F5 key Restrictions and Problems with the Installation MultiScreen The MultiScreen installation may be affected by the Graphics card Motherboa...

Страница 66: ...ftware 8 8 Installing the Software 8 2 2 Removing the Software Click Start select Settings Control Panel and then double click Add or Remove Programs Select MultiScreen from the program list and click the Add Delete button ...

Страница 67: ...uct is working normally If the screen remains blank check the PC system video controller and cable 9 1 2 Checking the Resolution and Frequency For a mode that exceeds the supported resolution refer to 10 3 Standard Signal Mode Table the message Not Optimum Mode will appear for a short time 9 1 3 Check the following Installation issue PC mode The screen keeps switching on and off Check the cable co...

Страница 68: ... of resolution and frequency compatible with the product Next if required change the settings referring to Standard Signal Mode Table page 74 in this manual and the INFORMATION menu on the product There are shadows or ghost images left on the screen The screen is too bright The screen is too dark Adjust Brightness page 33 and Contrast page 34 Screen color is inconsistent Change the COLOR settings ...

Страница 69: ...nitor settings z Windows ME 2000 Go to Control Panel Display Settings Advanced Monitor and adjust Refresh rate under Monitor settings z Windows Vista Go to Control Panel Appearance and Personalization Personalization Display Settings Advanced Settings Monitor and adjust Refresh rate under Monitor settings z Windows 7 Go to Control Panel Appearance and Personalization Display Screen Resolution Adva...

Страница 70: ...indows 7 Go to Control Panel Appearance and Personalization Display Adjust Resolution and adjust the resolution How do I set power saving mode z Windows XP Set power saving mode in Control Panel Appearance and Themes Display Screen Saver Settings or BIOS SETUP on the PC z Windows ME 2000 Set power saving mode in Control Panel Display Screen Saver Settings or BIOS SETUP on the PC z Windows Vista Se...

Страница 71: ...ensions W x H x D Weight Without Stand 510 x 319 x 53 mm 20 1 x 12 6 x 2 1 Inches With Stand 510 x 398 x 195 mm 3 0 kg 20 1 x 15 7 x 7 7 Inches 6 6 lbs Environmental considerations Operating Temperature 50 F 104 F 10 C 40 C Humidity 10 80 non condensing Storage Temperature 4 F 113 F 20 C 45 C Humidity 5 95 non condensing Plug and Play This monitor can be installed and used with any Plug and Play c...

Страница 72: ...ubject to change without notice to improve quality This device is a Class B digital apparatus USA only Dispose unwanted electronics through an approved recycler To find the nearest recycling location go to our website www samsung com recyclingdirect or call 877 278 0799 ...

Страница 73: ...has a power saving function S22B350T z The power consumption level can vary in different operating conditions or when settings are changed z To reduce the power consumption to 0 watts turn off the power switch on the back of the product or disconnect the power cable Be sure to disconnect the power cable when you will not be using the product for an extended period of time To reduce the power consu...

Страница 74: ...al transmitted from the PC does not belong to the standard signal modes the screen may be blank even though the power LED turns on In such a case change the settings according to the following table by referring to the graphics card user manual S22B350T Resolution Horizontal Frequency kHz Vertical Frequency Hz Pixel Clock MHz Sync Polarity H V IBM 720 x 400 31 469 70 087 28 322 MAC 640 x 480 35 00...

Страница 75: ... kHz z Vertical Frequency Repeating the same picture dozens of times per second allows you to view natural pictures The repeat frequency is called vertical frequency or refresh rate and is indicated in Hz VESA 1280 x 1024 79 976 75 025 135 000 VESA 1440 x 900 55 935 59 887 106 500 VESA 1600 x 900 60 000 60 000 108 000 VESA 1680 x 1050 65 290 59 954 146 250 VESA 1920 x 1080 67 500 60 000 148 500 Re...

Страница 76: ...ung com CHILE 800 SAMSUNG 726 7864 From mobile 02 482 82 00 http www samsung com COLOMBIA 01 8000112112 http www samsung com COSTA RICA 0 800 507 7267 http www samsung com DOMINICA 1 800 751 2676 http www samsung com ECUADOR 1 800 10 7267 http www samsung com EL SALVADOR 800 6225 http www samsung com GUATEMALA 1 800 299 0013 http www samsung com HONDURAS 800 27919267 http www samsung com JAMAICA 1...

Страница 77: ...5 SAMSUNG 726 7864 0 14 Min http www samsung com CYPRUS From landline 8009 4000 http www samsung com GREECE From landline 80111 SAMSUNG 7267864 From landline mobile 30 210 6897691 http www samsung com HUNGARY 06 80 SAMSUNG 726 7864 http www samsung com ITALIA 800 SAMSUNG 726 7864 http www samsung com KOSOVO 381 0113216899 http www samsung com LUXEMBURG 261 03 710 http www samsung com MACEDONIA 023...

Страница 78: ... ch_fr French U K 0330 SAMSUNG 7267864 http www samsung com EIRE 0818 717100 http www samsung com LITHUANIA 8 800 77777 http www samsung com LATVIA 8000 7267 http www samsung com ESTONIA 800 7267 http www samsung com TURKEY 444 77 11 http www samsung com CIS RUSSIA 8 800 555 55 55 http www samsung com GEORGIA 8 800 555 555 http www samsung com ARMENIA 0 800 05 555 http www samsung com AZERBAIJAN 0...

Страница 79: ...ww samsung com hk_en INDIA 1800 1100 11 3030 8282 1800 3000 8282 1800 266 8282 http www samsung com INDONESIA 0800 112 8888 021 5699 7777 http www samsung com JAPAN 0120 327 527 http www samsung com MALAYSIA 1800 88 9999 http www samsung com PHILIPPINES 1 800 10 SAMSUNG 726 7864 for PLDT 1 800 3 SAMSUNG 726 7864 for Digitel 1 800 8 SAMSUNG 726 7864 for Globe 02 5805777 http www samsung com SINGAPO...

Страница 80: ...ng com SAUDI ARABIA 9200 21230 http www samsung com U A E 800 SAMSUNG 726 7864 http www samsung com AFRICA CAMEROON 7095 0077 http www samsung com COTE D IVOIRE 8000 0077 http www samsung com GHANA 0800 10077 0302 200077 http www samsung com KENYA 0800 724 000 http www samsung com NIGERIA 0800 726 7864 http www samsung com SENEGAL 800 00 0077 http www samsung com SOUTH AFRICA 0860 SAMSUNG 726 7864...

Страница 81: ...tomer requests software installation and setup for the productU z If a service technician removes cleans dusts or foreign materials inside of the productU z If customer requests an installation additionally after purchasing a product through home shopping or online A Product damage caused by customer s fault Product damage caused by customer s mishandling or wrong repairU If a product damage is ca...

Страница 82: ...nt possible harm to the environment or human health from uncontrolled waste disposal please separate these items from other types of waste and recycle them responsibly to promote the sustainable reuse of material resources Household users should contact either the retailer where they purchased this product or their local government office for details of where and how they can take these items for ...

Страница 83: ...ay an image although the refreshing is invisible to the naked eye The number of screen refreshes is called scanning rate and is measured in Hz A scanning rate of 60Hz means that the screen refreshes 60 times per second The screen scanning rate depends on the performance of the graphics cards in your PC and monitor Horizontal Frequency Characters or images displayed on the monitor screen consist of...

Страница 84: ...n the screen and is suitable for performing multiple tasks at the same time E g A resolution of 1920 x 1080 consists of 1 920 horizontal pixels horizontal frequency and 1 080 vertical lines vertical resolution Plug Play The Plug Play feature allows the automatic exchange of information between a monitor and PC to produce an optimum display environment The monitor uses VESA DDC international standa...

Страница 85: ...E 76 Contrast 34 Copyright 7 Correct Disposal 82 Correct posture to use the product 17 Customized Key 58 D Display Time 60 E Eco Saving 53 F Fine 39 G Gamma 47 General 71 Green 44 H HDMI Black Level 41 I Image Size 49 INFORMATION 62 Installation 23 K Key Repeat Time 57 L Language 52 M Menu Transparency 61 MultiScreen 65 O Off Timer OnOff 54 Off Timer Setting 55 P Parts 20 PC AV Mode 56 Q Q A 69 R ...

Страница 86: ...ntacting Samsung Customer Service Center 67 Reset 51 Response Time 40 Responsibility for the Pay Service Cost to Customers 81 S Safety Precautions 10 SAMSUNG MAGIC Bright 36 SAMSUNG MAGIC Color 42 Sharpness 35 Standard Signal Mode Table 74 ...

Отзывы: