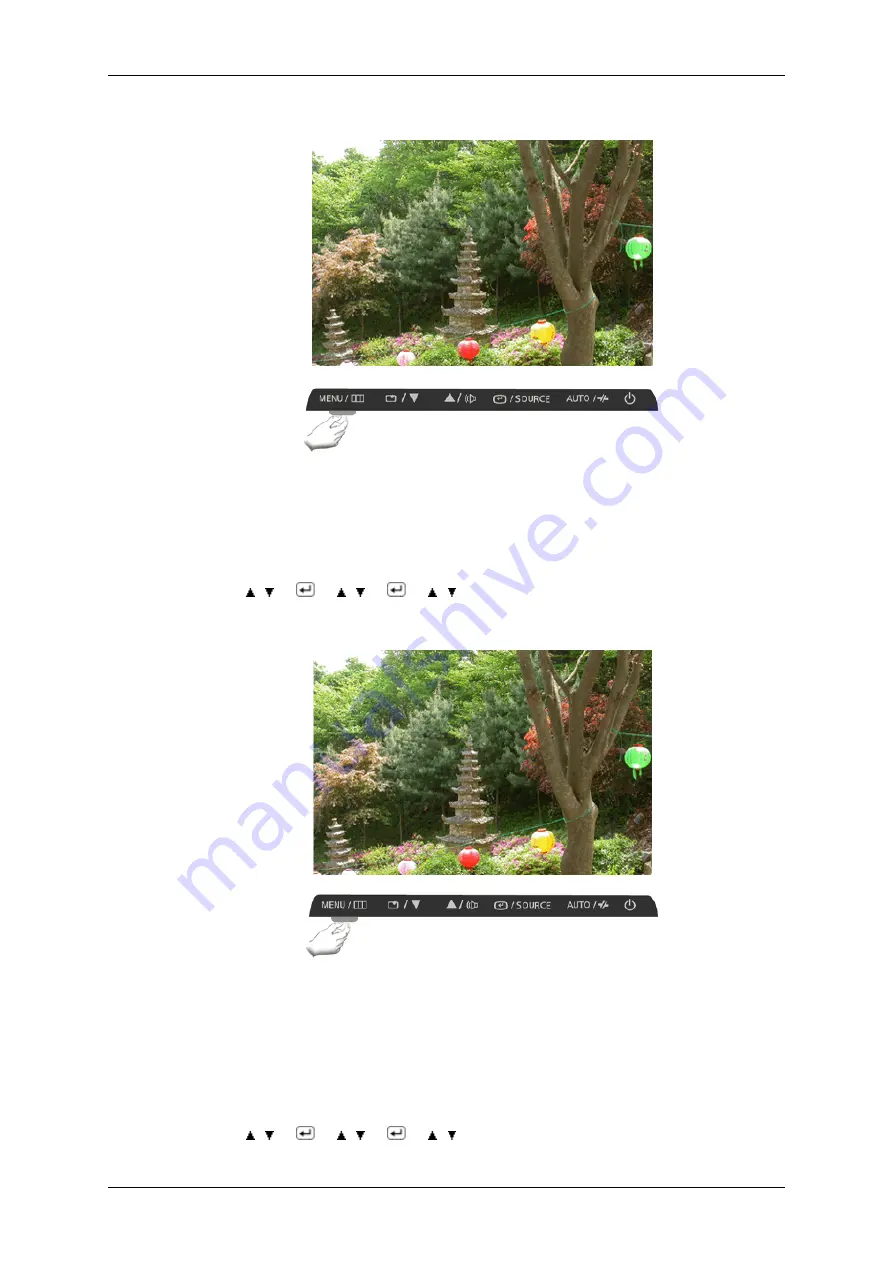
background image

Transparency

Change the transparency of the background of the OSD.

Off

On

MENU 

   ,   


   ,   


   ,   

 MENU

Display Time

The menu will be automatically turned off if no adjustments are made for a certain time period.

You can set the amount of time the menu will wait before it is turned off.

5 sec

10 sec

20 sec

200 sec

MENU 

   ,   


   ,   


   ,   

 MENU

Adjusting the Monitor

Содержание SyncMaster 930ND

Страница 1: ...SyncMaster 930ND LCD Monitor User Manual ...

Страница 2: ...ot touch Ground to prevent an electric shock Power When not used for extended period of time set your computer to DPM If using screen saver set it to active screen mode The images here are for reference only and are not applicable in all cases or countries Shortcut to Anti Afterimage Instructions Do not use a damaged power cord or plug or a damaged or loose power outlet Otherwise this may result i...

Страница 3: ...e the provided power cord of another product Otherwise this may result in fire or electric shock Installation Be sure to contact an authorized Service Center when installing your monitor in a location with heavy dust high or low temperatures high humidity and exposed to chemical substances and where it operates for 24 hours such as at airports train stations etc Failure to do so may cause serious ...

Страница 4: ...d cause personal injury Make sure to install the specified wall mount Install your product in a well ventilated location Ensure that there is a clearance of more than 10 cm from the wall Otherwise it may result in fire due to an increase in the internal tem perature Ensure that the packaging vinyl is kept away from children Otherwise it may result in serious harm suffocation if children play with ...

Страница 5: ...pecified cloth adding only a little water As the product may be scratched if there is any foreign material on the cloth make sure to shake it thoroughly before using it When cleaning the product do not spray water directly onto the main body of the product Ensure that water does not enter the product and that it is not wet Otherwise this may result in electric shock fire or a malfunction Others Th...

Страница 6: ...m perature Do not place any containers containing water vases flowerpots med icines as well as any metal on the product If water or a foreign material enters the product disconnect the power cord and contact a Service Center This may result in a product malfunction electric shock or fire Do not use or keep combustible spray or flammable material near the product Otherwise this may result in an exp...

Страница 7: ...ck or fire Ensure that children do not hang onto the product or climb up onto the product The product may fall and cause personal injury or death If you do not use the product for a long period of time disconnect the power cord from the power outlet Otherwise this may result in overheating or fire due to dust and may result in fire due to electric shock or leakage Do not place any heavy items or t...

Страница 8: ...the product too far it may fall and cause personal injury Do not install the product in a location low enough for children to reach Otherwise it may fall and result in personal injury Since the front part of the product is heavy install the product on a level and stable surface Do not put any heavy objects on the product This may result in personal injury and or damage to the product Good Postures...

Страница 9: ... Keep your elbow at 90 degrees Keep your knees at greater than 90 degrees and keep your heels firmly on the floor Keep your arms lower than your heart Safety Instructions ...

Страница 10: ... and enabling users to access the Internet create documents and edit figures In addition this new concept monitor enables users to play music videos and games by connecting an external input source device such as DSC MP3 external storage device and so on to the USB port In addition this monitor can be utilized for various fields such as video confer encing and co working by displaying the network ...

Страница 11: ...ard USB Mouse USB D Sub Cable Your Monitor Initial Settings Select the language using the up or down key The displayed content will disappear after 40 seconds Turn the power button off and on It will be displayed again It can be displayed up to three 3 times Make sure to adjust the resolution of your PC before reaching the maximum count Introduction ...

Страница 12: ...rms the role of the direction buttons in Analog mode Volume button When OSD is not on the screen push the button to adjust volume Adjust buttons Adjust items in the menu Enter button SOURCE button Activates a highlighted menu item Push the SOURCE then selects the video signal while the OSD is off When the SOURCE button is pressed to change the input mode a message appears in the upper left of the ...

Страница 13: ...ation regarding power saving functions For energy conservation turn your monitor OFF when it is not needed or when leaving it unattended for long periods Speaker You can hear sound by connecting the soundcard of your PC to the monitor Rear Note The configuration at the back of the monitor may vary from product to product POWER Connect the power cord for your monitor to the POWER port on the back o...

Страница 14: ...nal Connect when using it as a monitor DVI OUT Use it by connecting it to another monitor USB AUDIO IN USB Connection Terminal Connect USB devices such as a mouse keyboard and external storage devices DSC MP3 external storage etc AUDIO IN Connect the audio cable for your monitor to the audio port on the back of your computer MIC Headphone output terminal MIC Connect a microphone to the MIC termina...

Страница 15: ...ensington Lock may be dif ferent depending on its model Using the Anti Theft Kensington Lock 1 Insert the locking device into the Kensington slot on the Monitor and turn it in the locking direction 2 Connect the Kensington Lock cable 3 Fix the Kensington Lock to a desk or a heavy stationary object Cable Fix Ring Stand Stop per Cable Fix Ring When connecting the cable is finished fix the ca bles to...

Страница 16: ... 15 pin D sub port on the back of your monitor VGA IN Connected to a Macintosh Connect the monitor to the Macintosh computer using the D sub connection cable Note If the monitor and the computer are connected you can turn them on and use them Connecting USB Note You can use a USB device such as a mouse keyboard Memory Stick or external hard disk drive by connecting them to the USB port of the moni...

Страница 17: ...ect the power cord to the power terminal at the back of the monitor Connect the mouse and the keyboard to the USB ports Connect the LAN port on the back of the monitor and the hub Connect the hub and the LAN port of the host PC Note The host PC must have an IP address After connecting the LAN and setting the IP address you can view the host PC screen on the monitor Connections ...

Страница 18: ... DSC MP3 external storage etc Connecting to one Host PC from many client device is possible only when virtualization solution like vmware is installed in Host PC Connecting Headphone Note You may connect your headphones to the monitor 1 Connect your headphones to the Headphone connection terminal Connecting MIC Note You may connect your microphone to the monitor 1 Connect the microphone cable to t...

Страница 19: ...oid the monitor slide When you try to rotate the monitor in the state of the power cord or cable connecting to the monitor the power cord of cable can be destroyed Tilt angle You can tilt the monitor screen forward to adjust the angle to a particular angle Attaching a Base This monitor accepts a 100 mm x 100 mm VESA compliant mounting interface pad Connections ...

Страница 20: ... on their specifications Do not use screws that do not comply with the VESA standard screw specifica tions Do not fasten the screws too tightly as this may damage the product or cause the product to fall leading to personal injury Samsung is not liable for these kinds of accidents Samsung is not liable for product damage or personal injury when a non VESA or non specified wall mount is used or the...

Страница 21: ...e operating system you have Prepare a blank disk and download the driver program file at the Internet web site shown here Internet web site http www samsung com Installing the Monitor Driver Automatic 1 Insert CD into the CD ROM drive 2 Click Windows 3 Choose your monitor model in the model list then click the OK button 4 If you can see following message window then click the Continue Anyway butto...

Страница 22: ...ert your Manual CD into your CD ROM drive 2 Click Start and Control Panel Then double click on Appearance and Personalization 3 Click Personalization and then Display Settings 4 Click Advanced Settings 5 Click Properties in the Monitor tab If the Properties button is deactivated it means the configuration for your monitor is completed The monitor can be used as is If the message Windows needs is d...

Страница 23: ...posted on Samsung Monitor homepage 6 Click Update Driver in the Driver tab 7 Check the Browse my computer for driver software checkbox and click Let me pick from a list of device drivers on my computer 8 Click Have Disk and select the folder for example D Drive where the driver setup file is located and click OK Using the Software ...

Страница 24: ...l that matches your monitor from the list of monitor models on the screen and click Next 10 Click Close Close OK OK on the following screens displayed in sequence Microsoft Windows XP Operating System Using the Software ...

Страница 25: ... Click Display icon and choose the Settings tab then click Advanced 4 Click the Properties button on the Monitor tab and select Driver tab 5 Click Update Driver and select Install from a list or then click Next button 6 Select Don t search I will then click Next and then click Have disk Using the Software ...

Страница 26: ...lowing message window then click the Continue Anyway button Then click OK button Note This monitor driver is under certifying MS logo and this installation doesn t damage your system The certified driver will be posted on Samsung Monitor homepage http www samsung com 9 Click the Close button then click OK button continually Using the Software ...

Страница 27: ...on is active click the Properties button then follow next steps continually 5 Click Driver and then click on Update Driver then click on the Next button 6 Choose Display a list of the known drivers for this device so that I can choose a specific driver then click Next and then click Have disk 7 Click the Browse button then choose A D Driver 8 Click the Open button then click OK button 9 Choose you...

Страница 28: ...r clicking Test If the screen is not normal change to a different mode lower mode of resolution colors or frequency Note If there is no Mode at All Display Modes select the level of resolution and vertical frequency by referring to the Preset Timing Modes in the user guide Linux Operating System To execute X Window you need to make the X86Config file which is a type of system setting file 1 Press ...

Страница 29: ...ion refer to Help F1 in the software program How to install the Natural Color software Insert the CD included with the Samsung monitor into the CD ROM Drive Then the initial screen of the program Natural Color will be executed Click Natural Color on the initial screen to install the Natural Color software To install the program manually insert the CD included with the Samsung monitor into the CD R...

Страница 30: ...cense agreement to accept the terms of use 6 Choose a folder to install the MagicTune program 7 Click Install 8 The Installation Status window appears 9 Click Finish 10 When the installation is complete the MagicTune executable icon appears on your desktop Double click the icon to start the program MagicTune execution icon may not appear depending on specification of computer sys tem or monitor If...

Страница 31: ...1 Go to Task Tray Start Settings and select Control Panel in the menu If the program runs on Windows XP go to Control Panel in the Start menu 2 Click the Add or Remove Programs icon in Control Panel 3 In the Add or Remove Programs screen scroll down to find MagicTune Click on it to highlight it 4 Click the Change Remove button to remove the program 5 Click Yes to begin the uninstall process 6 Wait...

Страница 32: ... the Multiscreen executable icon appears on your desktop Double click the icon to start the program Multiscreen execution icon may not appear depending on specification of computer system or monitor If that happens press F5 Key Installation Problems The installation of MultiScreen can be affected by such factors as the video card motherboard and the network environment System Requirements OS Windo...

Страница 33: ...ndow is accessible through the Settings button on the Connect Screen An administrative password is required to change Portal settings Connect Screen The Connect Screen is shown on startup except when the Portal has been configured for a managed start up or auto reconnect The logo displayed above the Connect button can be changed by uploading a information on updating the Connect Screen logo Connec...

Страница 34: ...ptions menu contains The logo displayed above the Connect button can be changed by uploading a information on updating the Connect Screen logo Configuration Diagnostics Information User Settings Password Selecting one of the selections will produce a settings window Using the Software ...

Страница 35: ...agement Session Bandwidth RDP Language OSD Reset All settings in the configuration tabs are password protected Select the Unlock button in the bottom left corner of the Configuration window enter password and select the OK button to unlock the settings Each tab has an associated OK Cancel and Apply button to accept or cancel the setting update Network The Network tab allows an administrator to set...

Страница 36: ...ect it Gateway The Gateway field is the device s gateway IP address If DHCP is disabled this field is required If DHCP is enabled this field is not editable This field must be a valid IP address and if an invalid IP address is entered the OSD will prompt the administrator to correct it Primary DNS Server The Primary DNS Server field is the device s primary DNS IP address If DHCP is disabled this f...

Страница 37: ...e complex system Enable Connection Management If the Enable Connection Management option is enabled the device can be configured and con trolled by an external connection manager Identify Connection Manager By The Identify Connection Manager By selector allows the administrator to choose whether the connection manager is identified by IP address or by Fully Qualified Domain Name FQDN If connection...

Страница 38: ...ically reduce configuration and maintenance effort for complex systems Enable Host Discovery The Enable Host Discovery feature allows the Portal to discover Hosts that are not in a PC over IP session When enabled the Portal is able to display up to 10 available hosts in order of being discovered It is expected that the Enable Host Discovery feature will be used with small numbers of Hosts Session ...

Страница 39: ...ver automatically Users can deselect the Enable Auto Recon nect option by connecting to the client through the Web Interface Session Timeout The Session Timeout configures the timeout for a connection If the timeout period elapses without the PC over IP processor detecting a network the PC over IP processor will disconnect the ses sion Bandwidth The Bandwidth tab allows limiting the Portal bandwid...

Страница 40: ...Resolution The Resolution field is the RDP screen resolution setting Possible values are 1024x768 1280x1024 1600x1200 Bitdepth The Bitdepth is the RDP session colour bit depth Possible values are 8 bpp bits per pixel 16 bpp 24 bpp Terminal Server Port The Terminal Server Port field sets the port number that the RDP client connects to Audio Mode The Audio Mode field allows you to set the audio stat...

Страница 41: ...reen Language The Language tab allows changing the user interface language for the local GUI Language The Language field allows configures the language of the OSD and user level event log messages Keyboard Layout The Keyboard Layout field allows the administrator to change the keyboard layout OSD The OSD tab allows modifying the On Screen Display OSD parameters Using the Software ...

Страница 42: ...t The timeout can be configured in seconds up to 9999 seconds A setting of 0 seconds disables the screen saver Reset The Reset tab allows resetting all the configurable parameters stored in flash Reset Parameters The Reset Parameters Reset button resets all configuration and permissions to factory default values Factory default values by Reset Parameters are activated after system reboot When this...

Страница 43: ...t Log tab allows viewing and clearing of event log messages from the Portal View event log message The View event log messages field displays log messages with time stamp information There are two associated buttons available Refresh Selecting the Refresh button refreshes event log messages displayed Clear Selecting the Clear button clears all of the displayed event log messages Session Statistics...

Страница 44: ...otal number of PC over IP packets lost in the current session Bytes Sent The Bytes Sent field reports the total number of bytes sent in the current session Bytes Received The Bytes Received field reports the total number of bytes received in the current session Round Trip Latency The Round Trip Latency field reports the total round trip PC over IP system e g Portal to Host and back to Portal and n...

Страница 45: ...evice to see if it is reachable across an IP network This may be useful for determining if a Host is reachable Ping Settings IP Address IP Address to ping Interval Interval between ping packets Packet Size Size of ping packet Using the Software ...

Страница 46: ...VPD Information Vital Product Data VPD is information provisioned by the factory to uniquely identify each Portal or Host MAC Address Portal unique MAC address Unique Identifier Portal unique identifier Serial Number Portal unique serial number Hardware Version Portal hardware version number Firmware Information The firmware information reflects the current PC over IP firmware details Using the So...

Страница 47: ...rrent PC over IP bootloader details Bootloader Version Version of current PC over IP bootloader Bootloader Build ID Revision code of current PC over IP bootloader Bootloader Build Date Build date of current PC over IP bootloader User Settings The User Settings menu allows the user to access the window tabs to define the mouse and keyboard settings as well as the PC over IP image quality The tabs i...

Страница 48: ... Keyboard Repeat Delay field allows configuration of the Portal keyboard repeat delay Keyboard Repeat Rate The Keyboard Repeat Rate field allows configuration of the Portal keyboard repeat rate Repeat Settings Test Box The Repeat Settings Test Box field allows testing of the chosen keyboard settings Image The Image tab allows a user to change the image settings on the PC over IP system Using the S...

Страница 49: ...dth constrained environments When network bandwidth is not constrained the PCoIP system will maintain perception free quality regardless of the Minimum Image Quality setting Password The Change Password window allows an administrator to update the administrative password for the device Note that this will affect the web interface and the local OSD GUI Old Password The Old Password field must match...

Страница 50: ...elf adjust to the incoming Analog signal The values of Fine Coarse and Position are adjusted automatically Available in Analog mode only If auto adjustment does not work properly press AUTO button again to adjust picture with more accuracy If you change resolution in the control panel auto function will be executed automatically OSD Lock Unlock When pressing the AUTO button after locking the OSD ...

Страница 51: ...urrent states of settings or prevent others from adjusting the current settings Lock Hold down the MENU button for more than five 5 seconds to activate the OSD adjustment lock function Unlock Hold down the MENU button for more than five 5 seconds to deactivate the OSD adjustment lock function Adjusting the Monitor ...

Страница 52: ...nected to a server the server power is turned on or off This button may perform another function according to the options of the server PC Disconnect In Client mode press the button to disconnect from the server when connected to the server Adjusting the Monitor ...

Страница 53: ...the video signal while the OSD is off OSD Function Picture Brightness Contrast MagicBright Color MagicColor Color Tone Color Con trol Color Effect Gamma Image Coarse Fine Sharpness H Position V Position OSD Language H Position V Position Transparen cy Display Time Adjusting the Monitor ...

Страница 54: ...mic Contrast You can use the on screen menus to change the brightness according to personal preference MENU MENU Contrast Not available in MagicBright mode of Dynamic Contrast You can use the on screen menus to change the contrast according to personal preference Adjusting the Monitor ...

Страница 55: ...ully chosen by our engineers the pre configured values may not be comfortable to your eyes depending on your taste If this is the case adjust the brightness and contrast by using the OSD menu Text For documents or works involving heavy text Internet For working with a mixture of images such as texts and graphics Game For watching motion pictures such as a game Sport For watching motion pictures su...

Страница 56: ... color more clearly without disturbing image quality Off Returns to the original mode Demo The screen before applying MagicColor appears on the right and the screen after applying MagicColor appears on the left Full Displays not only vivid natural color but also more realistic natural skin color with clearness Intelligent Displays vivid natural color with clearness MENU MENU Adjusting the Monitor ...

Страница 57: ... selected Cool Makes whites bluish Normal Keeps whites white Warm Makes whites reddish Custom Select this mode when you want to adjust the image according to your preferences MENU MENU Color Control Adjusts individual Red Green Blue color balance MENU MENU Adjusting the Monitor ...

Страница 58: ...fault colors of black and white are displayed Green This applies the green color effect to a black and white screen Aqua This applies the aqua color effect to a black and white screen Sepia This applies the Sepia color effect to a black and white screen MENU MENU Gamma Gamma correction changes the luminance of the colors with intermediate luminance Adjusting the Monitor ...

Страница 59: ...noise such as vertical stripes Coarse adjustment may move the screen image area You may relocate it to the center using the horizontal control menu Available in Analog mode only MENU MENU Fine Removes noise such as horizontal stripes Adjusting the Monitor ...

Страница 60: ...adjusting the frequency clock speed Available in Analog mode only MENU MENU Sharpness Changes the clearance of image MENU MENU H Position Changes the horizontal position of the monitor s entire display Available in Analog mode only MENU MENU Adjusting the Monitor ...

Страница 61: ...V Position Changes the vertical position of the monitor s entire display Available in Analog mode only MENU MENU OSD Language You can choose one of nine languages Adjusting the Monitor ...

Страница 62: ...ct on any software running on the computer MENU MENU H Position You can change the horizontal position where the OSD menu appears on your monitor MENU MENU V Position You can change the vertical position where the OSD menu appears on your monitor MENU MENU Adjusting the Monitor ...

Страница 63: ... OSD Off On MENU MENU Display Time The menu will be automatically turned off if no adjustments are made for a certain time period You can set the amount of time the menu will wait before it is turned off 5 sec 10 sec 20 sec 200 sec MENU MENU Adjusting the Monitor ...

Страница 64: ...Setup Reset Reverts the product settings to factory defaults No Yes MENU MENU Information Shows a video source display mode on the OSD screen MENU MENU Adjusting the Monitor ...

Страница 65: ...r and computer system your monitor is functioning properly Warning Messages If there is something wrong with the input signal a message appears on the screen or the screen goes blank although the power indicator LED is still on The message may indicate that the monitor is out of scan range or that you need to check the signal cable Environment The location and the position of the monitor may influ...

Страница 66: ...ng the D sub cable Check the signal cable connection Connected using the DVI cable If you still see an error message on the screen when the monitor is connected properly check to see if the monitor status is set to analog If you still see an error message on the screen when the monitor is connected properly check to see if the monitor status is set to analog Press SOURCE button to have the monitor...

Страница 67: ...and then reconnect the DVI cable while the system is running as certain types of graphic cards do not send out video signals Connect the DVI cable and then reboot the system I cannot see the On Screen Display Q Have you locked the On Screen Display OSD Menu to prevent changes A Unlock the OSD by pressing the MENU button for at least 5 seconds The screen shows strange colors or just black and white...

Страница 68: ...olors been set properly A Windows XP Set the resolution at the Control Panel Appearance and Themes Display Settings A Windows ME 2000 Set the resolution at the Control Panel Display Settings Q Has the video card been set properly A Set the video card by referring to the video card manual There is a message that reads Unrecognized monitor Plug Play VESA DDC monitor found Q Have you installed the mo...

Страница 69: ...Reboot the computer after installing the program for the first time If a copy of the program is already installed remove it reboot the computer and then install the program again You need to reboot the computer for it to operate normally after installing or removing the program Note Visit the MagicTune website and download the installation software for MagicTune MAC Check the following items if th...

Страница 70: ...earance and Themes Display Screen Saver Set the function in the BIOS SETUP of the computer Refer to the Windows Computer Man ual A Windows ME 2000 Set the resolution at the Control Panel Display Screen Saver Set the function in the BIOS SETUP of the computer Refer to the Windows Computer Man ual Q How can I clean the outer case LCD Panel A Disconnect the power cord and then clean the monitor with ...

Страница 71: ... 60 Hz RB Maximum resolution 1280x1024 60 Hz RB Input Signal Terminated RGB Analog 0 7 Vp p 5 Separate H V sync Composite TTL level V high 2 0 V V low 0 8 V Maximum Pixel Clock 135 MHz Analog Power Supply AC 100 240 V 10 50 60 Hz 3 Hz Signal Cable 15pin to 15pin D sub cable Detachable Dimensions W x H x D Weight 416 6 x 420 9 x 200 mm 16 4 x 16 6 x 7 9 inch With Stand 6 9 kg 15 2 Ibs 416 6 x 375 2...

Страница 72: ...with the Electromagnetic Compatibility Directives for residential use and can be used in all areas including common residential areas Class B equipment emits less electromagnetic waves than Class A equipment PowerSaver This monitor has a built in power management system called PowerSaver This system saves energy by switching your monitor to low power mode when it has not been used for a certain am...

Страница 73: ...0 49 500 VESA 1024 x 768 48 363 60 004 65 000 VESA 1024 x 768 56 476 70 069 75 000 VESA 1024 x 768 60 023 75 029 78 750 VESA 1280 x 1024 63 981 60 020 108 000 VESA 1280 x 1024 79 976 75 025 135 000 Horizontal Frequency The time to scan one line connecting the right edge to the left edge of the screen horizontally is called the Horizontal Cycle and the inverse number of the Horizontal Cycle is call...

Страница 74: ...icture by performing the Auto Adjustment function in display screen that is appeared as window termination button is pressed If there s still noise after the automatic adjustment use the Fine Coarse adjustment func tion When viewing a fixed screen for an extended period of time a residual image or blur riness may appear Change the mode to energy save or set a screensaver to move the picture when y...

Страница 75: ...s Ex Airports Transit Stations Stock Markets Banks and Controlling Systems We recom mend that you follow set up of your display system program as below Display Information together with Logo or Moving image cycle Ex Cycle Display Information for 1 hour followed by a Display Logo or moving image for 1 minute Change the Color Information periodically Use 2 different colors Ex Rotate the Color Inform...

Страница 76: ...ditions are defined as continuously changing video patterns When the LCD panel is operated for a long time with a fixed pattern over 12 hours there may be slight difference in voltage between electrodes that work the liquid crystal LC in a pixel The voltage difference between electrodes increases with time forcing the liquid crystal to lean When this occurs the previous image may be seen when the ...

Страница 77: ...Our LCD Monitor satisfies ISO13406 2 Pixel fault Class II Information ...

Страница 78: ...http www samsung com latin GUATEMALA 1 800 299 0013 http www samsung com latin HONDURAS 800 7919267 http www samsung com latin JAMAICA 1 800 234 7267 http www samsung com latin NICARAGUA 00 1800 5077267 http www samsung com latin PANAMA 800 7267 http www samsung com latin PUERTO RICO 1 800 682 3180 http www samsung com latin REP DOMINICA 1 800 751 2676 http www samsung com latin TRINIDAD TO BAGO 1...

Страница 79: ...SWITZERLAND 0848 SAMSUNG 7267864 CHF 0 08 min http www samsung com ch U K 0845 SAMSUNG 7267864 http www samsung com uk CIS ESTONIA 800 7267 http www samsung ee LATVIA 8000 7267 http www samsung com lv LITHUANIA 8 800 77777 http www samsung lt KAZAKHSTAN 8 10 800 500 55 500 http www samsung com kz_ru KYRGYZSTAN 00 800 500 55 500 RUSSIA 8 800 555 55 55 http www samsung ru TADJIKISTAN 8 10 800 500 55...

Страница 80: ...or Refresh Rate Unit Hz Example If the same light repeats itself 60 times per second this is regarded as 60 Hz Horizontal Frequency The time to scan one line connecting the right edge to the left edge of the screen horizontally is called the Horizontal Cycle The in verse number of the Horizontal Cycle is called Horizontal Fre quency Unit kHz Interlace and Non Interlace Methods Showing the horizont...

Страница 81: ...ecycling Business users should contact their supplier and check the terms and conditions of the purchase contract This prod uct should not be mixed with other commercial wastes for disposal Correct disposal of batteries in this product Europe only Applicable in the European Union and other European countries with separate battery return systems This marking on the battery manual or packaging indi ...

Страница 82: ...the furnishing performance or use of this material Samsung is the registered trademark of Samsung Electronics Co Ltd Microsoft Windows and Win dows NT are registered trademarks of Microsoft Corporation VESA DPM and DDC are registered trademarks of Video Electronics Standard Association the ENERGY STAR name and logo are reg istered trademarks of the U S Environmental Protection Agency EPA All other...

Отзывы: