1-16
Samsung Electronics
Disassembly and Reassembly
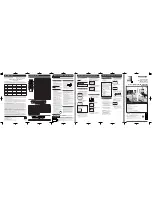
1-2-25 Cylinder Ass’y Removal
1) Remove the 3 Screws
Œ
,
ˇ
,
ˆ
.
2) Remove the Plate Cylinder A, B, C
´
,
¨
,
Ø
in the
direction of arrow.
3) Lift the Cylinder AssÕy
∏
.
Note
:
1) When reinstalling, push the Plate Cylinder A, B
¨
,
Ø
in the reverse of arrow and then, tighten the
2 Screws
ˇ
,
ˆ
.
2) Take care not to touch the Cylinder AssÕy and the
tape guide post at reinstalling Plate Cylinder C
´
.
3) Take care not to touch the Cylinder AssÕy with
screw driver at reinstalling the Plate Cylinder C
´
.
ˆ
SCREW
∏
CYLINDER ASS'Y
Œ
SCREW
´
PLATE CYLINDER C
ˇ
SCREW
¨
PLATE CYLINDER B
Ø
PLATE CYLINDER A
1-2-26 Belt Pulley Removal
1) Remove the Belt Pulley
Œ
.
Note
: Take extreme care not to touch the grease on
Belt Pulley
Œ
at assembling or reassembling.
Œ
BELT PULLEY
Fig. 1-28 Cylinder Ass’y Removal
Fig. 1-29 Belt Pulley Removal
1-2-27 Lever Head Cleaner Ass’y Removal
(Optional)
1) Release the Hook
Œ
.
2) Lift the Lever Head Cleaner AssÕy
´
.
Œ
HOOK
´
LEVER HEAD CLEANER ASS'Y
Fig. 1-30 Lever Head Cleaner Ass’y Removal
Содержание SVR-527
Страница 8: ...2 4 Samsung Electronics Alignment and Adjustment MEMO ...
Страница 16: ...Exploded View and Parts List 3 8 Samsung Electronics MEMO ...
Страница 22: ...4 6 Samsung Electronics Electrical Parts List MEMO ...
Страница 25: ...Schematic Diagrams Samsung Electronics 5 3 5 1 S M P S ...
Страница 26: ...Schematic Diagrams 5 4 Samsung Electronics 5 2 Power Drive ...
Страница 27: ...Schematic Diagrams Samsung Electronics 5 5 OPTION 5 3 System Control Servo LED ...
Страница 28: ...Schematic Diagrams 5 6 Samsung Electronics 5 4 Audio Video ...
Страница 29: ...Schematic Diagrams Samsung Electronics 5 7 OPTION 5 5 Hi Fi ...
Страница 30: ...Schematic Diagrams 5 8 Samsung Electronics 5 6 Input Output ...
Страница 31: ...Schematic Diagrams Samsung Electronics 5 9 5 7 Remote Control ...
Страница 32: ...Schematic Diagrams 5 10 Samsung Electronics MEMO ...
Страница 57: ...2 6 Samsung Electronics Alignment and Adjustment MEMO ...


