background image

GB

39

B

38

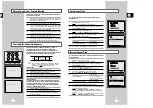
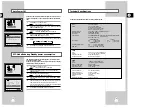
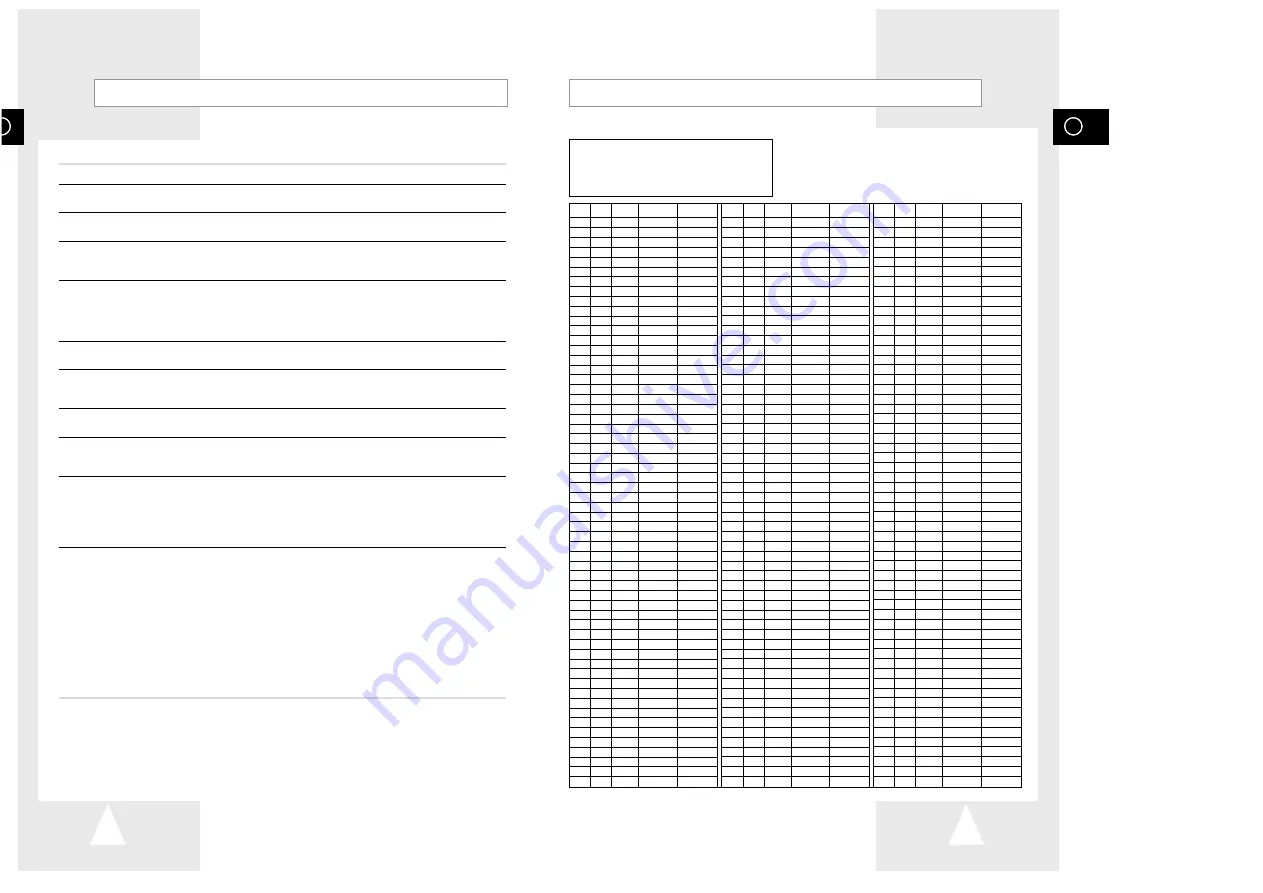
TV Frequency Table (System B/G-D/K)

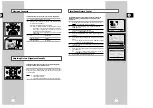
Problems and Solutions

Before contacting the Samsung after-sales service, perform the following simple checks.

Problem

Explanation/Solution

No power

Check that the power plug is connected to a wall outlet.

Have you pressed the VCR STANDBY/ON button?

You cannot insert a video cassette

A video cassette can only be inserted with the window 
side up and the safety tab facing you.

The television programme was not recorded

Check the VCR aerial connections.

Is the VCR tuner properly set?

Check if the safety tab is intact on the cassette.

Timer recording was unsuccessful

Was the VCR STANDBY/ON button pressed to activate the 
timer?

Re-check the recording start/stop time settings.

If there was a power failure or interruption during timer 
recording, the recording will have been cancelled.

No playback picture or the picture 

Check to see if you are using a prerecorded tape. 

is distorted

You cannot see normal broadcasts

Check the TUNER/EXTERNAL setting. It should be on 
TUNER.

Check the TV/VCR aerial connections.

Noise bars or streaks on playback

Press the PROG/TRK (

"

or 

) buttons to minimize this 

effect.

When the 

II 

button is pressed

A still picture may have “noise bars”, depending on the 

during playback, the still picture

condition of the tape. Press the PROG/TRK (

"

or 

has severe “noise bars” streaks

buttons during SLOW motion to minimize this effect.

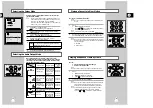
Video Head Cleaning 

If poor pictures appear on a variety of cassettes, the video 
heads may need cleaning. This is not a common problem 
and unless it appears, the heads should not be cleaned. 
When cleaning the video heads, read all instructions 
provided with the head cleaning cassette. Incorrect head 
cleaning can permanently damage the video heads.

If when tuning in your TV to the VCR test  

1. Remove the aerial input plug from the socket marked (aerial  

pattern your TV does not find the test pattern 

symbol) on the rear of the VCR. 

or the pattern when found suffers from 

2. Carry out the instructions “Tuning Your Television for the VCR”

interference, it may be due to the VCR output

(see page 12).

channel clashing with the normal TV 

3. Carry out the instructions “Setting the VCR output Channel” 

transmissions in your area. To prevent this 

(see page 15), move the channel number several channels 

you will need to change the VCR output 

down from the original setting. (example: from 36 to 33). 

channel in the following way 

4. Replace the aerial plug into the socket marked (aerial symbol) 

on the rear of the VCR. 

5. Re-tune your TV to the VCR again by following instructions 

“Tuning Your Television for the VCR” (page 12). 

6. If the problem still exists repeat steps 1 to 5 moving several 

more channels away from the original setting.

If you are unable to solve the problem after reading the above instructions, note:

The model and serial number on the rear of your VCR

The warranty information

A clear description of the problem

Then contact your nearest SAMSUNG after-sales service.

002~012 :CCIR STD VHF

244~250 :MOROCCO

013~020 :ITALY

251~255 :BELGUIM

021~069 :CCIR STD UHF
071~075 :CCIR CABLE
201~241 :CCIR STD CABLE

DISP   CH    Band         Fp             STD

DISP   CH    Band         Fp           STD

DISP   CH    Band         Fp             STD

002

E02

V-L

48.25         CCIR

003

E03

V-L

55.25         CCIR

004

E04

V-L

62.25         CCIR

005

E05

V-H    

175.25         CCIR

006

E06

V-H    

182.25         CCIR

007

E07

V-H     189.25         CCIR

008

E08

V-H     196.25         CCIR

009

E09

V-H      203.25         CCIR

010

E10

V-H     210.25         CCIR

011

E11

V-H       217.25         CCIR

012

E12

V-H       224.25         CCIR

013

A

V-L

53.75   

Italy

014

B

V-L

62.25   

Italy

015

C

V-L

82.25   

Italy

016

D

V-H     175.25   

Italy

017

E

V-H    

183.25   

Italy

018

F

V-H     192.25   

Italy

019

G

V-H

201.25   

Italy

020

H

V-H

210.25   

Italy

021

E21

UHF

471.25         CCIR

022

E22

UHF

479.25         CCIR

023

E23

UHF

487.25         CCIR

024

E24

UHF

495.25         CCIR

025

E25

UHF

503.25         CCIR

026

E26

UHF

511.25         CCIR

027

E27

UHF

519.25         CCIR

028

E28

UHF

527.25         CCIR

029

E29

UHF

535.25         CCIR

030

E30

UHF

543.25         CCIR

031

E31

UHF

551.25         CCIR

032

E32

UHF

559.25         CCIR

033

E33

UHF

567.25         CCIR

034

E34

UHF

575.25         CCIR

035

E35

UHF

583.25         CCIR

036

E36

UHF

591.25         CCIR

037

E37

UHF

599.25         CCIR

038

E38

UHF

607.25         CCIR

039

E39

UHF

615.25         CCIR

040

E40

UHF

623.25         CCIR

041

E41

UHF

631.25         CCIR

042

E42

UHF

639.25         CCIR

043

E43

UHF

647.25         CCIR

044

E44

UHF

655.25         CCIR

045

E45

UHF

663.25         CCIR

046

E46

UHF

671.25         CCIR

047

E47

UHF

679.25         CCIR

048

E48

UHF

687.25         CCIR

049

E49

UHF

695.25         CCIR

050

E50

UHF

703.25         CCIR

051

E51

UHF

711.25         CCIR

052

E52

UHF

719.25         CCIR

053

E53

UHF

727.25         CCIR

054

E54

UHF

735.25         CCIR

055

E55

UHF

743.25         CCIR

056

E56

UHF

751.25         CCIR

057

E57

UHF

759.25         CCIR

058

E58

UHF

767.25         CCIR

059

E59

UHF

775.25         CCIR

060

E60

UHF       783.25        CCIR

061

E61

UHF       791.25        CCIR

062

E62

UHF       799.25        CCIR

063

E63

UHF       807.25        CCIR

064

E64

UHF       815.25        CCIR

065

E65

UHF       823.25        CCIR

066

E66

UHF       831.25        CCIR

067

E67

UHF       839.25        CCIR

068

E68

UHF       847.25        CCIR

069

E69

UHF       855.25        CCIR

071

X

V-L         69.25 

CCIR

072

Y

V-L         76.25 

CCIR

073

Z

V-L         83.25 

CCIR

074  Z+1

V-L         90.25 

CCIR

075

Z+2

V-L         97.25 

CCIR

101

S01

V-L        105.25        CCIR

102

S02

V-L        112.25        CCIR

103

S03

V-L        119.25        CCIR

104

S04

V-L        126.25        CCIR

105

S05

V-L        133.25        CCIR

106

S06

V-L        140.25        CCIR

107

S07

V-H

147.25        CCIR

108

S08

V-H

154.25        CCIR

109

S09

V-H

161.25        CCIR

110

S10

V-H

168.25        CCIR

111

S11

V-H

231.25        CCIR

112

S12

V-H

238.25        CCIR

113

S13

V-H

245.25        CCIR

114

S14

V-H

252.25        CCIR

115

S15

V-H

259.25        CCIR

116

S16

V-H

266.25        CCIR

117

S17

V-H

273.25        CCIR

118

S18

V-H

280.25        CCIR

119

S19

V-H

287.25        CCIR

120

S20

V-H

294.25        CCIR

121

S21

V-H

303.25        CCIR

122

S22

V-H

311.25        CCIR

123

S23

V-H

319.25        CCIR

124

S24

V-H

327.25        CCIR

125

S25

V-H

335.25        CCIR

126

S26

V-H

343.25        CCIR

127

S27

V-H

351.25        CCIR

128

S28

V-H

359.25        CCIR

129

S29

V-H

367.25        CCIR

130

S30

V-H

375.25        CCIR

131

S31

V-H

383.25        CCIR

132

S32

V-H

391.25        CCIR

133

S33

V-H

399.25        CCIR

134

S34

V-H

407.25        CCIR

135

S35

V-H

415.25        CCIR

136

S36

V-H

423.25        CCIR

137

S37   UHF

431.25        CCIR

138

S38   UHF

439.25        CCIR

139

S39   UHF

447.25        CCIR

140

S40   UHF

455.25        CCIR

141

S41   UHF

463.25        CCIR

142

1A

V-L

42.25 lndoesia 

143

01

V-L

45.25 Nez

151

01

V-L

43.25 Angola 

152

02

V-L

52.25 Angola

153

03

V-L

60.25 Angola

154

04

V-H

175.25 S/Afri

155

05

V-H

183.25 S/Afri

156

06

V-H

191.25 S/Afri

157

07

V-H

199.25 S/Afri

158

08

V-H

207.25 S/Afri

159

09

V-H

215.25 S/Afri

160

10

V-H

223.25 S/Afri

161

11

V-H

231.25 S/Afri

162

13

V-H

247.45 S/Afri

201

R1

V-L

49.75 OIRT

202

R2

V-L

59.25 OIRT

203

R3

V-L

77.25 OIRT

204

R4

V-L

85.25 OIRT

205

R5

V-L

93.25 OIRT

206

R6

V-H

175.25 OIRT

207

R7

V-H

183.25 OIRT

208

R8

V-H

191.25 OIRT

209

R9

V-H

199.25 OIRT

210

R10

V-H

207.25 OIRT

211

R11

V-H

215.25 OIRT

212

R12

V-H

223.25 OIRT

244

M4

V-H

163.25 

M o r o c c o

245

M5

V-H

171.25 

M o r o c c o

246

M6

V-H

179.25 

M o r o c c o

247

M7

V-H

187.25 

M o r o c c o

248

M8

V-H

195.25 

M o r o c c o

249

M9

V-H

203.25 

M o r o c c o

250

M10

V-H

211.25 

M o r o c c o

251

U1

V-H

226.25 Belguim

252

U2

V-H

234.25 Belguim

253

U3

V-H

242.25 Belguim

254

U4

V-H

250.25 Belguim

255

U5

V-H

258.25 Belguim

Содержание SV-G600

Страница 1: ...M A2 STEREO SV G600 Instruction Manual PAL www samsungvcr com STANDBY ON PLAY STOP OK VCRSTANDBY ON TVSTANDBY ON SLOW SHUTTLE V LOCK CLR RST F ADV INDEX TV VCR INPUT REPEAT VOL PROG TRK AUDIO REC MENU SPEED DUB TV VCR TIMER DISP SELECT ...

Страница 2: ...s 4 VCR OVERVIEWS Front View of the VCR 5 Rear View of the VCR 5 Infrared Remote Control 6 Display Indicator 7 Accessories 7 CONNECTING YOUR VIDEO CASSETTE RECORDER Deciding How to Connect Your VCR 8 Connecting Your VCR to the TV using the Coaxial Cable 9 Connecting Your VCR to the TV using the RCA Cable 9 Connecting Other Equipment to Your VCR 10 Plug Auto Set Up 11 Tuning your Television for the...

Страница 3: ...ondi tions below 5 C and above 40 C or to extreme humidity conditions less than 10 and more than 75 Do NOT expose the VCR to direct sunlight Do NOT expose the VCR to any liquids Do NOT place any objects on the VCR or remote control During a storm and or light ning unplug the VCR from the mains socket and aerial If the remote control is not used for a long period of time remove the batteries and st...

Страница 4: ...PEED DUB TV VCR TIMER DISP SELECT VCR STANDBY ON BUTTON SLOW BUTTON SHUTTLE BUTTON V LOCK BUTTON CLEAR AND RESET BUTTON TV BUTTON VCR BUTTON VOLUME BUTTONS AUDIO MODE SELECTION BUTTON STOP BUTTON REWIND REVERSE PICTURE SEARCH BUTTON RECORD BUTTON MENU SELECTION BUTTON MENU SELECTION DOWN BUTTON RECORDING SPEED SELECTION BUTTON TV STANDBY ON BUTTON INDEX BUTTON FRAME ADVANCE BUTTON TUNER LINE IN 1 ...

Страница 5: ...he television and the VCR are switched off before connecting the cables 1 Connect the coaxial cable as indicated in the above section 2 Connect one end of the RCA Audio Video cable to the Video output and Audio L R output socket on the rear of the VCR 3 Plug the other end into the appropriate connector on the television Aerial TV LINE IN 1 VIDEO AUDIO LINE OUT R L RF coaxial cable TV 2 TV LINE IN ...

Страница 6: ...to start the auto scanning The number of stations automatically stored by the VCR depends on the number of stations that it has found 6 On completion press MENU twice to exit the menu TV TV LINE IN 1 VIDEO AUDIO LINE OUT R L 2 Connecting Other Equipment to Your VCR You can connect other audio and or video equipment to your VCR in different ways The following illustrations give a few examples of th...

Страница 7: ... reserved for use with your VCR 4 Insert the video cassette in the VCR Check that the VCR starts reading the cassette if not press II button 5 Start a scan on your television or set the television to UHF channel 36 6 Fine tune the television until the pictures and sound are obtained clearly 7 If you cannot find the pictures and sound or there is interference from nearby channels it may be necessar...

Страница 8: ...US LANG CLOCK CLOCK MON 12 00 1 JAN 2001 END MENU 1 OK END MENU Your VCR contains a 24 hour clock and calendar used to Automatically stop programme recording Preset your VCR to record a programme automatically You must set the date and time when You purchase the video cassette recorder The power supply remains off for more than 1 hour Do not forget to reset the time when you change clocks from win...

Страница 9: ...ress OK to store the language selected 6 Press MENU to exit the menu Result From now on all the on screen information will be displayed in the language selected USER SET PROG OPTIONS INSTALL CLOCK BONUS LANG OPTIONS OK END MENU Your VCR displays most information both on the VCR and the television You can choose to display or hide this information on the television screen except for the Index Progr...

Страница 10: ...n stored 11 On completion press the MENU button three times to exit the menu INSTALL AUTO SET UP MANUAL SET UP TV SYSTEM G VCR OUTPUT CH CH36 END MENU TV STATION TABLE PR CH 1 002 2 3 4 5 SWAPPING OK DELETE CLR RST MENU MANUAL TUNING PR 1 CH MFT MEMORY OK END MENU Presetting the Stations Automatically You do not need to preset the stations if you have already set them automatically see Plug Auto S...

Страница 11: ... menu INSTALLATION PROG OPTIONS INSTALL CLOCK BONUS LANG INSTALL OK END MENU INSTALL AUTO SET UP MANUAL SET UP TV SYSTEM G VCR OUTPUT CH CH36 END MENU TV STATION TABLE PR CH 1 002 2 3 4 5 SWAPPING OK MENU TV STATION TABLE PR CH 1 2 3 002 4 5 SWAPPING OK MENU If you have stored a TV station That you do not require At the wrong programme position you can cancel it 1 Press the MENU button on the remo...

Страница 12: ...F IPC ON END MENU Selecting the Cassette Type If you wish to use the tape counter to display the time remaining on a cassette you must indicate the type of cassette inserted 1 Press MENU on the remote control Result The programming menu is displayed 2 Press the corresponding or buttons to select the USER SET option 3 Press the OK button to select this option 4 Press the corresponding or buttons un...

Страница 13: ...EED DUB TV VCR TIMER 5 6 Recording a Programme Immediately Protecting a Recorded Cassette Video cassettes have a safety tab to prevent accidental erasure When this tab has been removed you cannot record on the tape 1 If you wish to protect a cassette break off the tab using a small screwdriver 2 To re record over a protected cassette safety tab broken cover the hole with adhesive tape 1 VOL PROG T...

Страница 14: ...3 Press the or buttons to switch between the AUTO SP Standard Play or LP Long Play 14 When you have finished press the MENU button 15 Press the VCR STANDBY ON button to activate the timer Result Before starting recording the VCR compares the timer duration with the remaining time on the cassette Auto Tape Speed Select The VCR s Auto Tape Speed Select function compares the duration of the timer rec...

Страница 15: ...SYSTEM AUTO NICAM ON ECO MODE OFF IPC ON END MENU This function allows you to play back any pre recorded cassette 1 Switch on both the television and your VCR 2 Insert the video cassette to be played If the safety tab on the cassette is intact press ll Otherwise the cassette is played automatically When a cassette is loaded the tape position is optimized automatically to reduce disturbance Digital...

Страница 16: ...REPEAT VOL PROG TRK AUDIO REC MENU DISP L R MIX MONO L R Heard in stereo left channel and right channel Left channel heard from both the left and right speakers Right channel heard from both the left and right speakers Heard in monaural Channel I MAIN heard from the left speaker channel II SUB heard from the right speaker Channel I MAIN heard from both the left and the right speakers Channel II SU...

Страница 17: ...n the or button the VCR will search at 9 times the normal speed Releasing the button will return the VCR to search at 5 times the normal speed To return to normal playback mode press the II button 4 Whilst in Picture Search mode if you press the button again the VCR will enter normal Fast Forward mode 5 Likewise whilst in Picture Search mode if you press the button again the VCR will enter normal ...

Страница 18: ...le into the appropriate output connectors on the other system VCR camcorder or Hi Fi sound system Using the Tape Counter V LOCK CLR RST F ADV INDEX TV VCR INPUT REPEAT SELECT TV VCR INPUT REPEAT VOL PROG TRK AUDIO DISP SELECT 0 00 00 2 2 The tape counter Indicates the elapsed time in the play and record modes hours minutes and seconds Is reset when a cassette is inserted in the VCR Allows you to f...

Страница 19: ...AUDIO DISP 1 2 2 6 6 7 3 5 5 4 GB 34 F ADV This function allows you to start a new recording at a specific position on the cassette while maintaining a very smooth scene change 1 Insert the cassette to be edited in your VCR 2 Press the ll button to start playback 3 When you reach the position from which you wish to start the new recording press the ll button 4 Press the F ADV button again as often...

Страница 20: ...1 Press MENU on the remote control Result The programming menu is displayed 2 Press the corresponding or buttons to select the EASY OPERATION option 3 Press the OK button to select this option Result The EASY OPERATION menu is displayed 4 Press the corresponding or buttons until the AUTO POWER OFF option is selected 5 Press the button until you select the time of Auto Power off interval OFF 2HOUR ...

Страница 21: ...9 E09 V H 203 25 CCIR 010 E10 V H 210 25 CCIR 011 E11 V H 217 25 CCIR 012 E12 V H 224 25 CCIR 013 A V L 53 75 Italy 014 B V L 62 25 Italy 015 C V L 82 25 Italy 016 D V H 175 25 Italy 017 E V H 183 25 Italy 018 F V H 192 25 Italy 019 G V H 201 25 Italy 020 H V H 210 25 Italy 021 E21 UHF 471 25 CCIR 022 E22 UHF 479 25 CCIR 023 E23 UHF 487 25 CCIR 024 E24 UHF 495 25 CCIR 025 E25 UHF 503 25 CCIR 026 E...

Страница 22: ...THIS APPLIANCE IS DISTRIBUTED BY www samsungvcr com AC68 01331A ELECTRONICS ...

Отзывы: