


Selecting Picture Mode
Custom Settings of the Picture
You can adjust
Contrast
,
Brightness
,
Sharpness
,
Color
and
Tint
of the picture as desired.
Picture Adjustment
Selecting Picture Mode
Picture Adjustment
Custom Settings of the Picture
34
35
NOTE
You cannot adjust tint
when the input of
COMPONENT1
and
COMPONENT2
are set
at 480p, 720p and
1080i.
Contrast
Used to adjust the contrast between the object
and the background.
Brightness
Used to adjust brightness of the entire picture.
Sharpness
Used to adjust the outlines of the object
sharper or less sharp.
Color
Used to adjust color lighter or deeper.
Tint
Used to obtain more natural color of objects
using Green or Red enhancement.
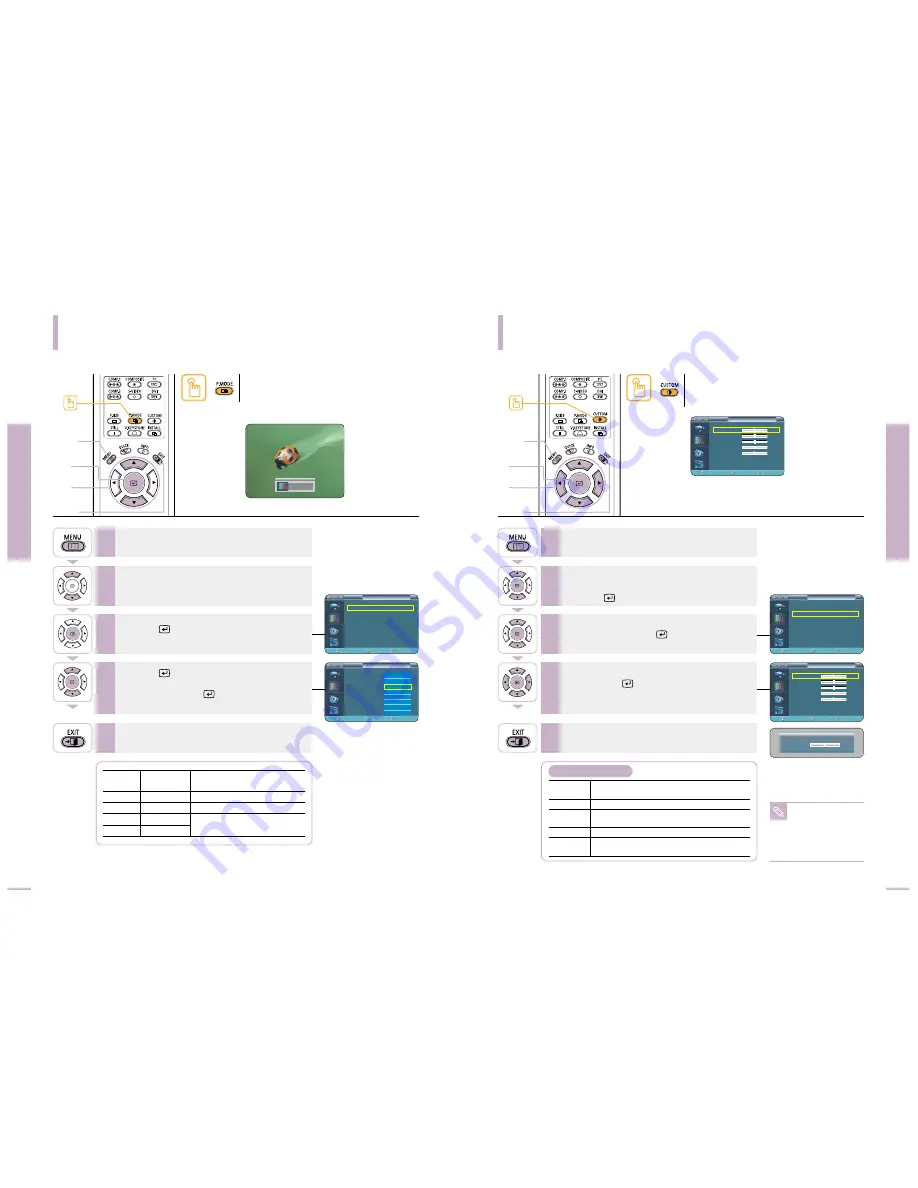
Custom Picture Menu
Press the
P.MODE
button.
Each press of the button, picture mode is switched to
Dynamic, Standard, Movie1, Movie2, User1, User2,
User3 and Custom.
Press the
CUSTOM
button.
The Custom Picture menu is displayed.
Refer to number 4 below to make adjustments.
One Touch
1
MENU
3, 4
Select
2, 4
…
/
†
5
EXIT
One Touch
1
MENU
2, 3, 4
Select
2, 3, 4
…
/
†
/
œ
/
√
5
EXIT
Press the
MENU
button.
The main menu is displayed.
1
Press the
▲
or
▼
button to move to
Picture
.
The Picture menu is displayed.
2
Press the
button.
The Picture Mode is selected.
3
Press the
button again.
Press the
▲
or
▼
button to move to desired
mode, then press the
button.
Setup is switched to the selected mode.
4
Press the
EXIT
button to exit the menu.
5
Picture
Color
Gamma
Modes
Temperature
Dynamic
9300K
Gamma Mode3: Graphic Mode
Standard
8000K
Gamma Mode2: Video Mode
Movie1
6500K
Gamma Mode1: Film Mode
Movie2
5500K
Press the
MENU
button.
The main menu is displayed.
1
Press the
▲
or
▼
button to move to
Picture
.
The Picture menu is displayed.
Press the
button.
2
Press the
▲
or
▼
button to move to
Custom
Picture
, then press the
button.
The Custom Picture menu is displayed.
3
Press the
▲
or
▼
button to move to desired item,
then press the
button.
Press the
œ
or
√
button to adjust the selected
item.
4
Press the
EXIT
button to exit the menu.
5
…
Contrast
†
Picture
Picture Mode
: Movie 1
√
Custom Picture
√
Picture Size
: Full
√
DNIe
: Off
√
Film Mode
: On
√
Overscan
: On
√
Move
Enter
Return
Picture
Picture Mode
: Movie 1
√
Custom Picture
√
Picture Size
: Full
√
DNIe
: Off
√
Film Mode
: On
√
Overscan
: On
√
Move
Enter
Return
Dynamic
Standard
Movie1
Movie2
User1
User2
User3
Custom
Picture
Picture Mode
: Movie 1
√
Custom Picture
√
Picture Size
: Full
√
DNIe
: Off
√
Film Mode
: On
√
Overscan
: On
√
Move
Enter
Return
Custom Picture
Contrast
50
Brightness
50
Sharpness
50
Color
50
Tint
G
50
R
50
†
More
Move
Enter
Return
50
Custom Picture
Contrast
50
Brightness
50
Sharpness
50
Color
50
Tint
G
50
R
50
†
More
Move
Enter
Return
Standard


