background image

2_ 

English


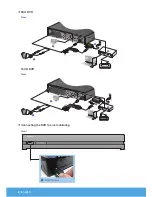
8ch DVR

Rear

16ch DVR

Rear


connecting the DVR to Live monitoring


Front

IN1

IN3

IN4

AUDIO IN

AUDIO OUT

VGA 

LAN

IN2

HDMI

eSATA

VIDEO IN

LAN

USB

RS485

DC12V

3

2

4

5

IN1

IN3

IN4

AUDIO IN

AUDIO OUT

VGA 

LAN

RS485

IN2

HDMI

DC 12 V

USB

eSATA

VIDEO IN

3

4

2

5

POWER     REC     NETWORK

Connect a mouse

Содержание SDS-P3042

Страница 1: ...have any questions or need help installing your new product please contact our free technical support Telephone 1 877 349 3149 9am 9pm EST Monday Friday Internet http www samsungsv com inStaLLinG YOuR...

Страница 2: ...the DVR to Live monitoring Front IN1 IN3 IN4 AUDIO IN AUDIO OUT VGA LAN IN2 HDMI eSATA VIDEO IN LAN USB RS485 DC12V 3 2 4 5 IN1 IN3 IN4 AUDIO IN AUDIO OUT VGA LAN RS485 IN2 HDMI DC 12 V USB eSATA VIDE...

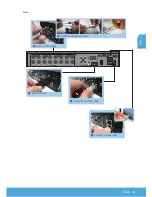
Страница 3: ...HDMI DC 12 V USB eSATA AUDIO OUT CH16 VGA LAN RS485 IN1 CH1 CH2 CH3 CH4 CH5 CH6 CH7 CH8 IN2 IN3 IN4 AUDIO IN VIDEO IN HDMI DC 12 V USB eSATA AUDIO OUT VGA LAN RS485 IN1 CH1 CH2 CH3 CH4 IN2 IN3 IN4 AU...

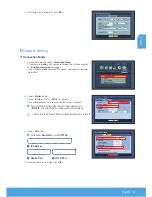
Страница 4: ...ck on the mouse and select main menu 2 In the login window enter the password and click OK J J The initial administrator ID is admin and the password should be set when logging in for the first time S...

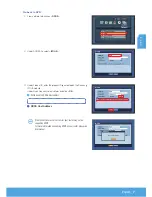
Страница 5: ...center for more information 2 Under Interface Tab Check IP Type is set to DHCP as default If it connected successfully you can see the success comment J J If you know Static IP information from your...

Страница 6: ...nt J J Write down your User ID and Password below 1 ID 2 Password 5 Add your DVR to your account Click PRODUCT REGISTRATION 6 Create a name Product ID for your DVR Use 4 to 20 alphanumeric characters...

Страница 7: ...enter the product ID you created on the Samsung iPOLiS website Under Quick Connect select Use and click OK J J Write down the DDNS Host address 1 DDNS Host Address If the connection was not successful...

Страница 8: ...and password you wrote down earlier 3 Click 4 You will be asked to install the active X plug in 5 Enter the user ID and password for the DVR J J If the screen to the bottom right does not appear chec...

Страница 9: ...ter the last port number of Device Port you wrote down earlier ID Default ID is admin If you change before please enter changed ID Password If you changed before please enter changed Password Camera S...

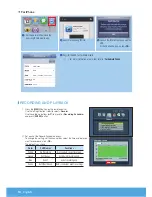
Страница 10: ...d Phone RECORDING AND PLAYBACK 1 Press the MENU button on the remote control Use the left right button to select Record Use the up down buttons to move to Recording Schedule and press ENTER button 2 S...

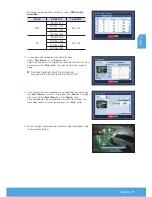
Страница 11: ...Time bar and press the Play button if you want to watch the recorded video J J The colored line indicates types of the recording data If you want to play a time specific data enter an exact time 4 If...

Отзывы: