


You can take photos as well as record video files.
1. Slide [Mode Selector] down to turn on the CAM and slide it down again.
◆
The <Mode Selection> screen appears.
2. Slide the [
▲
/
▼
] switch to select
Photo
mode and press the [OK] button.
◆
The CAM is ready for taking pictures.
◆
[
] indicator is displayed on LCD.
3. Press [Record/Stop] button to take pictures.
6
Capturing Images
Viewing Photo files on the LCD Monitor
Note
✤
If the battery is low and the battery charge icon blinks, the light will not operate
and the light icon(
) will not appear in the LCD screen.
You can transfer music files from your PC to the internal memory, Memory Stick or Memory Stick Pro.
For copying music files, the CAM must be connected to your PC with the USB cable.
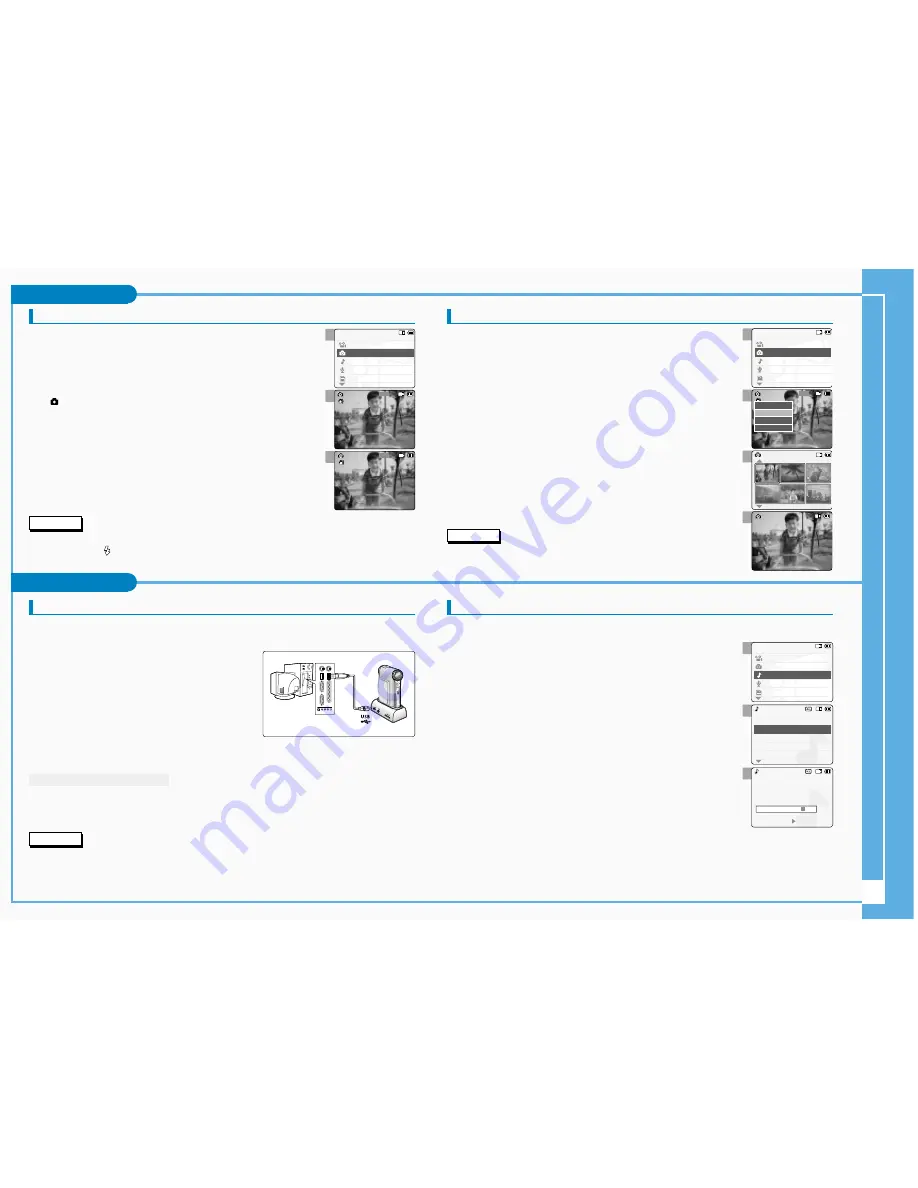
1. Connect the CAM to a PC with the USB cable.
◆
Your computer recognizes the CAM and the symbol for
removable drive will appear in ‘My Computer’.
2. Double-click the new removable drive to open.
3. Select the MP3 folder and double-click to enter.
4. Drag and drop the MP3 file from your PC into the MP3 folder
under MSAMSUNG.
Copying Music files to the CAM
Playing Music files
Disconnecting USB Connection
Notes
After completing the data transfer, you must disconnect the cable in the following way.
1. Select the removable disk icon and click the right mouse button to select ‘Safely Remove Hardware’.
2. Select ‘Stop’ and disconnect the USB cable when the pop-up screen disappears.
The LCD monitor allows you to view your photo right after taking them.
1. Slide [Mode Selector] down to turn on the CAM and slide it down again.
◆
The <Mode Selection> screen appears.
2. Slide the [
▲
/
▼
] switch to select
Photo
mode and press the [OK] button.
◆
The Photo Capture screen appears.
3. Press the [Menu] button and slide the [
▲
/
▼
] switch.
Press the [OK] button after selecting <View>.
4. Slide the [
▲
/
▼
] switch to find the photo you want to view.
◆
Each time you slide the [
▲
/
▼
] switch, the frame moves horizontally.
◆
Each time you press the [+]/[-] button, a page(6 frames) moves.
5. Press [OK] button to view the photo you want.
◆
The full screen displays.
Photo Mode
MP3 Mode
Note
✤
Display time may vary depending on the picture size.
You can hear the music copied from your PC directly or with the Memory Stick.
1. Connect the earphones to the CAM.
◆
You can also hear the music from the Built-in speaker without the earphones.
2. Slide [Mode Selector] down to turn on the CAM and slide it down again.
◆
The <Mode Selection> screen appears.
3. Slide the [
▲
/
▼
] switch to select
MP3
mode and press the [OK] button.
4. Slide the [
▲
/
▼
] switch to find the music you want to hear and press the [OK]
button.
◆
The selected music is played.
5. Press the [OK] button again to stop hearing music.
◆
Each time you press the [OK] button, play or pause is selected alternately.
✤
Transferring and playing with the Memory Stick operates in the same way as the internal memory.
✤
When connecting the CAM to your PC, if the message ‘USB-D07 Capture Device hasn’t passed Windows
Logo testing’ appears, do not be concerned, it is OK to proceed with file transfer.
1
2
3
Mode Selection
MP3
Voice Recorder
File Browser
Video
Photo
Capturing...
800
Photo Capture
800
Photo Capture
2
3
4
5
Mode Selection
Mode Selection
MP3
Voice Recorder
File Browser
Video
Photo
Capturing...
800
Photo Capture
View
Capture
Settings
Back
Photo View 100-0022
Capturing...
Photo V
Photo View 100-0022
iew 100-0022
3
4
5
Mode Selection
Voice Recorder
File Browser
Video
Photo
MP3
3 black or white.mp3
5 What a wonderful world.mp3
MP3 Play
4 Let it be.mp3
1 hey jude.mp3
2 I believe I can fly.mp3
MP3 Play
2. I belive i can fly.mp3
4.4 Kbytes
Stereo 44.1KHz 128Kbps
03:19 / 04:32


