background image

22

_ English

USING THE DISPLAY (

)/

i

CHECK BUTTON

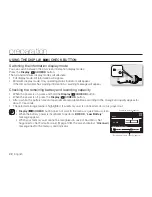
Switching the information display mode

You can switch between the on-screen information display modes:

Press the 

Display 

(

)

/

i

CHECK

 button.

The full and minimum display modes will alternate.

•  Full display mode: All information will appear.

•  Minimum display mode: Only operating status indicators will appear.

If the HD camcorder has warning information, a warning message will appear.

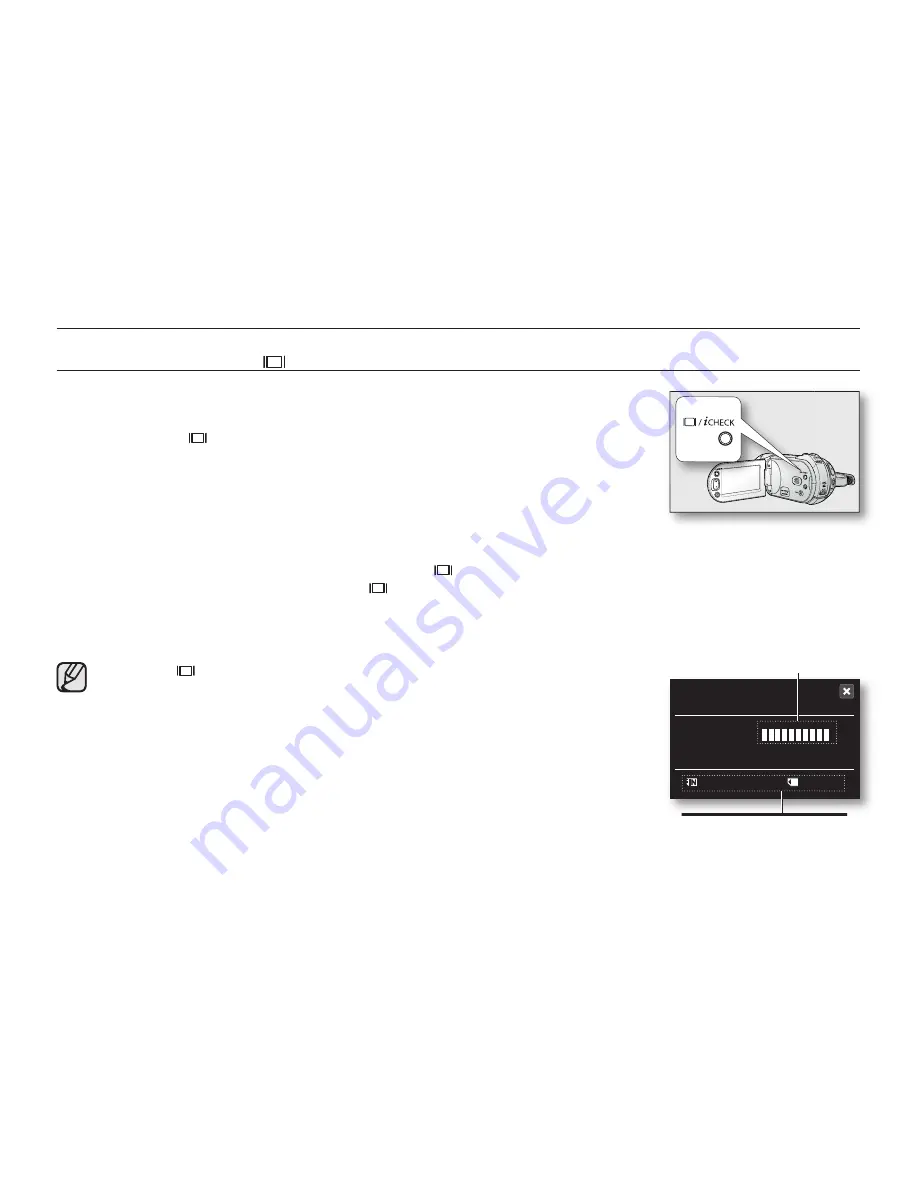
Checking the remaining battery and recording capacity

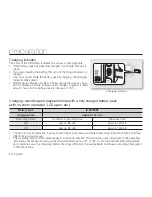
•  When the power is on, press and hold the 

Display 

(

)

/

i

CHECK

 button.

•  When the power is off, press the 

Display 

(

)

/

i

CHECK

 button.

•  After a while, the battery time and approximate recordable time according to the storage and quality appear for 

about 10 seconds. 

•  The selected storage media is highlighted. If a memory card is not inserted, its icon is grayed out.

• 

Display (

)/

i

CHECK

 button does not work in the menu or quick menu screen.

•  When the battery power is insufficient to perform 

i

CHECK

, “

Low Battery

” 

message appears.

•  When your memory card cannot be recognized in case of Card Error, Not 

Supported or Not Formatted card (

page 108), the screen displays “

Unknown

” 

message next to the memory card indicator.

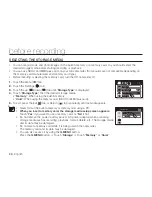
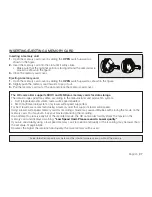
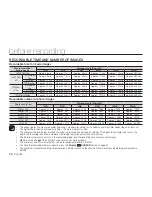
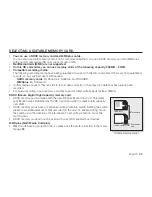
preparation

Remaining battery (approx.)

Recordable memory capacity (approx.)

Battery

Memory (Super Fine)

0%

80 Min

50%

100%

070 Min

070 Min

Содержание SC-HMX20C

Страница 1: ...ion Digital Camcorder user manual SC HMX20C imagine the possibilities Thank you for purchasing this Samsung product To receive more complete service please register your product at www samsung com glo...

Страница 2: ...mage quality This HD camcorder offers 1080i resolution with a sharper image than previous SD camcorders 480i It also supports widescreen recording with an aspect ratio of 16 9 Recordings made in Full...

Страница 3: ...n HDMI jack you can enjoy a clearer and sharper image when compared to a standard definition TV This HD camcorder supports Anynet Anynet is an AV network system that enables you to control all connect...

Страница 4: ...e The Risk Of Fire Or Electric Shock Do Not Expose This Apparatus To Rain Or Moisture Caution Apparatus shall not be exposed to dripping or splashing and no objects filled with liquids such as vases s...

Страница 5: ...table specified by the manufacturer or sold with the apparatus When a cart is used use caution when moving the cart apparatus combination to avoid injury from tip over 13 Unplug this apparatus during...

Страница 6: ...rom the unit 20 OUTDOOR ANTENNA GROUNDING CAMCORDER be sure the antenna or cable system is grounded to provide some protection against voltage surges and built up static charges Section 810 of the Nat...

Страница 7: ...MCORDER from the wall outlet and refer servicing to qualified service personnel under the following conditions a When the power supply cord or plug is damaged b If any liquid has been spilled onto or...

Страница 8: ...s B digital device pursuant to part 15 of the FCC Rules These limits are designed to provide reasonable protection against harmful interference in a residential installation This equipment generates u...

Страница 9: ...igh HD VIDEO and Standard resolution SD VIDEO Please note that this HD camcorder is not compatible with other digital video formats Before recording important video make a trial recording Play back yo...

Страница 10: ...permission beforehand ABOUT THIS USER MANUAL The screenshots are from Windows XP The screens may vary depending on the operating system of the computer The displays in this user manual may not be exac...

Страница 11: ...when the camcorder is at low temperature as in cold areas or immediately after power is turned on Normal brightness will be restored when the temperature inside the camcorder rises This has no effect...

Страница 12: ...used near strong radio waves or magnetic field such as near a radio transmitter or electric appliances noise could enter video and audio that are being recorded During playback of normally recorded v...

Страница 13: ...he remote control 11 Installing the button type battery 11 Using the cradle 12 Holding the HD camcorder 13 Charging the battery pack 17 Basic HD camcorder operation 18 Screen indicators 22 Using the d...

Страница 14: ...images in movie record mode dual recording 36 Capturing still images during movie images playback 37 Using the external microphone 37 Zooming 38 Self record using the remote control 39 Using the buil...

Страница 15: ...u items 54 Quick menu items 55 Recording menu items 69 Playback menu items 72 Setting menu items 80 Deleting a section of a movie image 81 Dividing a movie image 84 Combining two movie images 85 Playl...

Страница 16: ...irements 95 Installing the Cyberlink DVD Suite 97 Connecting the USB cable 98 Viewing the contents of storage media 100 Transferring files from the HD camcorder to your PC 101 Playing back the video f...

Страница 17: ...ry pack page 13 Setting the date time and the OSD language pages 24 25 Setting the storage media built in memory or memory card page 26 Recording Recording movie or photo images pages 31 33 Playing ba...

Страница 18: ...camcorder You have to connect the AC power adaptor to the cradle when connecting external devices using the cradle Your HD camcorder includes user manual CD and quick start guide printed For more deta...

Страница 19: ...tton EASY Q button Jack cover COMPONENT AV S Video jack USB jack TFT LCD screen touch panel Recording start stop button Zoom W T button Remote control sensor Q MENU button CAUTION When using the remot...

Страница 20: ...08_ English RIGHT TOP VIEW PHOTO button Zoom W T lever Swivel handle Built in flash Grip belt hook Grip belt getting to know your HD camcorder...

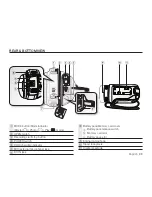
Страница 21: ...mode OPEN switch Recording start stop button POWER switch CHG charging indicator MIC external microphone jack DC IN jack Battery pack Memory card cover Battery pack release switch Memory card slot Ba...

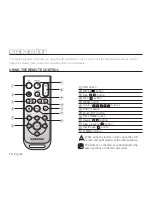
Страница 22: ...ton CAUTION When using the remote control open the LCD screen and point directly at the remote sensor The buttons on the remote control function the same as those on the HD camcorder preparation This...

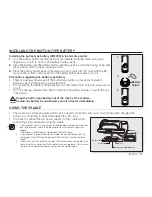
Страница 23: ...isk of explosion WARNING Keep the button type battery out of the reach of the children Should any battery be swallowed consult a doctor immediately USING THE CRADLE The cradle is a connection plate wh...

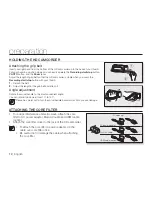
Страница 24: ...ength of the grip belt and attach it Angle adjustment Rotate the swivel handle to the most convenient angle You can rotate it downward from 10 to 150 Please be careful not to turn the swivel handle ba...

Страница 25: ...the POWER switch downward to turn off the power 2 Open the DC IN jack cover and connect the AC power adaptor to the DC IN jack 3 Connect the AC power adaptor to a wall socket 4 Once charged disconnect...

Страница 26: ...ck times with a fully charged battery pack with no zoom operation LCD open etc Battery type IA BP85ST Charging time approx 100 min Recording format Continuous recording time Playback time HD approx 85...

Страница 27: ...Open the battery pack cover by sliding the OPEN switch upward as shown in the figure 2 Slide the Battery pack release switch and pull out the battery pack Gently slide the Battery pack release switch...

Страница 28: ...ck damages the internal cells The battery pack may be prone to leakage when fully discharged Charge the battery pack at least once per 6 months to prevent complete discharge of the battery pack About...

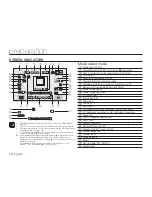
Страница 29: ...he date and time the date and time setting screen appears every time you turn on your camcorder Setting the operating modes You can switch the operating mode in the following order each time you press...

Страница 30: ...lable recording time is 1 066 minutes 999 will be displayed on the screen Movie record mode Movie record mode Operating mode STBY standby or recording Time counter movie recording time Self timer Face...

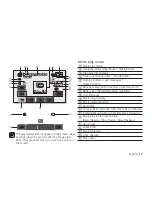
Страница 31: ...e quality Movie image resolution Date Time TV type when component or Multi AV cable is connected Component out when component cable is connected Movie play related function tab Skip Search Play Pause...

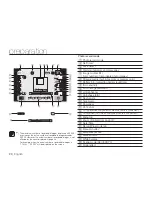
Страница 32: ...cted Component out when component cable is connected Menu tab Zoom Digital zoom position Date Time Record Play mode tab Manual shutter Manual exposure Manual focus White balance Scene mode AE EASY Q D...

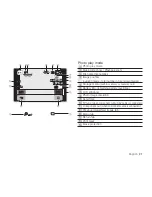
Страница 33: ...rage media built in memory or memory card Battery info remaining battery level time LCD enhancer Photo image resolution Date Time TV type when component or Multi AV cable is connected Component out wh...

Страница 34: ...ress the Display iCHECK button After a while the battery time and approximate recordable time according to the storage and quality appear for about 10 seconds The selected storage media is highlighted...

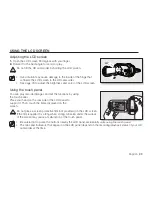
Страница 35: ...your hand on the rear side of the LCD panel to support it Then touch the items displayed on the screen WARNING Do not place a screen protective film not provided on the LCD screen If the film is appl...

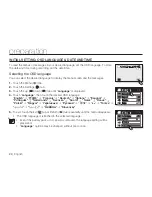
Страница 36: ...ouch Language then touch the desired OSD language English Fran ais Deutsch Italiano Espa ol Portugu s Nederlands Svenska Suomi Norsk Dansk Polski Magyar T rk e e tina Slovensky 5 To exit touch the Exi...

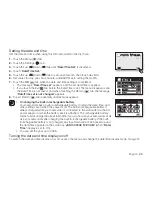
Страница 37: ...ble battery Your camcorder has a built in rechargeable battery to retain the date time and other settings even when the power is off The built in rechargeable battery is always charged while your camc...

Страница 38: ...built in memory Card When using the memory card SDHC or MMCplus card 5 To exit press the Exit tab or Return tab repeatedly until menu disappears Never format the built in memory or memory card using a...

Страница 39: ...e manufacturer and production system SLC single level cell system faster write speed enabled MLC multi level cell system only lower write speed supported For best results we recommend using a memory c...

Страница 40: ...x 11952 2880x2160 Approx 478 Approx 957 Approx 1914 Approx 3829 Approx 7658 Approx 15316 2304x1728 Approx 494 Approx 988 Approx 1976 Approx 3953 Approx 7906 Approx 15812 2048x1536 Approx 928 Approx 18...

Страница 41: ...ey may lose data that has already been recorded For movie recording use a memory card that supports faster write speeds at least 4MB s SDHC Secure Digital High Capacity memory card SDHC memory card co...

Страница 42: ...another device format it on your HD camcorder Note that formatting erases all information on the memory card A memory card has a certain life span If you cannot record new data you have to purchase a...

Страница 43: ...Set the appropriate storage media page 26 If you want to record on a memory card insert the memory card 2 Check the subject on the LCD screen 3 Press the Recording start stop button The recording indi...

Страница 44: ...media If the power cable battery is disconnected or recording is disabled during recording the system is switched to the data recovery mode While data is being recovered no other function is enabled A...

Страница 45: ...ars the photo image has been recorded While saving the photo image on the storage media you cannot proceed with the next recording The number of photo images that can be stored depends on the image qu...

Страница 46: ...el EASY Q mode Press the EASY Q button again The EASY Q and Anti shake indicators disappear from the screen Almost all the settings will return to the settings that were set prior to activating the EA...

Страница 47: ...sound Movie images are continuously recorded even while photo images are taken To stop recording press the Recording start stop button again You can also capture photos in STBY mode 1 Press the PHOTO...

Страница 48: ...TO button fully down The still image is recorded on the storage media Resolution of the captured photos differs according to the resolution of the recorded movie images Movie images recorded in HD res...

Страница 49: ...ut Slide the Zoom lever towards W wide angle Or press the W zoom button on the LCD panel The further you slide the Zoom lever the quicker the zoom action Zoom magnification over 10x is done through di...

Страница 50: ...self timer function before recording press the SELF TIMER REC or PHOTO button again CAUTION When using the remote control open the LCD screen and point directly at the remote sensor Do not obstruct t...

Страница 51: ...d is set to slow and the flash fires at the adjusted shutter speed Use to capture both the subject and background at night or in dim light Use of a tripod not supplied is recommended to prevent a blur...

Страница 52: ...ecorded movie and photo images are displayed in thumbnail index view According to the resolution movie images are stored in HD and SD thumbnail index view respectively When switching to the play mode...

Страница 53: ...The play related tabs disappear on the screen a few seconds after the image plays back They reappear when you touch any part of the screen Depending on the amount of data to be played back it may tak...

Страница 54: ...the selected movie if you touch the Forward skip tab it moves to the next movie If you touch Reverse skip it moves to the beginning of the movie If you touch Reverse skip within 3 seconds from the sta...

Страница 55: ...nail index view touch the Return tab The play related tabs disappear on the screen a few seconds after play starts They reappear when you touch any point on the screen Loading time may vary depending...

Страница 56: ...you can only play SONG0001 M4A file Volume control is not available during music slide show Zooming during playback You can magnify the playback photo image from the original size Magnification can be...

Страница 57: ...77 About HDMI High Definition Multimedia Interface HDMI carries both video and audio signals over one cable and supplies high quality images and sound The HDMI jack on your HD camcorder is for output...

Страница 58: ...cables at the same time the video output priorities are as follows HDMI output Component output S Video output Video output When connecting your HD camcorder to TV through HDMI component or multi AV c...

Страница 59: ...e on the HD camcorder appears on the TV screen You can also monitor the image on the LCD screen of the HD camcorder You can also perform play recording or editing in play mode while viewing on a TV sc...

Страница 60: ...a VCR or DVD HDD recorder Refer to editing movie images to create a playlist by selecting desired scenes from those recorded on this HD camcorder page 86 Use the provided multi AV cable to connect the...

Страница 61: ...page Return tab Use it to move to the previous menu or exit from the menu Exit tab Use it to exit from the menu Q MENU button Use it to enter the quick menu Quick menu provides easier access to frequ...

Страница 62: ...ab until the menu disappears When using the Q MENU button 1 Press the Q MENU button to enter the quick menu 2 Touch WB 3 Touch the desired option 4 To exit touch the Exit tab or Return tab until the m...

Страница 63: ...e Balance Auto 56 Exposure Auto 57 Super C Nite X Off 58 Anti Shake EIS Off 58 Digital Effect Off 59 Focus Auto 59 Shutter Auto 61 Tele Macro Off 62 Resolution Movie HD 1080 60i Photo 2304x1728 63 Qua...

Страница 64: ...ete X 80 Divide X 81 Combine X 84 Cont Capture X 1Cut 70 File Info 71 Music Slide Show X 43 Slide Show Interval X 1Sec 71 Resize X 71 Print Mark DPOF memory card only X 91 Setting menu items Operating...

Страница 65: ...uto 77 TV Display On 78 Default Set 78 Language 78 Demo On 79 Anynet HDMI CEC Off 79 Some items will not appear depending on the storage media type There are some functions you cannot activate simulta...

Страница 66: ...menu items Operating mode Movie Photo Default value Page Storage Memory 26 Highlight X 70 Delete 89 Edit X 80 84 Playlist X 86 87 File Info 71 Slide Show X 43 Resize X 71 Print Mark memory card only...

Страница 67: ...ocus manually Sports Reduces blurring when recording rapidly moving subjects such as in golf or tennis If the Sports mode is used under a fluorescent light the image may flicker In this case use the A...

Страница 68: ...Balance indicator is displayed 2 Frame a white object such as a piece of white paper so that it fills the screen Use an object that is not transparent If the object that fills the screen is not focus...

Страница 69: ...e exposure the default setting appears as the value is automatically adjusted according to the environmental light conditions Touch the decrease or increase tab to adjust the exposure while viewing th...

Страница 70: ...gs Contents On screen display Off Disables the function None On Compensates for unstable images caused by camcorder shake particularly at high magnification EASY Q mode automatically sets the Anti Sha...

Страница 71: ...lps adjust for facial imperfections Cinema Tone This mode mimicks the color used in commercial movies This function will be set to Off in the EASY Q mode Focus The HD camcorder usually focuses on a su...

Страница 72: ...icture containing several objects some close to the HD camcorder others further away A person enveloped in fog or surrounded by snow Very shiny or glossy surfaces like a car People or objects moving c...

Страница 73: ...ast moving subject to be captured one frame at a time vividly Use these settings when an automatic adjustment does not work well with Sports mode in Scene Mode AE page 55 Recommended shutter speed whe...

Страница 74: ...ve focal distance in the Tele macro mode is between 50 cm 19 7 inches and 100 cm 39 4 inches Settings Contents On screen display Off Disables the function None On Tele macro is executed When recording...

Страница 75: ...sts the bit rate according to the recording image High resolution images occupy more memory space than low resolution images If the higher resolution is selected there is less space to record movie im...

Страница 76: ...hone If Wind Cut On is set the low frequency components in the sound picked up by the microphone will be cut off during recording This makes it easier to hear voice and sound during playback Use the W...

Страница 77: ...On screen display Off Disables the function None On Backlight compensation is executed Backlight compensation brightens the subject quickly Back lighting influences recording when the subject is darke...

Страница 78: ...ed out This function will work only in Movie record mode and only works once Face Detect This function automatically adjusts face focus and exposure even in backlight or dark settings for clearer reco...

Страница 79: ...uideline makes a balanced composition Guidelines are not recorded on the images Digital Zoom You can select the maximum zoom level in case you want to zoom to a level greater than 10X the default sett...

Страница 80: ...de Cont Shot Continuous shot allows the user to take consecutive images of a moving object Records images continuously up to the storage capacity Settings Contents On screen display Off Records only o...

Страница 81: ...hese settings will help brighten a subject in dark surroundings Higher ISO sensitivity might produce a grainy noisy effect on the photo image Auto ISO mode will allow you to take quality photo images...

Страница 82: ...ll images per second of movie playback are captured while the PHOTO button is pressed The images are captured continuously while the PHOTO button is pressed The number of the captured images varies de...

Страница 83: ...s by 2304x1728 1152x864 Resizes the photo images by 1152x864 1024x768 Resizes the photo images by 1024x768 800x600 Resizes the photo images by 800x600 640x480 Resizes the photo images by 640x480 Resiz...

Страница 84: ...he current date and time JAN 01 2008 12 00AM The date time will read JAN 01 2008 12 00 AM in the following conditions The movie or photo recording was made before setting the date time in the HD camco...

Страница 85: ...g on the conditions under which you are using the HD camcorder indoors or outdoors for example you can adjust LCD brightness and color Settings Contents On screen display Bright Adjusts the brightness...

Страница 86: ...recordable time on the built in memory Card You can view the used space available space and the recordable time on the memory card Format You can use the Format function to completely delete all file...

Страница 87: ...y Off Cancels the shutter sound None On When on the shutter will sound with each press of the PHOTO button None Auto Power Off You can set the HD camcorder to automatically turn off when there is no o...

Страница 88: ...e with the HD camcorder Settings Contents On screen display Off Disable the function The indicator appears when you use the remote control None On You can control the HD camcorder with the remote cont...

Страница 89: ...the TV you have connected Settings Contents On screen display Auto The video signals are output in the same format as the recorded file Use this setting only when connecting to an HDTV When Auto is s...

Страница 90: ...efault Set You can restore menu settings to default initial settings at the factory pages 51 54 Initializing the HD camcorder settings to factory defaults does not affect recorded images Language You...

Страница 91: ...ding start stop Q MENU Display iCHECK EASY Q or PHOTO etc When the Auto Power Off function is set to 5 min the Auto Power Off function works with priority rather than Demo function If you execute Demo...

Страница 92: ...the next group of options 3 Touch a desired movie image The selected movie image will be paused 4 Search the start point of deletion by touching the playback related or tabs 5 Touch the the tab at th...

Страница 93: ...an perform the Partial Delete function when there is at least 2MB of memory space remaining on the built in memory or memory card DIVIDING A MOVIE IMAGE This function works only in Play mode page 17 Y...

Страница 94: ...iding the movie image you can also combine other desired movie images see page 84 The second image of the divided image will be displayed at the end of the thumbnail index To delete a movie image you...

Страница 95: ...image is divided the first image of the divided images is stored in the playlist again You can also access it by using the Q MENU button Press the Q MENU button Touch Edit Touch Divide You can perfor...

Страница 96: ...of the first movie image will appear in the combined movie image It is impossible to combine movie images with different resolutions For example if there is one movie image recorded at HD 1080 30p and...

Страница 97: ...tle of the storage capacity When creating or deleting a playlist the original movie image will not be erased In addition adding or deleting movie images from a playlist does not affect the original mo...

Страница 98: ...on image or not the indicator is removed from image 4 Touch the OK OK tab The message Add selected files to Playlist will appear 5 Touch Yes When creation of a playlist is completed the thumbnail vie...

Страница 99: ...tab The message Arrange selected a file to this order will appear 4 Touch Yes The selected movie image will be moved to the new position Deleting movie images from a playlist You can delete undesired...

Страница 100: ...elect them for protection The indicator is displayed on the selected movie images Touching the thumbnail image toggles between the thumbnail image being selected for protection the indicator appears o...

Страница 101: ...uch All Files 4 The message according to the selected option will appear Touch Yes After completion selected images will be deleted Accordingly the deleted files also disappear in playlist page 86 It...

Страница 102: ...on the selected images Touching the thumbnail image toggles between the thumbnail image being selected for copying the indicator appears on image or not the indicator is removed from image Touch the...

Страница 103: ...e selected images Touching the photo thumbnail image toggles between the photo thumbnail image being selected for printing the indicator appears on image or not the indicator is removed from image Tou...

Страница 104: ...ch for a photo image touch the previous image or next image tab The message Print will appear 5 Touch Yes The selected photo image will be printed After the connection the easy printing menu will disp...

Страница 105: ...PictBridge is a registered trademark of CIPA Camera Imaging Products Association an image transfer standard developed by Canon Fuji HP Olympus Seiko Epson and Sony Use the USB cable provided with the...

Страница 106: ...compatible DVD CD burners refer to CyberLink web site http www cyberlink com english products powerproducer 4 comp_dvd_drive jsp Video card nVIDIA Geforce 7600GT or higher ATi X1600 series or higher...

Страница 107: ...sing Check that there are no other application icons on the status bar 1 Load the provided CD ROM into the PC Set up screen appears within several seconds If the setup screen does not appears doublecl...

Страница 108: ...plete screen appears 8 Setup Complete appears Click Finish The icon of CyberLink DVD Suite is created on the desktop If you perform installation of software that is already installed uninstallation wi...

Страница 109: ...Disconnect the USB cable from the HD camcorder and PC We recommend using the AC power adaptor as the power supply instead of the battery pack When the USB cable is connected turning the camcorder on o...

Страница 110: ...memory is the first recognized drive of two removable discs newly registered in the My Computer For example when F drive and G drive are recognized in the PC F drive and G drive are the built in memo...

Страница 111: ...les are created in one folder A new folder is created when more than 999 files are created Photo image file As in movie image files the file number automatically increases when a new image file is cre...

Страница 112: ...to Reset at this time You may modify the name of a file folder stored in the storage media using a PC This HD camcorder may not recognize modified files TRANSFERRING FILES FROM THE HD CAMCORDER TO YO...

Страница 113: ...vided software CD To playback video files in the playlist Start the CyberLink Power DVD program to playback the videos recorded to your HD camcorder on a PC 1 Click the CyberLink DVD Suite icon on the...

Страница 114: ...owerDVD main screen and the program will play the file right away You can play all video files with a file format supported by the PowerDVD and playlist 1 Click the CyberLink DVD Suite icon on the des...

Страница 115: ...t is recommended that you put the HD camcorder in a box together with a small silica bag when storing it in a closet etc Do not store the HD camcorder in a place subject to strong magnetism or intense...

Страница 116: ...in locations with high temperature or high humidity Do not touch the metal parts Copy the recorded files to your PC Samsung shall not be responsible for any lost data It is recommended that you copy t...

Страница 117: ...r powered unit when not in use as these components may use current even when switched off We recommended only using genuine Samsung batteries in this camcorder Using generic non Samsung batteries can...

Страница 118: ...s recorded with SD standard definition image resolution you need an NTSC system based TV with Audio Video Component or HDMI input jacks and an HDMI cable Component cable or Multi AV cable connected On...

Страница 119: ...attery This is not a Samsung approved battery pack Use a Samsung approved battery pack We recommend using only genuine Samsung batteries in this camcorder Storage media Message Icon Informs that Actio...

Страница 120: ...k the supported file format page 100 Format the memory card using menu item Not Supported Card The memory card is not supported in this camcorder Change the memory card with the one recommended Low Sp...

Страница 121: ...recording resolutions It is not possible to add a file that has a different recording resolution than the selected playlist Read Error Some problems occurred during reading data from storage media For...

Страница 122: ...fore using it When does the dew condensation occur When the device is relocated to a place with a higher temperature than the previous location or when using it in a hot area suddenly it will cause co...

Страница 123: ...urns off automatically Is Auto Power Off set to 5 min If no button is pressed for about 5 minutes the HD camcorder is automatically turned off Auto Power Off To disable this option change the setting...

Страница 124: ...AC power adaptor or remove the battery pack before turning the power off The image on the LCD screen looks dark Ambient light too bright Adjust the brightness and angle of LCD Use the LCD enhancer fu...

Страница 125: ...Release the lock on the write protection tab of the memory card if any The storage media is full Use a new memory card or format the storage media page 74 Or remove unnecessary images page 89 The shu...

Страница 126: ...y page 29 You cannot move or delete the protected images Release the protection of the image on the device page 88 You cannot format the memory card Release the lock on the write protect tab of the me...

Страница 127: ...Scene Mode AE to avoid or minimize this phenomenon page 55 Image s color balance is not natural White balance adjustment is required Adjust to the proper White Balance page 56 The subject may appear b...

Страница 128: ...om the connected device Connect the audio of the component or Multi AV cable to your camcorder or connected device TV HD recorder etc Red color right White color left The connection cable Multi AV cab...

Страница 129: ...ecting Dubbing with other devices Recorder PC Printer etc Symptom Explanation Solution You cannot dub correctly using the HDMI cable You cannot dub images using the HDMI cable You cannot dub correctly...

Страница 130: ...able but the provided CyberLink DVD Suite software is not Macintosh compliant This HD camcorder is recognized as a removable storage device on the Macintosh computer with Mac OS 10 3 6 or higher that...

Страница 131: ...Solution Menu items are grayed out You cannot select grayed items in the current recording playback mode Menu and quick menu cannot be used in EASY Q mode The following functions cannot be used during...

Страница 132: ...to Mode Built in Flash Focus Touch Point Face Detect On Resolution SD Slow Motion Digital Zoom On Shutter Resolution SD Slow Motion Super C Nite Exposure Manual Anti Shake EIS in Photo Mode Face Detec...

Страница 133: ...output A type connector Audio output 7 5dBs 600 terminated USB output Mini B type connector External MIC 3 5 stereo General Power source DC 8 4V Lithium Ion battery pack 7 4V Power source type Lithium...

Страница 134: ...ted to the authorized service center EXCLUSIONS WHAT IS NOT COVERED This warranty does not cover damage due to accident fire flood and or other acts of God misuse incorrect line voltage improper insta...

Страница 135: ...SUNG 726 7864 www samsung com us RoHS compliant Our product complies with The Restriction Of the use of certain Hazardous Substances in electrical and electronic equipment and we do not use the 6 haza...

Отзывы: