background image

English _

43

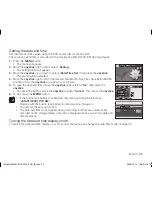
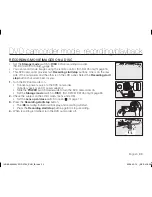
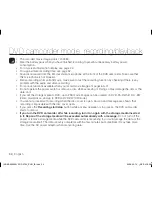
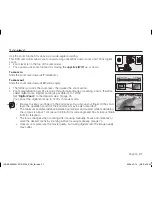
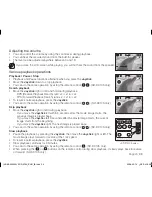
Creating a playlist

•  This function works only in Play mode.

•  Set the 

Storage mode

 switch to 

DISC

. (SC-DX103/ DX105 only) 

page 30

•  You can create a playlist by gathering your favorites from the recorded movie images.

•  You can create only one playlist.

1. 

Move the 

Joystick

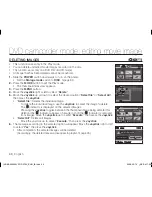
 to select the playlist( ) tab in the thumbnail index view.

•  Thumbnail index view of the playlist appears.

2. 

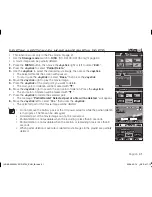
Press the 

MENU

 button, then move the 

Joystick

 right or left to select “

Edit

.”

3. 

Move the 

Joystick

 up or down to select “

Add

,” then press the 

Joystick

.

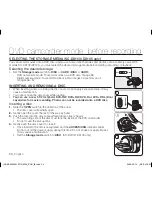
4. 

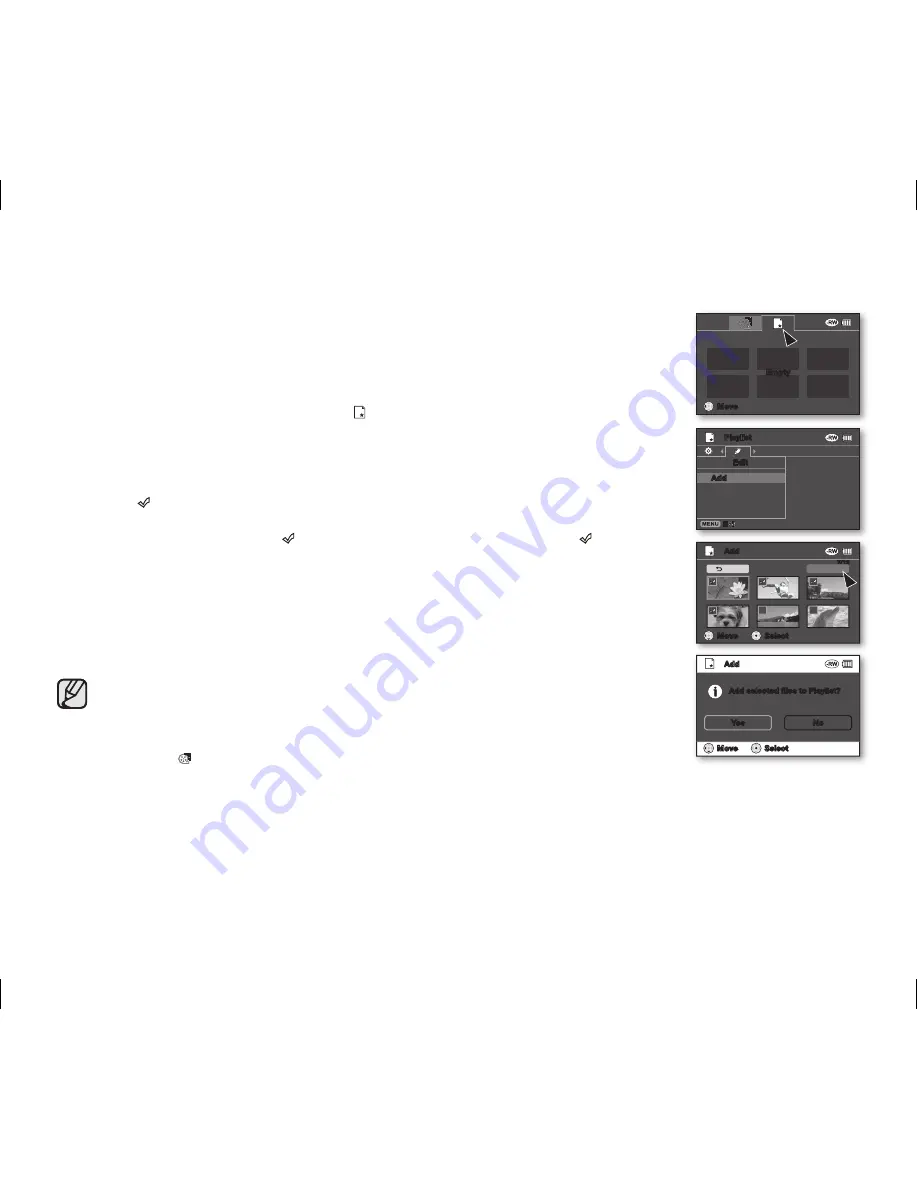
Use the 

Joystick

 to select the movie images to add to the playlist.

•  The ( ) indicator is displayed on the selected movie images.

•  Pressing the 

Joystick

 toggles between the movie thumbnail image being selected 

for creating a playlist (the ( ) indicator appears on image) or not (the ( ) indicator is 

removed from image).

•  To return, use the 

Joystick

 to select “

Back

,” then press the 

Joystick

.

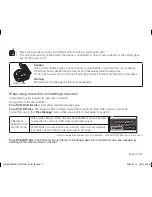
5. 

Use the 

Joystick

 to select “

Execute

,” then press the 

Joystick

.

•  The message “

Add selected files to Playlist ?

” appears.

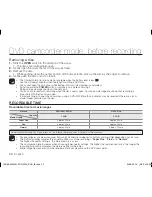
6. 

Move the 

Joystick

 right or left to select “

Yes

,” then press the 

Joystick

.

•  The selected files are added to the playlist.

•  You can play a playlist in the same manner as you play a movie image. 

page 38

•  If free space available on the disc is insufficient, delete unnecessary movie images.

•  Up to 64 movie images can be included in the playlist.

•  When playing back the playlist, the counter refers to total counter of the playlist.

•  To return to the thumbnail index view of movie images, use the 

Joystick

 to select 

the play( ) tab.

Playlist

Edit

Add

Arrange
Delete
Partial Delete

Empty

 Move

 Move

 Select

Add

Add selected files to Playlist?

Yes

No

Add

7/12

Execute

Back

 Move

 Select

(AD68-02550A) SC-DX100_ENG_IB.indb   43

2008-03-10   ¿ÀÈÄ 4:17:39

Содержание SC-DX103

Страница 1: ...r user manual imagine the possibilities Thank you for purchasing this Samsung product To receive more complete service please register your product at www samsung com global register AD68 02550A SC DX100_ENG_IB indb 1 2008 03 10 ÀÈÄ 4 14 58 ...

Страница 2: ...omposing shots even easier Capture visions farther than the eye can see 34X optical 1200X digital zoom Samsung s powerful optical zoom lenses bring the world closer without sacrificing image quality In addition digital zoom interpolation means that extreme digital zooming is clearer with less distortion than previous types of digital zooms Viewing images on your PC and using PC CAM With DV Media P...

Страница 3: ...tric Shock Do Not Expose This Apparatus To Rain Or Moisture Caution Apparatus shall not be exposed to dripping or splashing and no objects filled with liquids such as vases shall be placed on the apparatus To disconnect the apparatus from the mains the plug must be pulled out from the mains socket therefore the mains plug shall be readily operable CAUTION TO REDUCE THE RISK OF ELECTRIC SHOCK DO NO...

Страница 4: ...facturer or sold with the apparatus When a cart is used use caution when moving the cart apparatus combination to avoid injury from tip over 13 Unplug this apparatus during lightning storms or when unused for long periods of time 14 Refer all servicing to qualified service personnel Servicing is required when the apparatus has been damaged in any way such as power supply cord or plug is damaged li...

Страница 5: ...0 OUTDOOR ANTENNA GROUNDING CAMCORDER be sure the antenna or cable system is grounded to provide some protection against voltage surges and built up static charges Section 810 of the National Electrical Code ANSI NFPA No 70 1984 provides information with respect to proper grounding of the mast and supporting structure grounding of the lead in wire and supporting structure grounding of the mast and...

Страница 6: ...icing to qualified service personnel under the following conditions a When the power supply cord or plug is damaged b If any liquid has been spilled onto or objects have fallen into the CAMCORDER c If the CAMCORDER has been exposed to rain or water d If the CAMCORDER does not operate normally by following the operating instructions adjust only those controls that are covered by the operating instr...

Страница 7: ...pursuant to part 15 of the FCC Rules These limits are designed to provide reasonable protection against harmful interference in a residential installation This equipment generates uses and can radiate radio frequency energy and if not installed and used in accordance with the instructions may cause harmful interference to radio communications However there is no guarantee that interference will no...

Страница 8: ...memory card Samsung cannot be responsible for your recorded video and audio Recorded contents may be lost due to a mistake when handling this DVD camcorder or memory card etc Samsung shall not be responsible for compensation for damages due to the loss of recorded contents precautions Warning This camcorder should always be connected to an AC outlet with a protective grounding connection Batteries...

Страница 9: ...Corporation registered in the United States and other countries Macintosh is the trademark of Apple Computer Inc All the other product names mentioned herein may be the trademark or registered trademarks of their respective companies Furthermore TM and R are not mentioned in each case in this manual Portions of this software are copyright 2006 The Free Type Project Website http www freetype org Al...

Страница 10: ...do not strike it against a hard object or let it fall Do not use the DVD camcorder on a tripod in a place where it is subject to severe vibrations or impact No sand or dust Fine sand or dust entering the DVD camcorder or AC power adaptor could cause malfunctions or defects No water or oil Water or oil entering the DVD camcorder or AC power adaptor could cause electric shock malfunctions or defects...

Страница 11: ...orrode so that power will not turn on Do not expose the DVD camcorder to insecticide Insecticide entering the DVD camcorder could dirty the lens in the laser pickup block and in such a case the DVD camcorder might not operate normally Turn the DVD camcorder off and cover it with vinyl sheet etc before using insecticide Do not use a 3 1 2 inch 8cm CD lens cleaner Cleaning the lens is not necessary ...

Страница 12: ...ntrol SC DX105 only 14 Installing the button type battery 15 Holding the DVD camcorder 16 Charging the battery pack 21 Basic DVD camcorder operation 22 Screen indicators 26 Using the display button 26 Using the joystick 27 Using the LCD screen 27 Using the viewfinder 28 Initial setting OSD language date and time 30 Selecting the storage media SC DX103 DX105 only 30 Inserting and removing a disc 32...

Страница 13: ... Recording with ease for beginners EASY Q mode 36 Capturing still images during movie image playback SC DX103 DX105 only 37 Zooming 38 Playing movie images 40 Deleting images 41 Deleting a section of a movie image partial delete 42 Playlist 47 Disc finalize 49 Disc unfinalize 50 Disc format 51 Disc information AD68 02550A SC DX100_ENG_IB indb 3 2008 03 10 ÀÈÄ 4 15 14 ...

Страница 14: ...ber of images 56 Recording movie images on a memory card 57 Taking photo images 58 Playing movie images 59 Viewing photo images 60 Protection from accidental erasure 61 Deleting images 62 Handling menus 63 Menu items 65 Recording menu items 78 Playback menu item 78 Setting menu items 83 DPOF print setting 84 Direct printing with a PictBridge AD68 02550A SC DX100_ENG_IB indb 4 2008 03 10 ÀÈÄ 4 15 1...

Страница 15: ...VCR or DVD HDD recorder 89 Using Voice Plus 90 System requirements 91 Installing DV Media PRO 93 Connecting the USB cable 94 Viewing the contents of storage media memory card 96 Transferring files on the memory card from the DVD camcorder to your PC 97 Using the PC cam function 98 Maintenance 99 Additional information 102 Using your DVD camcorder abroad 103 Troubleshooting 112 AD68 02550A SC DX100...

Страница 16: ...0 31 Charging the battery pack page 18 Setting OSD language and the date time pages 28 29 Selecting the storage media DISC and CARD SC DX103 DX105 only page 30 You can record movie and photo images You can take a photo only on the memory card DVD discs do not support photo mode Refer to pages 52 54 for the supported memory cards before purchasing them Do you want to delete or edit movie images on ...

Страница 17: ...views pages 38 58 59 Viewing playback from your DVD camcorder on your PC SC DX103 DX105 only or TV pages 86 89 96 Editing movie images as your preference Editing function is available only in DVD RW VR mode pages 40 46 Recording movie images pages 33 37 56 Taking the photo images SC DX103 DX105 only page 57 Selecting an image to play back from the thumbnail index views Step 3 Playing back Editing ...

Страница 18: ... MKM Verbatim discs that have the designation If you do not use them recording and playback operation may not work properly or you may not be able to eject the disc from the camcorder The time it takes to finalize a disc may vary depending on the recording time You cannot overwrite edit or format a finalized disc If needed unfinalize the disc DVD RW only page 49 It is not guaranteed that all DVD p...

Страница 19: ...mpatible with your DVD camcorder SC DX103 DX105 only To buy this optional accessory contact your nearest Samsung dealer getting to know your DVD camcorder Battery pack IA BP80W AD43 00186A AC power adaptor AA E9 type AD44 00116B AV cable AD39 00001A USB cable AK39 00095A SC DX103 DX105 only User manual AD68 02550A Quick start guide AD68 02561A Button type battery AD43 10130H for internal clock TYP...

Страница 20: ...en close switch Lens Remote sensor SC DX105 only Light SC DX105 only Internal microphone Grip belt hook Grip belt Swivel handle Disc cover getting to know your DVD camcorder CLOSE OPEN AD68 02550A SC DX100_ENG_IB indb 10 2008 03 10 ÀÈÄ 4 15 21 ...

Страница 21: ... BATT battery release switch Storage mode switch DISC CARD SC DX103 DX105 only Battery pack LCD screen Recording start stop button Joystick up down right left Select W T MENU button Tripod receptacle Memory card slot SC DX103 DX105 only AD68 02550A SC DX100_ENG_IB indb 11 2008 03 10 ÀÈÄ 4 15 22 ...

Страница 22: ...stment knob MODE button Mode indicator Record Play mode Recording start stop button ACCESS CHG indicator OPEN switch AV jack USB jack SC DX103 DX105 only DC IN USB SC DX103 DX105 only AV jack cover DC IN jack POWER switch getting to know your DVD camcorder AD68 02550A SC DX100_ENG_IB indb 12 2008 03 10 ÀÈÄ 4 15 24 ...

Страница 23: ...tton Search button Slow playback button The buttons on the remote control function the same as those on DVD camcorder This section provides information on using this DVD camcorder such as how to use the provided accessories how to charge the battery how to setup the operation mode and initial setup preparation AD68 02550A SC DX100_ENG_IB indb 13 2008 03 10 ÀÈÄ 4 15 26 ...

Страница 24: ...ay on Installing the button type battery in the remote control SC DX105 only 1 Turn the battery holder counterclockwise as indicated with mark using your fingernail or a coin to open it The battery holder opens 2 Insert the battery into the battery holder with the positive terminal facing down and press it firmly until you hear a locking sound 3 Place the battery holder back in the remote control ...

Страница 25: ...the DVD camcorder is stable when you press the Recording start stop button with your thumb 1 Pull and detach the grip belt Insert the grip belt into its hook as shown in the figure 2 Insert your hand into the grip belt and adjust its length 3 Close the grip belt Angle Adjustment Rotate the swivel handle to the most convenient angle You can rotate it downwards upto 140 Please be careful not to turn...

Страница 26: ...th your finger 2 Slide the BATT battery release switch in the direction as shown in the figure and pull out the battery pack WARNING Insert the battery pack in the accurate direction as shown in the figure When the battery pack is wrongly inserted it may cause malfunction of the DVD camcorder and battery pack It is recommended that you purchase one or more additional battery packs to allow continu...

Страница 27: ...etailer When the battery reaches the end of its life please contact your local dealer The batteries have to be treated as chemical waste Make sure that the battery pack is fully charged before starting to record When fully discharged a battery pack damages the internal cells The battery pack may be prone to leakage when fully discharged Remove the battery from the camcorder when it is not in use E...

Страница 28: ... in green when the battery is fully charged 6 Once charged disconnect the AC power adaptor from the DC IN jack on your DVD camcorder Even with the power switched off the battery pack will still discharge if it is left attached to the DVD camcorder It is recommended that you remove the battery pack from the DVD camcorder Charging indicator The color of the ACCESS CHG charging indicator indicates th...

Страница 29: ...depending on the remaining battery level Continuous recording time without zoom The times shown in the table reflect the available recording time when the DVD camcorder is in the recording mode without using any other functions In actual recording the battery pack may discharge 2 3 times faster than this reference since the record start stop and zoom are being operated and playback is performed As...

Страница 30: ...r can be used around the world An AC plug adaptor is required in some foreign countries If you need one purchase it at your local Samsung dealer CAUTION Before detaching the power source make sure that the DVD camcorder s power is turned off Failure to do so can result in DVD camcorder malfunction Use a nearby wall outlet when using the AC power adaptor Disconnect the AC power adaptor from the wal...

Страница 31: ...of the MODE button toggles between the Record mode and Play mode When the DVD camcorder is turned on the self diagnosis function operates and a message may appear In this case refer to warning indicators and messages on pages 103 105 and take corrective action When using this camcorder first time When you use your DVD camcorder for the first time or you reset it you will see the Date Time Set scre...

Страница 32: ...er disc record mode Movie record mode Operating mode STBY standby or recording Warning indicators and messages Time counter movie recording time Remaining time Storage media disc Battery info remaining battery level Disc format type DVD RW disc only Quality Anti Shake DIS Wind Cut Back Light Fader Light SC DX105 only C Nite Zoom Digital Zoom position Date Time Manual Shutter Manual Exposure Digita...

Страница 33: ...ors and messages Time code elapsed time Storage media disc Battery info remaining battery level Disc Format RW Video VR mode only Quality Voice plus Movie No Date Time Volume control 0 00 59 JAN 01 2008 12 00 AM 02 Activate Remote Control 001 AD68 02550A SC DX100_ENG_IB indb 23 2008 03 10 ÀÈÄ 4 15 57 ...

Страница 34: ...ing time Storage media memory card Battery info remaining battery level The total number of recordable photos Back Light Zoom position Date Time Manual Exposure Manual Focus White Balance preparation The digital camera mode is for models SC DX103 DX105 only STBY 0 00 00 64 min JAN 01 2008 12 00 AM Insert Card 29 4830 AD68 02550A SC DX100_ENG_IB indb 24 2008 03 10 ÀÈÄ 4 15 59 ...

Страница 35: ...l number of recorded images Warning indicators and messages Storage media memory card Battery info remaining level Erase Protection File Name folder file name Date Time Print Mark DPOF Photo size The digital camera mode is for models SC DX103 DX105 only Activate Remote Control 02 Activate Remote Control Activate Remote Control 02 02 0 00 03 100 0002 JAN 01 2008 12 00 AM Activate Remote Control 02 ...

Страница 36: ...status indicators will appear If the DVD camcorder has warning information a warning message will appear USING THE JOYSTICK The Joystick is used to make a selection and to move the cursor left right up and down Using the Joystick you can easily make your selection and navigate the menu 1 Move to a previous menu item Adjust the selected item to the left 2 Move to a sub menu item Adjust the selected...

Страница 37: ...HE VIEWFINDER You can view pictures through the viewfinder or see correct images when the picture on the LCD screen is poor The viewfinder will work when the LCD screen is closed Adjusting the focus The focus adjustment knob of the viewfinder enables individuals with vision problems to see clearer images 1 Close the LCD screen 2 Use the focus adjustment knob of the viewfinder to focus the picture ...

Страница 38: ...NU button The menu will appear 2 Move the Joystick right or left to select Setting The setting menu will appear 3 Move the Joystick up or down to select Language then press the Joystick 4 Move the Joystick up or down to select the desired language then press the Joystick 5 To exit press the MENU button Even if the battery pack or AC power were removed the language setting would still be preserved ...

Страница 39: ...ystick To cancel the setting move the Joystick to select Cancel then press the Joystick 6 To exit press the MENU button If the button type battery is exhausted the date and time will be reset as JAN 01 2008 12 00 AM Replace with the button type battery for internal clock page 14 You can set the year up to 2040 The date and time do not appear during recording but they are automatically recorded on ...

Страница 40: ...on You cannot open the disc cover while loading You can use a new 3 1 2 inch 8cm DVD RW DVD RW DVD R or DVD R DL Dual Layer disc for movie recording Photos can not be recorded onto a DVD disc Inserting a disc 1 Slide the OPEN switch in the direction of the arrow The disc cover will partially open 2 Gently open the cover the rest of the way by hand 3 Push the disc into the disc compartment until a ...

Страница 41: ...automatically begin For a DVD RW disc The Format menu is offered Select the recording format Video mode or VR mode Format the disc in the Disc Manage menu when you want to format again page 50 Differences between Video and VR mode Video Video Mode If the disc has been finalized you will be able to play the disc on most DVD players recorders drives VR VR Mode You can edit the disc on a DVD camcorde...

Страница 42: ... using a DVD RW More than 5 minutes may be required if there are a lot of movie images recorded on the disc RECORDABLE TIME Recordable time for movie images Storage DVD RW RW R DVD R DL Capacity Movie Quality 1 4GB 2 6GB Super Fine Approx 20min Approx 35min Fine Approx 30min Approx 53min Normal Approx 60min Approx 106min The above figures are measured under Samsung s standard recording test condit...

Страница 43: ... 1 Turn the DVD camcorder on Connect a power source to the DVD camcorder A battery pack or an AC power adaptor Slide the POWER switch downwards to turn the DVD camcorder on Set the Storage mode switch to DISC SC DX103 DX105 only page 30 2 Check the subject on the LCD screen Lens and LCD Set the Lens open close switch to open page 10 3 Press the Recording start stop button The recording indicator w...

Страница 44: ...ge media to DVD up to 253 movie images can be created on DVD R RW R DL RW Video mode discs and up to 999 on DVD RW VR mode You cannot proceed with recording when the disc cover is open An icon and message are shown that recording is impossible with the disc cover open If you press the Recording start stop button while a menu operation is in process the DVD camcorder starts to record If you turn th...

Страница 45: ...ime 3 To record movie images press the Recording start stop button To cancel EASY Q mode Press the EASY Q button once again The and Anti Shake DIS indicators disappear from the screen Almost all the settings will return to the settings that were set prior to activating EASY Q mode You cannot cancel the EASY Q mode during recording Unavailable buttons during EASY Q operation The following controls ...

Страница 46: ...2 Use the Joystick to select the desired movie image To change the current thumbnail page move the Joystick down to highlight the page bar then move the Joystick right or left to select the page 3 Press the Joystick The selected file fills the screen and is played automatically 4 Press the PHOTO button at the desired point A shutter sound is heard The photo image is recorded on the memory card and...

Страница 47: ...e up to 1200x Set Digital Zoom to the desired value page 76 You can set the digital zoom up to 1200x in movie mode Be sure to keep your finger on the Zoom lever If you move your finger off the zoom lever the operation sound of the Zoom lever may be also recorded The minimum possible distance between camcorder and subject while maintaining sharp focus is about 1 cm about 0 39 inch for wide angle an...

Страница 48: ...he latest created or played file To change the current thumbnail page move the Joystick down to highlight the page bar then move the Joystick right or left to select the page 3 Move the Joystick to select the desired movie image then press the Joystick The selected file fills the screen and is played automatically To stop playback move the Joystick down Press Display button to toggle the OSD On Sc...

Страница 49: ...X105 only Skip playback Move the Joystick right or left during playback If you move the Joystick left within 3 seconds after the movie image starts the previous image is played back If you move the Joystick left 3 seconds after the movie image starts the current image starts from the beginning If you move the Joystick right the next image is played back You can do the same operation by using the r...

Страница 50: ...To delete the individual image use the Joystick to select the image to delete The indicator is displayed on the selected images Pressing the Joystick toggles between the thumbnail image being selected for deletion the indicator appears on image or not the indicator is removed from image Move the Joystick up to select Execute then press the Joystick Select All Deletes all images Move the Joystick u...

Страница 51: ...will be marked with 7 Press the Joystick to delete the selected part The message Partial Delete Selected part of a file will be deleted will appear 8 Move the Joystick left to select Yes then press the Joystick The selected part of the movie image will be deleted Do not remove the battery pack or the AC power adaptor while the partial deletion is in progress The file can be damaged A deleted part ...

Страница 52: ... RW to VR mode before recording page 50 Example You have recorded a few scenes on a DVD disc You want to save the original recording but you also want to create a digest by putting your favorite scenes together In this case you can create a playlist by selecting your favorite scenes leaving the original recording as it is JAN 12 2008 JAN 30 2008 Movie image 1 Movie image 2 Movie image 3 Movie imag...

Страница 53: ...tor appears on image or not the indicator is removed from image To return use the Joystick to select Back then press the Joystick 5 Use the Joystick to select Execute then press the Joystick The message Add selected files to Playlist appears 6 Move the Joystick right or left to select Yes then press the Joystick The selected files are added to the playlist You can play a playlist in the same manne...

Страница 54: ...image being selected for arrangement within the playlist the indicator appears on image or not the indicator is removed from image A bar will also appear next to the selected movie image 5 Move the Joystick to select the desired position then press the Joystick The selected file is arranged in the desired position To return use the Joystick to select Back then press the Joystick 6 To execute use t...

Страница 55: ...isplayed on the selected movie image Pressing the Joystick toggles between the movie thumbnail image being selected for deleting from the playlist the indicator appears on image or not the indicator is removed from image To return use the Joystick to select Back then press the Joystick 5 Use the Joystick to select Execute then press the Joystick The message Delete files from playlist Original file...

Страница 56: ...Press the Joystick to delete the selected part The message Partial Delete Selected part of a file will be deleted will appear 8 Move the Joystick left to select Yes then press the Joystick The selected part of the movie image will be deleted Do not remove the battery pack or the AC power adaptor while the partial deletion is in progress The file can be damaged A deleted part of the movie image can...

Страница 57: ...right or left to select Yes then press the Joystick The message showing that the disc is being finalized will appear WARNING During finalizing do not cause impact or vibration to your DVD camcorder This could cause a malfunction The finalize function is not available when the battery level is less than Once finalized the movie images or a playlist in the disc cannot be deleted or edited Time requi...

Страница 58: ...nalized disc on a DVD player recorder To playback a disc You can playback finalized DVD R RW Video mode R DL discs on DVD players recorders Playback is not guaranteed in all DVD players recorders For compatibility details refer to your DVD player recorder owner s manual Most DVD players recorders can play back a DVD RW disc that has not been finalized Refer to the page 8 for finalized disc compati...

Страница 59: ...n will appear 5 Move the Joystick to select Execute then press the Joystick To exit use the Joystick to select Back the press the Joystick 6 The message Make the disc recordable will appear Move the Joystick right or left to select Yes then press the Joystick The message showing that the disc is being unfinalized will appear and the disc will be unfinalized WARNING The unfinalize function is not a...

Страница 60: ...isc is inserted move the Joystick to select Yes then press the Joystick The Format function is not available at the battery level under Formatting will delete all the recorded contents on a disc Be careful not to delete data by mistake Do not turn the power off in the middle of the formatting The data recorded on a disc may be damaged Be sure to use the AC power adaptor when formatting a disc so t...

Страница 61: ... 2 Use the Joystick to move the cursor to Delete then press the Joystick to delete the existing disc name 3 Use the Joystick to select the desired characters and items then press the Joystick 4 Use the Joystick to select Done then press the Joystick The Disc Name will be changed To return move the Joystick right or left to select Back then press the Joystick Disc information may appear depending o...

Страница 62: ...n in the figure 3 Close the memory card cover Ejecting a memory card 1 Open the memory card cover 2 Slightly push the memory card inwards to pop it out 3 Pull the memory card out of the slot and close the memory card cover Selecting a suitable memory card You can use SD and MMC cards RS MMC or Mini SD should be inserted by using an Adapter not supplied On this DVD camcorder you can use memory card...

Страница 63: ...e inserting or removing the memory card to avoid data loss It is not guaranteed that you can use a memory card formatted by other devices Be sure to format your memory card using this camcorder Memory cards need to be formatted on this camcorder before use If you cannot use a memory card that has been previously used with another device format it on your DVD camcorder Note that formatting erases a...

Страница 64: ...forming to DCF The DVD camcorder supports SD and MMC memory cards for data storage The data storage speed may differ according to the manufacturer and production system SLC single level cell system faster write speed is enabled MLC multi level cell system only lower write speed is supported For best results we recommend using a memory card that supports faster write speed Using a lower write speed...

Страница 65: ... Samsung s standard recording test conditions and may differ depending on actual use The DVD camcorder provides only super fine for photo quality The compression rate increases when choosing lower quality settings The higher the compression rate is the longer the recording time will be However the picture quality will be lower Memory cards of bigger than 2GB in capacity may not work properly Movie...

Страница 66: ...turn the DVD camcorder on Set the Storage mode switch to CARD page 30 2 Check the subject on the LCD screen Lens and LCD Set the Lens open close switch to open page 10 3 Press the Recording start stop button The recording indicator will display and recording will start Press the Recording start stop button again to stop recording 4 When recording is finished turn the DVD camcorder off You can use ...

Страница 67: ...u can use the zoom function while recording page 37 The number of photo images that can be stored depends on the quality and size of the image page 55 The photo image is taken only in the 4 3 aspect ratio on the memory card Audio will not be recorded with the photo image on the memory card Please check the protection tab setting on your memory card before recording You may not be able to record wh...

Страница 68: ...ected file fills the screen and is played automatically To stop playback move the Joystick down Use the Joystick to enjoy various playback operations Press the Joystick to pause or play back Move the Joystick right or left to skip to the next or previous image Move the Joystick right or left and hold to fast forward or reverse playback x2 4 To return to the thumbnail index view move the Joystick d...

Страница 69: ...To search for an image quickly move the Joystick right or left and hold During Search you will see image numbers change but not the Photos 4 To return to the thumbnail index view move the Joystick down All the icons disappear or appear when you press Display button on the camcorder Loading time may vary depending on the image size Any large sized image taken with another device will be displayed a...

Страница 70: ...t the image to protect press the MENU button 4 Move the Joystick right or left to select Protect 5 Move the Joystick up or down to select the desired option Off or On then press the Joystick After completion the selected images will be protected The indicator appears on the selected image This function operates identically in the full image display mode single image displayed on the screen Photo i...

Страница 71: ...the Joystick right or left to select Delete 5 Move the Joystick up or down to select the desired option This File or All Files then press the Joystick This File Deletes the selected file All Files Deletes all images 6 The message according to the selected option will appear Move the Joystick right or left to select Yes the press the Joystick After completion the selected images will be deleted Thi...

Страница 72: ... left to adjust focus manually 5 To exit press the MENU button Using the Joystick The guide provides easier access to frequently used menus without using the MENU button 1 Slide the POWER switch downwards to turn on the power 2 Press the Joystick to display the guide 3 Move the Joystick down to select focus 4 Move the Joystick down to select the desired option Moving the Joystick down toggles betw...

Страница 73: ...2 Quality X Fine 72 Wind Cut X Off 73 Back Light Off 73 C Nite X Off 74 Light SC DX105 only X Off 74 Fader X Off 75 Guideline Off 75 Digital Zoom X Off 76 File No X Series 77 Disc Manage X 47 51 possible X not possible Some items will not appear depending on the storage media type SC DX103 DX105 only There are some functions you cannot activate simultaneously in the menu You cannot select the gray...

Страница 74: ... items Operating mode Default value Page Date Time Set JAN 01 2008 12 00 AM 78 Date Time Off 79 LCD Brightness 18 79 LCD Color 18 79 Beep Sound On 80 Shutter Sound SC DX103 DX105 only On 80 Auto Power Off 6 Min 80 Remote SC DX105 only On 81 TV Display On 81 USB Connect SC DX103 DX105 only DISC PC Cam 81 CARD Mass Storage Default Set 81 Menu Color Midnight Blue 81 Transparency 20 82 Language 82 Dem...

Страница 75: ...e the Auto mode for recording Portrait Creates a shallow depth of field so that the person or subject appears against a softened background The portrait mode is most effective when used outdoors Spotlight Prevents overexposure of subject s face etc when strong light strikes the subject as in a wedding or on stage Beach Snow Prevents underexposure of subject s face etc in a place where reflection o...

Страница 76: ... option is for when there is less than 3200K of tungsten light being used Custom WB You can manually adjust white balance to match the light source or situation Setting white balance manually 1 Move the Joystick up or down to select Custom WB then press the Joystick The Set White Balance indicator is displayed 2 Frame a white object such as a piece of white paper so that it fills the screen Use an...

Страница 77: ...matically You can also manually adjust the exposure depending on the recording conditions Settings Contents On screen display Auto This option automatically adjusts image brightness according to the environmental light conditions None Manual You can adjust the brightness of an image manually Adjust the brightness when the subject is too bright or too dark xx Setting the exposure manually When manu...

Страница 78: ...e images caused by camcorder shake particularly at high magnification EASY Q mode automatically sets the Anti Shake DIS to On When Anti Shake DIS On is set there will be a slight difference between the actual movement and the movement on screen Gross camcorder shake may not be entirely corrected even if Anti Shake DIS On is set Firmly hold the DVD camcorder with both hands It is recommended that y...

Страница 79: ...ode creates a 3D effect embossing on the surrounding area of an image Mosaic This mode gives the images a mosaic effect Mirror This mode cuts the picture in half using a mirror effect Pastel1 This mode applies a pale pastel drawing effect to an image Pastel2 This mode applies a pale pastel drawing effect to the surrounding area of an image Mirror mode is not available in the 16 9 Wide mode Release...

Страница 80: ...he desired indicator to adjust focus then press the Joystick Focusing on a farther subject To focus on a farther subject move the Joystick to the indicator Focusing on a nearer subject To focus on a nearer subject move the Joystick to the indicator The nearer or farther icon appears between the indicators when focus adjustment reaches the end The adjusted value is applied right after moving the Jo...

Страница 81: ... speed 1 Move the Joystick up or down to select Manual then press the Joystick The manual shutter adjustment indicators appear 2 Move the Joystick right or left to select the desired indicator to adjust shutter speed then press the Joystick The adjusted value is applied right after moving the Joystick right or left to adjust the shutter speed The manual shutter setting will be applied and 1 XX ind...

Страница 82: ...back on a 4 3 TV screen On Records images in full screen for playback on a 16 9 wide TV screen Mirror mode and Digital Zoom are not available in the 16 9 Wide mode A movie image is played in 16 9 aspect ratio in the DVD camcorder When the movie image recorded in 4 3 aspect ratio is played in the DVD camcorder or 16 9 aspect ratio screen the displayed picture may appear wider than the actual size Q...

Страница 83: ...uilt in microphone Back Light When subject is lit from behind this function will compensate for lighting so that the subject is not too dark Settings Contents On screen display Off Disables the function None On Backlight compensation is executed Backlight compensation brightens the subject quickly Back lighting influences recording when the subject is darker than the background The subject is in f...

Страница 84: ...set to Off in the EASY Q mode Light SC DX105 only You can record images brighter in a dark place Settings Contents On screen display Off Records a image without using light None On Records a clear image in a dark place without sacrificing color with the light CAUTION The LED light can become extremely hot Do not touch it while in operation or soon after turning it off otherwise serious injury may ...

Страница 85: ...e DVD camcorder record mode This function will be set to Off in the EASY Q mode Guideline Guideline displays certain patterns on the LCD screen so that you can easily set the image composition when recording movie or photo images The DVD camcorder provides 3 types of guidelines Settings Contents On screen display Off Disables the function None Cross Enables you to center the subject for proper rec...

Страница 86: ...nd after that up to 100x 200x 400x or 1200x is performed digitally None The image quality may deteriorate depending on how much you zoom in on the subject Maximum zooming may result in lower image quality Digital Zoom is not available while Anti Shake DIS EASY Q C Nite Digital Effect Emboss2 Mosaic Mirror Pastel1 and Pastel2 is in use Once Anti Shake DIS C Nite EASY Q Digital Effect Emboss2 Mosaic...

Страница 87: ... formatting or after deleting all files The file number is reset when a new folder is created None Reset Resets the file number to 0001 even after formatting deleting all or inserting a new memory card Use Reset when the folder and files cannot be created anymore because the number of the folders and files reaches the limit None This function can be set only in the digital camera record mode AD68 ...

Страница 88: ...he erased files cannot be recovered Do not turn the power off in the middle of formatting A memory card with the protection tab set to lock will not be formatted page 53 Card information may appear depending on the card type This function can be set only in the digital camera play mode SETTING MENU ITEMS You can set up the date and time OSD language and display settings of the DVD camcorder Date T...

Страница 89: ...nternal clock becomes weak or dead LCD Brightness You can adjust the brightness of the LCD screen to compensate for ambient lighting conditions Moving the Joystick right will brighten the screen whereas moving it left will darken the screen A brighter LCD screen setting consumes more battery power You can adjust the LCD brightness from 0 to 35 when the ambient lighting is too bright and the monito...

Страница 90: ... off automatically when there is no operation for 6 minutes in the STBY mode and thumbnail index view Settings Contents On screen display Off The DVD camcorder does not turn off automatically The DVD camcorder does not enter the sleep mode even if 3 minutes go by without any button pressed None 6 Min The DVD camcorder enters the sleep mode if no operation is performed for 3 minutes in STBY or thum...

Страница 91: ...e you can connect the DVD camcorder to a PC or a printer You can copy your movie and photo images from the memory card to a PC and print your photo images in the digital camera mode You can use the DVD camcorder as PC cam in the DVD camcorder disc record mode Settings Contents On screen display Mass Storage Connect to a PC to use the DVD camcorder as mass storage in the digital camera mode SC DX10...

Страница 92: ...D camcorder so that you may use them more easily Settings Contents On screen display Off Disables the function None On Activates demonstration mode and shows various features None Demonstration starts in the following cases Right after Demo is set to On With Auto Power Off set to Off if there is no operation for about 6 minutes in the STBY mode whether a disc is inserted or not Demonstration stops...

Страница 93: ...ress the Joystick Set All Print marks all images You can print only one copy per one image by selecting Set All Reset All Removes the print mark 6 The message according to the selected option will appear Move the Joystick right or left to select Yes then press the Joystick You can set the number of prints in the single display view only Press the MENU button then move the Joystick right or left to...

Страница 94: ... using the provided USB cable 4 Turn your printer power on The PictBridge menu screen appears automatically after a short period To see the previous or next photo image press the MENU button and move the Joystick left or right Each press of the MENU button toggles the PictBridge menu screen on or off 5 Press the MENU button Move the Joystick right or left to select Print and then press the Joystic...

Страница 95: ...the USB cable and set the DVD camcorder to PictBridge The date time option may not be supported by all printers Check with your printer manufacturer The Date Time menu cannot be set up if the printer does not support this option PictBridge is a registered trademark of CIPA Camera Imaging Products Association an image transfer standard developed by Canon Fuji HP Olympus Seiko Epson and Sony Use the...

Страница 96: ...the volume on TV is turned down forgetting this may cause feedback from the TV speakers Carefully connect the input and output cables to the corresponding connections on the device the DVD camcorder is being used with Viewing on TV screen 1 Turn on the TV and set the input selector to the Input connection the DVD camcorder is connected to This is often referred to as line Refer to the TV instructi...

Страница 97: ...n that the DVD camcorder is recording will appear on the TV screen Press the Display button to switch the display status page 26 Howling may occur when the DVD camcorder is too close to the other devices or the volume is high Keep the DVD camcorder a reasonable distance away from the other connected devices Image display depending on TV screen ratio Storage Recording ratio Wide 16 9 TV 4 3 TV DISC...

Страница 98: ...select the recorded dubbed image in the thumbnail index view then press the Joystick 4 Press the record button on the connected device The DVD camcorder will start playback and the recording device will dub it Refer to Editing chapter to create a playlist by selecting desired scenes from those recorded on this DVD camcorder pages 40 46 Audio is heard from the speaker If the volume is too high nois...

Страница 99: ...AV device instead of copying the pre recorded sound on a disc 7 To cancel press the Recording start stop button again Voice Plus is available only when the AV cable is connected If a USB cable is connected the Voice Plus function may not operate properly SC DX103 DX105 only If you perform Stop Play Pause REW or FF while the Voice Plus function is being executed the Voice Plus function will be deac...

Страница 100: ...or or higher Miscellaneous Internet Explorer 5 5 or later DirectX 9 0 or later USB port must be provided as standard USB 2 0 or USB 1 1 Hi speed USB USB 2 0 is recommended USB interface is not supported on Macintosh operating systems The above system requirements information is not a guarantee that the provided software will work on all personal computers meeting those requirements On a slower PC ...

Страница 101: ... your CD ROM drive is mapped to D Drive Installing Driver DV Driver and DirectX 9 0 DV Driver is a software driver that is required to support establishing connection to a PC If it is not installed some functions will not be supported 1 Click on DV Driver on the Setup screen Driver software is installed automatically Following drivers will be installed PC Camera USB Streaming driver Capture Driver...

Страница 102: ...ility for different CD versions For movie playback on a PC install software in this order DV Driver DirectX 9 0 Video Codec For PC Cam use install software in this order DV Driver DirectX 9 0 Video Codec You have to install DV Driver DirectX 9 0 Video Codec to run DV Media Pro properly If a message saying Digital Signature not found or something similar appears ignore the message and continue with...

Страница 103: ...e icon on the task tray 2 Select USB Mass Storage Device or USB Disk then click Stop 3 Click OK 4 Disconnect the USB cable from the DVD camcorder and PC We recommend using the AC power adaptor as the power supply instead of the battery pack When the USB cable is connected turning the camcorder on or off may cause the PC to malfunction If you disconnect the USB cable from the PC or the DVD camcorde...

Страница 104: ... The Removable Disk icon which represents the storage media in the DVD camcorder appears in the My Computer window b Double click the Removable Disk icon 4 The folders in the storage media appear Different file types are stored in different folders If the Removable Disk window does not appear confirm the connection page 93 or perform steps 1 and 2 If the Removable Disk window does not appear click...

Страница 105: ... 3 As in movie image files the file number automatically increases when a new image file is created When the number of photo images exceeds 99 a new folder is created A new folder stores files from DCAM0001 The folder name increases in the order of 100SSDVC 101SSDVC etc Image format Movie image Images are compressed in MPEG4 Moving Picture Experts Group format The file extension is AVI The picture...

Страница 106: ...a pages 94 95 The folders in the storage media appear 2 Create a new folder enter the folder name then double click it 3 Select the folder to copy then drag and drop it into the destination folder The folder is copied from the memory card to the PC It is not guaranteed that the files downloaded to the PC will be played connecting to a PC SC DX103 DX105 only AD68 02550A SC DX100_ENG_IB indb 96 2008...

Страница 107: ...munication Using the DVD camcorder with PC Net meeting program installed you can participate in a video conference The PC camera s screen size Transferred video frame rate for the PC camera function is max 12 5 fps 640X480 VGA pixels for USB 2 0 connection If PC is connected to the DVD camcorder with a USB cable only the POWER switch and Zoom lever can be operated Run a video chatting application ...

Страница 108: ...that you put the DVD camcorder in a box together with a small silica bag when storing it in a closet etc Do not store the DVD camcorder in a place subject to strong magnetism or intense vibration This could cause malfunctions Detach the battery pack from the DVD camcorder and store it in a cool and dry place Leaving the battery pack attached or storing it at high temperatures could shorten its lif...

Страница 109: ...dust ADDITIONAL INFORMATION Storage media Be sure to follow the guidelines below to prevent corruption or damage to your recorded data Do not bend or drop the storage media or subject it to strong pressure jolts or vibrations Do not splash the storage media with water Do not use replace or store the storage media in locations that are exposed to strong static electricity or electrical noise Do not...

Страница 110: ...ry in a plastic bag Do not modify or disassemble Do not expose the battery to temperatures exceeding 60 C 140 F as this may cause the battery to overheat explode or catch fire To prevent damage and prolong service life Do not subject to unnecessary shock Charge in an environment where temperatures are within the tolerances shown as below This is a chemical reaction type battery cooler temperatures...

Страница 111: ... recording on it When loading a DVD RW disc you must format it in Video or VR mode When loading a DVD RW disc you must format it We cannot guarantee that you will be able to play back in all other manufacturer s DVD camcorders DVD players recorders or PC s For compatibility information please refer to the manual of the device you wish to play back on Discs must be finalized before it can be played...

Страница 112: ...t to view your recordings on a TV or to copy it to an external device it must be an NTSC system based TV or an external device and have the appropriate Audio Video jacks Otherwise you may need to use a separate video format transcoder NTSC PAL format converter NTSC compatible countries regions Bahamas Canada Central America Japan Korea Mexico Philippines Taiwan United States of America etc PAL com...

Страница 113: ...sc Erase recorded image Finalized Disc The disc is finalized To record on a DVD RW RW disc unfinalize it Not Supported Disc The disc is not recognized in the DVD camcorder The disc has been finalized in a camcorder manufactured by another company The supported discs are DVD R DVD R DL DVD RW and DVD RW Use a new disc Disc Error File system does not match to the disc Disc is formatted in the PC Ref...

Страница 114: ...ruption or recordings from other DVD camcorders or recorders are present on the storage media Memory cards SC DX103 DX105 only Message Icon Informs that Action Insert Card There is no memory card inserted in the card slot Insert a memory card Use another storage media pages 30 Card Full There is not enough space to record in the memory card Delete unnecessary files on the memory card Use another s...

Страница 115: ...hen this happens you temporarily may not use the record or play functions of the DVD camcorder Also using the camcorder while there is condensation may cause malfunction or damage What can I do Turn the power off and detach the battery pack and leave it in a dry area for 1 2 hours before using it When does the dew condensation occur When the device is relocated to a place with a higher temperature...

Страница 116: ...pan and cannot be recharged Use another battery pack Displays Symptom Explanation Solution The LCD is turned off Keep away from magnetic materials When magnetic material is near the left side of the DVD camcorder the LCD may be turned off but it is not a malfunction The image in the Viewfinder is blurred The Viewfinder lens has not been adjusted Adjust the Viewfinder control lever until the indica...

Страница 117: ... card SD card if any page 53 You cannot delete images protected by another device Release the protection of the image on the device You cannot format the memory card Release the lock on the write protect tab of the memory card SD card if any page 53 The memory card is not supported on your camcorder or card has some problems The data file name is not indicated correctly The file may be corrupted T...

Страница 118: ...screen becomes red or black for an instant This is not a malfunction During recording the date time does not display Date Time is set to Off Set the Date Time to on page 29 You cannot record a photo image SC DX103 DX105 only Set your camcorder to the digital camera memory card record mode page 30 Release the lock on the write protection tab of the memory card if any The memory card is full Use a n...

Страница 119: ... page 52 54 The Skip or Search function does not work properly If the temperature inside the camcorder is too high it may not function properly Turn the camcorder off and turn it on again a little later Connecting Dubbing with other devices TV DVD players etc Symptom Explanation Solution You cannot view the image or hear the sound from the connected device Connect the audio of the audio video cabl...

Страница 120: ...again properly The image or sound on your camcorder is not played on your computer properly Movie playback or sound may stop temporarily depending on your computer The movie or sound copied to your computer is not affected If your camcorder is connected to a computer that does not support hi speed USB USB2 0 the image or sound may not be played correctly The image and sound copied to your computer...

Страница 121: ...workable combinations of functions and menu items Menu cannot be used in the EASY Q mode The following menu cannot be used during recording Anti Shake DIS 16 9 Wide Quality Wind Cut Digital Zoom Disc Manage Cannot Use Because of the following setting Scene Mode AE Exposure Manual Shutter Manual C Nite Digital Effect Mosaic Emboss2 Pastel1 Pastel2 Anti Shake DIS C Nite Digital Effect Mirror 16 9 Wi...

Страница 122: ...neral Power source DC 8 4V Lithium ion battery pack 7 4V Power source type Lithium Ion battery pack Power supply 100V 240V 50 60Hz Power consumption Recording 5 35W LCD Viewfinder Operating temperature 0 40 C 32 F 104 F Storage temperature 20 C 60 C 4 F 140 F External dimensions Width 51 5 mm 2 03 inches Height 87 5 mm 3 44 inches Length 122 mm 4 80 inches Weight 439 g 0 92 lb 14 71 oz Except for ...

Страница 123: ... EXCLUSIONS WHAT IS NOT COVERED This warranty does not cover damage due to accident fire flood and or other acts of God misuse incorrect line voltage improper installation improper or unauthorized repairs commercial use or damage that occurs in shipping Exterior and interior finish lamps and glass are not covered under this warranty Customer adjustments which are explained in the instruction manua...

Страница 124: ...ead Pb Mercury Hg Hexavalent Chromium Cr 6 Poly Brominated Biphenyls PBBs Poly Brominated Diphenyl Ethers PBDEs in our products Code No AD68 02550A 00 If you have any questions or comments relating to Samsung products please contact the SAMSUNG customer care center Samsung Electronics America inc 1 800 SAMSUNG 726 7864 www samsung com AD68 02550A SC DX100_ENG_IB indb 114 2008 03 10 ÀÈÄ 4 20 14 ...

Отзывы: