background image

Navigation Menus


             DS/ITP-5012L Phone User Guide


129 

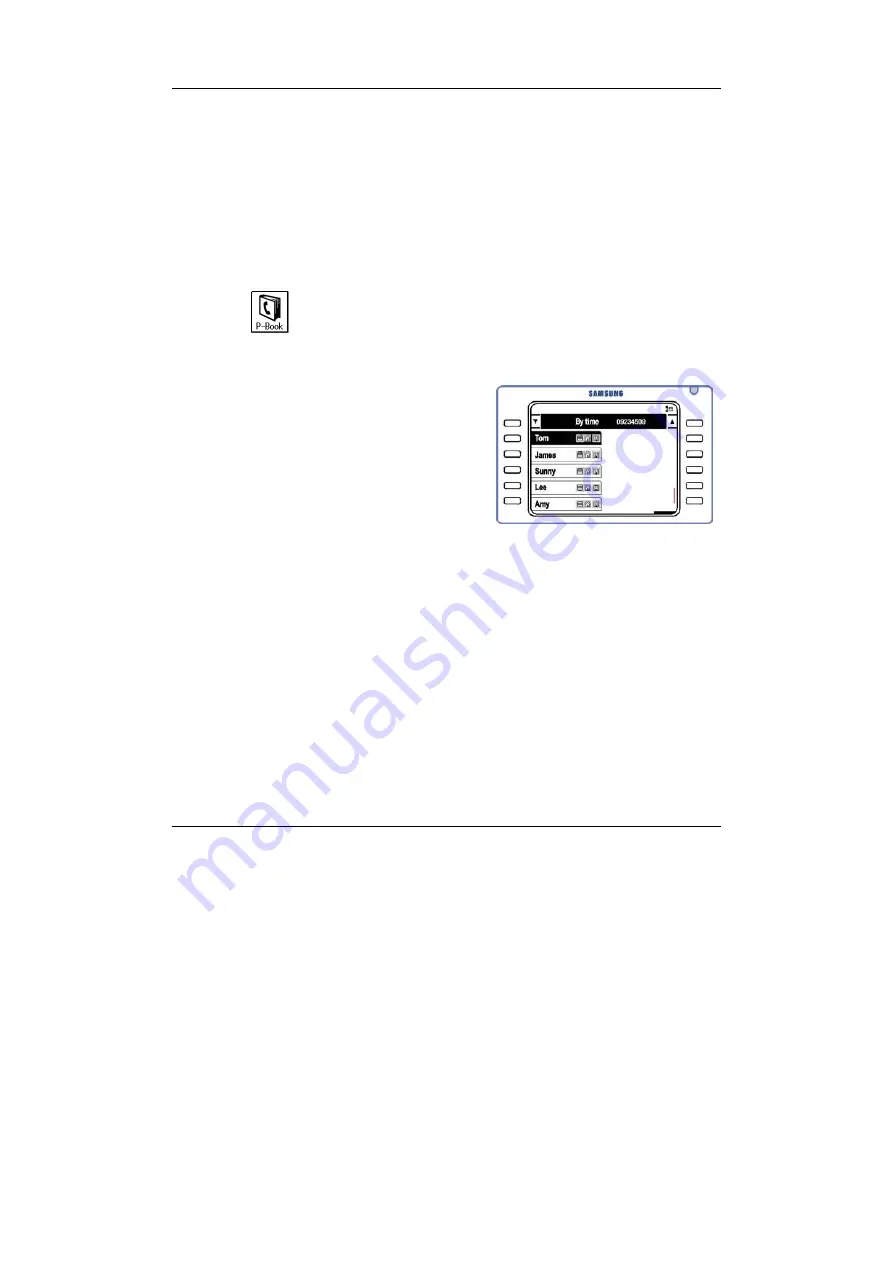
Search by Time 

You can search for any telephone number based on the time the number 
was registered in the phone. Speed dial names will be displayed commenc-
ing with the latest entry. 


1.

 Press the 

[Menu] 

button and use the direction buttons to select 

Æ

 [1. Search] 

Æ

 [5. By time] 

Then, press the 

[Enter]

 button. 

2.

 When the list of registered numbers  

is displayed, select the number and  
press the 

[Enter] 

button. 

z


To change or delete the number,  
press the [Menu] button. When the  
popup menu appears, select the  
desired menu 

Edit/Delete/


New Entry


3.

 Move to the telephone number you want to call and press the 

[Send]


button. 

Recently Called Numbers 

The last 30 numbers you called are saved in memory. You can review these 
numbers and redial any of them automatically. 


Содержание OfficeServ DS-5012L

Страница 1: ...SAMSUNG OfficeServ User Guide EnterpriseIPSolutions for Large LCD Phones ITP 5012L DS 5012L ...

Страница 2: ...aimer Samsung Telecoms is not responsible for errors or problems arising from customers not installing programming or operating their Samsung systems as described in this manual Copyright 2004 Samsung Telecoms UK Limited All rights reserved No part of this manual may be reproduced in any form or by any means graphic electronic or mechanical including recording taping photocopy or information retri...

Страница 3: ...000 RTTE TBR4 November 1995 incorporating TBR4 A1 December 1997 EN61000 3 3 1995 EN61000 4 2 1995 98 EN61000 4 3 1996 EN61000 4 4 1995 EN61000 4 5 1995 EN61000 4 6 1996 LVD EN60950 2000 IEC 60950 Third Edition 1999 EN61000 4 11 1994 AS NZS3548 1995 Manufacturer Samsung Electronics Co Ltd 259 Gongdan Dong Gumi City Kyungbuk Korea 730 030 Tae eok Jang General Manager place and date of issue name and...

Страница 4: ... operate it Take time to study this guide and familiarise yourself with the operation of your phone and the benefits the new IP technology can provide if using the Internet Phone Keep the guide in a convenient place by the phone and refer to it whenever necessary Safety Tips The ITP 5012L IP phone is supplied with an AC power adapter and this adapter must be used If an alternative power adapter is...

Страница 5: ...ratures May cause a fire or electric shocks Do not install the phone near a heat source electric fire radiator etc May cause a fire or electric shocks Do not use or store inflammable solvents or materials near the phone May cause a fire or electric shocks If the phone makes unexpected noises odd smells or smoke immediately unplug the phone and call your dealer May cause a fire or electric shocks ...

Страница 6: ...oft dry cloth to clean the phone Do not use any chemical solvents such as wax benzene alcohol thinner mosquito spray aerosol lubricant or detergent to clean your phone The use of chemicals on the phone may cause fading discoloration or damage Do not place heavy items on top of the phone May cause damage Do not attempt to dismantle or repair the phone yourself If repair is needed contact your deale...

Страница 7: ... the Samsung Network SYNC Program 9 CONFIGURING THE IP PHONE 10 1 Entering the Environment Setup Mode 10 2 Network Settings 13 3 Load Upgrade Settings 15 4 Setting System Authentication Information 17 5 Verifying Settings 18 6 Exiting Setup 19 THINGS YOU SHOULD KNOW 20 1 About Stations and Central Office Lines 20 2 Introduction to the Main Screens 21 Background Screen 21 AOM Screen 21 Fixed Featur...

Страница 8: ...e 33 8 Signal Tones 34 9 Changing Dial Tone 35 10 Phone Status Indicator 35 11 Button LEDs 36 MAIN FEATURES 37 1 Overview 37 2 Layout of the Phone 42 ANSWERING CALLS 46 1 Before Answering a Call 46 2 Answering an Intercom Call 47 Automatic Answering Mode 48 Voice Announce Mode 49 3 Answering an Outside Call 50 Automatic Answering Mode 51 Universal Answer for Outside Calls 52 4 Other Call Functions...

Страница 9: ...l 69 Using Authentication Account Codes 69 Saving a Telephone Number 71 Redialling a Saved Number 71 4 Other Call Functions 72 Last Number Redial 72 Calling From Lists of the Most Recent Called Numbers or Incoming Calls 73 Dialling from the Recent Call Log 73 Speed Dialling 74 Dialling from Directory Names 75 HANDLING CALLS 77 1 Intercom Calls 77 Hold an Intercom Call 77 Mute Your Phone 78 2 Exter...

Страница 10: ...Forward No Answer 88 Forward Busy No Answer 89 Forward Follow Me 89 Forward DND 90 Cancel Call Forwarding 91 2 Do Not Disturb DND 91 Setting Cancelling DND 91 3 Paging 93 Internal Page 93 External Page 94 All Page 96 Meet Me Page 97 Call Park and Page 99 Page Pickup 100 4 Off Hook Voice Announce OHVA 101 Make OHVA 101 Answer OHVA 102 Cancel OHVA 102 Reject OHVA 103 Block OHVA 103 5 Messaging 104 L...

Страница 11: ...tation 115 Saving Caller Number 115 Dialling a Saved Caller Number 116 Storing a Caller Number as a Speed Dial Number 116 Viewing the CID of Calls Parked or On Hold 117 10 Call Duration Display 118 11 Door Phone Related Features 118 Answering the Door Phone 118 Calling the Door Phone 119 12 Background Music 120 NAVIGATION MENUS 121 1 Navigation Buttons 121 Menu Button 121 Send Button 122 Enter But...

Страница 12: ...g Groups 132 Deleting All Telephone Numbers 133 Checking Your Own Extension Number 134 4 E Diary 135 Wakeup Call 135 Alarm Clock 136 Daily Planner 137 Memo Pad 139 Calculator 140 World Time 141 D DAY Plus 142 Unit Conversion 143 5 Messages 144 Received Messages 145 Sent Messages 148 Draft 151 6 Volume Adjustment 153 Selecting a Ring Type 153 Ringer Volume 154 Off Hook Volume 155 Handset Volume 156...

Страница 13: ...ring Mode 162 Phone Language 163 Setting the Type of Caller ID CID Display 164 Setting Absence Messages 164 Displaying Internal Calls 165 Dial Mode 166 Switching Station Features On Off 167 9 My Phone 168 Select the Background Screen 169 Entering Your Name 169 Network Information 170 Viewing Status Information 170 Enbloc Timeout 171 Privacy Option 172 Reset Configuration 172 Version Information 17...

Страница 14: ...r Guide 1 Installing the Phone ITP 5012L Internet Phone 1 Checking Components You should have received the following items If any are missing or dam aged contact your dealer LAN Cable for PC connection Phone Stand Handset ITP 5012L Power Adapter ...

Страница 15: ...nnecting the LAN cable from a PC s network card Power adapter connection jack For connecting the power adapter cable Handset connection jack For connecting the handset cord jack marked with symbol Connection jack for a recording device For connecting a recording device Holes for mounting the phone stand For inserting the phone stand when used as a desk phone ...

Страница 16: ...e Phone DS ITP 5012L Phone User Guide 3 2 Assembling the Phone Connecting Cables to the Phone 1 Connect the handset to the handset connection jack 2 Connect the LAN cable from the network to the LAN connection jack ...

Страница 17: ...utlet yet or if you do ensure that the power is not switched on 5 Connect any recording device to the recording device jack REC The recording device can record phone conversations Using the Phone Stand If the phone is to stand on a desk insert the phone stand into the two side holes located on the base and slide it upward as shown Now skip to the section Configuring the IP Phone to configure the w...

Страница 18: ...DS ITP 5012L Phone User Guide 5 DS 5012L Digital Phone 1 Checking Components You should have received the following items If any are missing or dam aged contact your dealer 4 Hole Jack Line Cord Phone Stand Handset DS 5012L ...

Страница 19: ...ng the line cord Handset connection jack For connecting the handset cord jack marked with the symbol Connection jack for a recording device For connecting a recording device USB connection port For connecting PC to the phone Holes for mountiong the desk top stand USB connection port Connection Jack for a recording device Phone line connection Jack Handset Connection Jack ...

Страница 20: ...stalling the Phone DS ITP 5012L Phone User Guide 7 2 Assembling the Phone Connecting Cables to the Phone 1 Connect the handset to the handset connection jack 2 Connect the line cord to the phone line jack ...

Страница 21: ...ect one end of a data cable not supplied to the USB connection port on the phone and connect the other end to the USB port on the PC z Refer to Supporting the Samsung Network SYNC Program below Using the Phone Stand Insert the phone stand into the two side holes located on the base and slide it upward as shown To familiarise yourself with the features of your phone refer to Things You Should Know ...

Страница 22: ...Samsung Network SYNC installation program can be downloaded from the Samsung Telecoms UK website shown below If your web browser is already open right click on the link and select to open the link in the browser http www samsung telecoms co uk You are also provided with details of how to use the program Connect the data cable as described above and start the program When finished exit the program ...

Страница 23: ...P 5012L IP phone You also need to do this if the phone sys tem to which your phone is connected has been changed or re initialised Before beginning the procedure make sure the power to the phone has been switched off 1 Entering the Environment Setup Mode Press and hold down the Menu button and turn on the power to the phone The environment setup menu appears on the LCD screen ...

Страница 24: ...etwork 3 Load Option 4 MAC address 2 Network 1 Mode 2 IP 3 Netmask 4 Gateway Items 2 to 4 are only displayed when setting Manual IP 3 Load Upgrade 1 Load Option 2 Upgrade Program 3 Upgrade Bootrom 4 Format 4 System 1 Password Not Used 5 Server 1 Server IP 2 ID 3 Password 6 Exit How to Edit the Setup Menus Navigation Buttons Dial Buttons ...

Страница 25: ... Numbers and Characters Enter a number or character using the dial buttons 0 to 9 Press the 4 button to enter a full stop Refer to Entering Numbers and Characters in the Things You Should Know part of this guide for how to enter characters Deleting Entries Press the button or Cancel button to delete entries by moving the cur sor to the left Saving Information Press the Enter button to save any inf...

Страница 26: ...menu to manually enter the IP address OR Select 2 DHCP to let the system automatically set the IP address The IP Address Subnet Mask and Gateway values are automatically set and are not displayed on the LCD screen OR Select 3 PPPoE to use broadband such as ADSL In this case you will need to enter the ID and password given to you by your Internet Service Provider The screen displays your selection ...

Страница 27: ...ou selected the 1 Manual IP menu you see the following options 1 Select 2 IP to display the phone s current IP address No address is displayed if an IP address has not yet been set Use the dial buttons 0 to 9 and 4 to enter a new IP address and press the Enter button Note Take care not to enter a duplicate IP address as the network does not sup port redundant IP addresses 2 Select 3 Netmask to dis...

Страница 28: ... the Enter button Your network settings are now complete 3 Load Upgrade Settings 1 Use the and V buttons to move to the 3 Load Upgrade menu and press the Enter button 2 Select 1 Load Option 3 Select 1 File System to download programs saved in the internal flash memory OR Select 2 TFTP down run to download programs saved in the TFTP server to the RAM memory of the IP phone ...

Страница 29: ...he Bootrom Enter the IP address of the TFTP server from which the Bootrom program should be downloaded and press the Enter button z The IP phone is rebooted after downloading the Bootrom program and the Environment Setup Main Menu appears You don t need to press the Menu button 6 The 4 Format menu is used to delete previously saved programs Check if the program needs to be deleted before using thi...

Страница 30: ...ired while operating it 1 Use the and V buttons to move to the 5 Server menu and press the Enter button 2 The submenus are displayed z If the system is set to request the ID and password of the IP phone 2 ID and 3 Password should be entered 3 The 1 Server IP menu is used for verifying or changing the IP address of the system Verify the current IP address of the system To change the IP address ente...

Страница 31: ... a maximum of eight numbers and is displayed as asterisks 4 when entered 5 Verifying Settings You can verify the settings after setup and make any changes required 1 Use the and V buttons to move to the 1 Information menu and press the Enter button 2 The submenus are displayed Select each menu and verify the settings Check especially the 2 Network menu settings before using the phone NOTE ...

Страница 32: ...ironment setup operation and reboot the system 1 Return to the environment setup menu select the 6 Exit menu and press the Enter button 2 The settings are saved and the phone reboots To familiarise yourself with the features of your phone refer to Things You Should Know and Main Features ...

Страница 33: ...ws you to make calls to other stations connected to the telephone system in the office A trunk central office line is directly connected to the switching system of your phone company It carries telephone calls from stations to phones outside the office and incoming calls from outside to stations in the office Station ...

Страница 34: ...isplay depending on whether you are busy on a call or the phone is idle in standby mode Background Screen This is the default screen that appears when in standby mode You can chan ge the Background screen using the My Phone feature in the Navigation Menu Screen below AOM Screen The AOM screen appears when the Screen button is pressed once when in standby mode or during a call The various features ...

Страница 35: ... are chosen from menus by pressing the Selection button next to each menu Executive Status Display If the Executive Secretary function is set in the system this screen appears when the Screen button is pressed three times while in standby mode A secretary can set the executive status appropriate to each situation Example of the Fixed Feature Menu screen during a call Example of the Fixed Feature M...

Страница 36: ...ge Volume Forward Configuration and My Phone features are displayed as icons When the phone is in standby mode the AOM screen Fixed Feature Menu screen Executive Status Display and Background screen are displayed consecutively whenever the Screen button is pressed Keep pressing the Screen button until the desired screen appears The menus displayed on the AOM screen depend on what is set up in the ...

Страница 37: ...he Screen button until the required AOM screen is displayed 2 Press the Selection button for the desired feature For example if you want to use the Message feature press the Selection button for MESSAGE 4 Using the Fixed Feature Menu Screen Features that can be used during a call or when in standby mode are displayed on the Fixed Feature Menu screen You select a feature by pressing the Selection b...

Страница 38: ...L Moving the Scroll key up and down scrolls through long text displays on the Fixed Feature Menu screen You can move between menus using either the Scroll key or Navigation direction buttons The menus displayed on the Fixed Feature Menu screen depend on what is set up in the system If there are more features than will display on the screen use the Scroll key or Navigation buttons to scroll to the ...

Страница 39: ...t fea tures However the phone system also provides feature codes which can be dialled to select features such as forwarding calls sending mes sages paging etc The table below lists the dialling codes for each function You can find out more about all these features by referring to the relevant sections in this guide Use this table for quick reference ...

Страница 40: ...sage No Ring 600 Cancel all call forwarding 42 ext no Cancel message 601 ext or grp no Set Fwrd All Calls 43 Set return messages 602 ext or grp no Set Fwrd Busy 44 Busy extension line callback 603 ext or grp no Set Fwrd No Ans 45 Busy extension camp on 604 ext or grp no Set Fwrd Busy No Ans 46 Set up a conference 605 ext or grp no Set Fwrd DND 47 Enter account code 606 ext or grp no Set Fwrd Follo...

Страница 41: ...uttons and Navigation buttons you can easily enter and edit alphabetic characters numbers and special characters on the LCD screen Selecting an Input Mode When a screen appears for entering text or numbers press the Menu but ton repeatedly until the desired input mode is selected These modes are shown below ...

Страница 42: ... dial buttons to insert the desired characters see table below Characters are printed on some of the dial buttons Each press of a different button automatically moves the cursor to the right If the character you want to enter is the same as the previous character press the button on the Navigation buttons to move the cursor one space to the right before press ing the required dial button Numeric M...

Страница 43: ...ame button wait for about three seconds after entering a character and then press the button again Press the button to insert a space following a character To insert a space between already entered characters press the and buttons to move the cursor to the character after which the space is to be entered and press the dial button To delete a character press the Cancel button This deletes the chara...

Страница 44: ... displayed press the and V buttons to scroll through other possible selections 2 Press the and buttons to move the cursor and select the character then press the Enter button 1 Press the dial button 0 to insert a space 2 Press the Cancel button to delete the character s to the left of the cursor Press and hold down the Cancel button to delete all charac ters Entering Numbers Press the Menu button ...

Страница 45: ...ustment TVolumeS buttons are used for adjusting the volume of the handset speaker and ringing Adjusting Handset Volume 1 Lift the handset and make a call 2 Press the VolumeS button to increase the handset volume OR Press the TVolume button to decrease the handset volume ...

Страница 46: ...crease the speaker volume OR Press the TVolume button to decrease the speaker volume Adjusting Ring Volume Here s how to adjust the ring volume while the phone is ringing Refer to Vol ume Adjustment in Navigation Menus to adjust ring volume while the phone is in standby mode 1 To increase the ring volume press the VolumeS button while the phone is ringing ...

Страница 47: ...th these tones as you begin to use your phone Signal Tone Meaning Signal Interval Dial tone Steady tone You can begin dialling Ring back tone The station you dialled is ring ing Busy tone The station you dialled is busy Transfer tone Your call is being held and you can dial another station Confirmation tone Very short beeps You have correctly set or cancelled a system feature The Signal Interval v...

Страница 48: ...ll Every number dialled subsequently will be transmitted in tone mode 10 Phone Status Indicator The status indicator turns on or off and lights different colours according to the status of the phone Status Indication Busy Steady red Station Ring Slow flashing red Trunk Line Ring Slow flashing blue Recall Ring Flashing pink Message Waiting Flashing red DND Set Slow flashing red ...

Страница 49: ...he phone status y Transfer button LED y y y y LED Status Steady red Call Forwarding is set on station y Hold button LED y y y y LED Status Flashing red Phone is locked for outgoing trunk line calls Steady red Phone is locked for incoming and outgoing calls y Speaker button LED y y y y LED Status Steady red Speakerphone is switched on Transfer Hold Speaker ...

Страница 50: ...arch and selection of menus The ITP 5012L IP phone represents a new era for voice and data communications It uses Internet Pro tocol IP to send receive voice and data For voice communication the phone uses your existing data network connection in your home or office There is no need for a separate telephone connection so reducing your communication infrastructure costs Network ...

Страница 51: ...ig and My Phone Features are shown as icons or menus on the LCD screen just like a mobile phone You can also use the buttons to scroll through long text displays on the LCD panel You can answer a call to another extension from your own phone You can program the speed dialling feature with fre quently used phone numbers Pressing a single dial button will make a call to the speed dial number ...

Страница 52: ...be connected for a conference call If a called line is busy you can reserve the automatic redial retry function and waiting mode The phone redials the called number automatically after the called party hangs up their phone Hold You can use the Hold or Transfer function when some thing urgently requires your attention or another call arrives at the phone This button is used for briefly holding a ca...

Страница 53: ...d to another extension always or if you are busy on another call or you do not answer If you have an urgent announcement to make you can page through the speakerphones of other extensions or through external speakers without calling individual ext ensions If you do not want any calls to ring at your phone the DND feature can be set to block incoming calls ...

Страница 54: ...me can be displayed on the LCD screen This feature is useful in situations where it is required to have this in formation before calls are answered When the Executive Secretary button is pressed an executive and secretary are connected The secretary can use this feature to receive an incoming call and then simply forward it to the executive ...

Страница 55: ...e LCD screen comprises the status screen and the main screen z The status screen at the top of the LCD displays the set feature icons Status Indicator Dial Button Selection Buttons LCD Panel Navigation Button Volume Button Screen Button Speaker Button Hold Button Transfer Button Selection Buttons Microphone Conference Button Speaker Scroll Key ...

Страница 56: ...ue or pink indicates the phone status These are described in Things You Should Know Screen Button Select menus on the AOM Add On Module screen Fixed Feature Display or Executive Status Display These are described in Things You Should Know Executive Secretary Call Forward Phone Lock Answer Mode DND Headset Mode Group Listening Mute Alarm Message Network Connection Status ...

Страница 57: ...uttons to quickly move between the items displayed in the phone menus Conference Button Connect multiple callers in a conference Transfer Button Transfer a call Navigation Buttons Use phone functions such as Phone Book E Diary Message Vol ume Forward Config and My Phone via icons or menus on the screen Microphone Speak through the speakerphone instead of the handset Hold Button Briefly hold a call...

Страница 58: ...Main Features DS ITP 5012L Phone User Guide 45 Dial Buttons Enter numbers and characters Speaker Hear a caller s voice or ring tones through the speaker instead of the handset ...

Страница 59: ...swering method Handset or speakerphone Answering an intercom call Automatic Answering mode Voice Announce mode Answering an outside call Universal Answer Feature Station Call Pickup Group Call Pickup Answering a waiting call How Answer a Call Using the handset Lift the handset to answer a call Using the speakerphone Answer a call through the speakerphone without lifting the handset by pressing the...

Страница 60: ...tercom Call How to answer a call from another station Using the Handset 1 When a call arrives a call receipt message will be displayed on the LCD 2 Lift the handset The call is automatically connected to your phone for you to answer 3 Replace the handset when finished ...

Страница 61: ...when finished To adjust the speaker volume while the phone is ringing press the T Volume S buttons When a call arrives and a call receipt message appears on the LCD but the phone does not ring you should lift the handset to answer the call Automatic Answering Mode How to answer a station call on a phone which has the Automatic An swering mode set z Refer to Setting the Answer Mode in Navigation Me...

Страница 62: ...he handset for privacy during the call Voice Announce Mode How to answer a station call on a phone which has the Voice Announce mode set 1 When an incoming call arrives you hear a short signal tone and then hear the caller s voice through the speaker 2 To answer the call lift the handset or press the Send button When the conversation is finished press the Speaker or End button ...

Страница 63: ...an Outside Call How to answer an outside external call Using the Handset 1 When a call arrives a call receipt message is displayed on the LCD 2 Lift the handset and the ringing call will be automatically connected to your phone 3 Replace the handset when finished ...

Страница 64: ...ume S buttons while the phone is ringing to adjust the speaker volume When a call arrives and a call receipt message appears on the LCD but the phone does not ring you should lift the handset to answer the call Automatic Answering Mode If the Auto Answer option for external calls is enabled on your phone when an incoming call arrives you hear a signal tone of short interval and the phone automatic...

Страница 65: ...r the call and ring through an external speaker for attention The Universal Answer feature does not apply to intercom calls 1 If an outside call arrives it rings through an external speaker 2 At a station press the Screen button repeatedly until the Fixed Feature Menu screen appears z Or press 6 7 the function code for Universal Answer 3 Press the Selection button for UNIV ANSWER displayed on the ...

Страница 66: ...unctions The following functions are available for answering both intercom and outside call Station Call Pickup From your own phone you can pick up a call ringing at another station e g if there is no one at that station to answer 1 Lift the handset and listen for dial tone 2 Press 6 5 the function code for station call pickup NOTE ...

Страница 67: ...answer recalls to a station ex cept operator recalls only new intercom or outside calls Group Call Pickup Use the group call pickup feature to pick up a call at another ringing sta tion when your phone and the ringing phone are part of the same pickup group 1 Lift the handset and listen for dial tone 2 Press 6 6 the function code for group call pickup NOTE ...

Страница 68: ... Answering a Waiting Call If you are busy on a call and another call rings your phone you hear a camp on tone The menu box for a waiting call will flash on the AOM screen so you can answer the new call 1 Press the Screen button until the AOM screen appears z If the Automatic Hold feature is set on your phone the current call will be placed on hold automatically 2 Press the Selection button for the...

Страница 69: ...ring Calls DS ITP 5012L Phone User Guide 56 3 When a new incoming call arrives during the phone conversation press the Hold button and then press the Selection button of the flashing number on the AOM screen ...

Страница 70: ... speakerphone Making an intercom call Busy station callback Busy station camp on Calling system operator Making an outside call Redial Automatic redial Setting callback on external line Answering external call back Call parking orbits Using authentication codes billing codes Save dialled number Calling the saved number Feature Last number redial Dialling from recent call log Speed dialling Diallin...

Страница 71: ...ake a Call Using the handset Lift the handset to make a call Using the speakerphone Make a call through the speakerphone without lifting the handset by pressing the Speaker button Hot keypad feature If the Hot Keypad feature has been enabled on your phone you do not need to lift the handset or press the Speaker button to begin dialling Simply dial the number and press Send The Speaker button LED l...

Страница 72: ...r of the station z Or press the Selection button corresponding to the extension number shown on the AOM screen 3 Press the Send button to begin dialling z If you hear a signal tone of very short interval without the dial tone the station you called is set for a voice announcement or automatic answer Begin speaking immediately 4 Begin speaking when the called party answers ...

Страница 73: ...the speakerphone to the handset by lifting the handset during the call if required Press the Speaker button to hang up the call on the speakerphone when finished Busy Station Callback Q Setting a Callback When you call another station and receive a busy signal you can set a callback on that station When it becomes free it will automatically ring you back 1 Press the Selection button for CALLBACK d...

Страница 74: ...e handset The screen will display a callback message Q Answering a Callback When the station on which you set a callback becomes free your phone will ring 1 Lift the handset You will hear ringing at the free station 2 Begin speaking when the other party answers the reserved extension number ...

Страница 75: ... receive a busy signal but you do not want to wait for a callback you can set a camp on to the station The called station is made aware that your call is waiting 1 Press the Selection button for CAMP ON displayed on the screen z Or press 4 5 the function code for camp on to an extension The called station will receive off hook ring tone repeated every few seconds to indicate that your call is wait...

Страница 76: ...ll the system operator or group of operators If a specific operator needs to be called dial that person s extension number 3 Making an Outside Call Using the Handset 1 Lift the handset press 9 and then dial the external telephone number z Or press the Selection button corresp onding to the external number on the AOM screen to dial the number 2 Press the Send button to begin dialling NOTE ...

Страница 77: ... speak through the microphone You can switch from the speakerphone to the handset by lifting the handset during the call if required Press the Speaker button to hang up the call on the speakerphone when finished Redial Number You can redial the last external number you dialled 1 With the phone is in standby mode press the Screen button repeatedly until the Fixed Feature menu screen appears z Or pr...

Страница 78: ...re Menu screen will automatically display Last Re dial during a call even if the Screen button is not pressed Automatic Redial If the called external number is busy the phone redials the called number automatically up to 99 times depending on what is programmed in the sys tem This is a useful when the called party is often busy at a service centre or call centre for example NOTE ...

Страница 79: ...hrough the speaker The microphone is automatically disabled 2 When the called party answers either lift the handset or press the Speaker button or the Send button z You must respond within 10 seconds An automatic redial will be cancelled if not answered within this time When you dial another number the automatic redial is cancelled To cancel redial lift and replace the handset NOTE ...

Страница 80: ...e Q Setting a Callback 1 When busy tone is heard press the Selection button for CALLBACK displayed on the screen z Or press 4 4 the function code for a callback 2 When you hear a confirmation tone replace the handset When the busy line becomes available your phone will ring Answer the callback as described next To cancel a callback Follow the above procedure for setting a callback At step 2 press ...

Страница 81: ... 68 Q Answering a Callback 1 Lift the handset You will hear dial tone Dial the outside telephone number and press the Send button 2 Begin speaking when the called party answers A callback will be cancelled if not answered within 30 seconds NOTE ...

Страница 82: ...mes called Authorisation Codes and Account Codes may be set up in your system An authentication code may be re quired to allow you to make external calls Account codes are used for billing purposes so call charges can be assigned to specific accounts Q Using an Authentication Code If you are asked for an authentication code before you are allowed to make an outside call press the Selection button ...

Страница 83: ...screen z Or press 4 7 the function code for using an account code Your call will not be interrupted 2 Enter the account code 3 Press the Selection button for ACCT on the screen If you enter an incorrect account code press the Selection button for the ACCT menu twice and enter the correct account code Only the correct code will be printed out on call records The use of authentica tion codes and acc...

Страница 84: ...AVE REPEAT before hanging up This will save the phone number called Redialling a Saved Number You can redial a saved number at any time but before you save another number Press the Selection button for SAVE REPEAT on the Fixed Feature Menu screen z Or press 1 7 the function code for redialling a saved number Remember the saved number is stored in memory until you save another number NOTE ...

Страница 85: ... for making both intercom and outside call Last Number Redial Press and hold the Send button while in standby mode The phone redials the last telephone number that you dialled You can make a call through the speakerphone or handset You can switch from the speaker to the handset simply by lifting the handset ...

Страница 86: ...s in the Navigation Menus Phone Book part of this guide Dialling from the Recent Call Log Up to 60 numbers that were recently sent or received via your phone will be stored in a Recent Call Log in the order they were dialled received You can select a number to dial from the log 1 Press the Send button while in standby mode The Recent Call Log is displayed 2 Use the direction buttons to move the cu...

Страница 87: ...s made or received and call duration After viewing this information press the Send button to dial the number Speed Dialling Frequently dialled telephone numbers can be programmed in a system wide list of speed dial numbers 500 999 or 050 999 or your personal speed dial list of numbers 00 49 Telephone numbers can then be automatically dialled for you at the press of a button 1 With the phone in sta...

Страница 88: ...numbers that can be used only on your station The system administrator determines the maxi mum number of personal speed dial numbers allowed To register new speed dial numbers or search the list refer to the Navigation Menus Phone Book part of the guide Dialling from Directory Names Extension and speed dial numbers with associated names can be stored in your phone s directory You can select number...

Страница 89: ...rs or station extension numbers 4 Enter the first letter of the desired name using the dial buttons and press the TVolumeS buttons to search for the name 5 When name appears press the Selection button for DIAL to dial the number Begin speaking when the called party answers To enter characters refer to Entering Characters in Things You Should Know It is possible to move directly to the directory yo...

Страница 90: ...ring a Waiting Call in Answering Calls Hold an Intercom Call You can put a call on hold and resume the call later 1 Press the Hold button and replace the handset to put the current call on hold z If using the speakerphone press Hold and then the Speaker button to put on hold z When the call is on hold the held party hears music or a voice message depending on the system setting 2 Lift the handset ...

Страница 91: ... cannot be heard by the other party 2 Press the Selection button for the MUTE OFF feature to clear the Mute function You can again be heard by the other party 2 External Calls The following features can be used during an external call The Hold fea ture is useful for temporarily disconnecting a call to which you want to re turn later To hold a call and answer a waiting call refer to Answering a Wai...

Страница 92: ...puts the call on system hold so you can reconnect to the call from any phone z Pressing the Hold button twice puts the call on exclusive hold so you can reconnect to the call only from your own phone 2 Press the Screen button until the AOM screen is displayed The call number on hold flashes on the screen 3 To resume the call press the DT button for the flashing number on hold 4 Resume your convers...

Страница 93: ...d make a call to another station This is useful for example if you need to consult with a colleague dur ing your call 1 Press the Transfer button The external caller will hear Transfer Call tone 2 Dial the station number 3 Begin speaking when the called party answers 4 Press the Transfer button to reconnect to the external call on hold ...

Страница 94: ... call to the requested station or external number 1 Press the Transfer button during the call 2 Press the station or external number recipient to which the call should be transferred 3 Disconnect the call e g replace the handset z To transfer the call automatically disconnect the call when the recipient s phone rings Otherwise wait until the recipient answers your call inform them of the transfer ...

Страница 95: ... the Transfer button to re connect to the external call If the recipient is busy you can disconnect and park the call then no tify the busy station of the parked call see Call Parking below Call Parking You can place a call in a parking orbit and announce the call over a paging system for someone to pick up There is a total of 10 0 9 selectable park ing orbits Q Parking a Call 1 During a call pres...

Страница 96: ...d call is announced press the Selection button for the PARK menu on the AOM screen and dial the orbit number You will be connected to the call Transfer Calls to the Voice Mailbox You can transfer an incoming call to your voice mailbox if this exists The phone system should have a Voice Mail card installed and the system ad ministrator should have enabled the voice mailbox function 1 When a call ar...

Страница 97: ...for you in the mailbox 3 Intercom and External Calls The following functions are available for use during both intercom and external calls Conference Calls Up to five parties including yourself as the conference supervisor can participate in a conference call simultaneously If your system has been programmed with conference groups you can select a group to confer ence see Load Group for Conference...

Страница 98: ... each number by pressing the right Selection button for the entry field Press the button again if you want to cancel an entry 3 Press the Selection button for Send All The conference connection status of all the numbers is displayed z To delete a number from the conference press the Selection button for Delete to the right of the number You can also dial the conference function code 4 6 to set up ...

Страница 99: ... in the group by moving to the group and pressing the Menu button Select the Save menu and save the entered number to the group 3 Use the direction buttons to move to the required group and press the Enter button The numbers listed in the group are shown 4 Press the Selection button for Send All Your system must be programmed with conference groups and your phone set to Enbloc dialling mode for yo...

Страница 100: ...hen you are busy on a call Call forwarding is set using the appropriate function codes Lift the handset to dial the codes if the Hot Keypad feature is not set on your phone Call Forwarding can also be set using the Navigation Menus Refer to the Call Forwarding section in Navigation Menus Forward All Calls You can set a call forward to another station for all incoming calls uncondi tional 1 Press 6...

Страница 101: ... arrive when you are busy on another call 1 Press 6 0 2 in standby mode and dial the number to which calls should be forwarded 2 Wait for the confirmation tone Forward No Answer You can set a call forward to another station for calls that you do not an swer within a specified time 1 Press 6 0 3 in standby mode and dial the number to which calls should be forwarded ...

Страница 102: ...n can only be set if forward destinations are already sepa rately set for both Busy and No Answer conditions above 1 Press 6 0 4 in standby mode 2 Wait for the confirmation tone Forward Follow Me If you intend to temporarily relocate to a different position you can forward calls that are incoming to your usual phone to the phone at the new posi tion that is you cause your calls to follow your move...

Страница 103: ... the station to where calls are to be forwarded 2 Enter the number of the station from where calls are to be forwarded 3 Wait for the confirmation tone Forward DND DND is Do Not Disturb mode You can set this mode described below if you don t want calls to ring at your phone However you can instead choose to automatically forward any calls when DND mode is set 1 Press 6 0 5 in standby mode and dial...

Страница 104: ... can cancel any call forwarding set at your phone Lift the handset and press 6 0 0 2 Do Not Disturb DND If you set DND mode on your phone incoming calls are forwarded to the DND forward destination if programmed see Forward DND above or callers will receive busy tone Setting Cancelling DND 1 Press the Screen button until the Fixed Feature Menu screen is displayed Or press the DND setup code 4 0 1 ...

Страница 105: ...utton for DND displayed on the screen 3 Press the Selection button for ON to set DND Or to cancel a DND setting press the Selection button for OFF The status indicator stops flashing 4 The status indicator blinks to notify that the DND mode is set You will hear confirmation tone ...

Страница 106: ...n work areas such as offices or factories An additional All Page feature allows you to do both Stations and speakers are arranged in zones which you can select When making a page announcement you should use the handset for best audio quality Internal Page To page announce through station speakers 1 Lift the handset Or press the Page function code 5 5 2 Press the Selection button for the PAGE menu ...

Страница 107: ... Press 0 to page all internal zones 4 Deliver the announcement after the confirmation tone The announcement will be broadcast to stations in the selected zone 5 Replace the handset after completing the page External Page To page through external speakers 1 Lift the handset Or press the Page function code 5 5 ...

Страница 108: ...AGE menu displayed on the screen 3 Select the external zone by pressing 5 6 7 or 8 Press 9 to page all external zones 4 Deliver the announcement after the confirmation tone The announcement will be broadcast through speakers in the external zone 5 Replace the handset after completing the page ...

Страница 109: ...he handset Or press the Page function code 5 5 2 Press the Selection button for the the PAGE menu displayed on the screen 3 Press the 4 button 4 Deliver the announcement after the confirmation tone The announce ment will be broadcast through speakers in the external and internal zones 5 Replace the handset after completing the page ...

Страница 110: ...dual and have them dial a code to con nect to your phone 1 Lift the handset Or press the Meet Me Page function code 5 4 2 Press the Selection button for the the MEET ME PAGE menu displayed on the screen 3 Press the page zone number 0 9 4 Instruct the recipient to press 5 6 after the confirmation tone ...

Страница 111: ...age is displayed on the screen Press the Selection button for ANSWER WAIT Or press Transfer then 5 4 6 The Wait until the recipient responds message is displayed Hold on to the handset until the recipient answers 7 When the recipient answers their line is automatically connected to yours ...

Страница 112: ...m calls cannot be parked or paged 1 Press the Selection button for the PAGE menu while the call is on line The call is automatically parked 2 Press the number of the page zone where the recipient is normally located or press the 4 button to page all internal and external zones 3 Wait for the confirmation tone and announce the call and the station number or trunk line number where the call is parke...

Страница 113: ...Call Park and Page announcement above 1 Lift the handset and press the Screen button until the Fixed Feature Menu screen is displayed Or press the Page Pickup function code 1 0 2 Press the Selection button for the PAGE PICKUP menu displayed on the screen 3 Press the phone number announced in the page The line is connected to the parked call ...

Страница 114: ... receive OHVA from other stations You can put your current call on hold and answer the OHVA However you also have the option to reject or block OHVA calls Make OHVA Both the handset and speakerphone may be used for OHVA but the handset is recommended since making announcements to nearby sta tions through the speakerphone may cause echoes 1 Dial the station number and press the Selection button for...

Страница 115: ...ransferred calls Answer OHVA When an OHVA call is connected the selection box for the station number flashes on the AOM screen Press the Screen button and the flashing Call button to put the current call on hold and connect to the OHVA caller An OHVA must be answered within a programmable time usually 10 seconds or it will be automatically cancelled Cancel OHVA After the OHVA call is finished pres...

Страница 116: ...onnect the OHVA call and resume your original call Block OHVA You can set the OHVA Block feature which prevents other users from making an OHVA call to you when you are on a call 1 Press the Screen button until the Fixed Feature Menu screen is displayed 2 Press the Selection button for OHVA BLOCK displayed on the screen Or press the Selection button for OFF to cancel an OHVA Block ...

Страница 117: ...g Indication When calling a station that does not answer or is busy you can leave a message waiting indication to notify the user to call you back The indica tion takes the form of a flashing status indicator or button LED or a spe cial dialling tone depending on the type of phone receiving the indication Similarly indications can be left at your station by others This feature does not apply to ex...

Страница 118: ...ion number Enter your own number to delete all messages at your station or refer to Verify Return or Delete Message below to selectively delete indications left at your station Verify Return or Delete an Indication The keyset status indicator flashes red when a message indication is left at your phone You can check the number of each calling station and ei ther ring them back or delete the indicat...

Страница 119: ... the Selection button for the REPLY menu to reply to the message The number of the station is automatically dialled If the station does not answer the status indicator continues to flash and you can try again later or delete the indication If more than one indication is left at the phone press the Selection but ton for NEXT to move to the next message and reply or delete Press the Selection button...

Страница 120: ...u Messages 01 15 are set by the system administrator as standard messages By default the first 10 of these 01 10 are preset as shown below but may be changed Check with your system administrator what messages are set 01 GIVE ME THE CALL 02 TAKE A MESSAGE 03 ASK THEM TO HOLD 04 SEND TO MY VM 05 TRSF TO MY SECY 06 LEAVE A MESSAGE 07 PAGE ME 08 OUT OF TOWN 09 IN A MESSAGE 10 I WILL CALL BACK 1 Lift t...

Страница 121: ...d Message code To cancel a set message press the Selection button for the STATUS MSG menu and press the cancel code 0 0 The message displays on your phone Programmed Messages can also be set using the Navigation Menus You can also set your own personal messages See Setting Absence Mes sages in Navigation Menus Configuration NOTE ...

Страница 122: ...rator if you re not sure This allows a secretary to set the status of the executive to be displayed on the phone to set up messages for sending between the secretary and executive and to intercept calls for the executive and transfer them if appropriate Executive Status Display To set an appropriate display to indicate the status of the executive 1 In standby mode press the Screen button until the...

Страница 123: ...tary can receive calls for the executive and transfer them if appropriate 1 Answer and verify the nature of the call Then press the Selection button for BOSS SECR and notify the executive of the call 2 Replace the handset to transfer the call to the executive If the executive does not answer or rejects the call reconnect with the caller by pressing the Hold button ...

Страница 124: ... when required There are no preset messages in the system Create and Send Messages 1 In standby mode press the Screen button until the Fixed Feature Menu screen is displayed 2 Press the Selection button for the EXE SECR MSG menu 3 Press the Selection button for the extension number of the recipient z This screen is not displayed if there is only one executive or secretary phone z Up to four recipi...

Страница 125: ...s set up you see blank messages only Create your message as follows i Move to the Blank Message field where you want to enter a new message and press the Menu button ii Move to the Edit menu and press the Enter button iii Enter the message in the Input Message screen The message can be up to eight characters long Then press the Enter button ...

Страница 126: ...s to your extension number but you cannot answer calls to the group You can reassign the phone to the group at any time 1 In standby mode press the Screen button until the Fixed Feature Menu screen is displayed 2 Press the Selection button for the IN OUT GROUP menu 3 To remove your phone from the group press the Selection button for OUT OF GROUP To reassign your phone to the group press the Select...

Страница 127: ...1 During the call press the Selection button for GROUP LISTEN Others can now hear the conversation through the speaker but cannot be heard by the calling called party 2 To disable the speaker and resume a private conversation press the Selection button for LISTEN OFF If you want to disconnect the call after group listening always select LISTEN OFF before disconnecting to prevent any squeals from t...

Страница 128: ...s not provided e g international calls If the call is from a public phone If the information sent is corrupted If the telephone company fails to transmit the CID To set the type of CID Presentation you want on your phone refer to Setting the Type of Caller ID CID Display in Navigation Menus Con figuration There are a number of useful options that take advantage of CID displays Saving Caller Number...

Страница 129: ...he saved number Storing a Caller Number as a Speed Dial Number 1 When the CID is displayed press the Selection button for STORE displayed on the screen 2 The speed dial number in which the caller number is saved is displayed on the screen To dial using speed dial numbers see Speed Dialling in Making Calls ...

Страница 130: ...call press the Selection button for the INQUIRE menu displayed on the screen 2 Press the trunk line number displayed on the screen to verify the CID The CID of the trunk line number is displayed on the screen 3 When the inquiry is finished press the Send button to answer the call OR press the Selection button for the NND menu to view more information about the call OR press the Selection button fo...

Страница 131: ...h the trunk line is displayed on the LCD screen Incoming trunk calls The duration is displayed the moment you answer a call Outgoing trunk calls The duration is displayed after a preset time or when the recipient answers the call 11 Door Phone Related Features If the door phone and your phone are connected you can answer or call the door phone from your station Answering the Door Phone 1 When a ca...

Страница 132: ...button or Send button to connect to or or the door phone 3 If an electric door lock is installed press 1 3 to open the door Calling the Door Phone You can call the door phone to listen to what is happening in another room Dial the number of the door phone You can listen or speak through the door phone ...

Страница 133: ...ten to it through your phone s speaker 1 Press the Hold button to listen to background music 2 You can adjust the volume using the Volume buttons this will not affect the default speaker volume setting 3 Press the Hold button again to turn off the music Only the system administrator can set and change the background music NOTE ...

Страница 134: ...The Navigation buttons look like this Menu Button When the Menu button is pressed in standby mode main menus are dis played as icons If the End button or Speaker button is pressed while in menu mode the phone automatically exits menu mode NOTE ...

Страница 135: ...z Dial the most recently called number Enter Button The Enter button is used in menu mode to select or save the correspond ing item Direction Buttons Direction buttons are used to move between items or to edit item contents 1 button is used When moving the cursor upward in menu mode When moving to a higher level item of the current menu 2 button is used When moving the cursor to the right in menu ...

Страница 136: ...menu mode End Button Disconnects the call Exits from menu mode 2 Entering Menus When the phone is in standby mode press the Menu button on the Navi gation buttons The Phone Menu appears on the LCD screen Selecting Menus Use the direction buttons to move to the desired menu icon Then press the Enter button Alternatively press the dial button corresponding to the number of a menu 1 7 e g P Book is 1...

Страница 137: ...is connected to an external call in menu mode the phone becomes busy If there is a black bar at the bottom right of the LCD panel you can press the Menu button to perform other functions 3 Phone Book Press the Menu button and use the direction buttons to select Then press the Enter button NOTE Menu button ...

Страница 138: ...l No Then press the Enter button 2 When the speed dial number entry screen appears enter the speed dial number and press the Enter button 3 The telephone number corresponding to the entered number is dis played z If you press the Enter button without entering the speed dial number a list of all phone numbers will be displayed 4 Press the Send button to dial the selected telephone number z To chang...

Страница 139: ...utton Refer to Entering Characters in Things You Should Know for how to enter characters The speed dial name s matching the entry will be displayed z If you press the Enter button without entering a speed dial number a list of all the telephone numbers will be displayed 3 Press the Enter button to view the saved details for the selected num ber z To change or delete the speed dial name press the M...

Страница 140: ...mber is displayed z If you press the Enter button without entering a phone number a list of all telephone numbers will be displayed z If you enter only part of the telephone number a list of all telephone numbers that contain the entered digits will be displayed Entering 123 searches for all numbers that contain the sequence 123 Entering 123 searches for all numbers that start with 123 Entering 12...

Страница 141: ...ess the Menu button and use the direction buttons to select Æ 1 Search Æ 4 By Group Then press the Enter button 2 Move to the desired group from the list of registered groups and press the Enter button 3 Select a phone number mobile phone home work etc and press the Enter button 4 Move to the telephone number you want to call and press the Send button z To change or delete the selected number pres...

Страница 142: ...ect Æ 1 Search Æ 5 By time Then press the Enter button 2 When the list of registered numbers is displayed select the number and press the Enter button z To change or delete the number press the Menu button When the popup menu appears select the desired menu Edit Delete New Entry 3 Move to the telephone number you want to call and press the Send button Recently Called Numbers The last 30 numbers yo...

Страница 143: ...selected telephone number z To delete the selected number press the Menu button When the popup menu appears select the menu to delete the number or delete all saved calls Recent Caller Numbers Call details and caller ID if available of the last 30 incoming calls are saved in the incoming call log You can review these numbers and dial them automatically 1 Press the Menu button and use the direction...

Страница 144: ... the number or delete all saved calls Registering New Numbers You can save 1000 speed dial names and 2 400 telephone numbers in your Phone Book Each speed dial name can have the following infor mation registered up to five telephone numbers home mobile phone office etc fax e mail group and notes Each speed dial number can also be allocated a speed dial number location 1 Press the Menu button and u...

Страница 145: ...d message appears confirming the information is saved Editing Groups This procedure allows you to establish personalised groups to which speed dial names can be assigned This means you can search for speed dial numbers by group 1 Press the Menu button and use the direction buttons to select Æ 5 Edit Group Then press the Enter button 2 A list of registered groups appears if they exist 3 Press the M...

Страница 146: ...ct the group to delete from the list and press the Menu button Then select the delete menu When the Do you want to delete message appears select Yes and press the Enter button Deleting All Telephone Numbers To delete all saved telephone numbers 1 Press the Menu button and use the direction buttons to select Æ 6 Delete all Then press the Enter button 2 When the Password entry screen appears enter t...

Страница 147: ... the Enter button All the telephone numbers saved in the Phone Book will be deleted z Recent caller called numbers are not deleted Checking Your Own Extension Number You can check your own extension number if you need to Press the Menu button and use the direction buttons to select Æ 7 My own number Then press the Enter button Your number is displayed ...

Страница 148: ... button Move to the desired menu and press the Enter button Wakeup Call Allows you to set a wakeup call to ring for three minutes or until an swered The frequency options for a wakeup call are every day Mon day Friday or Monday Saturday 1 Press the Menu button and use the direction buttons to select Æ 1 Wakeup Call Then press the Enter button ...

Страница 149: ...ss the Enter button the set wakeup call will be cleared Alarm Clock This is similar to the Wakeup Call function except that the frequency of the alarm is limited to once only or every day Two separate alarm times are available 1 Press the Menu button and use the direction buttons to select Æ 2 Alarm Then press the Enter button 2 Select Alarm clock 1 or Alarm clock 2 3 Set the Time Ring and Repeat ...

Страница 150: ...tered z A note up to 32 characters long can be associated with each scheduled event If the note is more than eight characters long it can be viewed by se lecting it pressing the Menu button and then OK An available ring tone can be selected z An alarm can be set to ring at the set time the exact time an hour before the set time or 30 minutes before Q Schedule Registration 1 Press the Menu button a...

Страница 151: ... Press the Menu button and use the direction buttons to select Æ 3 Daily Planner Then press the Enter button 2 Use the direction buttons to select the date of the set schedule Press the Enter button 3 Press the Menu button and then z Select Add to add a new schedule z Select Edit to modify the schedule z Select Delete to delete the schedule When the Do you want to delete message appears select Yes...

Страница 152: ...mo Pad Æ 1 Add New Memo Then press the Enter button 2 Enter the memo in the Memo screen and press the Enter button Refer to Entering Characters in the Things You Should Know part of this guide for how to enter characters Q Checking Modifying Deleting Registering Memos 1 Press the Menu button and use the direction button to select Æ 4 Memo Pad Æ 2 Search Then press the Enter button ...

Страница 153: ...ss the Enter button Calculator A simple calculator is available to add subtract multiply and divide numbers 1 Press the Menu button and use the direction buttons to select Æ 5 Calculator Then press the Enter button 2 Enter the first number Then press the direction buttons to select a calculation operator x z Press the button to enter a negative number the button to enter a decimal point or the Can...

Страница 154: ... York Dallas Tokyo Denver La Paz London Rome Miami Moscow Midway Bangkok Berlin Buenos Aires Beijing Samoa San Francisco Seoul Sydney Chicago Abu Dhabi Athens Alaska Alma Tai Oakland Okhotsk Wellington Los Angeles Jakarta Middle Atlantic Tashkent Phoenix Caracas Cape Verde Paris Hawaii Honolulu Helsinki and Hong Kong 1 Press the Menu button and use the direction buttons to select Æ 6 World Time Th...

Страница 155: ...so that you can check the time remaining until or the time passed since the entered date D Day The D DAY can be entered directly or can also be entered automatically by calculating the number of days before after the entered base date Q Entering a New D DAY 1 Press the Menu button and use the direction button to select Æ 7 D Day Plus Æ 1 D Day Add Then press the Enter button 2 Select 1 D Day Exact...

Страница 156: ... D Day from the D Day Search screen and press the Enter button to check the details 3 Press the Menu button to edit or delete the settings for the selected D Day Unit Conversion This feature provides a simple conversion program for commonly used units of measurement for temperature length weight volume and area 1 Press the Menu button and use the direction buttons to select Æ 8 Unit Convert Then p...

Страница 157: ...convert e g centimeter unit value and unit of con version e g metre and press the Enter button The converted value is displayed 5 Messages Press the Menu button and use the direction buttons to select Then press the Enter button Move to the desired menu and press the Enter button ...

Страница 158: ...on buttons to select Æ 1 Received Then press the Enter button 2 When new messages are received the display shows the number of messages Q Message Charge You can review received text messages and decide how you wish to be no tified of the arrival of a new text message 1 Press the Menu button and use the direction buttons to select Æ 1 Received Æ 1 Msg Charge Then press the Enter button ...

Страница 159: ...nu button to reply to resend or delete the message or delete all messages Q Setting a Message Arrival Alarm Allows you to set an alarm 1 5 notifying you of message arrival 1 Press the Menu button and use the direction button to select Æ 1 Received Æ 2 TextMsg Setup Æ 2 Indi Tone Then press the Enter button 2 Select an alarm and press the Enter button z Alarms are 1 2 3 4 5 The alarm you specify ri...

Страница 160: ...ton 2 Select the notification interval z Once Alarm rings once when a message arrives Every 2 Minutes Alarm rings every 2 minutes until you view the message No Tone You are not notified when a message arrives Then press the Enter button Q Setting Clearing Message Display Allows you to select whether to display the contents of the message when a message arrives 1 Press the Menu button and use the d...

Страница 161: ...pup screen without displaying the contents of the received message Then press the Enter button Sent Messages Allows you to write and send a new message In addition messages saved in the Sent message box and the Reserved message box can be resent through the Sent message box function 1 Press the Menu button and use the direction buttons to select Æ 2 Write Sent Then press the Enter button 2 Select ...

Страница 162: ... in Recipient and the message in Contents Press the Enter button to send message Refer to Entering Characters in Things You Should Know for how to enter characters z If sending succeeds the screen prompting you to save the message in the sent message box will be displayed Select Yes and press the Enter but ton to save the message z If sending fails the screen prompting you to save the message in t...

Страница 163: ...Sent Æ 1 Write Message Æ 2 Invoke Message Then press the Enter button 2 Use the direction buttons to move to the message to be retrieved and press the Enter button You can add new text or edit text and send the message using the displayed options z You can also delete the message or delete all saved messages Q Managing the Sent Message Box You can check delete or resend sent or reserved messages s...

Страница 164: ...age press the Enter button The selected message can be resent to another person or deleted z Select Delete All to delete all the messages from the Sent Message Box Draft Draft messages are messages you have written and saved but not sent e g messages that were interrupted during writing due to for example an arriving call These messages can be retrieved and completed Q New Message Registration 1 P...

Страница 165: ...rafts 1 Press the Menu button and use the direction buttons to select Æ 3 Draft Æ 2 Search Message Then press the Enter button 2 Use the direction buttons to move to the message to be retrieved and press the Menu button z To view the message select the mess age and press the Enter button z You can select to send modify or del ete the message or to delete all draft messages z When free space in the...

Страница 166: ...d use the direction buttons to select Then press the Enter button Move to the desired menu and press the Enter button Selecting a Ring Type There are eight ring types To select the ring type 1 Press the Menu button and use the direction buttons to select Æ 1 Ring type Then press the Enter button ...

Страница 167: ...ings to demonstrate each ring as it is selected Then press the Enter button Ringer Volume There are eight volume levels To set the ringer volume 1 Press the Menu button and use the direction buttons to select Æ 2 Ringer Then press the Enter button 2 Press the Volume buttons to select the volume level and press the Enter button ...

Страница 168: ...olume There are eight volume levels for the Off Hook ringer To set the level 1 Press the Menu button and use the direction buttons to select Æ 3 OffHook Ring Then press the Enter button 2 Press the Volume buttons to set the volume level and press the Enter button ...

Страница 169: ...u button and use the direction buttons to select Æ 4 Handset Then press the Enter button 2 Press the Volume buttons to set the volume level and press the Enter button Speaker Volume There are 16 volume levels you can set for the speaker 1 Press the Menu button and use the direction buttons to select Æ 5 Speaker Then press the Enter button ...

Страница 170: ... press the Enter button Background Music BGM Volume There are 16 volume levels you can set for BGM volume when BGM is set on your phone 1 Press the Menu button and use the direction buttons to select Æ 6 BGM Then press the Enter button 2 Press the Volume buttons to set the volume and press the Enter button ...

Страница 171: ...nter button 2 Press the Volume buttons to set the volume and press the Enter button 7 Call Forwarding You can set your phone to forward incoming calls to another specified ex tension A number of forward options are available for you to select refer to Call Forwarding in Convenience Features for more details 1 Press the Menu button and use the direction buttons to select Then press the Enter button...

Страница 172: ...d select Save and press the Enter button 4 If the phone number is not saved or you want to modify the saved phone number select Edit and press the Enter button Enter the phone number and press the Enter button and repeat step 3 8 Configuration Press the Menu button and use the direction buttons to select Then press the Enter button Move to the desired menu and press the Enter button ...

Страница 173: ...2 Enter the four digits of the current password and press the Enter button z The entered password is displayed as asterisks 4 3 The New Password screen appears Enter a new password and press the Enter button 4 The Confirm New Password screen appears Re enter the new password to confirm and press the Enter button Locking Your Phone If you lock your phone this prevents others from using it without y...

Страница 174: ...er your password see your system administ rator 3 Use the direction buttons to select the lock option Then press the Enter button Setting the Answer Mode The answer mode can be set to Ring Auto Answer or Voice Announce Ring mode is the normal setting where you have to lift the handset or press the Send button to answer Auto Answer and Voice Announce modes automatically answer calls for you 1 Press...

Страница 175: ...onnected to the caller Then press the Enter button Setting the Boss Answering Mode To set the boss answering mode the phone must be assigned as a boss station in programming The options for answering are the same as those described in Setting the Answer Mode above 1 Press the Menu button and use the direction buttons to select Æ 4 Boss Answering Then press the Enter button 2 Use the direction butt...

Страница 176: ...be connected to the caller Then press the Enter button Phone Language You can set the language for the LCD screen display e g English 1 Press the Menu button and use the direction buttons to select Æ 5 LANGUAGE Then press the Enter button 2 Press the direction buttons to select the language z The language is set to English by default Then press the Enter button ...

Страница 177: ...n 2 Use the direction buttons to select the type of caller ID display z None Caller IDs are not displayed z Name If the name of a caller is registered with the Phone Book the name will be displayed If not the caller s telephone number will be displayed z Number The telephone number of the caller is displayed Then press the Enter button Setting Absence Messages If you are likely to be away from you...

Страница 178: ...e desired absence message and press the Enter button z To clear an absence message move to the message press the Menu button and select Clear z To enter a personal message move to one of the messages 16 to 20 press the Menu button and select the Modify menu to see the message input screen Enter a message of up to eight characters For information on how to enter characters refer to Entering Charact...

Страница 179: ...phone number in order to make a call In the alternative Overlap mode the call is made immedi ately you finish entering the number You can select the mode you prefer The advantage of Enbloc dialling is the ability to correct a wrongly en tered number before it is dialled 1 Press the Menu button and use the direction buttons to select Æ 9 Dial Mode Then press the Enter button 2 Use the direction but...

Страница 180: ...a tion on these features and how they are used They include AUTO HOLD AUTO CAMPON AUTO TIMER DISPLAY SPD NAME HEADSET USE SECURE OHVA HOT KEYPAD CALL COST DISP PAGE REJOIN CID REVIEW ALL RING PREF STOP CID DISPLAY AME P W AUTO ANS CO CALL 1 Press the Menu button and use the direction buttons to select Æ 0 Station ON OFF Then press the Enter button 2 Move to the desired feature and press the Enter ...

Страница 181: ...Guide 168 9 My Phone The My Phone icon allows you to select a number of other options for your phone Press the Menu button and use the direction buttons to select Then press the Enter button Move to the desired menu and press the Enter button ...

Страница 182: ...d use the direction buttons to select Æ 1 Select BG Then press the Enter button 2 Use the Scroll key or the direction buttons to select the desired screen and press the Enter button Entering Your Name Your name is displayed on the LCD screens of internal phones to which you make a call You enter your name as follows 1 Press the Menu button and use the direction buttons to select Æ 2 My Name Then p...

Страница 183: ...uld Know for how to entercharacters Network Information You can view the network information for your phone Press the Menu button and use the direction buttons to select Æ 3 Network Info Then press the Enter button The network information is displayed Viewing Status Information The status of the following features you have set on the phone can be dis played Call Forwarding Absent Message DND and L...

Страница 184: ...the interval between entering a phone number and pressing the Send button when the dial mode of the phone is set to Enbloc Valid times are 30 seconds 1 minute or 3 min utes When you subsequently enter a number to make a call you must press Send before this time expires otherwise the number is cancelled and you will need to re enter it 1 Press the Menu button and use the direction buttons to select...

Страница 185: ...nctions 1 Press the Menu button and use the direction buttons to select Æ 6 Privacy Option Then press the Enter button 2 Enter the password and select Save z To clear a password enter the password and select Clear Reset Configuration To delete all saved data Phone Book and Messages and return the phone to its default configuration settings 1 Press the Menu button and use the direction buttons to s...

Страница 186: ...hone s password and press Enter to reset Caution Take care when using this feature not to accidentally delete data you require Version Information To view your phone s software version 1 Press the Menu button and use the direction buttons to select Æ 8 Version Info Then press the Enter button ...

Страница 187: ...Samsung Telecoms U K Limited Brookside Business Park Greengate Middleton Manchester M24 1GS ...

Отзывы: