English 7
Installation instructions
Before you make the electrical connection:
To properly install your cooktop, you must determine the type of electrical
connection you will be using and follow the instructions provided for it here.
•
A 3-wire or 4-wire, single phase,
208
or
240 volt AC
, 60-Hz.
•
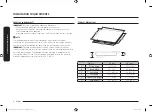
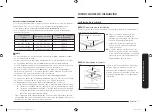
Use the chart below to determine the minimum recommended dedicated circuit
protection.
kW Rating (240 V)
kW Rating (208 V)
Recommended Circuit Size
(Dedicated)
≤4.8 kW
≤4.1 kW
20 Amp
4.9 kW - 7.2 kW
4.3 kW - 6.2 kW
30 Amp
7.3 kW - 9.6 kW
6.3 kW - 8.3 kW
40 Amp
9.7 kW - 12.0 kW
8.4 kW - 10.4 kW
50 Amp
NOTE
•
The cooktop is rated 240 volt. Some models have a neutral (white) wire.
•
The cooktop should be connected directly to the junction box through flexible,
armored or nonmetallic sheathed, copper cable. The flexible, armored cable
extending from the fuse box or circuit breaker box should be connected directly
to the junction box.
•
Locate the junction box to allow as much slack as possible between the junction
box and the cooktop so that the cooktop can be moved if servicing becomes
necessarry in the future.
•
Do not cut the conduit. Use the length of conduit provided.
•
A UL listed or CSA approved conduit connector is necessary at each end of the
power supply cable (at the cooktop and at the junction box). A listed conduit
connector is already provided at the cooktop.
•
If the house has aluminum wiring, follow the procedure below:
1.
Connect a section of solid copper wire to the pigtail leads.
2.
Connect the aluminum wiring to the added section of copper wire using
special connectors and/or tools designed and UL listed for joining copper
to aluminum.
Follow the electrical connector manufacturer’s recommended procedure.
Aluminum/copper connection must conform with local codes and industry
accepted wiring practices.
Installation instructions
Install cooktop
STEP 1
Prepare installation
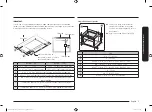
Decide on the final location for the cooktop. Avoid drilling or cutting into house
wiring during installation.
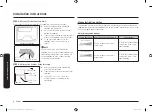
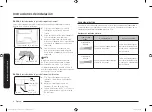
Foam Tape
Bottom of Cooktop
Cooktop Glass
01
Using 2 or more people, place the
cooktop upside down on a covered
surface using the foam end posts from
the packaging. Make sure that the knobs
are not resting on the foam.
02
The foam strip helps avoid damage to
the underside of the cooktop glass from
debris and helps the cooktop sit flat on
uneven counters.
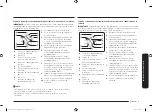
STEP 2
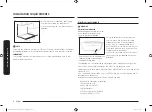
Place cooktop
Cooktop
Insert the cooktop centerd into the cutout
opening. Make sure the cooktop is parallel
to the front edge of the countertop. Make
final check that all required clearances are
met.
Radiant Install_NZ30K7570R_DG68-00825A-07_EN+MES+CFR.indb 7
11/22/2019 2:45:12 PM
Содержание NZ36K6430 Series
Страница 11: ...Memo Radiant Install_NZ30K7570R_DG68 00825A 07_EN MES CFR indb 11 11 22 2019 2 45 13 PM ...
Страница 23: ...Notas Radiant Install_NZ30K7570R_DG68 00825A 07_EN MES CFR indb 11 11 22 2019 2 45 17 PM ...
Страница 35: ...Notes Radiant Install_NZ30K7570R_DG68 00825A 07_EN MES CFR indb 11 11 22 2019 2 45 21 PM ...


