English 7
Impor
tant saf
ety inf
ormation
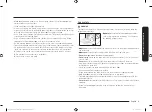
• Make sure
your range is correctly installed and adjusted by a qualified service
technician or installer for the type of gas (natural or LP) you will use. For your
range to utilize LP gas, the installer must replace the 5 surface burner orifices
and 2 oven orifices with the provided LP orifice set, and reverse the GPR adapter.
These adjustments must be made by a qualified service technician in accordance
with the manufacturer’s instructions and all codes and requirements of the
authority having jurisdiction. The qualified agency performing this work assumes
the gas conversion responsibility.
•
Installation of this range must conform with local codes or, in the absence of local
codes, with the National Fuel Gas Code, ANSI Z223.1/NFPA.54, latest edition. In
Canada, installation must conform with the current Natural Gas Installation Code,
CAN/CGA-B149.1, or the current Propane Installation Code, CAN/CGA-B149.2, and
with local codes where applicable. This range has been design-certified by ETL
according to ANSI Z21.1, latest edition, and Canadian Gas Association according
to CAN/CGA-1.1, latest edition.
Installation safety
WARNING
To reduce the risk of fire, electric shock, personal injuries, and/or death, obey the
following precautions.
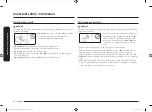
•
Have your range installed and properly
grounded by a
qualified installer
, in accordance
with the installation instructions. Any
adjustment and service should be performed
only by qualified gas range installers or service
technicians.
• Do not attempt
to service, modify, or replace your range or any part of your
range unless it is specifically recommended in this manual. All other service
should be referred to a qualified technician.
•
Always use new flexible connectors when installing a gas appliance.
Do not use
old flexible connectors.
• Make sure
the anti-tip device is properly installed on the range. See the
installation instructions for more information.
•
Due to the size and weight of the range, have
two or more people
move the
range.
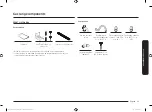
• Remove
all tape and packaging materials.
• Remove
all accessories from the cooktop, oven, and/or lower drawer. Grates and
griddles are heavy. Use caution when handling them.
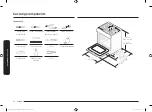
• Make sure
no parts came loose during shipping.
Install_NX60T9700_BEST_BETTER_AA_DG68-01243A-00_EN.indd 7
2020-03-26 6:41:18
Содержание NX60 8 Series
Страница 26: ...Memo Install_NX60T9700_BEST_BETTER_AA_DG68 01243A 00_EN indd 26 2020 03 26 6 41 26 ...
Страница 27: ...Memo Install_NX60T9700_BEST_BETTER_AA_DG68 01243A 00_EN indd 27 2020 03 26 6 41 26 ...
Страница 54: ...Notas Install_NX60T9700_BEST_BETTER_AA_DG68 01243A 00_MES indd 26 2020 03 26 6 41 09 ...
Страница 55: ...Notas Install_NX60T9700_BEST_BETTER_AA_DG68 01243A 00_MES indd 27 2020 03 26 6 41 09 ...
Страница 82: ...Notes Install_NX60T9700_BEST_BETTER_AA_DG68 01243A 00_CFR indd 26 2020 03 26 6 40 51 ...
Страница 83: ...Notes Install_NX60T9700_BEST_BETTER_AA_DG68 01243A 00_CFR indd 27 2020 03 26 6 40 51 ...


