6
GB
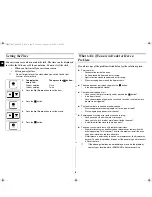
Setting the Time
Your microwave oven has an inbuilt clock. The time can be displayed
in either the 24-hour or 12-hour notation. You must set the clock:
•
When you first install your microwave oven
•
After a power failure
✉
Do not forget to reset the clock when you switch to and from
summer or winter time.
What to Do if You are in Doubt or Have a
Problem
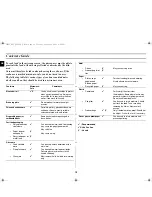
If you have any of the problems listed below try the solutions given.
◆
This is normal.
•
Condensation inside the oven.
•
Air flow around the door and outer casing.
•
Light reflection around the door and outer casing.
•
Steam escaping from around the door or vents.
◆
The oven does not start when you press the
button.
•
Is the door completely closed?
◆
The food is not cooked at all
•
Have you set the timer correctly and/or pressed the
button?
•
Is the door closed?
•
Have you overloaded the electric circuit and caused a fuse to blow or a
breaker to be triggered?
◆
The food is either overcooked or undercooked
•
Was the appropriate cooking length set for the type of food?
•
Was an appropriate power level chosen?
◆
Sparking and cracking occur inside the oven (arcing)
•
Have you used a dish with metal trimmings?
•
Have you left a fork or other metal utensil inside the oven?
•
Is aluminium foil too close to the inside walls?
◆
The oven causes interference with radios or televisions
•
Slight interference may be observed on televisions or radios when the
oven is operating. This is normal.To solve this problem, install the oven
away from televisions, radios and aerials.
•
If interference is detected by the oven’s microprocessor, the display may
be reset.To solve this problem, disconnect the power plug and reconnect
it. Reset the time.
✉
If the above guidelines do not enable you to solve the problem,
contact your local dealer or SAMSUNG after-sales service.
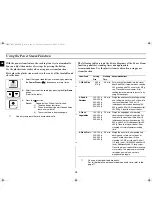
1.
To display the
Then press the
button...
time in the...
24-hour notation
Once
12-hour notation
Twice
2.
Press the
Up / Down
button to set the hour.
3.
Press the
button.
4.
Press the
Up / Down
button to set the minute.
5.
Press the
button.
ty_\z{WZWZWiniUGGwG]GG{ SGhGX]SGYWW\GGYaY\Gwt
Содержание MR85
Страница 20: ...20 GB Note ty_ z WZWZWi niU GGw GYWGG SGh GX SGYWW GGYaY Gwt ...
Страница 21: ...21 GB Note ty_ z WZWZWi niU GGw GYXGG SGh GX SGYWW GGYaY Gwt ...
Страница 22: ...22 GB Note ty_ z WZWZWi niU GGw GYYGG SGh GX SGYWW GGYaY Gwt ...
Страница 23: ...23 GB Note ty_ z WZWZWi niU GGw GYZGG SGh GX SGYWW GGYaY Gwt ...
Страница 24: ...ty_ z WZWZWi niU GGw GY GG SGh GX SGYWW GGYaY Gwt ...


