ENGLISH
132
132
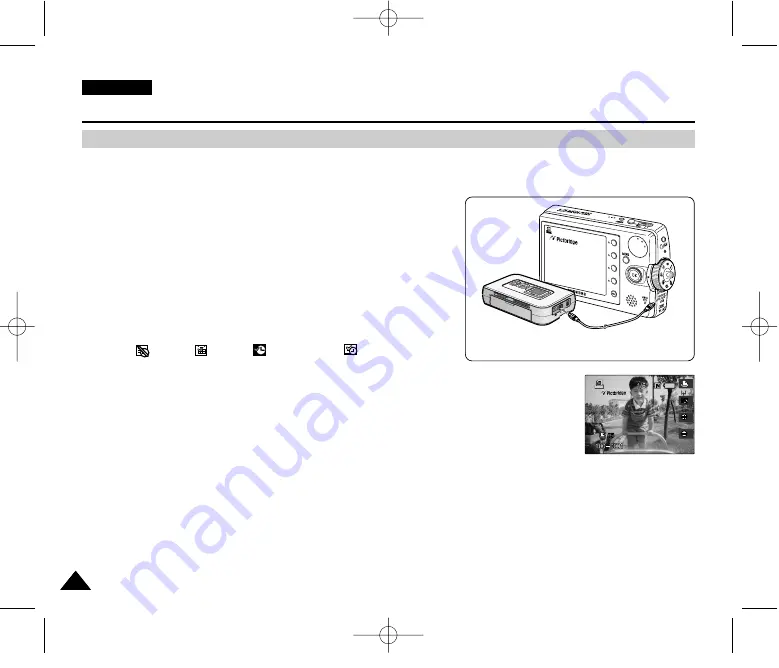
PictBridge Mode: Printing with PictBridge
With the provided USB cable and a PictBridge-supporting printer, you can print your photo images directly
without connecting to a PC.
1. Connect the Miniket Photo and the PictBridge supporting
printer with a USB cable.
2. Turn on the printer.
3. Turn the Mode Dial to Pictbridge mode.
4. Press the [POWER] button to turn on the Miniket Photo.
◆
If the USB connection is not made, the message “Connect USB Cable!”
appears.
5. Press the [Shortcut 2] button to set the date / time imprint
option.
◆
Each press of the [Shortcut 2] button cycles through
Off< >-Date < >-Time < >-Date & Time< >.
6. [Shortcut 3] button will increase the number of copies, while
the [Shortcut 4] button will decrease the number of copies.
◆
Range of possibilities: 1 ~ 99
◆
Pressing the [Shortcut 3] button on 99 will set to 1.
◆
Pressing the [Shortcut 4] button on 1 will set to 99.
7. Press the [Shortcut 1] button to begin printing.
◆
To cancel printing, press the [Shortcut 1] button again.
8. When finished, disconnect the USB cable.
[ Warning ]
✤
This function works only with printers that support PictBridge.
[ Notes ]
✤
Number of copies and imprint options can be set in the menu. Press the [MENU] button to access the function.
✤
For printing information, refer to the User's manual of the printer.
✤
Depending on the printer, printing failure may occur. In this case, download JPEG files directly to the PC and print them.
✤
Depending on the printer, date and time imprint option may not be supported. In this case, date and time menu will not be
displayed.
Printing with PictBridge
PictBridge Supporting Printer
(Optional Accessory)
00934J VP-MS10 UK~155 6/17/06 7:14 PM Page 132


