background image

English - 19

03

  O

VEN USE

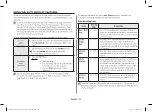
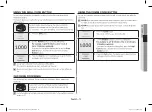
USING THE GRILL COOK BUTTON

For more time savings plus the benefits of grilling, use the Grill mode directly after 

microwave cooking.

This feature allows you to grill some of your favorite foods using the radiant heat from the 

grilling element.

For best results, place the food on the metal rack which is 

placed on the turntable tray. Use the rack for grilling only.

Do not leave it in the oven after grilling or use when microwaving.

1. 

Press the 

Grill

 button.

2. 

Use the 

Number

 buttons to set the grilling time.  

For example, to grill 10 minutes, enter 1, 0, 0, 0  

(up to 30 minutes maximum).


If you want to change the cooking time, press the

 Stop/

Cancel

 button, and then enter a new time using the 

Number

 buttons.

3. 

Press the 

Start 

button. The display counts down the time 

and beeps when the time has elapsed.

Do not worry if the heater turns off and on while grilling. 

This system is designed to prevent overheating of the oven.
Always use oven gloves when touching the dishes in the oven, as they will be very 

hot.

CHOOSING COOKWARE

Use microwave safe cookware. Do not use plastic containers, dishes, paper cups, 

towels, etc.

If you want to use the combined cooking mode (grill and 

microwave), use only dishes that are microwave-safe and 

ovenproof.

For further details on suitable cookware and utensils, refer to the cookware guide on 

pages 22-23.

USING THE COMBI COOK BUTTON

You can also combine microwave cooking with the grill, to cook quickly and grill at the 

same time.

ALWAYS

 use microwave-safe and oven-proof cookware. Glass or ceramic dishes 

are ideal as they allow the microwaves to penetrate the food evenly.

ALWAYS

 use oven gloves when touching dishes in the oven, as they will be very 

hot.

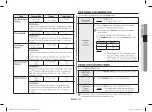
1. 

Press the 

Combi 

button. 

You cannot set the temperature of the grill.

2. 

Use the 

Number

 buttons to set the combine time. 

For example, to set 10 minutes, enter 1, 0, 0, 0 (up to 

60 minutes maximum).


If you want to change the cooking time, press the 

Stop/

Cancel 

button, and then enter a new time using the 

Number

 buttons.

3. 

Press the 

Start 

button. The display counts down the time 

and beeps when the time has elapsed

MG11H2020CT_AA_DE68-04270A-05_EN.indd   19

MG11H2020CT_AA_DE68-04270A-05_EN.indd   19

2021-05-03     4:51:22

2021-05-03     4:51:22

Содержание MG11H2020CT/AA

Страница 1: ...ons Cooking Guide MG11H2020CT MG14H3020CM imagine the possibilities Thank you for purchasing this Samsung product MG11H2020CT_AA_DE68 04270A 05_EN indd 1 MG11H2020CT_AA_DE68 04270A 05_EN indd 1 2021 0...

Страница 2: ...t information on the installation use and care of your appliance Please take time to read this manual to take full advantage of your microwave oven s many benefits and features WHAT YOU NEED TO KNOW A...

Страница 3: ...ore using the appliance 2 Read and follow the specific Precautions to avoid possible exposure to excessive microwave energy on page 2 3 This appliance must be grounded Connect only to properly grounde...

Страница 4: ...liquid both before and halfway through heating it c Do not use straight sided containers with narrow necks d After heating allow the container to stand in the microwave oven for a short time before re...

Страница 5: ...ght may flicker and the speed of the blower may vary when the microwave oven is on Cooking times may be longer too CRITICAL INSTALLATION WARNINGS The installation of this appliance must be performed b...

Страница 6: ...i ng to do so may result in electric shock or fire When the power plug or power cord is damaged contact your nearest service center for a replacement or repair CAUTION INSTALLATION CAUTIONS Position t...

Страница 7: ...children Packaging materials can be dangerous to children If a child places a bag over its head the child can suffocate Do not let children or any person with reduced physical sensory or mental capabi...

Страница 8: ...just after cooking This may result in damage to the appliance The steam or water spray may result in burns or injury Do not cook without the glass tray in place on the oven floor Food will not cook pr...

Страница 9: ...h the oven Wipe the interior and the door seal with a damp cloth before using your microwave oven for the first time CLEANING THE TURNTABLE AND ROLLER RINGS Clean the roller rings periodically and was...

Страница 10: ...mes 2 Select the weight by pressing the Number buttons 3 Press the Start button Refer to the section entitled Using the auto defrost features on page 18 for further details oven features OVEN 1 DOOR 2...

Страница 11: ...supports the turntable 2 Turntable to be placed on the roller ring with the center fitting to the coupler Purpose The turntable serves as the main cooking surface It can be easily removed for cleanin...

Страница 12: ...of the oven You should use the standing times specified in recipes and in this booklet to ensure Even cooking of the food right to the center The same temperature throughout the food CHECKING IF YOUR...

Страница 13: ...control the heating intensity from Warm 1 to High 10 ONE STAGE COOKING For simple one stage cooking you only need to set a cooking time The power level is automatically set to High If you want to set...

Страница 14: ...cooking close the door and then press the Start button again 2 Press the Stop Cancel button Result Cooking stops To resume cooking press the Start button again 2 To stop completely Press the Stop Canc...

Страница 15: ...microwave safe plate with the wide ends of the slices towards the outside edge of the plate Do not let the slices overlap Do not cover continued Food Serving Size Instructions Veggies 1 Fresh Vegetab...

Страница 16: ...e oven beeps remove the hot dogs from the oven put each hot dog in a bun place the buns and hot dogs in the oven and then restart the oven Let stand for 1 minute after heating For the best texture the...

Страница 17: ...NG THE SOFTEN MELT FEATURES The Soften Melt features has 4 pre programmed cooking times You do not need to set either the cooking times or the power level You can select the food servings by pressing...

Страница 18: ...e following table details the various Auto Defrost programs quantities and instructions Remove all packaging materials before defrosting Auto defrosting table Food Serving Size Instructions Roast Beef...

Страница 19: ...be very hot CHOOSING COOKWARE Use microwave safe cookware Do not use plastic containers dishes paper cups towels etc If you want to use the combined cooking mode grill and microwave use only dishes th...

Страница 20: ...damaged The crusty plate is not dish washer safe Do not put it in the dishwasher We recommend to preheat the crusty plate directly on the turntable Preheat the crusty plate with the Combi function set...

Страница 21: ...t potatoes in half Put them on the crusty plate with the cut side to the bottom Arrange in a circle Put the plate on the rack Let stand for 3 minutes SWITCHING THE BEEPER OFF You can switch the beeper...

Страница 22: ...r absorbed by the dish It is important to choose the correct cookware therefore look for cookware that is marked microwave safe The following table lists various types of cookware and indicates if and...

Страница 23: ...ts Plastic Containers Can be used if heat resistant thermoplastic Some plastics may warp or discolor at high temperatures Do not use Melamine plastic Cling film Can be used to retain moisture Avoid wr...

Страница 24: ...les occasionally while cooking to distribute heat evenly Food at the outside of the dish absorbs more energy and heats more quickly so stir from the outside towards the center The oven will turn off w...

Страница 25: ...commended see table Cook covered for the minimum time see table Continue cooking to get the result you prefer Stir once during and once after cooking Add salt herbs or butter after cooking Cover durin...

Страница 26: ...time and salt or add herbs and butter Remark The rice may not have absorbed all water after the cooking time is finished Pasta Use a large glass pyrex bowl Add boiling water a pinch of salt and stir...

Страница 27: ...ar care when heating liquids and baby food See also the chapter with the safety precautions REHEATING LIQUIDS Always allow a standing time of at least 20 seconds after the oven has been switched off t...

Страница 28: ...serve cheese fondue in a suitable sized glass pyrex bowl with lid Stir occasionally during and after reheating Stir well before serving Let stand for 1 2 minutes Reheating Baby Food and Milk Use the...

Страница 29: ...Size Power Time min Meat Minced Meat 0 6 lbs 1 1 lbs 20 6 7 9 12 Pork Steaks 0 6 lbs 20 5 7 Instructions Place the meat on the turntable Shield thinner edges with aluminium foil Turn over after half o...

Страница 30: ...d crispy top e g chicken pieces turning them over half way through cooking Please refer to the grill table for further details Important remark Whenever you use the combination mode microwave grill th...

Страница 31: ...e sure the plug is properly connected to a grounded outlet If the wall outlet is controlled by a wall switch make sure the wall switch is turned on Remove the plug from the outlet wait ten seconds and...

Страница 32: ...Difficult to replace Charcoal Filter Please refer to the instructions for replacing the charcoal filter in the user s manual Turntable rotates improperly Make sure you have not put too much food on t...

Страница 33: ...G at the address or phone number provided below for problem determination and service procedures Warranty service can only be performed by a SAMSUNG authorized service center The original dated bill o...

Страница 34: ...which this product was not intended damage caused by unauthorized modification or alteration of the product product where the original factory serial numbers have been removed defaced changed in any...

Страница 35: ...08 WARRANTY memo memo MG11H2020CT_AA_DE68 04270A 05_EN indd 35 MG11H2020CT_AA_DE68 04270A 05_EN indd 35 2021 05 03 4 51 23 2021 05 03 4 51 23...

Страница 36: ...e QUESTIONS OR COMMENTS COUNTRY CALL OR VISIT US ONLINE AT U S A Consumer Electronics 1 800 SAMSUNG 726 7864 www samsung com us support CANADA 1 800 SAMSUNG 726 7864 www samsung com ca support English...

Отзывы: