background image

operation _

25

op
E

ra
tion

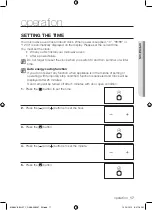
SWITCHING THE BEEPER OFF

You can switch the beeper off whenever you want.

1. 

Press the ( ) and ( ) buttons at the same time.

Result :


•  The following indication is displayed.

•  The  oven will not beep each time you press a button.

2. 

To switch the beeper back on, press the ( ) and ( ) 
buttons again at the same time.

Result :


•  The following indication is displayed.

•  The oven operates with the beeper on again.

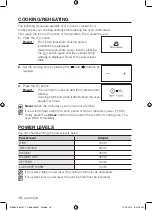
USING THE CHILD LOCK FEATURE

Your microwave oven is fitted with a special child lock programme, which enables 
the oven to be “locked” so that children or anyone unfamiliar with it cannot operate it 
accidentally.
The oven can be locked at any time.

1. 

Press the 

Child Lock

 ( ) button for one second.

Result :


•   The oven is locked (no functions can be 

selected).

•  The display shows “L”.

2. 

To unlock the oven, press the 

Child Lock

 ( ) button for 

one second.

Result :

  The oven can be used normally.

ME86V-BBH-XTC_DE68-03893T_EN.indd   25

10/19/2012   8:41:19 PM

Содержание ME86V-BBH

Страница 1: ...is Samsung product To receive more complete service please register your product at www samsung com register Microwave Oven user manual ME86V BBH ENGLISH This manual is made with 100 recycled paper ME86V BBH XTC_DE68 03893T_EN indd 1 10 19 2012 8 40 59 PM ...

Страница 2: ... and care when installing maintaining and operating your appliance Because these following operating instructions cover various models the characteristics of your microwave oven may differ slightly from those described in this manual and not all warning signs may be applicable If you have any questions or concerns contact your nearest service centre or find help and information online at www samsu...

Страница 3: ...ces should any attempt be made to operate the oven with the door open or to tamper with the safety interlocks door latches or to insert anything into the safety interlock holes b Do NOT place any object between the oven door and front face or allow food or cleaner residues to accumulate on sealing surfaces Ensure that the door and door sealing surfaces are kept clean by wiping after use first with...

Страница 4: ...or dusty location in a location exposed to direct sunlight and water or where gas may leak on un level ground This appliance must be properly grounded in accordance with local and national codes Remove all foreign substances such as dust or water from the power plug terminals and contact points using a dry cloth on a regular basis Do not pull or excessively bend or place heavy objecton the power c...

Страница 5: ...or installing in road vehicles caravans and similar vehicles etc Do not store flammable materials in the oven Take special care when heating dishes or drinks that contain alcohol as alcohol vapours may contact a hot part of the oven The microwave oven is intended to be used on the counter or counter top use only the microwave oven shall not be placed in a cabinet Counter top model only WARNING The...

Страница 6: ...the event of scalding follow these FIRST AID instructions Immerse the scalded area in cold water for at least 10 minutes Cover with a clean dry dressing Do not apply any creams oils or lotions During use the appliance becomes hot Care should be taken to avoid touching heating elements inside the oven WARNING The contents of feeding bottles and baby food jars shall be stirred or shaken and the temp...

Страница 7: ...ion due to the temperatures generated The temperature of accessible surfaces may be high when the appliance is operating The door or the outer surface may get hot when the appliance is operating CAUTION Only use utensils that are suitable for use in microwave ovens DO NOT use any metallic containers Dinnerware with gold or silver trimmings Skewers forks etc Remove wire twist ties from paper or pla...

Страница 8: ...eating ends and allow the liquid stand at least 20 seconds after heating to prevent eruptive boiling Stand at arms length from the oven when opening the door to avoid getting scalded by escaping hot air or steam Do not operate the microwave oven when it is empty The microwave oven will automatically shut down for 30 minutes for safety purposes We recommend placing a glass of water inside the oven ...

Страница 9: ...uipped with a cord that includes a grounding wire and a grounding plug The plug must be plugged into an outlet that is properly installed and grounded WARNING As shown connect the earth wire between earthing port on the rear of the product and metal water pipe or wall outlet if the earthing port is provided Do not connect the earth wire to a gas pipe phone line or plastic water pipe Grounding Grou...

Страница 10: ...rntable Check that the turntable rotates freely Never block the air vents as the oven may overheat and automatically switch itself off It will remain inoperable until it has cooled sufficiently Do not install the microwave oven in hot or damp surroundings like next to a traditional oven or radiator The power supply specifications of the oven must be respected and any extension cable used must be o...

Страница 11: ... Remove any splashes or stains on the inside surfaces or on the roller ring with a soapy cloth Rinse and dry 3 To loosen hardened food particles and remove smells place a cup of diluted lemon juice on the turntable and heat for ten minutes at maximum power 4 Wash the dishwasher safe plate whenever necessary DO NOT spill water in the vents NEVER use any abrasive products or chemical solvents Take p...

Страница 12: ...feature 19 Setting the energy save mode 20 Using the frozen ready meal feature 20 Frozen ready meal settings 21 Using the auto cook feature 21 Auto cook settings 22 Using the popcorn feature 23 Using the auto defrost feature 24 Using the memory feature 25 Switching the beeper off 25 Using the child lock feature cooking instructions 26 26 Cooking utensils 27 Testing utensils 29 Cooking guide 32 Rec...

Страница 13: ...nd serial number information which is usually located on the back or bottom of the product Please record these numbers below along with the other requested information Keep this information in a safe place as a permanent record of your purchase to aid in identification in case of theft or loss and a copy of your sales receipt as a proof of purchase if warranty service is needed MODEL NUMBER SERIAL...

Страница 14: ... for your oven by leaving at least four inches of space behind above and to the side of the oven 2 Open the oven door by pressing the button below the control panel 3 Wipe the inside of the oven with a damp cloth 4 Place the pre assembled ring in the indentation in the center of the oven 5 Place the glass tray on top of the ring so that the three glass tabs in the center of the tray fit securely i...

Страница 15: ...your new microwave oven _15 your new microwave oven Control panel buttons See next page for more information 1 2 3 4 5 6 7 8 9 10 11 12 13 ME86V BBH XTC_DE68 03893T_EN indd 15 10 19 2012 8 41 15 PM ...

Страница 16: ... 4 Microwave Press this pad to set power level other than high p 18 5 Deodorization p 19 6 Up Down Button Cook time weight and serving size 7 Cancel Eco p 19 8 Clock Setting Sets current time p 17 9 Frozen Ready Meal p 20 10 Popcorn p 22 11 Memory p 24 12 Child Lock p 25 13 Start 30 sec p 18 ME86V BBH XTC_DE68 03893T_EN indd 16 10 19 2012 8 41 15 PM ...

Страница 17: ...itch to and from summer or winter time Auto energy saving function If you do not select any function when appliance is in the middle of setting or operating with temporary stop condition function is canceled and Clock will be displayed after 25 minutes Oven Lamp will be turned off after 5 minutes with door open condition 1 Press the button to set the time 2 Press the and buttons to set the hour 3 ...

Страница 18: ...he button Result The oven light comes on and the turntable starts rotating Cooking starts and when it has finished the oven beeps four times Never switch the microwave oven on when it is empty If you wish to heat a dish for a short period of time at maximum power 750 W simply press the 30 sec button once for each 30 seconds of cooking time The oven starts immediately Power levels You can choose am...

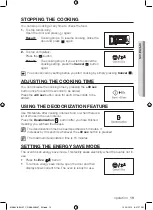
Страница 19: ...added Press the 30 sec button once for each 30 seconds to be added Using the deodorization feature Use this feature after cooking odorous food or when there is a lot of smoke in the oven interior Press the Deodorization button after you have finished cleaning you will hear four beeps The deodorization time has been specified as 5 minutes It increases by 30 seconds whenever the 30 sec button is pre...

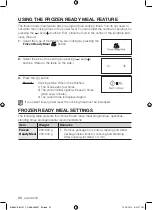
Страница 20: ...he table on the side 3 Press the button Result Cooking starts When it has finished 1 The oven beeps four times 2 The end reminder signal will beep 3 times once every minute 3 The current time is displayed again If you select lower power level the cooking time must be increased Frozen ready meal settings The following table presents the various frozen ready meal programmes quantities standing times...

Страница 21: ...current time is displayed again Use only recipients that are microwave safe Auto cook settings The following table presents the various auto cook programmes quantities standing times and appropriate recommendations Item Weight Remarks 1 Potato 1 ea 2 ea 3 ea 4 ea Prick each potato several times with fork Place on turntable in spoke like fashion Remove from oven wrap in foil and let stand 3 5 min 2...

Страница 22: ...serving by pressing the and buttons Refer to the table on the side 3 Press the button Result Cooking starts When it has finished 1 The oven beeps four times 2 The end reminder signal will beep 3 times once every minute 3 The current time is displayed again Use only recipients that are microwave safe Item Weight Remarks Popcorn 100g 85 100g Use one microwave only bag of popcorn Use caution when rem...

Страница 23: ...n is displayed 2 Select the food weight by pressing and buttons It is possible to set up to a maximum of 2 6 kg 3 Press the button Result Defrosting begins The oven beeps half way through defrosting to remind you to turn the food over Press button again to finish defrosting See page 28 for the Auto Defrosting Guide You can also defrost food manually To do so select the microwave cooking reheating ...

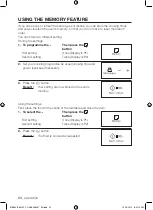
Страница 24: ...Second setting Once Display is P1 Twice Display is P2 2 Set your cooking programme as usual cooking time and power level see if necessary 3 Press the button Result Your setting are now stored in the oven s memory Using the settings First place the food in the centre of the turntable and close the door 1 To select the Then press the button First setting Second setting Once Display is P1 Twice Displ...

Страница 25: ...oven operates with the beeper on again Using the child lock feature Your microwave oven is fitted with a special child lock programme which enables the oven to be locked so that children or anyone unfamiliar with it cannot operate it accidentally The oven can be locked at any time 1 Press the Child Lock button for one second Result The oven is locked no functions can be selected The display shows ...

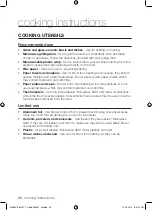
Страница 26: ...fire Paper plates and cups Use for short term heating at low temperatures Do not use recycled paper which may contain metal and can catch fire Thermometers Use only those labeled Microwave Safe and follow all directions Check the food in several places Conventional thermometers may be used once the food has been removed from the oven Limited use Aluminum foil Use narrow strips of foil to prevent o...

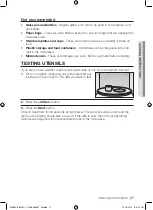
Страница 27: ... Metal utensils These can damage your oven Remove all metal before cooking Testing utensils If you are not sure whether a dish is microwave safe or not you can perform this test 1 Fill a 1 cup glass measuring cup with water and put it inside your oven next to the dish you want to test 2 Press the 30 Sec button 3 Press the Start button Once to heat them for 30 seconds at high power The water should...

Страница 28: ...move giblets before freezing poultry Start defrosting with the breast side down After the first stage turn the chicken over and shield any warm portions with narrow strips of aluminum foil After the second stage again shield any warm portions with narrow strips of aluminum foil Let stand covered for 30 60 minutes in the refrigerator Chicken Pieces 0 23 1 36 kg After each stage rearrange or remove ...

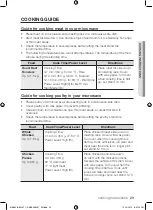
Страница 29: ...in your microwave Place poultry on a microwave safe roasting rack in a microwave safe dish Cover poultry with wax paper to prevent spattering Use aluminum foil to shield bone tips thin meat areas or areas that start to overcook Check the temperature in several places before letting the poultry stand the recommended time Food Cook Time Power Level Directions Whole Chicken Up to 1 8 kg Cooking Time ...

Страница 30: ...he outside of rack Cover with wax paper Turn over and rearrange when cooking time is half up Cook until fish flakes easily with a fork Let stand 3 5 min Fillets Up to 680 g Cooking Time 5 7 min 454 g Power Level High Hi Arrange fillets in a baking dish turning any thin pieces under Cover with wax paper If over 13 mm thick turn over and rearrange when cooking time is half up Cook until fish flakes ...

Страница 31: ...ey will cook more evenly if turned over after half the cooking time Always place vegetables like asparagus and broccoli with the stem ends pointing towards the edge of the dish and the tips toward the center When cooking cut vegetables always cover the dish with a lid or vented microwavable plastic wrap Whole unpeeled vegetables such as potatoes squash eggplant etc should have their skin pricked i...

Страница 32: ...10 minutes Remove bay leaf before serving Makes 6 servings can be replaced with canned mushroom slices Broccoli and cheese casserole cup butter or margarine cup chopped onion 1 Tbs flour tsp salt tsp dry mustard 1 8 tsp pepper 1 cups milk cup chopped red pepper 0 23 kg 2 cups cheddar cheese shredded 2 cups frozen chopped broccoli thawed 4 cups cooked spiral shaped pasta 0 23 kg dry 1 In a 2 quart ...

Страница 33: ...e ground black pepper 5 If wished add 1 8 cup of white wine to the coriander mixture Makes 6 servings Black bean soup 1 cup minced onion 1 garlic clove finely chopped 1 cup fried or pureed black beans 1 cup whole black beans drained 1 cups fried crushed tomato 3 cups chicken stock 1 teaspoon salt cup corn grains 1 sprig coriander 1 Place the onion and garlic in a deep pot with a capacity of 3 litr...

Страница 34: ...f aluminum foil Larger amounts can damage your oven Turning Turn foods over midway through cooking to expose all parts to microwave energy This is especially important with large items such as roasts Standing Foods cooked in the microwave build up internal heat and continue to cook for a few minutes after the oven stops Let foods stand to complete cooking especially foods such as roasts and whole ...

Страница 35: ...ld be pierced to prevent bursting Frying with heating oil or fat is not recommended Fat and oil can suddenly boil over and cause severe burns Some ingredients heat faster than others For example the jelly inside a jelly doughnut will be hotter than the dough Keep this in mind to avoid burns Home canning in the microwave oven is not recommended because all harmful bacteria may not be destroyed by t...

Страница 36: ...f too much foil is used Browning plate Do not preheat for more than eight minutes China and earthenware Porcelain pottery glazed earthenware and bone china are usually suitable unless decorated with a metal trim Disposable polyester cardboard dishes Some frozen foods are packaged in these dishes Fast food packaging Polystyrene cups containers Can be used to warm food Overheating may cause the poly...

Страница 37: ...t resistant thermoplastic Some other plastics may warp or discolour at high temperatures Do not use Melamine plastic Cling film Can be used to retain moisture Should not touch the food Take care when removing the film as hot steam will escape Freezer bags Only if boilable or oven proof Should not be airtight Prick with a fork if necessary Wax or grease proof paper Can be used to retain moisture an...

Страница 38: ...or door damage Press Cancel twice and re enter all cooking instructions The power goes off before the set time has elapsed If there has not been a power outage remove the plug from the outlet wait ten seconds then plug it in again If there was a power outage the time indicator will display Reset the clock and any cooking instructions Reset the circuit breaker or replace any blown fuse The food is ...

Страница 39: ...four cup measuring glass at High power for five minutes or until boiling Let stand in the oven for one or two minutes Remove the glass tray from the oven when cleaning the oven or tray To prevent the tray from breaking handle it carefully and do not put it in water immediately after cooking Wash the tray carefully in warm sudsy water or in the dishwasher Clean the outside surface of the oven with ...

Страница 40: ... levels including defrost Timer 90 minutes Power source 220 VAC 60 Hz Power output 750 Watts Power Consumption 1200 Watts Outside dimensions 489 X 275 X 374 mm Oven cavity dimensions 330 X 211 X 324 mm Net gross weight 11 3 12 5 kg ME86V BBH XTC_DE68 03893T_EN indd 40 10 19 2012 8 41 20 PM ...

Страница 41: ...memo ME86V BBH XTC_DE68 03893T_EN indd 41 10 19 2012 8 41 20 PM ...

Страница 42: ...memo ME86V BBH XTC_DE68 03893T_EN indd 42 10 19 2012 8 41 20 PM ...

Страница 43: ...memo ME86V BBH XTC_DE68 03893T_EN indd 43 10 19 2012 8 41 20 PM ...

Страница 44: ... 8888 021 5699 7777 JAPAN 0120 327 527 MALAYSIA 1800 88 9999 PHILIPPINES 1 800 10 SAMSUNG 726 7864 for PLDT 1 800 3 SAMSUNG 726 7864 for Digitel 1 800 8 SAMSUNG 726 7864 for Globe 02 5805777 SINGAPORE 1800 SAMSUNG 726 7864 THAILAND 1800 29 3232 02 689 3232 TAIWAN 0800 329 999 0266 026 066 VIETNAM 1 800 588 889 www samsung com hk Chinese www samsung com hk_en English www samsung com www samsung com...

Отзывы: