background image

English - 4

GROUNDING INSTRUCTIONS

T

his appliance must be grounded. In the event of an 

electrical short circuit, grounding reduces the risk of 

electric shock by providing an escape wire for the 

electrical current. This appliance is equipped with a cord 

that includes a grounding wire and a grounding plug. 

The plug must be plugged into an outlet that is properly 

installed and grounded.

WARNING

 WARNING

Improper use of the grounding plug can result in a risk of 

electric shock. 

•  Plug into a grounded 3 prong outlet. Do not remove 

the third (grounding) prong. Do not use an adaptor or 

otherwise defeat the grounding plug.

•  Consult a qualified electrician or service person if you 

do not understand the grounding instructions or if you 

are not sure if the appliance is properly grounded.

•  We do not recommend using an extension cord with 

this appliance. If the power-supply cord is too short, 

have a qualified electrician or serviceman install an 

outlet near the appliance. However, if it is necessary 

to use an extension cord, read and follow the “Use of 

Extension Cords” section below.

Use of Extension Cords

A short power-supply cord is provided to reduce the risk 

of your becoming entangled in or tripping over a longer 

cord. Longer cord sets or extension cords are available 

and you can use them if you exercise care. If you use a 

long cord or extension cord:

1. 

The marked electrical rating of the cord set or 

extension cord should be at least as great as the 

electrical rating of the appliance.

2. 

The extension cord must be a grounding-type 3-wire 

cord and it must be plugged into a 3-slot outlet.

3. 

The longer cord should be arranged so that it will not 

drape over the counter top or tabletop where it can 

be pulled on by children or tripped over accidentally. 

If you use an extension cord, the interior light may 

flicker and the speed of the blower may vary when the 

microwave oven is on. Cooking times may be longer, 

too.

WARNING

 CRITICAL 

INSTALLATION 

WARNINGS

This appliance must be installed by a qualified 

technician or service company.

•  Failing to have a qualified technician install 

the oven may result in electric shock, fire, an 

explosion, problems with the product, or injury.

Unpack the oven, remove all packaging material and 

examine the oven for any damage such as dents 

on the interior or exterior of the oven, broken door 

latches, cracks in the door, or a door that is not lined 

up correctly. If there is any damage, do not operate 

the oven and notify your dealer immediately.

Make sure to install your oven in a location with 

adequate space.
Remove all foreign substances such as dust or water 

from the power plug terminals and contact points 

using a dry cloth on a regular basis.

•  Unplug the power plug and clean it with a dry 

cloth.

•  Failing to do so may result in electric shock or fire.

Plug the power cord into a properly grounded 

3 pronged outlet. Your oven should be the only 

appliance connected to this circuit.

•  Sharing a wall socket with other appliances, using 

a power strip, or extending the power cord may 

result in electric shock or fire.

•  Do not use an electric transformer. It may result in 

electric shock or fire.

•  Ensure that the voltage, frequency and current 

provided match the product’s specifications. 

Failing to do so may result in electric shock or fire.

Keep all packaging materials out of the reach of 

children. Children may use them for play.

This appliance must be properly grounded. Read 

and follow the specific “Grounding instructions” 

found in the beginning of this Section. Do not ground 

the appliance to a gas pipe, plastic water pipe, or 

telephone line.

•  This may result in electric shock, fire, an 

explosion, or problems with the product

•  Never plug the power cord into a socket that is 

not grounded correctly and make sure that it is in 

accordance with local and national codes.

Do not cut or remove the third (ground) prong from 

the power cord under any circumstances.
Connect the oven to a 20A circuit. If you connect the 

oven to a 15A circuit, make sure that circuit breaker 

is operable. 

Do not install this appliance in a humid, oily, or dusty 

location, or in a location exposed to direct sunlight or 

water (rain drops).

•  This may result in electric shock or fire.

Plug the power plug into the wall socket firmly. Do 

not use a damaged power plug, damaged power 

cord, or loose wall socket.

•  This may result in electric shock or fire.

Do not mount over a sink.
Do not pull or excessively bend the power cord.
Do not twist or tie the power cord. 
Do not hook the power cord over a metal object, 

place a heavy object on the power cord, insert the 

power cord between objects, or push the power 

cord into the space behind the appliance.

•  This may result in electric shock or fire.

Do not pull the power cord when you unplug the oven.

•  Unplug the oven by pulling the plug only.

•  Failing to do so may result in electric shock or fire.

When the power plug or power cord is damaged, 

contact your nearest service center for a 

replacement or repair.

SAVE THESE INSTRUCTIONS

ME16H702SE_AA_AC_EN.indd   4

2/12/2015   9:19:50 AM

Содержание ME17R7011ES/AC

Страница 1: ...icrowave Oven user manual ME16H702SE This manual is made with 100 recycled paper imagine the possibilities Thank you for purchasing this Samsung product ME16H702SE_AA_AC_EN indd 1 2 12 2015 9 19 49 AM...

Страница 2: ...dvantage of your microwave oven s many benefits and features WHAT YOU NEED TO KNOW ABOUT SAFETY INSTRUCTIONS Warnings and Important Safety Instructions in this manual do not cover all possible conditi...

Страница 3: ...ed surfaces including the back of the oven 15 Do not let the cord hang over the edge of a table or counter 16 When cleaning surfaces of the door and oven that come together when the door closes use on...

Страница 4: ...is any damage do not operate the oven and notify your dealer immediately Make sure to install your oven in a location with adequate space Remove all foreign substances such as dust or water from the p...

Страница 5: ...nside If the oven needs to be repaired contact an authorized service center near you Do not attempt to repair disassemble or modify the appliance yourself Because a high voltage current enters the pro...

Страница 6: ...r when opening the door The food or object may fall and this may result in burns or injury Do not abruptly cool the door the inside of the appliance or the dish by pouring water over it during or just...

Страница 7: ...ng times Power levels 14 Eco mode COOKWARE GUIDE 15 15 Microwave safe utensils COOKING GUIDE 16 16 General microwave tips 16 Cooking meat 17 Cooking poultry 17 Cooking seafood 17 Cooking eggs 17 Cooki...

Страница 8: ...ng Samsung please provide the specific model and serial number information which is usually located on the back or bottom of the product Please record these numbers in the spaces provided below along...

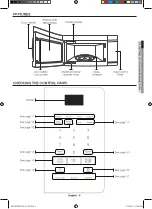
Страница 9: ...1 See page 12 See page 14 See page 14 See page 10 See page 10 See page 13 See page 10 See page 10 See page 11 Oven Control Panel Glass Turntable Door Safety Lock System Model and Serial Number Plate C...

Страница 10: ...DD 30 SEC BUTTON This simplified control saves you time letting you quickly start cooking at 100 power 1 Press the Add 30 sec button for each 30 seconds you want food to cook For example press it twic...

Страница 11: ...east 5 minutes before using again Amount 4 to 8 oz Veggies Fresh vegetables once Place 1 to 4 servings of fresh frozen vegetables in a microwave safe ceramic glass or plastic dish and add 2 4 Tbs wate...

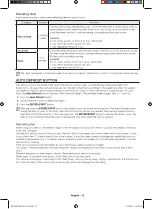
Страница 12: ...ess the Auto Defrost button 2 Use the number buttons to enter the weight 3 Press the ENTER START button After pressing the ENTER START button the display counts down the defrosting time The oven will...

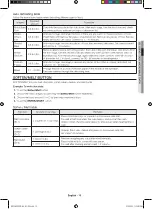
Страница 13: ...tes in the refrigerator Chicken Pieces 0 5 3 0 lbs After each stage rearrange or remove any pieces of food that are nearly defrosted Let stand for 10 20 minutes Bread 0 1 2 0 lbs Arrange the rolls in...

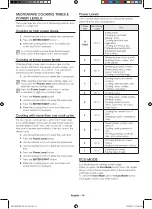
Страница 14: ...levels 1 Use the number buttons to enter the cooking time 2 Press the ENTER START button 3 When the cooking time is over four beeps will sound and End is displayed If you do not enter a power level t...

Страница 15: ...ed to warm food Overheating may cause the polystyrene to melt Paper bags or newspaper May catch fire Recycled paper or metal trims May cause arcing Glassware Cookware Comments Oven to table ware Can b...

Страница 16: ...king Areas that need shielding include poultry wing tips the ends of poultry legs and corners of square baking dishes Use only small amounts of aluminum foil Larger amounts can damage your oven Turnin...

Страница 17: ...tions Tuna steaks and salmon steaks Up to 1 5 lbs Cooking Time 7 11 min lb Arrange the steaks on a roasting rack with the meaty portions towards the outside of the rack Cover with wax paper Turn them...

Страница 18: ...tes until the onion is soft stirring once 2 Add flour salt mustard and pepper mix well Cook at High for 30 to 60 seconds until mixture boils Stir in milk until smooth 3 Stir in red pepper Cook at High...

Страница 19: ...o remove hardened food articles and remove smells place 2 cups of water add lemon juice for extra freshness into a four cup measuring glass Run the microwave at High power for 5 minutes or until the w...

Страница 20: ...ase filter in the microwave oven The aluminum will darken 3 To re install the filter slide it into the frame slot on the left or right and then push it upwards and to the right or left to lock it REPL...

Страница 21: ...Make sure the turntable and roller ring are positioned correctly Causes TV or radio interference This is similar to interference caused by other small appliances such as hair dryers Move your microwav...

Страница 22: ...uding but not limited to damage which occurs in shipment delivery and installation applications and uses for which this product was not intended altered product or serial numbers cosmetic damage or ex...

Страница 23: ...imited to damage which occurs in shipment delivery and installation applications and uses for which this product was not intended altered product or serial numbers cosmetic damage or exterior finish a...

Страница 24: ...om ca support English www samsung com ca_fr support French www samsung com us support www samsung com us support Please be advised that the Samsung warranty does NOT cover service calls to explain pro...

Страница 25: ...icro ondes Manuel d utilisation ME16H702SE Ce manuel est en papier recycl 100 un monde de possibilit s Nous vous remercions d avoir choisi ce produit Samsung ME16H702SE_AA_AC_CFR indd 1 2 12 2015 9 31...

Страница 26: ...ttentivement afin de profiter pleinement des nombreux avantages et fonctions qu offre votre four micro ondes CE QUE VOUS DEVEZ SAVOIR SUR LES CONSIGNES DE S CURIT Les avertissements et les consignes d...

Страница 27: ...cordon loign des surfaces chaudes y compris de l arri re du four 15 Ne laissez pas le cordon pendre par dessus le bord d une table ou d un comptoir 16 Lorsque vous nettoyez les zones de la porte et du...

Страница 28: ...g re poussi re ou eau pr sente sur les bornes et les points de contact de la fiche d alimentation l aide d un chiffon sec D branchez la fiche et nettoyez la l aide d un chiffon sec Le non respect de c...

Страница 29: ...utilisez votre four Ne tentez jamais de r parer le four vous m me La tension circulant l int rieur est tr s lev e Si le four n cessite des r parations contactez un centre de d pannage agr proche de ch...

Страница 30: ...de chute vous risqueriez de vous br ler ou de vous blesser Ne cr ez pas de choc thermique brutal au niveau de la porte de l int rieur de l appareil ou du plat ex en versant de l eau dessus pendant ou...

Страница 31: ...de puissance 14 Mode co GUIDE DES R CIPIENTS 15 15 Ustensiles adapt s la cuisson au four micro ondes GUIDE DE CUISSON 16 16 Conseils g n raux d utilisation du micro ondes 16 Cuisson de la viande 17 Cu...

Страница 32: ...www samsung com register Avant de contacter Samsung munissez vous des informations qui vous seront demand es lors de votre appel les r f rences et le num ro de s rie du mod le g n ralement situ s l ar...

Страница 33: ...4 Reportez vous aux page 10 Reportez vous la page 10 Reportez vous aux page 13 Reportez vous la page 10 Reportez vous la page 10 Reportez vous la page 11 Tableau de commande du four Plateau tournant e...

Страница 34: ...e gagner du temps et de d marrer rapidement la cuisson pleine puissance 100 1 Appuyez sur le bouton Add 30 sec Ajouter 30 s autant de fois que vous souhaitez ajouter 30 secondes au temps de cuisson Pa...

Страница 35: ...tre la m thode de couverture et le temps de repos Laissez le four refroidir pendant au moins 5 minutes avant toute nouvelle utilisation Quantit 4 8 oz L gumes L gumes frais une Mettez 1 4 portions de...

Страница 36: ...ion automatique 2 Utilisez les boutons num riques pour r gler le poids 3 Appuyez sur le bouton ENTER START ENTR E D PART Lorsque vous avez appuy sur le bouton ENTER START ENTR E D PART le d compte du...

Страница 37: ...es morceaux presque d congel s Laissez reposer pendant 10 20 minutes Pain 0 1 2 lb Disposez les petits pains en cercle sur une feuille de papier absorbant au centre du plateau tournant Retournez la mo...

Страница 38: ...rique pour r gler le temps de cuisson 2 Appuyez sur le bouton ENTER START ENTR E D PART 3 Lorsque le temps de cuisson est coul un signal sonore retentit quatre fois et le message End Fin s affiche Si...

Страница 39: ...Plats en verre Plats de service adapt s la cuisson au four Peuvent tre utilis s sauf s ils sont orn s de d corations m talliques Plats en cristal Peuvent tre utilis s pour faire r chauffer des aliment...

Страница 40: ...si une plus grande quantit de micro ondes Pour viter la surcuisson placez les morceaux fins ou d licats au centre du plateau tournant Protection Recouvrez les aliments de bandelettes de papier alumini...

Страница 41: ...la cuisson juste apr s Type d aliment Temps de cuisson Puissance Consignes Steaks de thon et de saumon Jusqu 1 5 lb Temps de cuisson 7 11 min lb Placez les steaks sur la grille r tir c t le plus pais...

Страница 42: ...lange entre en bullition et s paississe l g rement Incorporez le fromage et m langez bien jusqu ce qu il soit enti rement fondu 4 Ajoutez les brocolis et les p tes M langez bien Couvrez Faites cuire...

Страница 43: ...s incrust es et les mauvaises odeurs faites chauffer 2 tasses d eau additionn e de jus de citron pour d sodoriser dans un r cipient en verre d une capacit de quatre tasses puissance lev e pendant 5 mi...

Страница 44: ...e vers le haut et la droite ou la gauche pour le bloquer REMPLACEMENT DU FILTRE CHARBON Si la ventilation fonctionne l int rieur du four le filtre charbon doit tre remplac tous les 6 12 mois ou plus s...

Страница 45: ...tournant et son anneau sont plac s correctement Provoque des interf rences sur la radio ou le t l viseur Ces interf rences sont semblables celles provoqu es par les autres petits appareils tels que le...

Страница 46: ...miter tout dommage survenant au cours de l exp dition la livraison et l installation toute utilisation de l appareil contraire au but auquel il tait destin tout num ro de produit ou de s rie effac tou...

Страница 47: ...ge survenant au cours de l exp dition la livraison et l installation toute utilisation de l appareil contraire au but auquel il tait destin tout num ro de produit ou de s rie effac tout dommage du rev...

Страница 48: ...correcte ou ex cuter des travaux de nettoyage ou d entretien r guliers CANADA 1 800 SAMSUNG 726 7864 U S A Consumer Electronics 1 800 SAMSUNG 726 7864 U S A Mobile Phones 1 800 SAMSUNG 726 7864 www sa...

Отзывы: