background image

GB

21

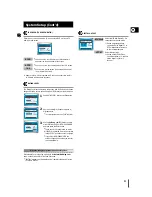
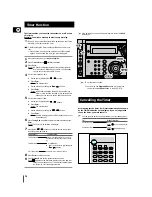
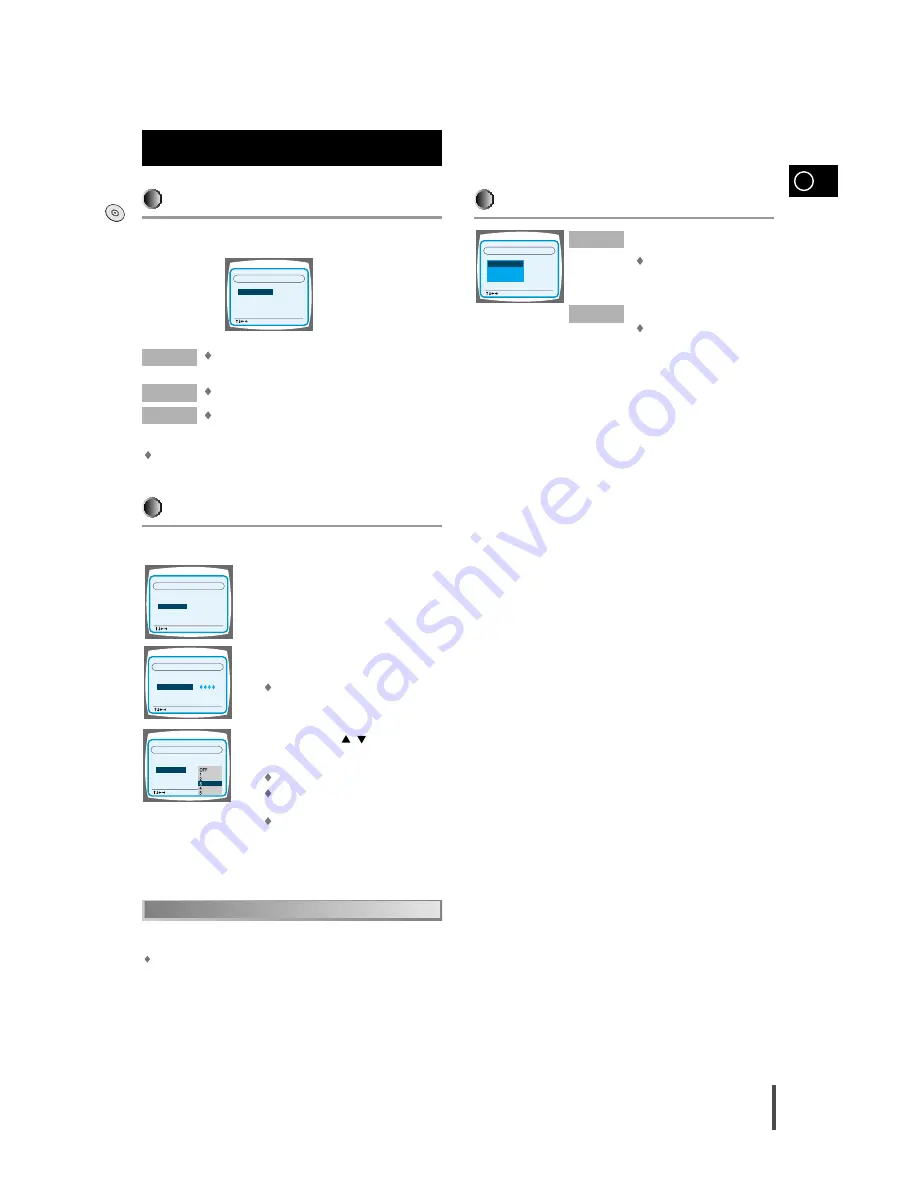
TV SCREEN(TV SCREEN RATIO)

Select when you want to watch a 16:9 screen ratio DVD movie on a TV
with a 4:3 ratio screen.

You can see the full 16:9 picture, but black bars will
appear at the top and bottom of the screen.

You can only view the central portion of the 16:9 screen.

You can view in wide screen  but the top and bottom of
the  picture will be cut off.

However if the movie is recorded in 4:3 ratio, you cannot view the full
16:9 picture with the above functions.

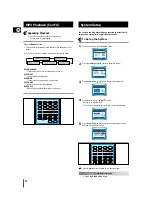
System Setup (Cont’d)

4:3 LB

OFF

RATING LEVEL

BITSTREAM

OUTPUT 

DIGITAL  

TV SCREEN 

 : Move                           Setup : Exit

LANGUAGES 

SYSTEM 

RATING LEVEL

The Rating Level function works in conjunction with DVDs which have been
assigned a rating, to help control the type of DVD that your family watches.

Select RATING LEVEL, then press the Enter button.

Use the number(0~9) buttons to input a 4-
digit password.

The player’s password is set to "7890" by default.

Use the Up/Down (

/

) button to select

either RATING LEVEL or NEW PASSWORD,
and then press the Enter button.

There are up to 8 rating levels on a disc.

If LEVEL 6 is selected, a disc which contains
rating LEVEL 7 and above cannot be played.

If you select NEW PASSWORD, the
screen changes and enables you to enter
the new password.

DIGITAL OUTPUT

Select this if Dolby Digital 5.1 CH
connections have been made.

Sends a digital signal that 
carries the Dolby Digital 5.1 or
DTS multichannel information 
to your external decoder. 

Select this otherwise.

Sends a linear PCM(Pulse
Code Modulation), or 2 channel
stereo signal, to your A/V
receiver.

4:3LB

4:3PS

16:9

4:3 LB

OFF

BITSTREAM

OUTPUT 

DIGITAL  

TV SCREEN 

RATING LEVEL

 : Move                           Setup : Exit

LANGUAGES 

SYSTEM 

4:3 LB

BITSTREAM

OUTPUT 

DIGITAL  

TV SCREEN 

RATING LEVEL

 : Move                           Setup : Exit

LANGUAGES 

SYSTEM 

OUTPUT 

DIGITAL  

TV SCREEN 

RATING LEVEL

 : Move                           Setup : Exit

LANGUAGES 

SYSTEM 

4:3 LB

While the player is in the stop mode, hold the 

Normal Dubbing

button

down on the main unit for more than 5 seconds.

"INITIAL" appears on the display and all default settings will return
to Factory Preset.

When the rating level password has been forgotten

BITSTREAM

LPCM

4:3 LB

OFF

RATING LEVEL

BITSTREAM

OUTPUT 

DIGITAL  

 : Move                           Setup : Exit

LANGUAGES 

SYSTEM 

TV SCREEN 

1

2

3

Содержание MAX-DS9250

Страница 1: ...Instruction Manual THREE CD CHANGER DVD MINI COMPACT SYSTEM MAX DS9250 ...

Страница 2: ...THE RISK OF ELECTRIC SHOCK DO NOT REMOVE REAR COVER NO USER SERVICEABLE PARTS INSIDE REFER SERVICING TO QUALIFIED SERVICE PERSONNEL CAUTION Safety Warnings DVD Digital Versatile Disc offers fantastic audio and video thanks to Dolby Digital surround sound and MPEG 2 video compression technology Now you can enjoy these realistic effects in the home as if you were in a movie theater or concert hall V...

Страница 3: ...ystem Setup 20 Setting up the Language Features 22 TUNER Searching for and Storing the Radio Stations 22 Selecting a Stored Station 23 Improving Radio Reception 23 TAPE DECK Listening to a Cassette 24 CD Synchro Record Feature 24 Recording a Compact Disc 24 Recording a Radio Programme 25 Copying a Cassette Dubbing 25 Tape Counter 25 Selecting the Cassette Playback Mode Deck 2 Only 25 OTHER FUNCTIO...

Страница 4: ... Mode 11 Deck 1 2 12 Cassette Deck 1 13 Record Pause 14 TAPE Normal Dubbing 15 CD Synchro Recording 16 Function Selection buttons 17 Cassette Deck 2 18 Skip Function buttons 19 Super Bass 20 Stop button 21 EQ Preset Classic 22 EQ Preset Rock 23 EQ Preset Pop 24 Enter 25 Search Function buttons 26 Volume 27 3D SOUND 28 Compact Disc Compartment 29 CD Open Close 30 Disc Change 31 Disc Selection butto...

Страница 5: ...OFER PRE OUT 2 VIDEO OUT 3 S VIDEO OUT 4 SW AERIAL CONNECTOR TERMINAL 5 DIGITAL OUT JACK 6 AM AERIAL CONNECTOR TERMINAL 7 FM AERIAL CONNECTOR TERMINAL 8 AUX INPUT 9 AUDIO OUT 10 LOUDSPEAKER CONNECTOR TERMINALS 1 2 3 5 4 6 7 8 9 10 ...

Страница 6: ...D Sound button Deck 1 2 button Counter Reset button TAPE Function buttons MO ST mono stereo button To open the cover of the remote control push the top of the cover then slide downward AUX button Mute button EQ button S Bass button Sleep button Menu button Direction Enter button Disc Number Skip button Open Close button Volume Control buttons Speaker output volume control Play Pause button Stop bu...

Страница 7: ...er 3 Slow button Setup button Title button Return button Subtitle button Clear button Display button Step button Audio button Go To button Number 0 9 buttons Remain button Angle button Repeat button Zoom button Repeat A B button Program button Follow these precautions to avoid leaking or cracking cells Place batteries in the remote control so they match the polarity to and to Use the correct type ...

Страница 8: ...main lead marked AC Cord on the rear of the system into an appropriate socket Press the On Standby button to switch your mini compact system on The loudspeaker connector terminals are located on the rear of the system There are four terminals on the system Two for the left speaker marked L Two for the right speaker marked R To achieve the correct sound quality connect the Red wire to the terminals...

Страница 9: ...sound quality of your mini compact system when listening to other sources Examples A television A video disc player A DAT or DCC cassette player A Hi Fi stereo video cassette recorder To connect the external source the source must have an audio output In addition you need an RCA connection cable Set the system to standby mode and disconnect it and the external source from the main Connect the audi...

Страница 10: ...nnecting to an amplifier with Dolby Pro Logic support Connection for better sound OPTICAL INPUT DIGITAL OUT OPTICAL While playing a DTS disc no sound is reproduced In this case connect to an external amplifier ...

Страница 11: ...y Connecting the AM MW Aerial How to connect a SCREW TYPE aerial The FM aerial connector terminals are located on the rear of the system and marked FM 75Ω Spread the T form FM aerial out and attach the ends to a wall in the position providing the best reception Connecting the FM Aerial How to connect a WIRE TYPE aerial Spread the SW aerial out and attach the ends to a wall in the position providin...

Страница 12: ...nd off automatically You should set the clock When you purchase the mini compact system After a power failure After unplugging the unit Remember to reset the time when the clock changes from winter to summer time and vice verse For each step you have a few seconds to set the required options If you exceed this time you must start again Switch the system on by pressing Standby on Press Timer Clock ...

Страница 13: ...n is automatically selected when DISC SKIP is pushed To select a specific disc press the corresponding Disc 1 2 3 button on the front panel or Disc Skip on the remote control until the required disc indicator flashes If you use the Disc 1 2 3 function when listening to the radio or to a tape the system switches automatically to the DVD CD mode If the disc selected is not loaded the next disc is pl...

Страница 14: ...X 4 X 8 PLAY Skipping through a Chapter Press the and button Each time the button is pressed during playback it moves to the next or previous chapter and plays it However you cannot skip forward or backward through consecu tive the chapters SEARCH SEARCH To move directly to a title chapter or time Press the Go To button Each time the button is pressed it repeats as shown below Press Number 0 9 but...

Страница 15: ...APTER TIME TITLE TIME REMAIN TIME DISC REMAIN TIME TRACK DISC TIME TRACK TIME Press the Repeat A B button at the beginning A of the segment you want to review Press the Repeat A B button again at the end B of the segment you want to review The segment will begin repeating A B Repeat Playback Repeat playback allows you to repeat a chapter title or track Playing Repeatedly Press the Repeat button Ea...

Страница 16: ...ect the desired chapter You can use also just the Left Right button Press the Enter button The selected track number is programming and the cursor moves to the next number At this time you can continue programming if you want to When programming more than 10 tracks select and then press the Enter button The program selection screen where you can program up to 10 additional tracks appears Program P...

Страница 17: ...Clear button When you have entered a wrong number You can program or change particular tracks for VCD or CD discs in the same manner Selecting the Audio Language Press the Audio button Depending on the number of languages recorded on a DVD disc a different audio language KOREAN ENGLISH JAPANESE etc is selected each time the button is pressed Selecting the Audio Language Subtitle Language Depending...

Страница 18: ... turn on your TV when playing back an MP3 disc Press the Open Close button to load a disc Press the Play Pause button After detecting the disc playback starts The on screen bar and the contents recorded on the MP3 disc will be shown on the TV if it is turned on MP3 Playback 1 2 What is MP3 MP3 is an abbreviation of Motion Picture Experts Group or MPEG Audio Layer 3 MP3 is simply a file format with...

Страница 19: ... CD R or CD RW discs make sure that the recording ses sion is properly terminated or they will not be playable Depending on disc properties and recording quality some CD R RW may not be playable CD RW has a lower reflection rate than CD R media and consequently it will take a longer to read CD R discs CD RW discs recorded at high speed tend to be difficult for the DVD player to read If the recordi...

Страница 20: ...tton Press the Left Right button to select the system Press the Up Down button to select the desired item Press the Enter button or Right button Move to the detailed items Then press the Left button to return to the previous step Press the Up Down button to select the desired sub item and then press the Enter button System Setup Press the Setup button again To End the System Setup 1 2 3 4 5 ENGLIS...

Страница 21: ...s the Enter button There are up to 8 rating levels on a disc If LEVEL 6 is selected a disc which contains rating LEVEL 7 and above cannot be played If you select NEW PASSWORD the screen changes and enables you to enter the new password DIGITAL OUTPUT Select this if Dolby Digital 5 1 CH connections have been made Sends a digital signal that carries the Dolby Digital 5 1 or DTS multichannel informat...

Страница 22: ...n the remote control Select the FM stereo or mono mode by pressing Mono ST Searching for and Storing the Radio Stations 1 2 3 4 5 6 7 GB 22 1 5 5 Using the DVD player s Setup function you can customize the Menu Language Subtitle Language and Disc Menu Language To set up the language feature Press the Setup button from the stop mode Press the Up Down button to select the desired item Press the Ente...

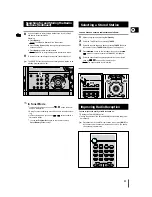
Страница 23: ...mory button in step 7 You can listen to a stored radio station as follows Switch the system on by pressing On Standby Select the TUNER function by pressing TUNER Select the required frequency band by pressing TUNER Band on the remote control or TUNER Band again on the front panel Press button on the front panel of the unit or the button on the remote control until PRESET is displayed Select the de...

Страница 24: ......

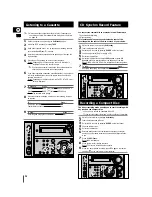
Страница 25: ...recording Direct recording This feature enables you to synchronize the start of the recording with the start of the disc or track of your choice Switch the system on by pressing On Standby Insert a blank cassette in Deck 2 Select the CD function by pressing DVD CD on the front panel Load a compact disc Only for playing a CD Select the required disc Select the required track and press CD Synchro or...

Страница 26: ...d dubbing Dubbing Result The appropriate indications are displayed and the cassette in Deck 1 is copied to the cassette in Deck 2 Press on the front panel or TAPE on the remote control when you have finished recording Recording a Radio Programme 1 2 3 4 5 6 Copying a Cassette Dubbing 1 2 3 4 5 Your mini compact system has three cassette playback modes which enable you to listen to both sides of a ...

Страница 27: ...XX corresponds to the vol ume already set Press Tuning Down and Up to adjust the volume level and press Enter Result The source to be selected is displayed pressing the buttons to select the source to be played when the system switches on If you select You must also TAPE cassette Insert a recorded cassette in one of the decks before setting the system to stand by TUNER radio a Press Enter b Select...

Страница 28: ...the required option is selected To obtain a Select Normal balance linear PASS Balance suitable for pop music POP Balance suitable for rock music ROCK Balance suitable for classic music CLASSIC Your mini compact system is equipped with the function of 3D Sound The function of 3D SOUND amplifies bass and improves high key or bass twice as much for you to appreciate powerful real sound To select 3D S...

Страница 29: ...me you can Check the remaining time by pressing Sleep Change the remaining time by repeating Steps 1 and 2 To cancel SLEEP function press Sleep one or more times until OFF is displayed Setting the System to Switch off Automatically Connecting Headphones 1 2 3 90 MIN The microphone enables the user to mix in his or her vocals to sing along with the music Preparation Plug the microphone with a 6 3mm...

Страница 30: ...system from the wall outlet Before cleaning it If you are not going to be using it for a long time Outer Casing Clean the outer casing regularly using a soft cloth and a light detergent Do not use abrasive powders liquids or aerosol cleaners Never let any liquids get into the system Compact Disc Player Before playing a compact disc clean it with a special CD cleaning agent Do not use the same clea...

Страница 31: ...e is excessive wow and flutter Reception is poor or no radio sta tions are received at all G E N E R A L C D R A D I O C A S S E T T E S Checks Explanation The main lead is not correctly plugged into a wall socket or the wall socket is not switched on The remote control batteries need replacing or the polarity has not been respected The Standby On button has not been pressed The volume has been co...

Страница 32: ... 10 dB Total harmonic distortion 0 5 COMPACT DISC PLAYER Capacity 3 discs Frequency range 20 Hz 20 KHz 1 dB Signal noise ratio 90 dB at 1 KHz with filter Distortion 0 05 at 1 KHz Channel separation 80 dB Disc sizes Diameter 120 or 80 mm Thickness 1 2 mm TAPE DECK Frequency range 125 Hz 8 KHz Signal noise ratio 40 dB Channel separation 32 dB Erasing effect 50 dB AMPLIFIER Output power 6Ω 35W CH RMS...

Страница 33: ...screen A DVD disc can contain up to 32 subtitle languages These numbers are recorded on DVD discs When a disc contains two or more movies these movies are numbered as Title 1 Title 2 etc These numbers are assigned to the tracks which are recorded on video and audio CDs They enable specific tracks to be located quickly Contains recordings of pictures and sound whose quality is roughly comparable to...

Страница 34: ...ELECTRONICS THIS APPLIANCE IS MANUFACTURED BY AH68 01235C ...

Отзывы: