background image

9

GB

What to Do if You are in Doubt or Have a 

Problem

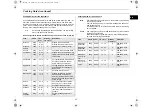
If you have any of the problems listed below try the solutions given. 

This is normal.

Condensation inside the oven

Air flow around the door and outer casing

Light reflection around the door and outer casing

Steam escaping from around the door or vents

The oven does not start when you press the

button.(M1733N)

Is the door completely closed?

The oven does not start when you turn the TIMER knob.(M1713N)

Is the door completely closed?

The food is not cooked at all

Have you set the timer correctly and/or pressed the

button?(M1733N)

Have you set the timer correctly? (M1713N)

Is the door closed?

Have you overloaded the electric circuit and caused a fuse to blow or a
breaker to be triggered?

The food is either overcooked or undercooked

Was the appropriate cooking length set for the type of food?

Was an appropriate power level chosen?

Sparking and cracking occur inside the oven (arcing)

Have you used a dish with metal trimmings?

Have you left a fork or other metal utensil inside the oven?

Is aluminium foil too close to the inside walls?

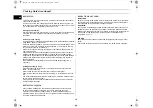
The oven causes interference with radios or televisions

Slight interference may be observed on televisions or radios when the
oven is operating. This is normal.To solve this problem, install the oven
away from televisions, radios and aerials.

If interference is detected by the oven’s microprocessor, the display may
be reset. To solve this problem, disconnect the power plug and reconnect
it. Reset the time. (M1733N)

If the above guidelines do not enable you to solve the problem,
contact your local dealer or SAMSUNG after-sales service.

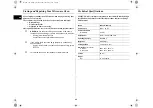
Cooking / Reheating

The following procedure explains how to cook or reheat food. 
ALWAYS check your cooking settings before leaving the oven 
unattended.
First, place the food in the centre of the turntable and close the door.

Model: M1733N

Never switch the microwave oven on when it is empty.

If you wish to heat a dish for a short period of time at maximum
power (800W), simply press the +30s button once for each 30
seconds of cooking time. The oven starts immediately.

Model: M1713N

Never switch the microwave oven on when it is empty.

You can change the power level during cooking by turning the
COOKING POWER CONTROL knob.

1.

Press the

button.

Result :

The 800W (maximum cooking power)
indications are displayed:
Select the appropriate power level by
pressing the

button again until the

corresponding wattage is displayed. Refer to
the power level table on the next page.

2.

Set the cooking time by pressing the 10min. 1min and
10s button.

3.

Press the

button.

Result :

The oven light comes on and the turntable
starts rotating.
Cooking starts and when it has finished the
oven beeps four times.

1.

Set the power level to maximum by turning COOKING
POWER CONTROL 
knob. (MAXIMUM POWER: 800 W)

2.

Set the time by turning TIMER knob.
Result :

The oven light comes on and the turntable
starts rotating.

M1733N_13N_GB.fm  Page 9  Thursday, March 22, 2001  2:19 PM

Содержание M1713N

Страница 1: ...orrect werkt 8 Suggesties voor het oplossen van problemen 9 Koken opwarmen 9 Vermogen 10 Bereiding stoppen 10 Bereidingstijd aanpassen 11 Functie voor opwarmen 11 Instellingen voor opwarmen 12 Automatisch ontdooien M1733N 13 Instellingen voor automatisch ontdooien M1733N 13 Handmatig ontdooien M1713N 13 Meer bereidingsfasen M1733N 14 Geschikt kookgerei 15 Bereidingstips 16 Magnetronoven schoonmake...

Страница 2: ...oort 1 Zet het bevroren voedsel in de magnetronoven Druk op de toets Auto 2 Druk enkele keren op de toets 100g tot het gewenste gewicht is ingesteld 3 Druk op Laat het voedsel in de magnetronoven staan Druk voor elke extra 30 seconden één keer op de toets 30s 1 Zet het voedsel in de magnetronoven Stel met de draaiknop VERMOGEN het gewenste vermogen in 2 Stel met de draaiknop TIJD de gewenste berei...

Страница 3: ...ILATIEOPENING DEUR VERGRENDELING DEUR PLATEAU KOPPELSTUK LOOPRING OPENINGEN DEURVERGRENDELING LAMP VERMOGEN INSTELLEN BEREIDINGSTIJD INSTELLEN KNOP OM DEUR TE OPENEN 1 Koppelstuk dat correct op de motoras onder in de magnetronoven moet worden gezet Doel Het koppelstuk zorgt dat het plateau draait 2 Loopring die u midden in de magnetronoven legt Doel De loopring ondersteunt het plateau 3 Plateau da...

Страница 4: ...ICHT INSTELLEN 5 KLOK INSTELLEN 6 TIJD INSTELLEN 7 START TOETS 8 MAGNETRONMODUS KIEZEN 9 STOP ANNULEERTOETS 10 KNOP OM DEUR TE OPENEN 1 2 3 4 6 5 7 10 8 9 1 ONTDOOIEN 2 VERMOGEN INSTELLEN 3 BEREIDINGSTIJD INSTELLEN 4 DIRECT OPWARMEN 5 KNOP OM DEUR TE OPENEN 1 4 5 2 3 M1733N_13N_NL fm Page 4 Thursday March 22 2001 1 34 PM ...

Страница 5: ...erstellen van magnetronovens Denk aan uw veiligheid Belangrijke veiligheidsinstructies Zorgvuldig doorlezen en bewaren Houd u bij het verhitten van voedsel of dranken in uw magnetronoven altijd aan de hieronder aangegeven veiligheidsmaatregelen 1 Gebruik in de magnetronoven NOOIT metalen servies of bestek zoals metalen bekers of kannen servies met opgedrukte gouden of zilveren versieringen bestek ...

Страница 6: ... gebruiken Gebruik altijd een kan of beker die boven breder is dan onder en giet die NOOIT tot de rand vol Dit voorkomt overkoken Flessen met een smalle nek kunnen bij oververhitting uit elkaar springen ALTIJD controleren of een fles of maaltijd voor de baby al voldoende is afgekoeld NOOIT de speen op de fles laten zitten want dan kan de fles door oververhitting exploderen 10 Zorg dat u nooit de n...

Страница 7: ... en de deurrubbers even met een klamme doek als u de nieuwe oven in gebruik neemt Klok instellen M1733N Uw magnetronoven heeft een ingebouwde klok die de tijd in een 12 of 24 uurs notatie kan aangeven U moet deze klok instellen na het installeren van de nieuwe oven en na een opgeheven stroomstoring Denk aan het aanpassen van de klok bij een overgang van winter naar zomertijd en andersom 1 Stel de ...

Страница 8: ...moet op een correct werkend stopcontact zijn aangesloten Het plateau moet geplaatst zijn Als u een lager niveau dan het maximale instelt dan duurt het langer voordat het water kookt 1 De microgolven worden opgewekt door de magnetron Door het draaien van het plateau worden zij uniform in het voedsel verdeeld zodat dit gelijkmatig wordt verwarmd 2 De microgolven dringen ongeveer 2 cm in het voedsel ...

Страница 9: ...verdwijnt soms de informatie op het display U lost dit probleem op door de netkabel uit het stopcontact te trekken en weer aan te sluiten Stel daarna de tijd opnieuw in M1733N Als de bovenstaande suggesties het probleem niet verhelpen neem dan contact met uw leverancier of met de technische dienst van SAMSUNG Koken opwarmen De volgende stappen geven aan hoe u een maaltijd kookt of opwarmt Controle...

Страница 10: ...ermogen M1733N M1713N HOOG OPWARMEN MIDDELHOOG GEMIDDELD MIDDELLAAG ONTDOOIEN LAAG VERWARMEN 800 W 600 W 450 W 300 W 180 W 100 W 800 W 700 W 600 W 450 W 300 W 180 W 100 W 1 Om te onderbreken open de deur Resultaat Programma stopt Sluit de deur en druk op als u de bereiding wilt voortzetten 2 Om te stoppen druk op Resultaat Programma stopt Als u instellingen wilt annuleren druk dan nogmaals op 1 Om...

Страница 11: ...volgende pagina Ontdooi alleen voedsel dat geschikt is voor een magnetron Model M1713N Zet het voedsel midden op het plateau Sluit de deur Ontdooi alleen voedsel dat geschikt is voor een magnetron Druk op de toets 30s voor elke verlenging met 30 seconden Pas de resterende bereidingstijd aan door de knop TIJD te verdraaien Druk enkele keren op de gewenste opwarmtoets Resultaat Na ongeveer twee seco...

Страница 12: ...ml 1 mok 1 2 min Doe de drank in een ovenvaste kop of mok en dek deze niet af Plaats de kop 150ml of mok 250ml in het midden van het draaiplateau Voor en na het nagaren goed roeren Kant en klaar maaltijd ingevroren 300 350 g 400 450 g 4 min Controleer of de verpakking waarin de ingevroren maaltijd zit geschikt is voor de magnetron Maak met een vork enkele gaatjes in de verpakking en plaats de maal...

Страница 13: ... ontdooitfunctie en een vermogen van 180 W Voor meer informatie over handmatig ontdooien en ontdooitijden zie pagina 20 Handmatig ontdooien M1713N Met de ontdooifunctie kunt u vlees gevogelte of vis ontdooien Leg het bevroren voedsel midden op het plateau en sluit de deur van de oven Ontdooi alleen voedsel dat geschikt is voor een magnetron 1 Druk op de toets Auto Resultaat Het display toont gewic...

Страница 14: ...500 g 3 Druk op Fase I Druk indien nodig enkele keren op om het vermogen in te stellen voorbeeld 600 W 4 Druk op de toetsen 10min 1min en 10s om de bereidingstijd in te stellen voorbeeld 4 x drukken op de toets 1min voor 4 minuten 5 Druk op Fase II Druk indien nodig enkele kere n op om het vermogen in te stellen voorbeeld 450 W 6 Druk op de toetsen 10min 1min en 10s om de bereidingstijd in te stel...

Страница 15: ...f metalen randjes Bruikbaar om een gerecht op te warmen maar polystyreen kan door oververhitting smelten Kunnen in brand vliegen Kan leiden tot vonkvorming Glas Vuurvaste ovenschalen Dun glaswerk Glazen bekers of kommen Bruikbaar behalve als zij zijn versierd met metaalhoudende opdruk Bruikbaar voor opwarmen van voedsel of dranken Erg dun glas kan breken of springen als het plotseling sterk wordt ...

Страница 16: ...ten tijdens het bereiden in de magnetron afdekt want de opstijgende waterdamp draagt bij aan het verwarmingsproces U kunt een gerecht op verschillende manieren afdekken bijvoorbeeld door een bord er omgekeerd op te leggen met een plastic deksel of met magnetronfolie Nawarmtijden Neem na het bereiden van een gerecht de nawarmtijd in acht want die is belangrijk om in het hele gerecht een gelijkmatig...

Страница 17: ...stelen naar het midden Spruitjes 250g 6 7 3 Voeg 60 75 ml 5 6 eetlepels water toe Worteltjes 250g 4 5 3 Snijd de worteltjes in schijfjes van gelijke grootte Bloemkool 250g 500 g 5 5 8 9 3 Snijd in roosjes van gelijke grootte Halveer grote roosjes en leg die met de stelen naar het midden Courgettes 250g 3 4 3 Snijd courgettes in schijfjes Voeg 30 ml 2 eetlepels water of een klontje boter toe Verwar...

Страница 18: ...or een nawarmtijd van minstens 20 seconden nadat de oven is uitgeschakeld Dan ontstaat een gelijkmatige temperatuur Roer indien nodig tijdens het verwarmen en roer ALTIJD na het verwarmen U kunt nakoken en verbranding verhinderen Plaats een plastic lepel of glazen staafje in de drank en roer daarmee vóór tijdens en na het verhitten VERWARMEN VAN BABYVOEDING Babyvoeding Doe de babyvoeding in een di...

Страница 19: ...ren Stoofschotel diepvries 350g 600 W 5 6 2 3 Doe de stoofschotel in een diep bord Dek af met een plastic deksel Roer af en toe tijdens het opwarmen en nogmaals vóór het nawarmen en serveren Pasta met saus diepvries 350g 600 W 4 5 3 Doe de pasta bijv spaghetti of noedels op een plat bord Dek af met magnetron folie Roer vóór het serveren Gevulde pasta met saus diepvries 350g 600 W 4 5 3 Doe de gevu...

Страница 20: ...oien van voedsel Gebruik de volgende tabel als richtlijn bij het ontdooien van voedsel met een temperatuur tussen 18 en 20 C Bevroren voedsel moet altijd worden ontdooid met op de ontdooistand 180W Gerecht Hoeveel heid Tijd min Nawarmti jd min Aanbevelingen Vlees Gehakt Varkenslapjes 500g 250g 14 15 7 7 5 20 Doe het vlees op een bord Bescherm de dunnere randen met aluminiumfolie Draai het vlees ha...

Страница 21: ...n melk 500 ml volgens de aanwijzingen op de verpakking en roer goed Gebruik een geschikte schaal van pyrexglas met deksel Verwarm afgedekt 6 tot 7 minuten op 800 W Roer enkele keren tijdens het verwarmen AMANDELEN ROOSTEREN Spreid 30 g amandelschaafsel gelijkmatig uit op een middelgroot bord Roer enkele keren door tijdens het roosteren 3 tot 4 minuten op 600 W Laat het nog 2 tot 3 minuten in de ov...

Страница 22: ...gnetronoven tijdelijk wilt opbergen kies dan een droge en stofvrije opbergruimte Reden Vocht en condens kunnen onderdelen in de magnetronoven aantasten Deze magnetronoven is niet bedoeld voor industrieel gebruik Technische gegevens SAMSUNG streeft continu naar produktverbetering Zowel de technische gegevens als de inhoud van deze handleiding kan daarom zonder voorafgaande kennisgeving worden gewij...

Страница 23: ...23 NL Opmerking M1733N_13N_NL fm Page 23 Thursday March 22 2001 1 34 PM ...

Страница 24: ...ELECTRONICS M1733N_13N_NL fm Page 24 Thursday March 22 2001 1 34 PM ...

Страница 25: ...ez un plat par micro ondes 9 Niveaux de puissance 10 Arrêtez la cuisson 10 Ajustez le temps de cuisson 11 Réchauffez un plat en mode instantané 11 Temps pour le réchauffage en mode instantané 12 Décongelez un plat automatiquement M1733N 13 Temps pour la décongélation automatique M1733N 13 Décongelez un plat manuellement M1713N 13 Cuisez en plusieurs étapes M1733N 14 Guide des récipients 15 Conseil...

Страница 26: ...retentit quatre fois 1 Mettez le plat congelé dans le four Appuyez sur le bouton Auto 2 Sélectionnez le poids en appuyant autant de fois que nécessaire sur le bouton 100g 3 Appuyez sur le bouton Laissez le plat dans le four Appuyez sur le bouton 30s chaque fois que vous souhaitez ajouter 30 secondes 1 Mettez le plat dans le four Sélectionnez le niveau de puissance en tournant le bouton de sélectio...

Страница 27: ...E VERROUILLAGE DE LA PORTE PORTE PLATEAU COUPLEUR ANNEAU DE GUIDAGE ORIFICES DE VERROUILLAGE ÉCLAIRAGE BOUTON DE SÉLECTION DU NIVEAU DE PUISSANCE BOUTON DE SÉLECTION DU TEMPS DE CUISSON BOUTON D OUVERTURE DE LA PORTE 1 Coupleur déjà placé sur l axe du moteur situé au centre du plancher du four Objet le coupleur fait tourner le plateau 2 Anneau de guidage à placer au centre du plancher du four Obje...

Страница 28: ... DE CUISSON ET DE L HEURE 7 BOUTON DE DÉMARRAGE ET D AJOUT DE TEMPS DE CUISSON 8 SÉLECTION DU MODE MICRO ONDES 9 BOUTON D ARRÊT ET D ANNULATION 10 BOUTON D OUVERTURE DE LA PORTE 1 2 3 4 6 5 7 10 8 9 1 DÉCONGÉLATION 2 BOUTON DE SÉLECTION DU NIVEAU DE PUISSANCE 3 BOUTON DE SÉLECTION DU TEMPS DE CUISSON 4 RÉCHAUFFAGE INSTANTANÉ 5 BOUTON D OUVERTURE DE LA PORTE 1 4 5 2 3 M1733N_13N_F fm Page 4 Friday ...

Страница 29: ...ions d emploi Précautions d emploi Lisez attentivement ce manuel et conservez le précieusement pour vous y reporter ultérieurement Avant de cuire des aliments ou des liquides dans votre four à micro ondes vous devez prendre les précautions suivantes 1 N utilisez aucun récipient ou ustensile métallique dans le four à micro ondes plats métalliques assiettes avec décorations dorées ou argentées broch...

Страница 30: ...omplètement le récipient Choisissez un récipient évasé pour prévenir tout débordement de liquide Des bouteilles à goulot étroit peuvent exploser en cas de surchauffe Vérifiez TOUJOURS la température du lait ou des aliments pour bébé avant de les servir NE chauffez JAMAIS un biberon avec la tétine car il pourrait exploser en cas de surchauffe 10 Veillez à ne pas endommager le cordon d alimentation ...

Страница 31: ...ple à côté d un radiateur ou d un four traditionnel Avant d utiliser votre four pour la première fois nettoyez les surfaces intérieures et les joints d étanchéité à l aide d un chiffon humide Réglez l horloge M1733N Votre four à micro ondes est équipé d une horloge grâce à laquelle vous pouvez afficher l heure sur 24 heures ou sur 12 heures Vous devez régler l horloge à l installation initiale apr...

Страница 32: ...r Le plateau doit être installé dans le four Si vous sélectionnez un niveau de puissance autre que le maximum il faudra plus longtemps pour faire bouillir l eau 1 Les micro ondes générées par le magnétron sont distribuées de façon homogène à l aide du plateau tournant De cette manière les aliments cuisent uniformément 2 Les micro ondes sont absorbées par les aliments jusqu à une profondeur d envir...

Страница 33: ...t être réinitialisé Pour remédier à ce problème déconnectez le cordon d alimentation puis rebranchez le Réglez de nouveau l horloge M1733N Si le problème ne peut être résolu à l aide des instructions ci dessus contactez votre revendeur ou le service après vente SAMSUNG le plus proche Cuisez et réchauffez un plat par micro ondes Suivez les instructions ci dessous pour cuire ou réchauffer des alimen...

Страница 34: ...d annulation Modèle M1713N Niveau Puissance M1733N M1713N MAXIMUM ÉLEVÉ MOYEN ÉLEVÉ MOYEN MOYEN BAS DÉCONGÉLATION BAS 800 W 600 W 450 W 300 W 180 W 100 W 800 W 700 W 600 W 450 W 300 W 180 W 100 W 1 Pour arrêter la cuisson temporairement ouvrez la porte Résultat la cuisson s arrête Pour redémarrer la cuisson refermez la porte et appuyez sur le bouton 2 Pour arrêter la cuisson complètement appuyez s...

Страница 35: ... micro ondes Modèle M1713N Posez le plat au centre du plateau puis fermez la porte N utilisez que des récipients garantis micro ondes Appuyez sur le bouton 30s chaque fois que vous souhaitez ajouter 30 secondes Ajustez le temps de cuisson restant en tournant le bouton de sélection du temps Sélectionnez le type d aliments et le nombre de portions en appuyant une ou plusieurs fois sur le bouton de r...

Страница 36: ...des légumes et des pommes de terres des pâtes ou du riz Boissons café lait thé eau à température ambiante 150 ml 1 tasse 250 ml 1 bol 1 à 2 min Versez la boisson dans une tasse ou un bol en céramique sans recouvrir Placez la tasse ou le bol au centre du plateau Remuez avant et après le temps de repos Plat congelé 300 à 350 g 400 à 450 g 4 min Vérifiez que l emballage est garanti micro ondes puis p...

Страница 37: ...urée de décongélation voir de guide de cuisson Pour plus d informations sur la décongélation manuelle reportez à vous à la page 21 Décongelez un plat manuellement M1713N La décongélation manuelle vous permet de décongeler des aliments tels que de la viande de la volaille ou du poisson Posez le plat congelé au centre du plateau puis fermez la porte N utilisez que des récipients garantis micro ondes...

Страница 38: ...e bouton le mode micro ondes I est sélectionné Si nécessaire sélectionnez le niveau de puissance en appuyant de nouveau sur le bouton 600 W dans l exemple 4 Réglez le temps de cuisson en appuyant autant de fois que nécessaire sur les boutons 10min 1min et 10s quatre minutes dans l exemple 5 Appuyez sur le bouton le mode micro ondes II est sélectionné Si nécessaire sélectionnez le niveau de puissan...

Страница 39: ...mer en cas de surchauffe Risquent de brûler Risquent de provoquer des arcs électriques étincelles Verre Résistant à la chaleur Verres de table Bocaux Utilisable à condition de ne pas présenter de décorations métalliques Utilisables pour réchauffer des aliments ou des liquides Du verre fin peut cependant être fêlé ou brisé par un changement soudain de température Retirez le couvercle et utilisez un...

Страница 40: ...ion sur les astuces micro ondes Nécessité de recouvrir les aliments pendant la cuisson En recouvrant les aliments pendant la cuisson l eau qu ils contiennent se transforme en vapeur et contribue alors au processus de cuisson Vous pouvez recouvrir les aliments de différentes façons à l aide d une assiette en céramique d un couvercle ou d un film en plastique garanti micro ondes Temps de repos Le te...

Страница 41: ...à soupe Carottes 250g 4 à 5 3 Découpez les carottes en rondelles Chou fleur 250g 500 g 5 à 5 8 à 9 3 Préparez des bouquets de taille similaire Recoupez les gros bouquets en deux Placez les tiges vers le centre Courgettes 250g 3 à 4 3 Découpez les courgettes en rondelles Ajoutez 30 ml d eau 2 cuillères à soupe ou une noix de beurre Cuisez jusqu à ce que les courgettes soient tendres Aubergines 250g...

Страница 42: ...es ou si l aliment risque de se réchauffer très rapidement tartelettes sucrées par exemple Pour obtenir un résultat optimal remuez ou retournez pendant le réchauffage Si possible remuez de nouveau avant de servir Faites particulièrement attention lorsque vous réchauffez des liquides ou des aliments pour bébé Pour empêcher les liquides de continuer à monter en température et éviter de vous brûler r...

Страница 43: ...vant de les servir La température recommandée pour le lait est d environ 37 C Remarque la température des aliments pour bébé doit absolument être vérifiée avant de les servir afin d éviter les brûlures Reportez vous au tableau de la page 19 20 pour plus de renseignements sur les niveaux de puissance et les temps de réchauffage Réchauffer des aliments pour bébé et du lait Reportez vous au tableau c...

Страница 44: ...ns une assiette creuse en céramique Recouvrez d un film ou d un couvercle en plastique Remuez de temps en temps pendant le réchauffage puis avant de laisser reposer et de servir Pâtes avec de la sauce réfrigérées 350g 600 W 4 à 5 3 Disposez les pâtes spaghetti ou coquil lettes dans une assiette plate en céramique Recouvrez d un film plastique garanti micro ondes Remuez avant de servir Pâtes fourré...

Страница 45: ...lorsque vous congelez ou décongelez des aliments Reportez vous au tableau ci dessous pour décongeler des aliments dont la température est située entre 18 C et 20 C Tous les aliments congelés doivent être décongelés en réglant votre four sur le niveau de puissance de décongélation 180 W Aliment Quantité Décongé lation en minutes Repos en minutes Recommandations Viande Viande hachée Côtelettes de po...

Страница 46: ... les couvercles puis laissez les pots retournés pendant cinq minutes FAIRE UN POUDING Mélangez la préparation pour pouding avec le sucre et le lait 500 ml en suivant les instructions Utilisez un saladier en verre avec couvercle Faites cuire 6 minutes à 7 minutes à 800 W Remuez souvent pendant la cuisson FAIRE DORER DES AMANDES EFFILÉES Étalez 30 g d amandes éffilées dans une assiette en céramique ...

Страница 47: ...la poussière et l humidité risquent de détériorer certains éléments du four Ce four à micro ondes n est pas conçu pour utilisation commerciale Spécifications techniques Les descriptions et caractéristiques figurant dans ce mode d emploi sont données à titre d information et sans engagement Soucieux de la qualité de ses produits SAMSUNG se réserve le droit d effectuer des modifications sans préavis...

Страница 48: ...ELECTRONICS M1733N_13N_F fm Page 24 Friday March 23 2001 2 47 PM ...

Страница 49: ...o Do if You are in Doubt or Have a Problem 9 Cooking Reheating 9 Power Levels 10 Stopping the Cooking 10 Adjusting the Cooking Time 11 Using the Instant Reheat Feature 11 Instant Reheat Settings 12 Using the Auto Defrost Feature M1733N 13 Auto Defrost Settings M1733N 13 Manual Defrosting Food M1713N 13 Multistage Cooking M1733N 14 Cookware Guide 15 Cooking Guide 16 Cleaning Your Microwave Oven 21 ...

Страница 50: ...ts The oven beeps four times when cooking is over 1 Place the frozen food in the oven Press the Auto button 2 Select the weight by pressing the 100g button as required 3 Press the button Leave the food in the oven Press 30s once or more times for each extra 30 seconds that you wish to add 1 Place the food in the oven Select the power level by rotating the COOKING POWER CONTROL knob 2 Select the co...

Страница 51: ...N HOLES DOOR LATCHES DOOR TURNTABLE COUPLER ROLLER RING SAFETY INTERLOCK HOLES LIGHT VARIABLE COOKING POWER CONTROL KNOB TIMER KNOB OPEN DOOR PUSH BUTTON 1 Coupler already placed over the motor shaft in the base of the oven Purpose The coupler rotates the turntable 2 Roller ring to be placed in the centre of the oven Purpose The roller ring supports the turntable 3 Turntable to be placed on the ro...

Страница 52: ...EIGHT SELECTION 5 CLOCK SETTING 6 TIME SETTING 7 START BUTTON 8 MICROWAVE MODE SELECTION 9 STOP CANCEL BUTTON 10 OPEN DOOR PUSH BUTTON 1 2 3 4 6 5 7 10 8 9 1 DEFROST 2 VARIABLE COOKING POWER CONTROL KNOB 3 TIMER KNOB 4 INSTANT REHEAT 5 OPEN DOOR PUSH BUTTON 1 4 5 2 3 M1733N_13N_GB fm Page 4 Thursday March 22 2001 2 19 PM ...

Страница 53: ...ained by the manufacturer Safety Precautions Important Safety Instructions Read Carefully and keep for future reference Before cooking food or liquids in your microwave oven please check that the following safety precautions are taken 1 DO NOT use any metallic cookware in the microwave oven Metallic containers Dinnerware with gold or silver trimmings Skewers forks etc Reason Electric arcing or spa...

Страница 54: ... milk before giving it to the baby NEVER heat a baby s bottle with the teat on as the bottle may explode if overheated 9 Be careful not to damage the power cable Do not immerse the power cable or plug in water and keep the power cable away from heated surfaces Do not operate this appliance if it has a damaged power cable or plug 10 Stand at arm s length from the oven when opening the door Reason T...

Страница 55: ...or and the door seal with a damp cloth before using your microwave oven for the first time Setting the Time M1733N Your microwave oven has an inbuilt clock The time can be displayed in either the 24 hour or 12 hour notation You must set the clock When you first install your microwave oven After a power failure Do not forget to reset the clock when you switch to and from summer and winter time 1 Wh...

Страница 56: ... plugged into an appropriate wall socket The turntable must be in position in the oven If a power level other than the maximum is used the water takes longer to boil 1 The microwaves generated by the magnetron are distributed uniformly as the food rotates on the turntable The food is thus cooked evenly 2 The microwaves are absorbed by the food up to a depth of about 1 inch 2 5 cm Cooking then cont...

Страница 57: ...microprocessor the display may be reset To solve this problem disconnect the power plug and reconnect it Reset the time M1733N If the above guidelines do not enable you to solve the problem contact your local dealer or SAMSUNG after sales service Cooking Reheating The following procedure explains how to cook or reheat food ALWAYS check your cooking settings before leaving the oven unattended First...

Страница 58: ... Level Output M1733N M1713N HIGH REHEAT MEDIUM HIGH MEDIUM MEDIUM LOW DEFROST LOW 800 W 600 W 450 W 300 W 180 W 100 W 800 W 700 W 600 W 450 W 300 W 180 W 100 W 1 To stop temporarily Open the door Result Cooking stops To resume cooking close the door and press again 2 To stop Completely Press the button Result The cooking stops If you wish to cancel the cooking settings press the Cancel button 1 To...

Страница 59: ...e table on the next page Use only recipients that are microwave safe Model M1713N First place the food in the center of the turntable and close the door Use only recipients that are microwave safe Press the 30s button once for each 30 seconds to be added Adjust the remaining cooking time by rotating the TIMER knob Press the Instant Reheat button which you want the required number of times Result C...

Страница 60: ...pasta Drinks coffee milk tea water with room temperature 150 ml 1 cup 250 ml 1 mug 1 2 min Pour into a ceramic cup and reheat uncovered Place cup 150 ml or mug 250 ml in the centre of turntable Stir carefully before and after standing time Ready Meal frozen 300 350 g 400 450 g 4 min Take frozen ready meal and check if dish is suitable for microwave Pierce film of ready meal Put the frozen ready me...

Страница 61: ... you want to defrost food manually For further details on Manual defrosting and defrosting time refer to the page 20 Manual Defrosting Food M1713N The Defrost feature enables you to defrost meat poultry fish First place the frozen food in the centre of the turntable and close the door Use only recipients that are microwave safe 1 Press the Auto button Result The following indication is displayed 2...

Страница 62: ...I if necessary set the power level by pressing the button again one or more times 600W in the example 4 Set the cooking time by pressing the 10min 1min and 10s buttons the appropriate number of times 4 minutes in the example 5 Press the button The microwave mode II if necessary set the power level by pressing the button again one or more times 450W in the example 6 Set the cooking time by pressing...

Страница 63: ...rs Paper bags or newspaper Recycled paper or metal trims Glassware Can be used to warm food Overheating may cause the polystyrene to melt May catch fire May cause arcing Glassware Oven to table ware Fine glassware Glass jars Can be used unless decorated with a metal trim Can be used to warm foods or liquids Delicate glass may break or crack if heated suddenly Must remove the lid Suitable for warmi...

Страница 64: ...r example see the chapter with tips techniques and hints Covering during cooking To cover the food during cooking is very important as the evaporated water rises as steam and contributes to cooking process Food can be covered in different ways e g with a ceramic plate plastic cover or microwave suitable cling film Standing times After cooking is over food the standing time is important to allow th...

Страница 65: ...to the centre Brussels Sprouts 250g 6 7 3 Add 60 75 ml 5 6 tbsp water Carrots 250g 4 5 3 Cut carrots into even sized slices Cauliflower 250g 500 g 5 5 8 9 3 Prepare even sized florets Cut big florets into halves Arrange stems to the centre Courgettes 250g 3 4 3 Cut courgettes into slices Add 30 ml 2 tbsp water or a knob of butter Cook until just tender Egg Plants 250g 4 5 3 Cut egg plants into sma...

Страница 66: ...es When reheating food for the first time it is helpful to make a note of the time taken for future reference Always make sure that the reheated food is piping hot throughout Allow food to stand for a short time after reheating to let the temperature even out The recommended standing time after reheating is 2 4 minutes unless another time is recommended in the chart Take particular care when heati...

Страница 67: ...fully Food Portion Power Time min Standing Time min Instructions Drinks coffee milk tea water with room temperature 150 ml 1 cup 250 ml 1 mug 800 W 1 1 1 2 1 2 Pour into a ceramic cup and reheat uncovered Place cup 150 ml or mug 250 ml in the centre of turntable Stir carefully before and after standing time Soup chilled 250g 450g 800 W 3 3 4 4 2 3 Pour into a deep ceramic plate Cover with plastic ...

Страница 68: ...nt while freezing and defrosting food For defrosting of frozen food with a temperature of about 18 to 20 C use the following table as a guide All frozen food should be defrosted using defrosting power level 180 W Food Portion Time min Standing Time min Instructions Meat Minced beef Pork steaks 500g 250g 14 15 7 7 5 20 Place the meat on a flat ceramic plate Shield thinner edges with aluminium foil ...

Страница 69: ...COOKING PUDDING Mix pudding powder with sugar and milk 500 ml by following the manufacturers instructions and stir well Use a suitable sized glass pyrex bowl with lid Cook covered for 6 to 7 minutes using 800 W Stir several times well during cooking BROWNING ALMOND SLICES Spread 30 g sliced almonds evenly on a medium sized ceramic plate Stir several times during browning for 3 to 4 minutes using 6...

Страница 70: ... wish to store your oven away temporarily choose a dry dust free place Reason Dust and damp may adversely affect the working parts in the oven This microwave oven is not intended for commercial use Technical Specifications SAMSUNG strives to improve its products at all times Both the design specifications and these user instructions are thus subject to change without notice Model M1733N M1713N Pow...

Страница 71: ...23 GB Note M1733N_13N_GB fm Page 23 Thursday March 22 2001 2 19 PM ...

Страница 72: ...M1733N_13N_GB fm Page 24 Thursday March 22 2001 2 19 PM ...

Отзывы: