background image

English - 26

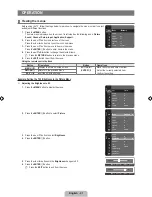
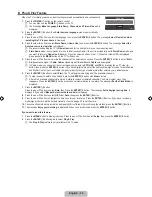
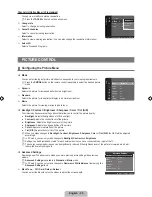
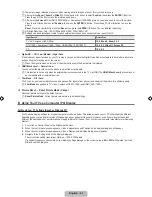
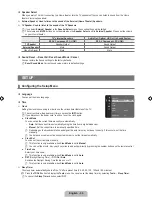
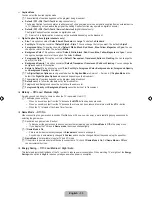
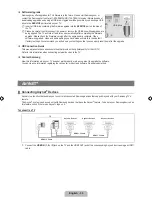
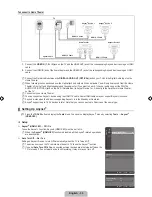
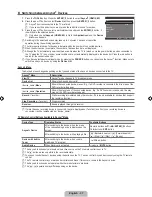
Dynamic Contrast → Off / Low / Medium / High 

You can adjust the screen contrast so that the optimal contrast is provided.

Gamma

You can adjust the primary color (red, green, blue) Intensity. (-3 ~ +3)

Color Space

Color space is a color matrix composed of red, green and blue colors. Select your favorite color space to experience the most 

natural color.

Native

: Native Color Space offers deep and rich color tone.

Auto

: Auto Color Space automatically adjusts to the most natural color tone based on program sources.

White Balance

You can adjust the color temperature for more natural picture colors.

R-Offset / G-Offset / B-Offset / R-Gain / G-Gain / B-Gain

: You can adjust the 

Color

 ‘temperature’ in the light areas by 

changing the values of 

R, G, B

. Recommended for advanced users only.

Reset

: The previously adjusted white balance will be reset to the factory defaults.

Flesh Tone

You can emphasize the pink ‘flesh tone’ in the picture.

Changing the adjustment value will refresh the adjusted screen.

Edge Enhancement → Off / On

You can emphasize object boundaries in the picture.

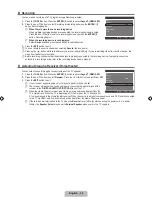
Picture Options

In PC mode, you can only make changes to the 

Color Tone

 and 

Size

 from among the 

items in 

Picture Options

.

Color Tone → Cool / Normal / Warm1 / Warm2

Warm1

 or 

Warm2

 is only activated when the picture mode is 

Movie

.

Settings can be adjusted and stored for each external device you have connected to an 

input of the TV.

Size

Occasionally, you may want to change the size of the image on your screen. Your TV comes 

with six screen size options, each designed to work best with specific types of video input. Your cable box/satellite receiver may 

have its own set of screen sizes as well. In general, though, you should view the TV in 16:9 mode as much as possible.

Alternately, you can press the 

P.SIZE

 button on the remote control repeatedly to change the picture size.

16: 

: Sets the picture to 16:9 wide mode.

Zoom1

: Magnifies the size of the picture on the screen.

Zoom2

: Magnifies the size of the picture more than 

Zoom1

.

Wide Fit

: Enlarges the aspect ratio of the picture to fit the entire screen.

4:3

 : Sets the picture to 4:3 normal mode.

Screen Fit

: Use the function to see the full image without any cutoff when HDMI (720p/1080i/1080p), Component 

(1080i/1080p) or DTV (1080i) signals are input.

16:

Zoom1

Zoom2

Wide Fit

4:3

Screen Fit

N

N

N
N

O

Picture Options

Color Tone 

: Normal 


Size 

: 16:9

Digital NR 

: Auto

HDMI Black Level 

: Normal

Film Mode 

: Off

Move     

Enter     

R

 Return

16:

Zoom1


U


Move

Zoom2 

U

 Move

Wide Fit


U


Move

4:3

Screen Fit

BN68-01883A-01Eng.indb   26

2009-01-30   �� 10:36:17

Содержание LN40B530P7FXZA

Страница 1: ...o comentario en relación con los productos de Samsung comuníquese con el centro de atención al cliente de SAMSUNG Country Customer Care Center Web Site Address CANADA 1 800 SAMSUNG 726 7864 www samsung com ca Samsung Electronics Canada Inc Customer Service 55 Standish Court Mississauga Ontario L5R 4B2 Canada Samsung Electronique Canada Inc Service à la Clientèle 55 Standish Court Mississauga Ontar...

Страница 2: ...ghts of certain third parties This license is limited to private non commercial use by end user consumers for licensed contents No rights are granted for commercial use The license does not cover any product unit other than this product unit and the license does not extend to any unlicensed product unit or process conforming to ISO IEC 11172 3 or ISO IEC 13818 3 used or sold in combination with th...

Страница 3: ...R 17 Connecting a Digital Audio System 17 Connecting an Amplifier DVD Home Theater 18 Connecting a Camcorder 19 Connecting a PC 20 Operation Viewing the menus 21 Plug Play Feature 22 Channel Control Configuring the Channel Menu 23 Managing Channels 23 Picture Control Configuring the Picture Menu 25 Using Your TV as a Computer PC Display 27 Setting up the TV with your PC 28 Sound Control Configurin...

Страница 4: ...Top Box needed HDMI DVI connection of your PC to this TV Excellent Picture Quality SRS TruSurround HD provides a virtual surround system Accessories Remote Control BN59 00856A Batteries AAA X 2 Power Cord 3903 000144 TV Holder Screw M4 X 16 LN32B530 BN96 10788A LN37B530 BN96 10788A LN40B530 BN96 10788A LN46B530 BN96 10788A LN52B530 BN96 10788A Cover Bottom LN32B530 BN63 05356A LN37B530 BN63 05330A...

Страница 5: ...menu of your TV s features 3 y Press to increase or decrease the volume In the on screen menu use the y buttons as you would use the and buttons on the remote control 4 Z Press to change channels In the on screen menu use the Z buttons as you would use the and buttons on the remote control 5 P POWER Press to turn the TV on and off 6 SPEAKERS 7 REMOTE CONTROL SENSOR Aim the remote control towards t...

Страница 6: ... Panel The product color and shape may vary depending on the model N LN52B530 TV Rear Panel TV Side Panel 1 1 3 4 6 5 7 8 9 8 9 0 7 3 2 4 0 5 6 LN32B530 LN37B530 LN40B530 LN46B530 1 1 3 4 6 5 7 8 9 8 9 0 7 3 2 4 0 5 6 TV Rear Panel ...

Страница 7: ...service only 4 PC IN PC AUDIO Connects to the video and audio output jacks on your PC 5 DIGITAL AUDIO OUT OPTICAL Connects to a Digital Audio component such as a Home theater receiver 6 AUDIO OUT Connects to the audio input jacks on your Amplifier Home theater 7 SERVICE Connector for software upgrades 8 POWER INPUT Connects the supplied power cord 9 KENSINGTON LOCK The Kensington Lock optional is ...

Страница 8: ...nnel you were watching z Press to change channels SOURCE Press to display and select the available video sources FAV CH Press to switch to your favorite channels MENU Displays the main on screen menu RETURN Returns to the previous menu UP DOWN LEFT RIGHT ENTERE Use to select on screen menu items and change menu values a EXIT Press to exit the menu b P SIZE Picture size selection c SRS Selects SRS ...

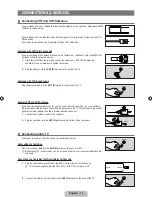
Страница 9: ...back of the TV Separate VHF and UHF Antennas If you have two separate antennas for your TV one VHF and one UHF you must combine the two antenna signals before connecting the antennas to the TV This procedure requires an optional combiner adaptor available at most electronics shops 1 Connect both antenna leads to the combiner 2 Plug the combiner into the ANT IN terminal on the bottom of the rear pa...

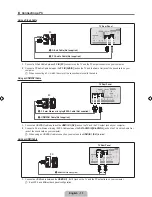
Страница 10: ... Top Box via HDMI This connection can only be made if there is an HDMI Output connector on the external device 1 Connect an HDMI Cable between the HDMI IN 1 2 or 3 jack on the TV and the HDMI jack on the DVD Blu ray Player or Cable Box Satellite receiver Set Top Box What is HDMI HDMI High Definition Multimedia Interface is an interface that enables the transmission of digital audio and video signa...

Страница 11: ...le Box Satellite receiver Set Top Box to your TV 1 Connect a Component Cable between the COMPONENT IN Y PB PR jacks on the TV and the COMPONENT Y PB PR jacks on the DVD Blu ray player Cable Box Satellite receiver Set Top Box 2 Connect Audio Cables between the COMPONENT IN R AUDIO L jacks on the TV and the AUDIO OUT jacks on the DVD Blu ray player Cable Box Satellite receiver Set Top Box Component ...

Страница 12: ...al Audio System is connected to the DIGITAL AUDIO OUT OPTICAL jack Decrease the volume of the TV and adjust the volume level with the system s volume control 5 1CH audio is possible when the TV is connected to an external device supporting 5 1CH Each Digital Audio System has a different back panel configuration When the Home Theater receiver is set to On you can hear sound output from the TV s Opt...

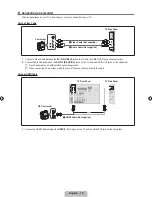
Страница 13: ...plifier is connected to the AUDIO OUT R AUDIO L jacks Decrease the volume of the TV and adjust the volume level with the Amplifier s volume control Each Amplifier DVD Home Theater has a different back panel configuration When connecting an Amplifier DVD Home Theater match the color of the connection terminal to the cable N N N TV Rear Panel 1 Audio Cable Not supplied Amplifier DVD Home Theater ...

Страница 14: ...DIO OUT jacks on the camcorder Each Camcorder has a different back panel configuration When connecting a Camcorder match the color of the connection terminal to the cable Using an HDMI Cable 1 Connect an HDMI Cable between the HDMI IN 1 2 or 3 jack on the TV and the HDMI OUT jack on the camcorder N N TV Rear Panel 1 Video Cable Not supplied 2 Audio Cable Not supplied Camcorder TV Rear Panel HD Cam...

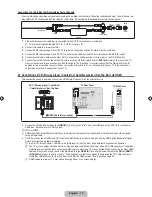
Страница 15: ...utput jack on your computer 2 Connect a 3 5 mm Stereo miniplug 2RCA Cable between the DVI AUDIO IN R AUDIO L jack on the TV and the Audio Out jack of the sound card on your computer When using an HDMI DVI cable connection you must use the HDMI IN 1 DVI terminal Using an HDMI Cable 1 Connect an HDMI cable between the HDMI IN 1 2 or 3 jack on the TV and the PC output jack on your computer Each PC ha...

Страница 16: ...TV Separate VHF and UHF Antennas If you have two separate antennas for your TV one VHF and one UHF you must combine the two antenna signals before connecting the antennas to the TV This procedure requires an optional combiner adaptor available at most electronics shops 1 Connect both antenna leads to the combiner 2 Plug the combiner into the ANT IN terminal on the bottom of the rear panel Connecti...

Страница 17: ...ia HDMI This connection can only be made if there is an HDMI Output connector on the external device 1 Connect an HDMI Cable between the HDMI IN 1 2 or 3 jack on the TV and the HDMI jack on the DVD Blu ray Player or Cable Box Satellite receiver Set Top Box What is HDMI HDMI High Definition Multimedia Interface is an interface that enables the transmission of digital audio and video signals using a...

Страница 18: ...llite receiver Set Top Box to your TV 1 Connect a Component Cable between the COMPONENT IN 1 or 2 Y PB PR jacks on the TV and the COMPONENT Y PB PR jacks on the DVD Blu ray player Cable Box Satellite receiver Set Top Box 2 Connect Audio Cables between the COMPONENT IN 1 or 2 R AUDIO L jacks on the TV and the AUDIO OUT jacks on the DVD Blu ray player Cable Box Satellite receiver Set Top Box Compone...

Страница 19: ...e Digital Audio Input jacks on the Digital Audio System When a Digital Audio System is connected to the DIGITAL AUDIO OUT OPTICAL jack Decrease the volume of the TV and adjust the volume level with the system s volume control 5 1CH audio is possible when the TV is connected to an external device supporting 5 1CH Each Digital Audio System has a different back panel configuration When the Home Theat...

Страница 20: ...plifier is connected to the AUDIO OUT R AUDIO L jacks Decrease the volume of the TV and adjust the volume level with the Amplifier s volume control Each Amplifier DVD Home Theater has a different back panel configuration When connecting an Amplifier DVD Home Theater match the color of the connection terminal to the cable N N N TV Rear Panel 1 Audio Cable Not supplied Amplifier DVD Home Theater ...

Страница 21: ...DIO L jacks on the TV and the AUDIO OUT jacks on the camcorder Each Camcorder has a different back panel configuration When connecting a Camcorder match the color of the connection terminal to the cable Using an HDMI Cable 1 Connect an HDMI Cable between the HDMI 1 2 or 3 jack on the TV and the HDMI OUT jack on the camcorder N N 3 3 TV Side Panel 1 Video Cable Not supplied 2 Audio Cable Not suppli...

Страница 22: ...ck on your computer 2 Connect a 3 5 mm Stereo miniplug 2RCA Cable between the DVI IN HDMI1 R AUDIO L jack on the TV and the Audio Out jack of the sound card on your computer When using an HDMI DVI cable connection you must use the HDMI IN 1 terminal Using an HDMI Cable 1 Connect an HDMI cable between the HDMI IN 1 2 or 3 jack on the TV and the PC output jack on your computer Each PC has a differen...

Страница 23: ...m Select the currently selected item Confirm the setting RETURN R Return to the previous menu EXIT e Exit the on screen menu Example Setting the TV s Brightness in the Picture Menu Adjusting the Brightness to 80 1 Press the MENU button to display the menu 2 Press the ENTERE button to select Picture 3 Press the or button to select Brightness 4 Press the ENTERE button 5 Press the or button until the...

Страница 24: ...he cable system signal source for both Analog and Digital Contact your local cable company to identify the type of cable system that exists in your particular area 6 Press the ENTERE button to select Start The TV will begin memorizing all of the available channels To stop the search before it has finished press the ENTERE button with Stop selected After all the available channels are stored it sta...

Страница 25: ...annels after Auto Program is completed This process may take up to 20 30 minutes To stop searching scrambled channels Press the ENTERE button to select Stop Press the button to select Yes then press the ENTERE button This function is only available in Cable mode Channel List For detailed procedures on using the Channel List refer to the Managing Channels instructions You can select these options b...

Страница 26: ... Favorite You can set channels you watch frequently as Favorite Press the TOOLS button to display the Tools menu You can also set the add to or delete from Favorites by selecting Tools Add to Favorite or Delete from Favorite The symbol will be displayed and the channel will be set as a favorite All favorite channels will be shown in the Favorite menu Timer Viewing If you reserve a program you want...

Страница 27: ...ure Color Adjusts color saturation of the picture Tint G R Adjusts the color tint of the picture When you make changes to Backlight Contrast Brightness Sharpness Color or Tint G R the OSD will be adjusted accordingly In PC mode you can only make changes to Backlight Contrast and Brightness Settings can be adjusted and stored for each external device you have connected to an input of the TV The ene...

Страница 28: ... among the items in Picture Options Color Tone Cool Normal Warm1 Warm2 Warm1 or Warm2 is only activated when the picture mode is Movie Settings can be adjusted and stored for each external device you have connected to an input of the TV Size Occasionally you may want to change the size of the image on your screen Your TV comes with six screen size options each designed to work best with specific t...

Страница 29: ...ctive only when an external device is connected to the TV via HDMI The HDMI Black Level function may not be compatible with all external devices Film Mode Off Auto The TV can be set to automatically sense and process film signals from all sources and adjust the picture for optimum quality Film Mode is supported in TV Video Component 480i 1080i and HDMI 480i 1080i Picture Reset Reset Picture Mode C...

Страница 30: ...A GTF 1280 X 720 52 500 70 000 1280 X 1024 74 620 70 000 128 943 VESA DMT DTV CEA 1920 X 1080p 67 500 60 000 148 500 When using an HDMI DVI cable connection you must use the HDMI IN 1 jack Setting up the TV with your PC Preset Press the SOURCE button to select PC mode Auto Adjustment Use the Auto Adjust function to have the TV set automatically adjust the video signals it receives The function als...

Страница 31: ... simultaneous translations of the program into foreign languages You can listen in a language other than the Preferred Language by pressing the MTS button on the remote control Preferred Language is available only in Digital TV mode You can only select the language from among the actual languages being broadcast Multi Track Sound MTS analog channels only Press the MTS button on the remote control ...

Страница 32: ... the INFO button If you disconnect the power cord you have to set the clock again Clock Mode You can set up the current time manually or automatically Auto Set the current time automatically using the time from a digital broadcast Manual Set the current time to a manually specified time Depending on the broadcast station and signal the auto time may not be set correctly If this occurs set the time...

Страница 33: ...TV ratings V Chip Lock Off On You can block rated TV Programs TV Parental Guidelines You can block TV programs depending on their rating This function allows you to control what your children are watching TV Y Young children TV Y7 Children 7 and over TV G General audience TV PG Parental guidance TV 14 Viewers 14 and over TV MA Mature audience ALL Lock all TV ratings FV Fantasy violence V Violence ...

Страница 34: ...ng changes depending on the downloaded information Even if you set the On screen display to your desired language the Downloadable U S Rating menu will appear in English only The rating will automatically block certain categories that are more restrictive The rating titles For example Humor Level etc and TV ratings For example DH MH H etc may differ depending on the broadcasting station Change PIN...

Страница 35: ...t The Digital Caption Options are only enabled when the Caption Mode is Service 1 Service 6 If Caption Mode is the default the Digital Caption Options are enabled depending on the broadcast The availability of captions depends on the program being broadcast Default means to follow the standard set by the broadcaster Foreground and Background cannot be set to have the same color Foreground Opacity ...

Страница 36: ... s call center for assistance No If the test pattern is properly displayed select No There may be a problem with your external equipment Please check your connections If the problem still persists refer to the external device s user manual Sound Test If you think you have a sound problem please perform the sound test You can check the sound by playing a built in melody sound through the TV Does th...

Страница 37: ...tings so that you can easily reset them after the upgrade HD Connection Guide This menu presents the connection method that provides the optimal quality for the HD TV Refer to this information when connecting external devices to the TV Contact Samsung View this information when your TV does not work properly or when you want to upgrade the software You can view the information regarding the call c...

Страница 38: ...en the AV device supporting Anynet is in the Standby or On status Anynet supports up to 12 AV devices in total Note that you can connect up to 3 devices of the same type Setting Up Anynet Press the TOOLS button to display the Tools menu You can also display Anynet menu by selecting Tools Anynet HDMI CEC Setup Anynet HDMI CEC Off On To use the Anynet Function Anynet HDMI CEC must be set to On When ...

Страница 39: ... If a DVD recorder is connected the disc menu of the DVD recorder will appear device_name Operation Shows the play menu of the connected device E g If a DVD recorder is connected the play menu of the DVD recorder will appear Record recorder Starts recording immediately using the recorder This is only available for devices that support the recording function Stop Recording recorder Stops recording ...

Страница 40: ...Home theater You can listen to sound through a receiver instead of the TV speaker 1 Press the TOOLS button Press the ENTERE button to select Anynet HDMI CEC 2 Press the or button to select Receiver Press the or button to select On or Off 3 Press the EXIT button to exit If your receiver supports audio only it may not appear in the device list The receiver will work when you have properly connected ...

Страница 41: ...nu Press the SOURCE button on the TV remote control and select a device other than Anynet devices Press z CH LIST PRE CH and FAV CH to change the TV mode Note that the channel button operates only when a tuner embedded Anynet device is not connected The message Connecting to Anynet device appears on the screen You cannot use the remote control when you are configuring Anynet or switching to a view...

Страница 42: ...antenna The image is too light or too dark Adjust the Brightness and Contrast Adjust the Fine tuning Black bars on the screen Make sure the broadcast you re receiving is High Definition HD HD channels sometimes broadcast Standard Definition SD programming which can cause black bars Set your cable satellite box to stretch or widescreen mode to eliminate the bars Picture has a Red Green or Pink tint...

Страница 43: ...ark pixels on the screen These pixels will have no impact on the performance of the product Installing the Stand 1 Attach your LCD TV to the stand Two or more people should carry the TV Make sure to distinguish between the front and back of the stand when attaching it To make sure the TV is installed on the stand at a proper level do not apply excess downward pressure to the upper left of right si...

Страница 44: ...ow the product installation instructions Our 57 and 63 models do not comply with VESA Specifications Therefore you should use our dedicated wall mount kit for this model Do not exceed 15 degrees tilt when mounting this TV Product Family inches VESA Spec A B Standard Screw Quantity LCD TV 19 22 100 X 100 M4 4 23 29 200 X 100 30 40 200 X 200 M6 46 55 400 X 400 M8 57 70 800 X 400 80 1400 X 800 PDP TV...

Страница 45: ... Make sure to only use the supplied screws 2 Firmly fasten the screws to the wall or cabinet where the TV is to be installed Tie the TV Holder attached to the TV and the screws fastened on the wall or cabinet so that the TV is fixed Purchase the screws to be used on the wall or cabinet separately Install the TV close to the wall so that it does not fall When attaching the TV to the wall tie the co...

Страница 46: ... C to 40 C 10 to 80 non condensing 4 F to 113 F 20 C to 45 C 5 to 95 non condensing Stand Swivel Left Right 20 20 Model Name LN46B530 LN52B530 Screen Size Diagonal 46 inches 45 9 inches measured diagonally 52 inches 52 0 inches measured diagonally PC Resolution Optimum 1920 X 1080 60 Hz 1920 X 1080 60 Hz Sound Output 10W X 2 10W X 2 Dimensions WxDxH Without Stand With stand 44 4 X 3 1 X 28 0 inche...

Страница 47: ...drawings are not necessarily to scale Some dimensions are subject to change without prior notice Refer to the dimensions prior to performing installation of your TV Not responsible for typographical or printed errors 2009 Samsung Electronics America Inc 20 4 22 1 17 6 27 5 15 5 8 7 3 0 31 5 7 9 200 mm 7 9 200 mm ...

Страница 48: ...ngs are not necessarily to scale Some dimensions are subject to change without prior notice Refer to the dimensions prior to performing installation of your TV Not responsible for typographical or printed errors 2009 Samsung Electronics America Inc 7 9 200 mm 7 9 200 mm 23 5 25 6 22 8 32 4 18 3 9 2 3 0 36 1 ...

Страница 49: ...ngs are not necessarily to scale Some dimensions are subject to change without prior notice Refer to the dimensions prior to performing installation of your TV Not responsible for typographical or printed errors 2009 Samsung Electronics America Inc 24 4 27 0 24 4 34 9 19 7 9 4 3 1 39 3 7 9 200 mm 7 9 200 mm ...

Страница 50: ...s are not necessarily to scale Some dimensions are subject to change without prior notice Refer to the dimensions prior to performing installation of your TV Not responsible for typographical or printed errors 2009 Samsung Electronics America Inc 28 0 30 2 24 4 40 2 22 6 10 2 3 1 44 4 15 7 400 mm 15 7 400 mm ...

Страница 51: ...s are not necessarily to scale Some dimensions are subject to change without prior notice Refer to the dimensions prior to performing installation of your TV Not responsible for typographical or printed errors 2009 Samsung Electronics America Inc 31 5 34 4 24 4 45 6 25 7 10 2 3 1 50 0 15 7 400 mm 15 7 400 mm ...

Отзывы: