background image

English-

78

F

U N C T I O N

D

E S C R I P T I O N

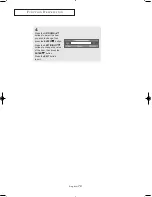
4

Press the 

UP/DOWN

buttons to select the item
you wish to change, then
press the 

ENTER

button.

Press the 

LEFT/RIGHT

buttons to change the value
of the item, then press the

ENTER

button.

Press the 

EXIT

button 

to exit.

02 BN68-00929A-00Eng.qxd  6/8/05 8:55 AM  Page 78

Содержание LN-R377D

Страница 1: ...BN68 00929A 00 LN R377D This device is a Class B digital apparatus Register your product at www samsung com global register 00929A 00 qxd 6 14 05 10 52 AM Page 1 ...

Страница 2: ...ixed for an extended period of time the amount of light transmission will also remain varied and as a result the borders may leave traces Digital Ready TV When you select the wide screen 16 9 mode to watch an SD grade digital broadcast and the Set Top Box output is 1080i Digital Ready TV When the TV receives HD grade signals and the Set Top Box output is 1080i When you watch a digital HD grade bro...

Страница 3: ...borders at the left right and the center of the screen remain fixed for an extended period of time the amount of light transmission will also remain varied and as a result the borders may leave traces When you watch a DVD CD or a video in wide screen 21 9 format on a wide screen 16 9 TV When you connect a computer or a game console to the TV and select the 4 3 screen mode If you connect a DVD play...

Страница 4: ... 9 Connecting a VCR 11 Connecting an S VHS VCR 13 Connecting a DVD Set Top Box via DVI 14 Connecting a DVD Set Top Box via HDMI 14 Connecting a DVD Player 15 Connecting a Digital Audio System 15 Connecting an Amplifier DVD Home Theater 16 Connecting a PC 16 Chapter 3 Operation Turning the TV On and Off 17 Changing Channels 17 Using the Channel Buttons 17 Using the PRE CH Button to select the Previ...

Страница 5: ... Sound 46 Using Automatic Sound Settings 47 Setting the Trusurround XT 48 Choosing a Multi Channel Sound MTS track Digital 49 Preferred Language 49 Multi Track Sound 50 Automatic Volume Control 51 Selecting the Internal Mute 52 Choosing a Digital Sound Format 53 Setting the On Off Melody 54 Chapter 6 Channel Control Selecting the Antenna 55 To Set up Your Favorite Channels 56 Labeling Channels 57 ...

Страница 6: ...rictions using the TV Parental Guidelines 88 How to Set up Restrictions using the MPAA Ratings G PG PG 13 R NC 17 X NR 90 How to Set up Restrictions Using the Canadian English 92 How to Set up Restrictions Using the Canadian French 93 How to Reset the TV after the V Chip Blocks a Channel Emergency Escape 94 Electronic Program Guide 95 Viewing the Electronic Program Guide 95 Using the Electronic Pr...

Страница 7: ...nput visual signal and adjusts to create optimum contrast Brightness Sensor Adjusts the screen brightness automatically depending on the brightness of the surrounding environment SRS TruSurround XT SRS TruSurround XT provides a virtual Dolby surround system Convenience The TV utilizes the HDMI system to implement perfect digital sound and picture quality The Anynet system enables you to easily con...

Страница 8: ...see an on screen menu of your TV s features VOL Press to decrease or increase the volume Also used to select items on the on screen menu CH Press to change channels Also press to highlight various items on the on screen menu POWER Press to turn the TV on and off POWER INDICATOR Blinks and turns off when the power is on and lights up in stand by mode REMOTE CONTROL SENSOR Aim the remote control tow...

Страница 9: ...Audio component HDMI DVI IN Connect to the HDMI jack of a device with an HDMI output Use the HDMI DVI terminal for DVI connection to an external device You should use the DVI to HDMI cable or DVI HDMI Adapter DVI to HDMI for the connection and the R AUDIO L terminal on DVI IN for sound output HDMI DVI IN terminal does not support PC No sound connection is needed for an HDMI to HDMI connection ANT ...

Страница 10: ...o change the channel PRE CH Tunes to the previous channel See page 17 CH and CH Channel UP Down Press CH or CH to change channels See page 17 VOL and VOL Press to increase or decrease the volume See page 17 SOURCE Press to display all of the available video sources UP DOWN LEFT RIGHT ENTER Use to select on screen menu items and change menu values FAV CH Press to switch to your favorite channels Se...

Страница 11: ...ge See page 34 SRS Selects TruSurround XT mode See page 48 SET Adjusts 5 separate devices TV VCR Cable DVD or Set Top Box See pages 25 27 INFO Use to see information on the current broadcast See page 18 EXIT Press to exit the menu SLEEP Press to select a preset time interval for automatic shut off CH Displays the available channels in sequence These buttons change channels in the PIP window only S...

Страница 12: ...o AAA size batteries Make sure to match the and ends of the batteries with the diagram inside the compartment Installing Batteries in the Remote Control 1 Slide the Cover out completely GENERAL INFORMATION If the remote control doesn t work Check the following 1 Is the TV power on 2 Are the plus and minus ends of the batteries reversed 3 Are the batteries drained 4 Is there a power outage or is th...

Страница 13: ...nnas see Separate VHF and UHF Antennas on page 7 Antennas with 300 ohm Flat Twin Leads If you are using an off air antenna such as a roof antenna or rabbit ears that has 300 ohm twin flat leads follow the directions below Chapter 2 CONNECTIONS 1 Place the wires from the twin leads under the screws on a 300 75 ohm adaptor not supplied Use a screwdriver to tighten the screws 2 Plug the adaptor into ...

Страница 14: ...rminal on the bottom of the rear panel Antennas with 75 ohm Round Leads 1 Plug the antenna lead into the ANT 2 IN AIR terminal on the bottom of the back panel Separate VHF and UHF Antennas If you have two separate antennas for your TV one VHF and one UHF you must combine the two antenna signals before connecting the antennas to the TV This procedure requires an optional combiner adaptor available ...

Страница 15: ... only some channels such as premium channels follow the instructions below You will need a two way splitter an RF A B switch and four lengths of RF cable These items are available at most electronics stores 1 Find and disconnect the cable that is connected to the ANT IN terminal on your cable box This terminal might be labeled ANT IN VHF IN or simply IN 2 Connect this cable to a two way splitter 3...

Страница 16: ... switch and the ANT 1 IN CABLE terminal on the rear of the TV After you have made this connection set the A B switch to the A position for normal viewing Set the A B switch to the B position to view scrambled channels When you set the A B switch to B you will need to tune your TV to the cable box s output channel which is usually channel 3 or 4 Incoming cable Splitter Cable Box Incoming cable Inco...

Страница 17: ...already connected your TV to an antenna or a cable TV system according to the instructions on pages 7 10 Skip step 1 if you have not yet connected to an antenna or a cable system 1 Unplug the cable or antenna from the back of the TV 2 Connect the cable or antenna to the ANT IN terminal on the back of the VCR VCR Rear Panel Incoming Cable or Antenna TV Rear Panel RF Cable Option VCR Rear Panel ANT ...

Страница 18: ...CR tape Each external input source device has a different back panel configuration If you have a mono non stereo VCR use the Y connector not supplied to hook up to the right and left audio input jacks of the TV If your VCR is stereo you must connect two cables TV Rear Panel RF Cable Option Audio Cable Option VCR Rear Panel TV Rear Panel RF Cable Option Audio Cable Option VCR Rear Panel Video Cable...

Страница 19: ...and your TV Connecting an S VHS VCR Your Samsung TV can be connected to an S Video signal from an S VHS VCR This connection delivers a better picture as compared to a standard VHS VCR 2 Connect an audio cable between the AUDIO OUT jacks on the VCR and the AV IN R AUDIO L jacks on the TV CONNECTIONS S Video Cable Option Audio Cable Option TV Rear Panel RF Cable Option VCR Rear Panel Audio Cable Opt...

Страница 20: ...is can be applied only if there is the HDMI Output connector on the external device 1 Connect an HDMI cable between the HDMI DVI connector on the TV and the HDMI connector on the DVD player Set Top Box What is HDMI HDMI or high definition multimedia interface is a next generation interface that enables the transmission of digital audio and video signals using a single cable without compression Mul...

Страница 21: ...he DVD player Note 5 1CH broadcasting is possible when it is connected to an external device supporting 5 1CH For an explanation of Component video see your Digital Audio System owner s manual Each external input source device has a different back panel configuration Connecting a Digital Audio System The rear panel jacks on your TV make it easy to connect a Digital Audio System to your TV 1 Connec...

Страница 22: ...PC IN AUDIO jack on the TV and the Audio Out jack of the sound card on your computer Connecting an Amplifier DVD Home Theater 1 Connect an audio cable between the AUDIO OUT R AUDIO L on the TV and AUDIO IN R AUDIO L on the Amplifier DVD Home Theater Audio Cable Option Amplifier DVD Home Theater TV Rear Panel When connecting an external device match the color of the connection terminal to the cable...

Страница 23: ... appear in the lower left corner of the screen 2 To turn mute off press the MUTE button again or simply press the VOL buttons Using Mute At any time you can cut off the sound using the MUTE button Changing Channels Using the Channel Buttons 1 Press the CH buttons to change channels When you press the CH buttons the TV changes channels in sequence You will see all the channels that the TV has memor...

Страница 24: ...rence and shows the current settings 1 Press the INFO button on the remote control The TV will display the channel the type of sound and the status of certain picture and sound settings 1 With the power on press the MENU button The main menu appears on the screen It s left side has six icons Input Picture Sound Channel Setup Guide The on screen menus disappear from the screen after about two minut...

Страница 25: ...ayed 2 Press the ENTER button to enter the language Press the UP DOWN buttons to select language then the ENTER button Select the antennas to memorize menu is automatically displayed 3 Press the UP DOWN buttons to memorize the channels of the selected connection Press the ENTER button to select Start If the antenna is connected to ANT 1 CABLE select CABLE and if it is connected to ANT 2 AIR select...

Страница 26: ...stored the Auto program menu reappears Press the ENTER button when channel memorization is complete Set to daylight savings time menu is auto matically displayed 4 Press the UP DOWN buttons to select Cable or Air Cable then press the ENTER button Press the UP DOWN buttons to select STD HRC or IRC press the ENTER button 6 Press the ENTER button Press the UP DOWN buttons to select Yes or No then the...

Страница 27: ...y If not see page 68 to set the clock 8 The message Completed Time will be updated automatically is displayed When you have finished press the ENTER button If you want to reset this feature 1 Press the MENU button Press the UP DOWN buttons to select Setup then press the ENTER button 2 Press the UP DOWN buttons to select Plug Play Press the ENTER button For further details on setting up options ref...

Страница 28: ...dcast source memorizing the channels automatic and adding and deleting channels manual Selecting the Video Signal source Before your television can begin memorizing the available channels you must specify the type of signal source that is connected to the TV i e an antenna or a cable system 1 Press the MENU button to display the menu Press the UP DOWN buttons to select Channel then press the ENTER...

Страница 29: ... Press the UP DOWN buttons to select Auto Program then press the ENTER button 3 Press the UP DOWN buttons to select the antenna connection then press the ENTER button Air Air antenna signal Cable Cable antenna signal Air Cable Air and Cable antenna signals 4 After all the available channels are stored the Auto Program menu reappears Press the EXIT button to exit ...

Страница 30: ...ect Channel then press the ENTER button 2 Press the UP DOWN buttons to select Add Delete then press the ENTER button 3 Repeatedly pressing the ENTER button will alternate between add channel and delete channel Press the CH or CH buttons to switch to the appropriate channel then repeat above Press the EXIT button to exit ...

Страница 31: ...lume 1Turn off your VCR 2 Press the MODE button and make sure that the VCR appears on the LCD screen 3 Press the SET button on your TV s remote control 4 Using the number buttons on your remote control enter three digits of the VCR code listed on page 28 of this manual for your brand of VCR Make sure you enter three digits of the code even if the first digit is a 0 If more than one code is listed ...

Страница 32: ...ber buttons on your remote control enter three digits of the cable box code listed on page 28 of this manual for your brand of cable box Make sure you enter three digits of the code even if the first digit is a 0 If there is more than one code listed try the first one 5 Press the Power button on the remote control Your cable box should turn on if your remote is set up correctly If your cable box d...

Страница 33: ...er three digits of the DVD code listed on page 28 of this manual for your brand of DVD Make sure you enter three digits of the code even if the first digit is a 0 If there is more than one code listed try the first one 5 Press the Power button on the remote control Your DVD should turn on if your remote is set up correctly If your DVD does not turn on after set up repeat steps 2 3 and 4 but try on...

Страница 34: ... 036 056 059 008 007 018 021 026 036 037 062 018 007 026 037 008 062 064 021 056 071 072 021 036 056 059 021 036 019 026 036 053 017 019 002 021 035 041 043 057 068 000 018 024 018 019 006 024 028 029 041 048 051 020 034 045 015 027 033 044 021 025 036 056 059 003 019 029 051 052 VCR Brand Hitachi Panasonic Philips Pioneer RCA Samsung Zenith Code 025 030 003 022 027 037 044 019 021 023 028 018 020...

Страница 35: ...buttons to select signal source then press the ENTER button Press the EXIT button to exit When you connect equipment to the LCD you can choose between the following sets of jacks TV AV S Video Component 1 Component 2 PC or HDMI on the TV s rear panel HDMI input can only be selected when the external device is turned on and connected via HDMI Note You can choose only those external devices that are...

Страница 36: ...Input Press the UP DOWN buttons to select Edit Name then pressthe ENTER button 2 Press the UP DOWN buttons to select AV S Video Component1 Component2 PC or HDMI input jack then press the ENTER button 3 Press the UP DOWN buttons to select VCR DVD D VHS Cable STB HD STB Satellite STB PVR STB AV Receiver DVD Receiver GAME Camcorder DVD Combo PC VOD STB or TV input source then press the ENTER button P...

Страница 37: ...UP DOWN buttons to select Picture then press the ENTER button 2 Press the ENTER button Press the ENTER button Press the UP DOWN buttons to select the Dynamic Standard Movie or Custom picture setting Press the ENTER button Note Each adjusted value of Picture mode will be stored separately according to its input mode Choose Dynamic to increase the clarity and sharpness of the picture Choose Standard...

Страница 38: ...select Contrast pressing the RIGHT button increases it Press the ENTER button Press the EXIT button to exit In the Component 480p 720p 1080i DVI HDMI mode you can t adjust the Tint Each adjusted setting will be stored separately according to its input mode When you make changes to Contrast Brightness Color Tint OSD color will also be adjusted accordingly The Tint can be adjusted in any mode other ...

Страница 39: ...ess the UP DOWN buttons to select Picture then press the ENTER button 2 Press the ENTER button 3 Press the UP DOWN buttons to select Color Tone then press the ENTER button 4 Press the UP DOWN buttons to select Cool2 Cool1 Normal Warm1 or Warm2 Press the ENTER button Press the EXIT button to exit Press the ENTER button again to select Mode Press the UP DOWN buttons to select Reset then press the EN...

Страница 40: ...mo then press the ENTER button 3 Press the UP DOWN buttons to select Off or On then press the ENTER button Press the EXIT button to exit This function doesn t work when Source is in PC mode DNIe Demo Off DNIe Demo mode is deactivated DNIe Demo On The right hand side of the screen shows the improved DNIe image The left hand side of the screen shows the original image The DNIe Demo is designed to sh...

Страница 41: ...ss the UP DOWN buttons to select Size then press the ENTER button 3 Press the LEFT RIGHT buttons to select the screen format you want Press the ENTER button Press the EXIT button to exit 16 9 Sets the picture to 16 9 wide mode Panorama Use this mode for the wide aspect ratio of a panoramic picture Zoom1 Magnifies the size of the picture on the screen Zoom2 Expands the Zoom1 format picture 4 3 Sets...

Страница 42: ...e screen displays in this order 16 9 Panorama Zoom1 Zoom2 4 3 Note If you watch a still image or the 4 3 mode for a long time over 2 hours an image may be burned onto the screen View the TV in 16 9 or Panorama mode as much as possible HD High Definition 16 9 1080i 1920x1080 720P 1280x720 Note In TV VIDEO S VIDEO and all COMPONENT modes all screen modes can be selected 16 9 Panorama Zoom1 Zoom2 4 3...

Страница 43: ...PICTURE CONTROL English 37 Freezing the Picture 1 Press the STILL button to freeze a moving picture Normal sound will still be heard Press again to cancel ...

Страница 44: ...e V Chip is in operation the PIP function cannot be used Activating Picture in Picture 1 Press the MENU button to display the menu Press the UP DOWN buttons to select Picture then press the ENTER button Press the UP DOWN buttons to select PIP then press the ENTER button 2 Press the ENTER button Press the UP DOWN buttons to select On then press the ENTER button If you turn the TV off while watching...

Страница 45: ...o select Source then press the ENTER button Select the source of the sub picture PIP by pressing the UP DOWN buttons and press the ENTER button Swapping the Contents of the PIP and Main image 4 Press the UP DOWN buttons to select Swap then press the ENTER button PC HDMI HDMI X O O O O O X X MAIN TV ATV PIP HDMI The sub picture can serve different source selections based on what the main picture is...

Страница 46: ...hannel buttons under the remote s cover Changing the Position of the PIP Window 6 Press the UP DOWN buttons to select Position then press the ENTER button Press the UP DOWN buttons to select the desired PIP window position MAIN AV S Video COM1 COM2 PIP TV DTV MAIN PC HDMI PIP TV ATV The channel can be active when the sub picture is set to TV The Double mode cannot be selected in position Press the...

Страница 47: ... the main screen to view a game or karaoke You can adjust picture position only by using the size menu Changing the Size of the PIP Window 7 Press the UP DOWN buttons to select Size then press the ENTER button Press the UP DOWN buttons to select the desired size of the PIP window Press the ENTER button Press the EXIT button to exit If main picture is in PC mode Size is not available ...

Страница 48: ...ess the UP DOWN buttons to select My Color Control then press the ENTER button 2 Press the UP DOWN buttons to select Easy Control then press the ENTER button 3 Press the LEFT RIGHT buttons to select the desired My Color Control color then press the ENTER button The Original picture before adjustment is shown on the left side while the selected mode is shown on the right side The sources are displa...

Страница 49: ... to select My Color Control then press the ENTER button 2 Press the UP DOWN buttons to select Detail Control then press the ENTER button 3 Press the UP DOWN buttons to select the desired My Color Control color and press the ENTER button To reset the Detail Control select Reset by pressing the UP DOWN buttons and then press the ENTER button Press the LEFT RIGHT buttons to increase or decrease the v...

Страница 50: ...sual signal input and adjusts to create optimum contrast 1 Press the MENU button to display the menu Press the UP DOWN buttons to select Picture then press the ENTER button 2 Press the UP DOWN buttons to select Dynamic Contrast then press the ENTER button 3 Press the UP DOWN buttons to select On then press the ENTER button Press the EXIT button to exit ...

Страница 51: ...ly by using a light detecting sensor 1 Press the MENU button to display the menu Press the UP DOWN buttons to select Picture then press the ENTER button 2 Press the UP DOWN buttons to select Brightness Sensor then press the ENTER button 3 Press the LEFT RIGHT buttons to select On then press the ENTER button Press the EXIT button to exit You can also directly access Brightness Sensor by pressing an...

Страница 52: ...hen press the ENTER button 2 Press the UP DOWN buttons to select Equalizer then press the ENTER button 3 Press the LEFT RIGHT buttons to select a particular frequency to adjust Press the UP DOWN buttons to increase or decrease the level of the particular frequency Press the ENTER button Press the EXIT button to exit L R Sound Balance Adjustment To adjust the sound balance of the L R speakers Bandw...

Страница 53: ...und then press the ENTER button 2 Press the ENTER button to select Mode Press the UP DOWN buttons to select Standard Music Movie Speech or Custom sound setting then press the ENTER button Press the EXIT button to exit Choose Standard for the standard factory settings Choose Music when watching music videos or concerts Choose Movie when watching movies Choose Speech when watching a show that is mos...

Страница 54: ... fully compatible with all multichannel formats 1 Press the MENU button to display the menu Press the UP DOWN buttons to select Sound then press the ENTER button 2 Press the UP DOWN buttons to select SRS TruSurround XT then press the ENTER button 3 Press the UP DOWN buttons to select Off 3D Mono Stereo then press the ENTER button Press the EXIT button to exit TRADEMARK LABEL LICENSE NOTICE TruSurr...

Страница 55: ...MENU button to display the menu Press the UP DOWN buttons to select Sound then press the ENTER button 2 Press the UP DOWN buttons to select Multi Track Options then press the ENTER button 3 Press the ENTER button to select Preferred Language Press the UP DOWN buttons to choose the language English Spanish or French you want then press the ENTER button Press the EXIT button to exit Quick way to acc...

Страница 56: ... UP DOWN buttons to select Multi Track Sound then press the ENTER button Press the UP DOWN buttons to select a setting you want then press the ENTER button Press the EXIT button to exit Choose Mono for channels that are broadcasting in mono or if you are having difficulty receiving a stereo signal Choose Stereo for channels that are broadcasting in stereo Choose SAP to listen to the Separate Audio...

Страница 57: ...sters 1 Press the MENU button to display the menu Press the UP DOWN buttons to select Sound then press the ENTER button 2 Press the UP DOWN buttons to select Auto Volume then press the ENTER button 3 Press the UP DOWN buttons to set Auto Volume On then press the ENTER button Press the EXIT button to exit ...

Страница 58: ...ted 1 Press the MENU button to display the menu Press the UP DOWN buttons to select Sound then press the ENTER button 2 Press the UP DOWN buttons to select Internal Mute then press the ENTER button Press the UP DOWN buttons to select On then press the ENTER button Press the EXIT button to exit ...

Страница 59: ...he MENU button to display the menu Press the UP DOWN buttons to select Sound then press the ENTER button 2 Press the UP DOWN buttons to select Digital Output then press the ENTER button Press the UP DOWN buttons to select Dolby Digital or PCM then press the ENTER button Press the EXIT button to exit DOLBY DIGITAL Manufactured under license from Dolby Laboratories Dolby and the double D symbol are ...

Страница 60: ...wered On or Off 1 Press the MENU button to display the menu Press the UP DOWN buttons to select Sound then press the ENTER button 2 Press the UP DOWN buttons to select Melody then press the ENTER button Press the UP DOWN buttons to select On or Off then press the ENTER button Press the EXIT button to exit ...

Страница 61: ... select Antenna Press the UP DOWN buttons to select Air or Cable then press the ENTER button Press the EXIT button to exit Note If the antenna is connected to ANT 1 IN CABLE select CABLE and if it is connected to ANT 2 IN AIR select AIR or If both ANT 1 IN CABLE and ANT 2 IN AIR are connected select the antenna input you want If the antenna input is not selected properly noise may appear on the sc...

Страница 62: ... buttons to select Favorite Channels then press the ENTER button 2 Press the UP DOWN buttons to select your favorite channels to watch among the labeled channels Press the UP DOWN buttons to select a channel as a favorite channel then press the ENTER button Press the ENTER button again to deselect the selected channel Press the EXIT button to exit Only memorized channels can be set as favorite cha...

Страница 63: ...T button to switch to the next field which will be selected Select a second letter or digit by pressing the UP DOWN buttons as above Repeat the process to select the last three digits When you have finished press the ENTER button to assign the new name To erase the assigned new name select Clear by pressing the or button then press the ENTER button Press the EXIT button to exit The names of digita...

Страница 64: ...ress the ENTER button Press the UP DOWN buttons to select All or Favorite then press the ENTER button 3 Press the UP DOWN buttons to select Channel and ENTER button To toggle between your favorite channels or all channels use the yellow button on the remote control Red button Press to display the previous channel list page Green button Press to display the next channel list page Yellow button Pres...

Страница 65: ...hen press the ENTER button 3 Press the UP DOWN buttons to select Channel and ENTER button Then the channel can be deleted or added If deleted the channel number will be dimmed To make the deleted channels be back on the list press the ENTER button Enter button Press to add or delete the channel Red button Press to display the previous channel list page Green button Press to display the next channe...

Страница 66: ... buttons to adjust the fine tuning 4 To store the fine tuning setting in the TV s memory press the ENTER button To reset the fine tuning setting press the DOWN button to select Reset then press the ENTER button Press the EXIT button to exit Only analog TV channels can be fine tuned will appear next to the name of fine tuned channels If you do not store the fine tuned channel in memory adjustments ...

Страница 67: ...r adjust your antenna to improve the reception of available digital channels 1 Press the MENU button to display the menu Press the UP DOWN buttons to select Channel then press the ENTER button 2 Press the UP DOWN buttons to select Signal Strength then press the ENTER button If the signal strength meter indicates that the signal is weak physically adjust your antenna to increase the signal strength...

Страница 68: ...u Press the UP DOWN buttons to select Channel then press the ENTER button 2 Press the UP DOWN buttons to select LNA then press the ENTER button Press the UP DOWN buttons to select On then press the ENTER button Press the EXIT button to exit LNA functions only when antenna is set to AIR and the settings will be stored separately in each channel See Selecting the antenna on page 55 For 37 LNA functi...

Страница 69: ...all cases If not contact your computer manufacturer or Samsung Dealer 1 First click on Control Panel on the Windows start menu 4 Navigate to the Settings tab on the display dialog box The correct size setting resolution LN R377D 1360 x 768 pixels If a vertical frequency option exists on your display settings dialog box the correct value is 60 or 60 Hz Otherwise just click OK and exit the dialog bo...

Страница 70: ... adjusts the frequency values and positions Note This function does not work in DVI Digital mode 1 Press the MENU button to display the menu Press the UP DOWN buttons to select Setup then press the ENTER button Press the UP DOWN buttons to select PC then press the ENTER button 2 Press the UP DOWN buttons to select Auto Adjustment then press the ENTER button PC DISPLAY Change to the PC mode first ...

Страница 71: ...f screen 1 Press the MENU button to display the menu Press the UP DOWN buttons to select Setup then press the ENTER button Press the UP DOWN buttons to select PC then press the ENTER button 2 Press the ENTER button to select Image Lock 3 Press the UP DOWN buttons to select Coarse or Fine then press the ENTER button Press the LEFT RIGHT buttons to adjust the screen quality Vertical stripes may appe...

Страница 72: ...s the ENTER button Press the UP DOWN buttons to select PC then press the ENTER button 2 Press the UP DOWN buttons to select Position then press the ENTER button 3 Press the UP DOWN buttons to adjust the V Position Press the LEFT RIGHT buttons to adjust the H Position Press the ENTER button Press the EXIT button to exit Change to the PC mode first ...

Страница 73: ...utton to display the menu Press the UP DOWN buttons to select Setup then press the ENTER button Press the UP DOWN buttons to select PC then press the ENTER button 2 Press the UP DOWN buttons to select Reset then press the ENTER button Press the EXIT button to exit Change to the PC mode first ...

Страница 74: ...ss the INFO button Option 1 Setting the Clock Manually 1 Press the MENU button to display the menu Press the UP DOWN buttons to select Setup then press the ENTER button Press the UP DOWN buttons to select Time then press the ENTER button 2 Press the ENTER button to select Clock 3 Press the ENTER button to select Clock Mode Press the UP DOWN buttons to select Manual then press the ENTER button ...

Страница 75: ...ay Year Hour Minute or am pm Set the date and time you want by pressing the UP DOWN buttons then press the ENTER button Press the EXIT button to exit The current time will appear every time you press the INFO button You can set the month day year hour and minute directly by pressing the number buttons on the remote control TIME SETTING ...

Страница 76: ... the UP DOWN buttons to select Setup then press the ENTER button Press the UP DOWN buttons to select Time then press the ENTER button 2 Press the ENTER button to select Clock 3 Press the ENTER button to select Clock Mode Press the UP DOWN buttons to select Auto then press the ENTER button TIME SETTING ...

Страница 77: ...p of the United States then press the ENTER button Depending on the broadcast station and signal the auto time may not be set correctly If this occurs set the time manually 6 Press the UP DOWN buttons to select DST Daylight Saving Time then press the ENTER button Press the UP DOWN buttons to select Yes or No then press the ENTER button Press the EXIT button to exit Antenna or cable must be connect...

Страница 78: ...on Press the UP DOWN buttons to select Time then press the ENTER button 2 Press the UP DOWN buttons to select Sleep Timer then press the ENTER button 3 Press the UP DOWN buttons to adjust Minute 4 Press the RIGHT button to select Activation Press the UP DOWN buttons to select Yes then press the ENTER button Press the EXIT button to exit Quick way to access the sleep timer setting Simply press the ...

Страница 79: ...s the RIGHT button to move to the next step Set other items using the same method as above When finished press the MENU button to return The current time will appear every time you press the INFO button You can set the hour minute channel and volume directly by pressing the number buttons on the remote control 4 Press the UP DOWN buttons to select Off Timer then press the ENTER button 5 Press the ...

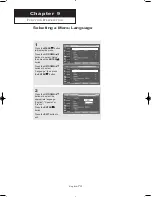
Страница 80: ...P DOWN buttons to select Setup then press the ENTER button Press the UP DOWN buttons to select Language then press the ENTER button 2 Press the UP DOWN buttons to select the appropriate language English Spanish or French Press the ENTER button Press the EXIT button to exit Selecting a Menu Language ...

Страница 81: ...hes off the Film mode 1 Press the MENU button to display the menu Press the UP DOWN buttons to select Picture then press the ENTER button 2 Press the UP DOWN buttons to select Film Mode then press the ENTER button 3 Press the UP DOWN buttons to select On then press the ENTER button Press the EXIT button to exit Note Film mode is supported in TV VIDEO S VIDEO and COMPONENT 480i ...

Страница 82: ... to help reduce any static and ghosting that may appear on the screen 1 Press the MENU button to display the menu Press the UP DOWN buttons to select Picture then press the ENTER button 2 Press the UP DOWN buttons to select Digital NR then press the ENTER button 3 Press the UP DOWN buttons to select On then press the ENTER button Press the EXIT button to exit ...

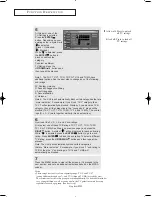
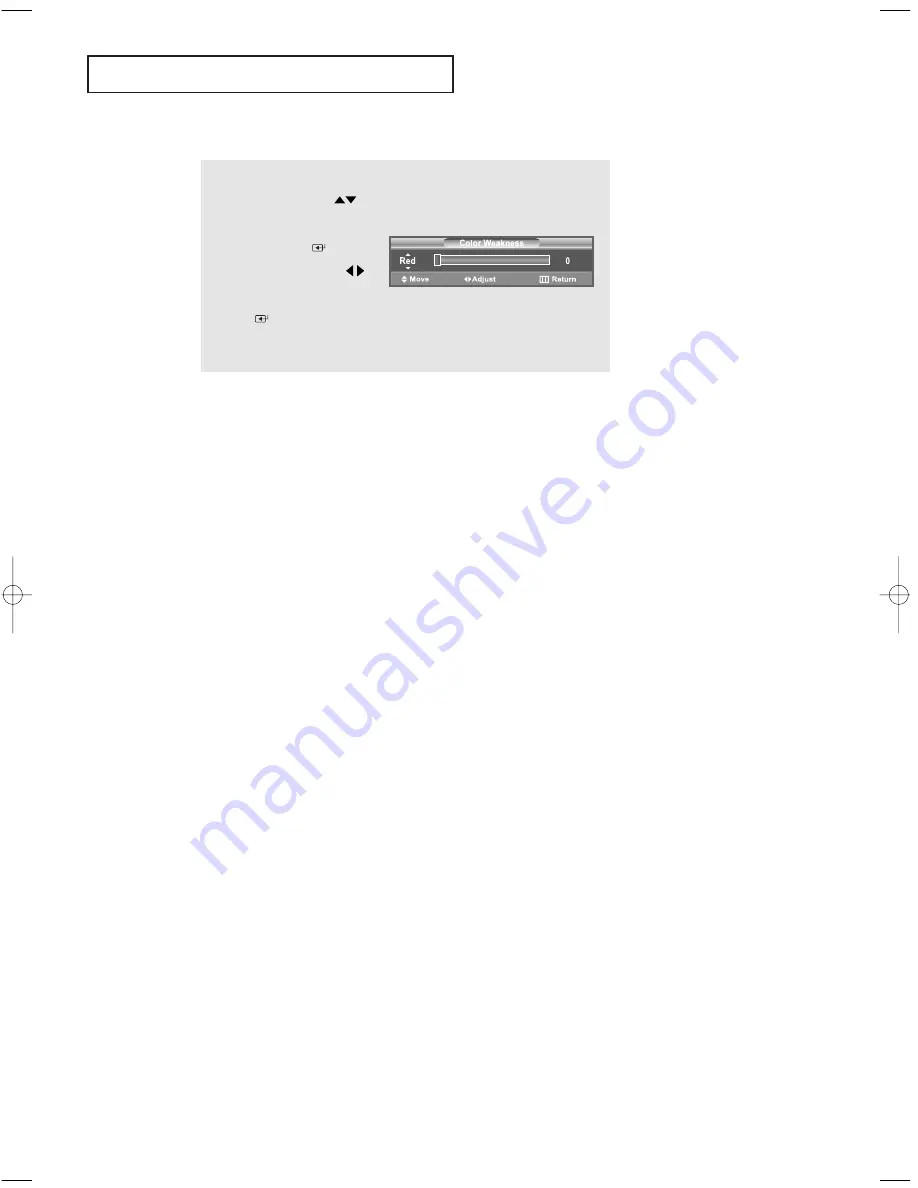
Страница 83: ...r weakness 1 Press the MENU button to display the menu Press the UP DOWN buttons to select Setup then press the ENTER button 2 Press the UP DOWN buttons to select Color Weakness then press the ENTER button 3 Press the ENTER button Press the UP DOWN buttons to select On then press the ENTER button You will also see the items Red Green and Blue FUNCTION DESCRIPTION ...

Страница 84: ...ESCRIPTION 4 Press the UP DOWN buttons to select the item you wish to change then press the ENTER button Press the LEFT RIGHT buttons to change the value of the item then press the ENTER button Press the EXIT button to exit ...

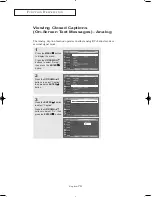
Страница 85: ...og RF channel mode or external signal mode 1 Press the MENU button to display the menu Press the UP DOWN buttons to select Setup then press the ENTER button 2 Press the UP DOWN buttons to select Caption then press the ENTER button 3 Press the ENTER button to select Caption Press the UP DOWN buttons to select On then press the ENTER button ...

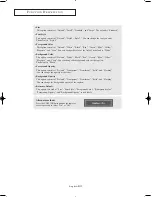
Страница 86: ...tions This channel carries data that is intended to augment information carried in the program CC3 Secondary Synchronous Caption Service Alternate program related caption data typically second language captions CC4 Special Non Synchronous Use Captions Similar to CC2 Text1 First Text Service This may be various non program related data Text2 Second Text Service Additional data usually not program r...

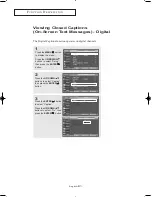
Страница 87: ...rates on digital channels 1 Press the MENU button to display the menu Press the UP DOWN buttons to select Setup then press the ENTER button 2 Press the UP DOWN buttons to select Caption then press the ENTER button 3 Press the ENTER button to select Caption Press the UP DOWN buttons to select On then press the ENTER button ...

Страница 88: ...hen Service1 Service6 can be selected in Caption Mode SERVICE1 6 in digital caption mode may not be available depending on the broadcast 6 Press the UP DOWN buttons to select Size then press the ENTER button Press the UP DOWN buttons to select the desired Caption option then press the ENTER button Press the Up or Down button to select the desired sub menu options see options below then press ENTER...

Страница 89: ... Yellow Magenta and Cyan You can change the background color of the caption The default is Black Foreground Opacity This option consists of Default Transparent Translucent Solid and Flashing You can change the opacity of the letter Background Opacity This option consists of Default Transparent Translucent Solid and Flashing You can change the background opacity of the caption Return to Default Thi...

Страница 90: ...n 1 Press the MENU button to display the menu Press the UP DOWN buttons to select Setup then press the ENTER button 2 Press the UP DOWN buttons to select Menu Transparency then press the ENTER button Press the UP DOWN buttons to select level then press the ENTER button Press the EXIT button to exit ...

Страница 91: ...tton to display the menu Press the UP DOWN buttons to select Setup then press the ENTER button 2 Press the UP DOWN buttons to select Function Help then press the ENTER button FUNCTION DESCRIPTION 3 Press the UP DOWN buttons to select On then press the ENTER button Press the EXIT button to exit ...

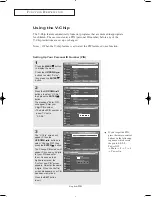
Страница 92: ...DOWN buttons to select V Chip then press the ENTER button The message Enter PIN will appear Enter your 4 digit PIN number The default PIN number of a new TV set is 0 0 0 0 3 The V Chip screen will appear Press the UP DOWN buttons to select Change PIN then press the ENTER button The Change PIN screen will appear Choose any 4 digits for your PIN and enter them As soon as the 4 digits are entered the...

Страница 93: ...WN buttons to select V Chip then press the ENTER button The message Enter PIN will appear Enter your 4 digit PIN number 3 The V Chip screen will appear To enable the V Chip feature press the ENTER button so that the V Chip Lock field is On Pressing the UP DOWN buttons will alternate between On and Off Press the ENTER button Press the EXIT button to exit FUNCTION DESCRIPTION ...

Страница 94: ...o select Setup then press the ENTER button 2 Press the UP DOWN buttons to select V Chip then press the ENTER button The message Enter PIN will appear Enter your 4 digit PIN number 3 The V Chip screen will appear Press the UP DOWN buttons to select TV Parental Guidelines then press the ENTER button 4 The TV Parental Guidelines screen will appear Press the UP DOWN buttons to select one of the six ag...

Страница 95: ... and V sub ratings First select one of these TV Ratings TV Y TV Y7 TV G TV PG TV 14 or TV MA See Step 4 on previous page and press the RIGHT button A symbol will be displayed for each sub rating While is selected press the ENTER button to go to a sub rating Press ENTER to block the sub rating To select a different TV Rating press the UP DOWN buttons and then repeat the process Note The V chip will...

Страница 96: ...ill automatically block any programs that are coded with objectionable ratings either MPAA or TV Ratings 1 Press the MENU button to display the menu Press the UP DOWN buttons to select Setup then press the ENTER button 2 Press the UP DOWN buttons to select V Chip then press the ENTER button The message Enter PIN will appear Enter your 4 digit PIN number 3 The V Chip screen will appear Press the UP...

Страница 97: ...ldren under 17 should be accompanied by an adult NC 17 No children under age 17 X X Adults only NR Not rated While a particular category is selected press the ENTER button to activate it A selected symbol will be displayed Press the ENTER button to block or unblock the category Note The V Chip will automatically block any category that is more restrictive For example if you block the PG 13 categor...

Страница 98: ...n to activate the restriction selected The symbol is indicated Press the EXIT button to exit Allow All Press to unlock all TV ratings Block All Press to lock all TV ratings E Exempt programming includes news sports documentaries and other information programming talk shows music videos and variety programming C Programming intended for children under age 8 C8 Programming generally considered accep...

Страница 99: ... a appropriate restriction Press the ENTER button to activate the restriction selected The symbol is indicated Press the EXIT button to exit Allow All Press to unlock all TV ratings Block All Press to lock all TV ratings E Exempt programming includes news sports documentaries and other information programming talk shows music videos and variety programming G General 8 ans 8 General Not recommended...

Страница 100: ...tune to a different channel using CH or CH button Under certain conditions depending on the rating of the local TV programs the V Chip might lock out all the channels In this case use the V Chip function for an emergency escape Press the MENU button Press the UP DOWN button to select Setup then press the ENTER button 1 Press the UP DOWN button to select V Chip then press the ENTER button 2 Enter y...

Страница 101: ...rolls backwards quickly 2 hours Press the Green button on the remote control E Displays titles and other details about upcoming programs of particular channels Highlight the program and press the INFO button to see additional and detailed information The availability of additional details depends on the broadcaster Use the buttons to search information about another channel F Scrolls forward quick...

Страница 102: ... to select Guide then press the ENTER button 2 Press the UP DOWN buttons to select Default Guide then press the ENTER button 3 Press the UP DOWN buttons to select Mini Guide or Full Guide then press the ENTER button Mini Guide Displays the guide for one channel Full Guide Displays the guide for all channels Press the EXIT button to exit ...

Страница 103: ...button on the remote control FUNCTION DESCRIPTION ENTER button Press to watch the current program or to add the program to remind list Red button Press to switch to the program guide for all channels Press again to switch to the program information for the selected channel Blue button Press to exit INFO button Press to view detailed information for the selected digital program Press the EXIT butto...

Страница 104: ...2 Hours INFO button Displays detailed information for the selected digital program button Displays program information for each channel based on the time Select your desired program using the UP DOWN LEFT RIGHT buttons and then press the INFO button to view the program information for the selected program Red button Each press switches between program information for one channel and all channels G...

Страница 105: ...the Program Guide and return to normal viewing mode Press the Blue button or the EXIT button Note The current time displayed on the program information is subject to the time information sent from the broadcasting station so it may differ from the actual time Press the GUIDE button on the remote control to view the program information for all channels However this function is available only when t...

Страница 106: ...would like to see then press the enter button The symbol will be displayed Each press of the ENTER button will switch between Reminded and Clear Press the EXIT button to exit Viewing the Remind List If you have made a scheduled viewing list of programs you would like to see the channel will be automatically switched to the scheduled program at the scheduled time even if you are watching another pr...

Страница 107: ...the UP DOWN buttons to select Remind List then press the ENTER button 1 Press the UP DOWN buttons to select a program to be removed then press the ENTER button To cancel the channels added press the ENTER button again To remove all programs press the LEFT RIGHT buttons to select Cancel All then press the ENTER button Press the EXIT button to exit To Remove the Scheduled Programs ...

Страница 108: ...ons Try another channel Adjust the antenna Try another channel Press the SOURCE button Make sure the TV is plugged in Check the antenna connections First check the volume of units connected to your TV digital broadcasting receiver DVD cable broadcasting receiver VCR etc Then adjust the TV volume accordingly Check all wire connections Unplug the TV for 30 seconds then try operating it again Make su...

Страница 109: ...ystem Move the computer s mouse or press any key on the keyboard If the setting is not correct use your computer utility program to change the display settings NOTE Your TV supports multiscan display functions within the following frequency domain Adjust the horizontal and vertical position The screen position must be adjusted on the output source i e STB with a digital signal When you need to lea...

Страница 110: ...r cushion on a table 2 Attach the stand to the TV set as shown in the picture 3 Use the four screws to tightly fix the stand 1 Place the TV faced down on a soft cloth or cushion on a table 2 Remove four screws from the back of the TV 3 Separate the stand from the TV 4 Cover the bottom hole with a cap 2 3 2 3 4 ...

Страница 111: ...er fitting anchors into the wall bracket Note If the bracket is not firmly fixed to the wall LCD TV can fall off 2 Turn the power off and unplug the power cord from the outlet Place the TV faced down on a soft cloth or cushion on a table Attach the set bracket onto the rear side of the TV set and secure the screws 3 Insert three Hangers of the set bracket into the grooves of the wall bracket Fix s...

Страница 112: ... is a device used to physically fix the system when using it in a public place The locking device has to be purchased separately The appearance and locking method may differ from the illustration depending on the manufacturer Please refer to the manual provided with the Kensington lock for proper use 1 Insert the locking device into the Kensington slot on the LCD TV Figure 1 and turn it in the loc...

Страница 113: ...Characteristics Audio Input 1 Audio Input 2 Headphone Out Frequency Response AC 110V 120V 60Hz Separate H V sync RGB Analog NTSC M CVBS S VHS 1 0 Vp p 75 ohm 500mVrms RCA Jack L R 0 5Vrms 9dB 3 5ø Stereo Jack 0 5Vrms 9dB Max 10mW Output 3 5ø Stereo Jack 32Ω RF 80Hz 15kHz at 3dB A V 80Hz 20kHz at 3dB LN R377D 37 inch 32 27 H X 18 14 V inch 819 6 H X 460 8 V mm a si TFT active matrix 0 024 H X 0 024...

Страница 114: ... 350 31 469 70 086 25 175 720 X 400 31 469 70 087 28 322 640 X 480 31 469 59 940 25 175 VESA 640 X 480 35 000 70 000 28 560 640 X 480 37 861 72 809 31 500 640 X 480 37 500 75 000 31 500 800 X 600 37 879 60 317 40 000 800 X 600 48 077 72 188 50 000 800 X 600 46 875 75 000 49 500 800 X 600 43 750 70 000 45 500 1024 X 768 48 363 60 004 65 000 1024 X 768 56 476 70 069 75 000 1024 X 768 56 672 72 000 7...

Отзывы: