background image

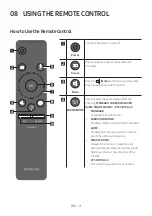
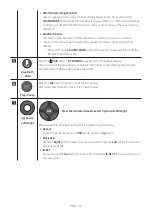
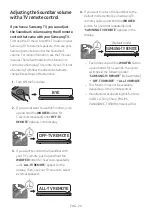
ENG - 9

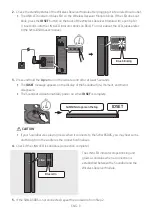
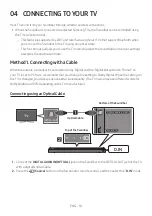
2. 

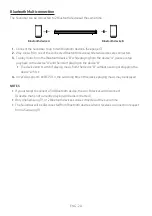
Check the standby status of the Wireless Receiver Module after plugging it into an electrical outlet.


The LINK LED indicator (blue LED) on the Wireless Receiver Module blinks. If the LED does not 
blink, press the 

ID SET

 button on the back of the Wireless Receiver Module with a pen tip for 

5~6 seconds until the LINK LED indicator blinks (in Blue). For more about the LED, please refer 
to the SWA-8500S user manual.

ID SET

L

R

SURROUND SPEAKERS OUT

SPEAKER IMPEDANCE : 3Ω

POWER

POWER

ID SET

SURROUND SPEAKERS OUT

SPEAKER IMPEDANCE : 3Ω

STANDBY

LINK

STANDBY

LINK

Blue blinking

5 Sec

3. 

Press and hold the 

Up 

button on the remote control for at least 5 seconds.


The 

ID SET

 message appears on the display of the Soundbar for a moment, and then it 

disappears.


The Soundbar will automatically power on when 

ID SET

 is complete.

ID SET

SOUN

D

MOD

E

PAIR

5 Sec

SAMSUNG logo is on the top


CAUTION


If your Soundbar was playing music when it connects to the SWA-8500S, you may hear some 

stuttering from the woofer as the connection finalises. 

4. 

Check if the LINK LED is solid blue (connection complete).

STANDBY

LINK

STANDBY

LINK

Blue is On

The LINK LED indicator stops blinking and 
glows a solid blue when a connection is 
established between the Soundbar and the 
Wireless Receiver Module.

5. 

If the SWA-8500S is not connected, repeat the procedure from Step 2.

Содержание HW-T650

Страница 1: ...HW T650 FULL MANUAL Imagine the possibilities Thank you for purchasing this Samsung product To receive more complete service please register your product at www samsung com register ...

Страница 2: ...e This symbol indicates that the rated voltage marked with the symbol is AC voltage DC voltage This symbol indicates that the rated voltage marked with the symbol is DC voltage Caution Consult instructions for use This symbol instructs the user to consult the user manual for further safety related information WARNING To reduce the risk of fire or electric shock do not expose this appliance to rain...

Страница 3: ...f the unit malfunctions Your product is not intended for industrial use It is for personal use only Condensation may occur if your product has been stored in cold temperatures If transporting the unit during the winter wait approximately 2 hours until the unit has reached room temperature before using 5 The battery used with this product contains chemicals that are harmful to the environment Do no...

Страница 4: ...connection between the Subwoofer and the Soundbar 6 Manually connecting the Subwoofer if automatic connection fails 7 Connecting an SWA 8500S Sold Separately to your Soundbar 8 04 ConnectingtoyourTV 10 Method 1 Connecting with a Cable 10 Connecting using an Optical Cable 10 Connecting a TV using an HDMI Cable 11 Method 2 Connecting Wirelessly 12 Connecting a TV via Bluetooth 12 05 ConnectinganExte...

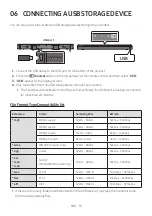
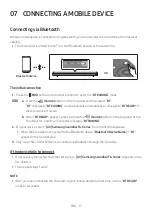
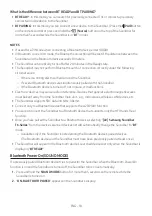
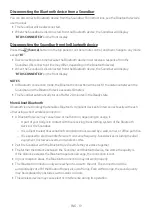
Страница 5: ... more than one function 25 Output specifications for the different sound effect modes 25 09 InstallingtheWallMount 26 Installation Precautions 26 Wallmount Components 26 10 PlacingtheSoundbaronaTVstand 28 11 SoftwareUpdate 29 Update Procedure 29 If UPDATE is not displayed 30 12 Troubleshooting 31 13 Licence 32 14 OpenSourceLicenceNotice 32 15 ImportantNotesAboutService 32 16 SpecificationsandGuide...

Страница 6: ... to the label attached to the product Label Bottom of the Soundbar Main Unit To purchase additional components or optional cables contact a Samsung Service Centre or Samsung Customer Care The appearance of the accessories may differ slightly from the illustrations above InsertingBatteriesbeforeusingtheRemoteControl AAbatteriesX2 Slide the back cover in the direction of the arrow until it is comple...

Страница 7: ...bar s front display Source Button Selects the source input mode Inputmode Display Optical Digital input D IN ARC HDMI OUT input D IN TV ARC Auto conversion HDMI input HDMI BLUETOOTH mode BT USB mode USB To turn on BTPAIRING mode change the source to BT mode and then press and hold the Source button for more than 5 seconds When you plug in the AC cord the power button will begin working in 4 to 6 s...

Страница 8: ...red on the USB device through the Soundbar HDMI Inputs digital video and audio signals simultaneously using an HDMI cable Connect to the HDMI output of an external device HDMITOTV ARC Connect to the HDMI ARC jack on a TV DC24V PowerSupplyIn Connect the AC DC power adapter When disconnecting the power cable of the AC DC power adaptor from a wall outlet pull the plug Do not pull the cable Do not con...

Страница 9: ...ation about the required electrical power and power consumption refer to the label attached to the product Label Bottom of the Soundbar Main Unit POWER RearofSubwoofer PowerCord Connecting ElectricalPower HDMI HDMI TO TV ARC DC 24V TV ARC DC 24V Bottomofthe SoundbarMainUnit AC DCAdapter PowerCord Connecting ElectricalPower Make sure to rest the AC DC Adapter flat on a table or the floor If you pla...

Страница 10: ...oofer LED Status Description Resolution Blue On Successfully connected normal operation Blinking Recovering the connection Check if the power cable attached to the main Soundbar unit is connected properly or wait about 5 minutes If blinking persists try manually connecting the subwoofer See page 7 Red On Standby with the Soundbar main unit turned off Check if the power cable attached to the main S...

Страница 11: ...ofer turns off and the blue indicator blinks 5 Sec RearofSubwoofer 2 Press and hold the Upbutton on the remote control for at least 5 seconds The IDSET message appears on the display of the Soundbar for a moment and then it disappears The Soundbar will automatically power on when IDSET is complete IDSET SOUND MODE PAIR 5 Sec SAMSUNGlogoisonthetop 3 Check if the LINK LED is solid blue connection co...

Страница 12: ... a steel concrete or metallic wall is between the main unit and the wireless subwoofer the system may not operate at all because the wireless signal cannot penetrate metal PRECAUTIONS Wireless receiving antennas are built into the wireless subwoofer Keep the unit away from water and moisture For optimal listening performance make sure that the area around the wireless subwoofer and the Wireless Re...

Страница 13: ...inking 5 Sec 3 Press and hold the Upbutton on the remote control for at least 5 seconds The IDSET message appears on the display of the Soundbar for a moment and then it disappears The Soundbar will automatically power on when IDSET is complete IDSET SOUND MODE PAIR 5 Sec SAMSUNGlogoisonthetop CAUTION If your Soundbar was playing music when it connects to the SWA 8500S you may hear some stuttering...

Страница 14: ...ngwithaCable When the audio in a broadcast is encoded in Dolby Digital and the Digital Output Audio Format on your TV is set to PCM we recommend that you change the setting to Dolby Digital When the setting on the TV is changed you will experience better sound quality The TV menu may use different words for Dolby Digital and PCM depending on the TV manufacturer ConnectingusinganOpticalCable USB 5V...

Страница 15: ...witch to D IN mode The screen displays D IN and TVARC in sequence and TV sound is played If TVARC does not appear in the display window of the Soundbar main unit confirm that the HDMI cable not supplied is connected to the correct port Use the volume buttons on the TV s remote control to change the volume on the Soundbar NOTES HDMI is an interface that enables the digital transmission of video and...

Страница 16: ... Soundbar for more than 5 seconds to display BTPAIRING 2 Select Bluetooth mode on the TV For more information see the TV s manual 3 Select AV SamsungSoundbarT6 Series from the list on TV s screen An available Soundbar is indicated with NeedPairing or Paired on the TV s Bluetooth device list To connect the TV to the Soundbar select the message and then establish a connection When the TV is connecte...

Страница 17: ...on the remote control or press and hold the Source button on the top of the Soundbar for more than 5 seconds while the Soundbar is in BT mode NOTES If asked for a PIN code when connecting a Bluetooth device enter 0000 In Bluetooth connection mode the Bluetooth connection will be lost if the distance between the Soundbar and the Bluetooth device exceeds 10 meters The Soundbar automatically turns of...

Страница 18: ...tingusinganOpticalCable USB 5V 0 5A DIGITAL AUDIO IN OPTICAL OPTICAL OUT OpticalCable BottomoftheSoundbar TopoftheSoundbar BD DVDplayer Set topbox Gameconsole D IN 1 Connect DIGITALAUDIOIN OPTICAL on the main unit to the OPTICAL OUT jack of the Source Device using a digital Optical Cable 2 Select D IN mode by pressing the Source button on the top panel or on the remote control ...

Страница 19: ...DMI cable not supplied from the HDMI jack on the back of the product to the HDMI OUT jack on your digital device 2 Connect an HDMI cable not supplied from the HDMITOTV ARC jack on the back of the product to the HDMI IN jack on your TV 3 Press the Source button on the top panel or on the remote control and then select HDMI 4 HDMI mode is displayed on the Soundbardisplaypanel and sound plays ...

Страница 20: ...s off Auto Power Down if no USB device has been connected for more than 20 minutes FileFormatTypeCompatibilitylist Extension Codec SamplingRate Bitrate mp3 MPEG1 Layer2 32kHz 48kHz 32kbps 320kbps MPEG1 Layer3 32kHz 48kHz 32kbps 320kbps MPEG2 Layer3 16kHz 24kHz 8kbps 160kbps MPEG2 5 Layer3 8kHz 12kHz 8kbps 160kbps wma WMA7 8 9 Audio Only 32kHz 48kHz 32kbps 320kbps ogg Vorbis 32kHz 48kHz 45kbps 500k...

Страница 21: ...BTREADY if there is a connect record b When BTREADY appears press and hold the Source button on the top panel of the Soundbar for more than 5 seconds to display BTPAIRING 2 On your device select AV SamsungSoundbarT6 Series from the list that appears When the Soundbar is connected to the Bluetooth device BluetoothDeviceName BT appears in the front display 3 Play music files from the device connecte...

Страница 22: ...devices may cause radio interference Devices that generate electromagnetic waves must be kept away from the Soundbar main unit e g microwaves wireless LAN devices etc The Soundbar supports SBC data 44 1kHz 48kHz Connect only to a Bluetooth device that supports the A2DP AV function You cannot connect the Soundbar to a Bluetooth device that supports only the HF Hands Free function Once you have pair...

Страница 23: ...tooth Bluetooth is a technology that enables Bluetooth compliant devices to interconnect easily with each other using a short wireless connection A Bluetooth device may cause noise or malfunction depending on usage if A part of your body is in contact with the receiving transmitting system of the Bluetooth device or the Soundbar It is subject to electrical variation from obstructions caused by a w...

Страница 24: ... the device A and then start playing on the device B The device won t switch if playing music from the device B without pausing or stopping the device A first 4 In versions prior to AVRCP V1 4 the switching time of the device playing music may be delayed NOTES If you attempt to connect a 3rd Bluetooth device the A or B devices will disconnect A device that is not currently playing will be disconne...

Страница 25: ...gain to unmute the sound SOUNDMODE VOL WOOFER SOUND MODE PAIR You can select the desired sound effect by choosing STANDARD SURROUNDSOUND GAME SMARTSOUND or DTSVIRTUAL X STANDARD Outputs the original sound SURROUNDSOUND Provides a wider sound field than standard GAME Provides stereoscopic sound to immerse you in the action while gaming SMARTSOUND Analyzes the content in real time and automatically ...

Страница 26: ... PAIR Press the PAIR button BTPAIRING appears in the Soundbar s display You can connect the Soundbar to a new Bluetooth device in this mode by selecting the Soundbar from the Bluetooth device s search list Play Pause VOL WOOFER SOUND MODE PAIR Press the p button to pause a music file temporarily When you press the button again the music file plays VOL WOOFER SOUND MODE PAIR Up Down Left Right Pres...

Страница 27: ...e adjusted to a setting between 6 to 6 using the Up Down buttons If the video on the TV and audio from the Soundbar are not synchronised press the SoundControl button to select AUDIOSYNC and then set the audio delay between 0 300milliseconds by using the Up Down buttons Not available in USB or BT mode If Surround Speakers are connected the Rear Speaker function can be turned ON OFF by using the Up...

Страница 28: ... O U N D B A R 5 Sec OFF TVREMOTE 3 If you want to control the Soundbar with your TV s remote push up and hold the WOOFER button for 5seconds repeatedly until ALL TVREMOTE appears in the display Then use your TV s menu to select external speakers S O U N D M O D E V O L W O O F E R S O U N D B A R 5 Sec ALL TVREMOTE 4 If you want to return the Soundbar to the default mode control by a Samsung TV r...

Страница 29: ...th Power page 22 Outputspecificationsforthedifferentsoundeffectmodes Effect Input Output WithoutWirelessRear SpeakerKit WithWirelessRear SpeakerKit SOUNDMODE Surround VOL WOOFER SOUND MODE Bluetooth POWER STANDARD 2 0 ch 2 1 ch 4 1 ch 5 1 ch 3 1 ch 5 1 ch SURROUND SOUND 2 0 ch 3 1 ch 5 1 ch 5 1 ch 3 1 ch 5 1 ch GAME 2 0 ch 3 1 ch 5 1 ch 5 1 ch 3 1 ch 5 1 ch SMART SOUND 2 0 ch 3 1 ch 5 1 ch 5 1 ch ...

Страница 30: ...ws into wall studs Purchase wall mounting screws according to the type and thickness of the wall you want to mount the Soundbar on Diameter M5 Length 35 mm or longer recommended Connect cables from the unit to external devices before you install the Soundbar on the wall Make sure the unit is turned off and unplugged before you install it Otherwise it may cause an electric shock WallmountComponents...

Страница 31: ...zed drill bit drill a hole in the wall at each marking If the markings do not correspond to the positions of studs make sure you insert appropriate anchors or mollies into the holes before you insert the support screws If you use anchors or mollies make sure the holes you drill are large enough for the anchors or mollies you use 5 Push a screw not supplied through each Holder Screw and then screw ...

Страница 32: ...the Bracket Wall Mounts and then slide the Bracket Wall Mounts down so that the Bracket Wall Mounts rest securely on the Holder Screws 10 PLACINGTHE SOUNDBARONA TVSTAND Place the Soundbar on a TV stand 3cmormore As illustrated in the image align the centre of the Soundbar with the centre of the TV carefully place the Soundbar onto the TV stand For optimal sound quality position the Soundbar at lea...

Страница 33: ...pdating the firmware resets the subwoofer connection too 1 Connect a USB thumb drive to the USB port on your computer Important Make sure there are no music files on the USB thumb drive This may cause the firmware update to fail 2 Go to the Samsung website samsung com select Enter Model Number and enter the model of your Soundbar Select manuals and downloads and download the latest software file 3...

Страница 34: ...ied The main unit will turn off automatically after completing the firmware update After the update is completed the user setup in the Soundbar is initialised so you can reset your settings We recommend you write down your settings so that you can easily reset them after the update Note that updating firmware resets the subwoofer connection too If the connection to the subwoofer is not re establis...

Страница 35: ...de See the Bluetooth connection sections on pages 12 and 17 Soundisnotproduced IstheMutefunctionon Press the Mute button to cancel the mute function Isthevolumesettominimum Adjust the Volume Theremotecontroldoesnotwork Arethebatteriesdrained Replace with new batteries Isthedistancebetweentheremotecontroland Soundbarmainunittoofar Move the remote control closer to the Soundbar main unit TheredLEDon...

Страница 36: ...e and the HDMI Logo are trademarks or registered trademarks of HDMI Licensing LLC in the United States and other countries The Bluetooth word mark and logos are registered trademarks owned by the Bluetooth SIG Inc and any use of such marks by Samsung Electronics Co Ltd is under license Other trademarks and trade names are those of their respective owners 14 OPENSOURCE LICENCENOTICE To send inquiri...

Страница 37: ...r SRD max transmitter power 6mW at 2 402GHz 2 480GHz 25mW at 5 725GHz 5 825GHz Subwoofer Name PS WR65BB Weight 6 2 kg Dimensions W x H x D 205 0 x 353 0 x 303 2 mm AMPLIFIER Rated Output power 160W WIRELESS DEVICE OUTPUT POWER SRD max transmitter power 25mW at 5 725GHz 5 825GHz Overall Standby Power Consumption W 2 0W Bluetooth Port deactivation method Press and hold the SOUNDMODE button for more ...

Страница 38: ...Equipment Applicableincountrieswithseparatecollectionsystems This marking on the product accessories or literature indicates that the product and its electronic accessories e g charger headset USB cable should not be disposed of with other household waste at the end of their working life To prevent possible harm to the environment or human health from uncontrolled waste disposal please separate th...

Страница 39: ...s es sich bei der mit diesem Symbol gekennzeichneten Nennspannung um eine Wechselspannung handelt Gleichspannung Dieses Symbol zeigt an dass es sich bei der mit diesem Symbol gekennzeichneten Nennspannung um eine Gleichspannung handelt Achtung Gebrauchsanweisung beachten Dieses Symbol weist den Benutzer an weitere sicherheitsrelevante Informationen der Gebrauchsanweisung zu entnehmen WARNUNG Setze...

Страница 40: ...n gewerblichen Einsatz vorgesehen Verwenden Sie dieses Produkt nur für den privaten Bereich Wenn Ihr Produkt oder die CD bei kalten Temperaturen aufbewahrt wurden kann Kondensation auftreten Wenn Sie das Gerät bei kaltenTemperaturen transportiert haben warten Sie mit der Inbetriebnahme circa 2 Stunden bis das Gerät Raumtemperatur erreicht hat 5 Die in diesem Produkt verwendeten Batterien enthalten...

Страница 41: ... Soundbar 6 Manuelles Verbinden des Subwoofers bei Fehlschlagen der automatischen Verbindung 7 Verbinden des SWA 8500S separat erhältlich mit einer Soundbar 8 04 AnschlussanihrFernsehgerät 10 Methode 1 Verbindung mit einem Kabel 10 Verbindung mit einem optischen Kabel 10 Einen Fernseher über ein HDMI Kabel verbinden 11 Methode 2 Drahtlose Verbindung 12 Verbindung eines Fernsehers per Bluetooth 12 ...

Страница 42: ...spezifikationen für die unterschiedlichen sound effekt modi 25 09 InstallierenderWandhalterung 26 Vorsichtsmaßnahmen für die Installation 26 Komponenten für die Anbringung an der Wand 26 10 PlatzierenderSoundbaraufeinemTV ständer 28 11 Softwareaktualisierung 29 Updateverfahren 29 Wenn UPDATE nicht angezeigt wird 30 12 Fehlerbehebung 31 13 Lizenz 32 14 BekanntmachungzuOpenSourceLizenzen 32 15 Wicht...

Страница 43: ... dem Etikett am Gerät Etikett Unterseite des Soundbar Hauptgeräts Wenden Sie sich für den Kauf zusätzlicher Komponenten oder optionaler Kabel an ein Servicezentrum oder den Kundendienst von Samsung Das Aussehen des Zubehörs kann etwas von den Abbildungen oben abweichen EinlegenderBatterienvorderVerwendungderFernbedienung AA BatterienX2 Schieben Sie die rückseitige Abdeckung in Pfeilrichtung bis si...

Страница 44: ...eingangsmodus aus Eingangsmodus Anzeige Optischer digitaler Eingang D IN ARC HDMI OUT Eingang D IN TV ARC Automatische Umwandlung HDMI Eingang HDMI BLUETOOTH Modus BT USB Modus USB Zum Einschalten des Modus BTPAIRING schalten Sie die Quelle auf den Modus BT um und halten Sie dann die taste Quelle länger als 5 Sekunden lang gedrückt Nach dem Anschluss des Netzkabels muss 4 bis 6 Sekunden gewartet w...

Страница 45: ...undbar wiederzugeben HDMI Gibt digitale Video und Audiosignale über ein HDMI Kabel simultan ein An den HDMI Ausgang eines externen Geräts anschließen HDMITOTV ARC An die HDMI ARC Buchse an einem Fernseher anschließen DC24V Stromversorgungseingang Den Netzadapter anschließen Ziehen Sie wenn Sie das Stromkabel des AC DC Adapters von der Steckdose trennen möchten am Stecker Ziehen Sie nicht am Kabel ...

Страница 46: ...ngen Weitere Informationen zur benötigten Stromversorgung und zum Stromverbrauch finden Sie auf dem Etikett am Gerät Etikett Unterseite des Soundbar Hauptgeräts POWER Rückseitedes Subwoofers Stromkabel Stromanschluss HDMI HDMI TO TV ARC DC 24V TV ARC DC 24V Unterseitedes Soundbar Hauptgeräts Netzadapter Stromkabel Stromanschluss Achten Sie darauf dass der Netzadapter flach auf einem Tisch oder dem...

Страница 47: ...edesSubwoofers LED Status Beschreibung Abhilfe Blau Ein Erfolgreich verbunden normaler Betrieb Blinkend Verbindung wird wieder hergestellt Prüfen Sie ob das am Soundbar Hauptgerät angeschlossene Stromkabel richtig verbunden ist oder warten Sie 5 Minuten Falls das Blinken andauert versuchen Sie den Subwoofer manuell anzuschließen Siehe Seite 7 Rot Ein Standby bei ausgeschaltetem Soundbar Hauptgerät...

Страница 48: ...ofers erlischt und die blaue Anzeigeleuchte blinkt 5 Sec RückseitedesSubwoofers 2 Halten Sie die Taste Oben auf der Fernbedienung länger als 5 Sekunden gedrückt Für kurze Zeit erscheint nun die Meldung IDSET im Display der Soundbar und erlischt dann Die Soundbar wird automatisch eingeschaltet wenn IDSET abgeschlossen ist IDSET SOUND MODE PAIR 5 Sec DasSAMSUNG Logobefindetsich aufderOberseite 3 Prü...

Страница 49: ...zwischen der Haupteinheit und dem drahtlosen Subwoofer befindet funktioniert die Anlage möglicherweise gar nicht weil das drahtlose Signal Metall nicht durchdringen kann VORSICHTSMASSNAHMEN Es sind Antennen für den drahtlosen Empfang in den drahtlosen Subwoofer eingebaut Halten Sie die Einheiten fern von Wasser und Feuchtigkeit Für eine optimale Wiedergabeleistung stellen Sie sicher dass der Berei...

Страница 50: ... Blinktblau 5 Sec 3 Halten Sie die Taste Oben auf der Fernbedienung länger als 5 Sekunden gedrückt Für kurze Zeit erscheint nun die Meldung IDSET im Display der Soundbar und erlischt dann Die Soundbar wird automatisch eingeschaltet wenn IDSET abgeschlossen ist IDSET SOUND MODE PAIR 5 Sec DasSAMSUNG Logobefindetsich aufderOberseite ACHTUNG Wenn die Soundbar Musik abspielt während sie mit der SWA 85...

Страница 51: ...gmiteinemKabel Wenn Rundfunksignale Dolby Digital sind und die Einstellung für Digitales Ausgangsaudioformat auf Ihrem Fernseher auf PCM gestellt ist wird empfohlen die Einstellung auf Dolby Digital zu ändern Nach dem Ändern der Einstellung können Sie eine bessere Soundqualität genießen Das Menü des Fernsehers kann je nach dem Hersteller des Fernsehers unterschiedliche Bezeichnungen für Dolby Digi...

Страница 52: ...dus zu wechseln Der Bildschirm zeigt der Reihe nach D IN und TVARC an und der TV Ton wird wiedergegeben Wenn im Displayfenster des Soundbar Hauptgeräts TVARC nicht angezeigt wird stellen Sie sicher dass das HDMI Kabel nicht mitgeliefert an den korrekten Anschluss angeschlossen ist Ändern Sie die Lautstärke der Soundbar mit den Lautstärketasten an der TV Fernbedienung HINWEISE HDMI ist eine Schnitt...

Страница 53: ... wird 2 Wählen Sie den Bluetooth Modus an dem Fernseher aus Weitere Informationen finden Sie im Handbuch des Fernsehers 3 Wählen Sie AV SamsungSoundbarT6 Series aus der Liste auf dem Bildschirm des Fernseher aus Eine verfügbare Soundbar wird durch NeedPairing oder Paired auf der Bluetooth Geräteliste des Fernsehers angezeigt Zum Verbinden der Soundbar wählen Sie die Meldung und stellen Sie eine Ve...

Страница 54: ...die Taste PAIR auf der Fernbedienung oder halten Sie die Taste Quelle auf der Oberseite der Soundbar für mehr als 5 Sekunden gedrückt während die Soundbar im BT Modus ist HINWEISE Falls sie beim Verbinden mit einem Bluetooth Gerät nach einem PIN Code gefragt werden geben Sie 0000 ein Im Bluetooth Verbindungsmodus geht die Bluetooth Verbindung verloren wenn der Abstand zwischen der Soundbar und dem...

Страница 55: ...tischenKabel USB 5V 0 5A DIGITAL AUDIO IN OPTICAL OPTICAL OUT OptischesKabel UnterseitederSoundbar Oberseiteder Soundbar BD DVD Player Set Top Box Spielkonsole D IN 1 Verbinden Sie den Anschluss DIGITALAUDIOIN OPTICAL am Hauptgerät über ein optisches Digitalkabel mit dem Anschluss OPTICAL OUT des Quellgeräts 2 Wählen Sie den D IN Modus aus indem Sie die Taste Quelle auf dem Bedienfeld der Oberseit...

Страница 56: ...Geräts über ein HDMI Kabel nicht mitgeliefert mit dem Anschluss HDMI OUT Ihres Digitalgeräts 2 Verbinden Sie den Anschluss HDMITOTV ARC auf der Rückseite des Geräts über ein HDMI Kabel nicht mitgeliefert mit dem Anschluss HDMI IN Ihres Fernsehers 3 Drücken Sie die Taste Quelle auf dem Bedienfeld derOberseite oderauf derFernbedienung undwählen Sie dann HDMI aus 4 DerModus HDMI wird auf dem Anzeigef...

Страница 57: ...ar wiedergeben Die Soundbar wird automatisch ausgeschaltet Auto Power Down wenn länger als 20 Minuten kein USB Gerät angeschlossen wurde Kompatibilitätsliste Verlängerung Codec Samplingrate Bitrate mp3 MPEG1 Layer2 32kHz 48kHz 32 320kbps MPEG1 Layer3 32kHz 48kHz 32 320kbps MPEG2 Layer3 16kHz 24kHz 8 160kbps MPEG2 5 Layer3 8kHz 12kHz 8 160kbps wma WMA7 8 9 Nur Audio 32kHz 48kHz 32 320kbps ogg Vorbi...

Страница 58: ... verzeichnet wurde b Wenn BTREADY erscheint die Taste Quelle auf dem Bedienfeld der Oberseite der Soundbar für mehr als 5 Sekunden gedrückt halten damit BTPAIRING angezeigt wird 2 Wählen Sie AV SamsungSoundbarT6 Series aus der Liste aus Wenn eine Soundbar mit dem Bluetooth Gerät verbunden ist wird Bluetooth Gerätename BT in der vorderen Anzeige angezeigt 3 Geben Sie Musikdateien auf dem über Bluet...

Страница 59: ...omagnetische Wellen erzeugende Geräte müssen vom Soundbar Hauptgerät ferngehalten werden z B Mikrowellen WLAN Geräte etc Der Soundbar unterstützt SBC data 44 1kHz 48kHz Nur an ein Bluetooth Gerät anschließen das die A2DP AV Funktion unterstützt Es kann keine Verbindungen zwischen dem Soundbar und Bluetooth Geräten hergestellt werden die nur die HF Hands Free Funktion unterstützen Nachdem Sie eine ...

Страница 60: ...überBluetooth Bluetooth ist eine neue Technologie mit der es möglich ist Bluetooth fähige Geräte über eine kurze Funkverbindung miteinander zu verbinden Ein Bluetooth Gerät kann Störungen erzeugen oder falsch funktionieren wenn Das Empfangs Sendesystem eines Bluetooth Geräts oder der Haupteinheit mit einem Körperteil berührt wird Die Funkübertragung durch Wände Ecken oder Bürotrennwände behindert ...

Страница 61: ...ergabe auf dem Gerät A und starten Sie dann die Wiedergabe auf dem Gerät B Das Gerät schaltet nicht um wenn Musik vom Gerät B abgespielt wird ohne dass das Gerät A zuerst pausiert oder gestoppt wird 4 In früheren Versionen als AVRCP V1 4 kann die Schaltzeit des Gerätes das Musik abspielt verzögert sein HINWEISE Falls Sie versuchen ein 3 Bluetooth Gerät zu verbinden werden die Geräte A oder B getre...

Страница 62: ...Sie sie erneut um den Ton wieder einzuschalten SOUNDMODE VOL BASS SOUND MODE PAIR Sie können den gewünschten Toneffekt durch Wahl von STANDARD SURROUNDSOUND GAME SMARTSOUNDoder DTSVIRTUAL X auswählen STANDARD Gibt den Originalton aus SURROUNDSOUND Liefert ein größeres Klangfeld als der Standard GAME Liefert einen stereoskopischen Sound der Sie beim Spielen in die Handlung eintauchen lässt SMARTSOU...

Страница 63: ...lay wird BTPAIRING angezeigt In diesem Modus können Sie die Soundbar mit einem neuen Bluetooth Gerät verbinden indem Sie die Soundbar aus der Bluetooth Gerätesuchliste auswählen Wiedergabe Pause VOL BASS SOUND MODE PAIR Drücken Sie die p Taste um eine Musikdatei vorübergehend anzuhalten Wenn Sie die Taste erneut drücken wird die Musikdatei wiedergegeben VOL BASS SOUND MODE PAIR Oben Unten Links Re...

Страница 64: ...ar und können mit den Tasten Oben Unten auf eine Einstellung zwischen 6 bis 6 eingestellt werden Falls das Video auf dem Fernseher und der Ton der Soundbar nicht synchron sind drücken Sie die Klangsteuerung Taste um AUDIOSYNC auszuwählen und stellen Sie dann mit den Oben Unten Tasten die Audioverzögerung zwischen 0 300 Millisekunden ein Nicht verfügbar im USB oder BT Modus Wenn die Sourroundlautsp...

Страница 65: ...O F E R S O U N D B A R 5 Sec OFF TVREMOTE 3 Wenn Sie die Soundbar mit der Fernbedienung Ihres Fernsehers steuern wollen drücken Sie wiederholt die Taste WOOFER nach oben und halten Sie sie für 5 Sekunden gedrückt bis ALL TVREMOTE in der Anzeige erscheint Verwenden Sie dann das Menü Ihres Fernsehers um externe Lautsprecher auszuwählen S O U N D M O D E V O L W O O F E R S O U N D B A R 5 Sec ALL T...

Страница 66: ...eunterschiedlichensound effekt modi Effekt Eingang Ausgang Ohnedrahtloses Rücklautsprecherkit Mitdrahtlosem Rücklautsprecherkit SOUNDMODE Surround VOL WOOFER SOUND MODE Bluetooth POWER STANDARD 2 0 Kanal 2 1 Kanal 4 1 Kanal 5 1 Kanal 3 1 Kanal 5 1 Kanal SURROUND SOUND 2 0 Kanal 3 1 Kanal 5 1 Kanal 5 1 Kanal 3 1 Kanal 5 1 Kanal GAME 2 0 Kanal 3 1 Kanal 5 1 Kanal 5 1 Kanal 3 1 Kanal 5 1 Kanal SMART ...

Страница 67: ...die Wandmontage entsprechend der Art und der Dicke der Wand an der Sie die Soundbar montieren wollen Durchmesser M5 Länge 35 mm oder länger empfohlen Schließen Sie die Kabel vom Gerät an externe Geräte an bevor sie die Soundbar an der Wand installieren Stellen Sie sicher dass das Gerät ausgeschaltet und der Netzstecker gezogen ist bevor Sie es installieren Andernfalls kann es zu einem elektrischen...

Страница 68: ...ie mit einem geeigneten Bohrer an jeder Markierung ein Loch in die Wand Wenn die Markierungen nicht den Positionen der Halterungsbolzen entsprechen achten Sie darauf geeignete Dübel oder Molly Dübel in die Löcher einzuführen bevor Sie die Aufhängungsschrauben einführen Wenn Sie Dübel oder Molly Dübel verwenden achten Sie darauf dass die gebohrten Löcher für die verwendeten Dübel oder Molly Dübel g...

Страница 69: ...ie dann die Wandhalterung nach unten sodass die Wandhalterung sicher auf den Aufhängungsschraube ruhen 10 PLATZIERENDER SOUNDBARAUF EINEMTV STÄNDER Platzieren Sie die Soundbar auf einen TV Ständer 3cmodermehr Richten Sie wie auf der Abbildung dargestellt die Mitte der Soundbar auf die Mitte des Fernsehers aus und positionieren Sie die Soundbar vorsichtig auf dem Fernsehständer Für eine optimale To...

Страница 70: ...ss zurücksetzt 1 Schließen Sie einen USB Stick an den USB Anschluss Ihres Computers an Wichtig Stellen Sie sicher dass sich keine Musikdateien auf dem USB Stick befinden Dies kann dazu führen dass das Firmware Update fehlschlägt 2 Gehen Sie auf die Samsung Website unter samsung com wählen Sie Modellnummer eingeben und geben Sie das Modell Ihrer Soundbar ein Wählen Sie Handbücher und Downloads und ...

Страница 71: ...der Firmware abgeschlossen ist wird das Hauptgerät automatisch ausgeschaltet Nach Abschluss der Aktualisierung wird die Benutzerkonfiguration in der Soundbar initialisiert so dass Sie Ihre Einstellungen wieder einstellen können Wir empfehlen Ihnen Ihre persönlichen Einstellungen schriftlich zu notieren damit Sie sie nach dem Update leicht wiederherstellen können Beachten Sie dass durch die Aktuali...

Страница 72: ...itte zur Bluetooth Verbindung auf Seite 12 und 17 EswirdkeinTonwiedergegeben IstdieStummschaltfunktionaktiviert Drücken Sie die Taste Stummschaltung um die Stummschaltfunktion zu deaktivieren IstdieLautstärkeaufdasMinimum eingestellt Passen Sie die Lautstärke an DieFernbedienungfunktioniertnicht SinddieBatterienleer Tauschen Sie sie gegen neue aus IstderAbstandzwischenFernbedienungund Soundbar Hau...

Страница 73: ...s of HDMI Licensing LLC in the United States and other countries The Bluetooth word mark and logos are registered trademarks owned by the Bluetooth SIG Inc and any use of such marks by Samsung Electronics Co Ltd is under license Other trademarks and trade names are those of their respective owners 14 BEKANNTMACHUNG ZUOPENSOURCE LIZENZEN Wenn Sie Fragen bezüglich des Themas Open Source haben wenden...

Страница 74: ...leistung 6mW bei 2 402GHz 2 480GHz 25mW bei 5 725GHz 5 825GHz Subwoofername PS WR65BB Gewicht 6 2 kg Abmessungen B H T 205 0 x 353 0 x 303 2 mm VERSTÄRKER Nennausgangsleistung 160W AUSGANGSLEISTUNG DES DRAHTLOSGERÄTS SRD max Transmitterleistung 25mW bei 5 725GHz 5 825GHz Gesamtstromverbrauch im Bereitschaftszustand W 2 0W Bluetooth Anschlussdeaktivierungsmethode Halten Sie die Taste SOUNDMODE für ...

Страница 75: ...tt GiltfürLändermitAbfalltrennsystemen Die Kennzeichnung auf dem Produkt Zubehörteilen bzw auf der dazugehörigen Dokumentation gibt an dass das Produkt und Zubehörteile z B Ladegerät Kopfhörer USB Kabel nach ihrer Lebensdauer nicht zusammen mit dem normalen Haushaltsmüll entsorgt werden dürfen Entsorgen Sie dieses Gerät und Zubehörteile bitte getrennt von anderen Abfällen um der Umwelt bzw der men...

Страница 76: ...dique que la tension nominale indiquée par le symbole est une tension CA Tension CC ce symbole indique que la tension nominale indiquée par le symbole est une tension CC Mise en garde Consulter le mode d emploi ce symbole avertit l utilisateur qu il doit consulter le manuel d utilisation pour en savoir plus sur les informations relatives à la sécurité AVERTISSEMENT Afin de diminuer les risques d i...

Страница 77: ...fonctionnement Votre produit n est pas prévu pour un usage industriel Ce produit ne peut être utilisé qu à des fins personnelles Une condensation peut se former si le produit ou un disque a été stocké à basse température Si vous devez transporter l ensemble pendant l hiver attendez environ 2 heures que l appareil ait atteint la température de la pièce avant de l utiliser 5 Les piles utilisées dans...

Страница 78: ...le Caisson de basse et la Soundbar 6 Connexion manuelle du Caisson de basse si la connexion automatique échoue 7 Connexion du SWA 8500S Vendue séparément à une Soundbar 8 04 ConnexionàvotreTéléviseur 10 Méthode 1 Connexion avec un câble 10 Connexion à l aide d un câble optique 10 Connexion d un téléviseur à l aide d un câble HDMI 11 Méthode 2 Connexion sans fil 12 Connexion à un téléviseur via Blu...

Страница 79: ...d une fonction 25 Spécifications de sortie pour les différents modes d effets sonores 25 09 InstallationduSupportMural 26 Précautions d installation 26 Composants de fixation au mur 26 10 InstallationdelaSoundbarsurunsoclede téléviseur 28 11 MiseàjourduLogiciel 29 Procédure de mise à jour 29 Si UPDATE ne s affiche pas 30 12 Dépannage 31 13 Licence 32 14 AvisdeLicenceLibre 32 15 RemarqueImportanteà...

Страница 80: ...llée sur le produit Étiquette Bas de l Unité Principale Soundbar Pour acheter des composants supplémentaires ou des câbles optionnels contactez un Centre de service Samsung ou le Service client de Samsung L aspect des accessoires peut légèrement différer des illustrations ci dessus Insertiondespilesavantl utilisationdelatélécommande PilesAAX2 Faites glisser le couvercle arrière dans la direction d...

Страница 81: ...ectionne le mode d entrée de la source Moded entrée Affichage Entrée numérique optique D IN Entrée ARC HDMI OUT D IN TV ARC Conversion automatique Entrée HDMI HDMI Mode BLUETOOTH BT Mode USB USB Pour activer le mode BTPAIRING changez la source sur le mode BT puis appuyez et maintenez enfoncée la touche Source pendant plus de 5 secondes Lorsque vous branchez le cordon CA la touche Marche Arrêt fonc...

Страница 82: ...met l entrée de signaux numériques vidéo et audio simultanément à l aide du câble HDMI Permet de connecter la sortie HDMI d un appareil externe HDMITOTV ARC Permet de connecter une prise jack HDMI ARC sur un téléviseur DC24V Entréed alimentationélectrique Permet de connecter l adaptateur CA CC Lorsque vous débranchez le câble d alimentation de l adaptateur d alimentation CA CC d une prise de coura...

Страница 83: ...ation et la consommation électriques requises reportez vous à l étiquette collée sur le produit Étiquette Partie inférieure de l unité principale Soundbar POWER Arrièredu Caissondebasse Cordon d alimentation Connexionde l alimentation électrique HDMI HDMI TO TV ARC DC 24V TV ARC DC 24V Partieinférieurede l unitéprincipale Soundbar AdaptateurCA CC Cordon d alimentation Connexionde l alimentation él...

Страница 84: ...sse LED État Description Résolution Bleu Activé Connexion réussie fonctionnement normal Clignotement Récupération de la connexion Vérifiez si le câble d alimentation fixé à l unité principale Soundbar est connecté correctement ou attendez environ 5minutes Si le clignotement continue essayez de connecter manuellement le caisson de basse Voir page 7 Rouge Activé En veille avec l unité principale de ...

Страница 85: ...sse s éteint et l indicateur bleu clignote 5 Sec ArrièreduCaissondebasse 2 Appuyez sur la touche Haut de la télécommande et maintenez la enfoncée pendant au moins 5secondes Le message IDSET s affiche un moment sur l écran de la Soundbar avant de disparaître La Soundbar est automatiquement mise sous tension lorsque IDSET est terminé IDSET SOUND MODE PAIR 5 Sec LelogoSAMSUNGestsurledessus 3 Vérifiez...

Страница 86: ...d exploitation Si un mur en béton armé ou métallique se trouve entre l unité principale et le subwoofer sans fil le système risque de ne pas fonctionner du tout car le signal sans fil ne peut pas passer à travers le métal PRÉCAUTIONS Les antennes de réception sans fil sont intégrées au subwoofer sans fil Gardez les unités à l abri de l eau et de l humidité Pour des performances d écoute optimales ...

Страница 87: ...ppuyez sur la touche Haut de la télécommande et maintenez la enfoncée pendant au moins 5secondes Le message IDSET s affiche un moment sur l écran de la Soundbar avant de disparaître La Soundbar est automatiquement mise sous tension lorsque IDSET est terminé IDSET SOUND MODE PAIR 5 Sec LelogoSAMSUNGestsurledessus ATTENTION Si votre Soundbar diffuse de la musique au moment où elle est connectée au S...

Страница 88: ...e et la coupure du son Méthode1 Connexionavecuncâble Lorsque les signaux de diffusion sont Dolby Digital et le réglage Format audio de sortie numérique est PCM sur votre téléviseur il est recommandé de modifier le réglage sur Dolby Digital Une fois le réglage modifié vous pouvez profiter d une meilleure qualité sonore Il se peut que le menu du téléviseur utilise des mots différents pour Dolby Digi...

Страница 89: ...ar pour passer en mode D IN L écran affiche successivement D IN et TVARC et vous pouvez entendre le son du téléviseur Si TVARC n apparaît pas sur la fenêtre d affichage de l unité principale Soundbar vérifiez que le câble HDMI non fourni est connecté au bon port Utilisez les touches de volume sur la télécommande du téléviseur pour modifier le volume de la Soundbar REMARQUES HDMI est une interface ...

Страница 90: ...BTPAIRING 2 Sélectionnez le mode Bluetooth sur le téléviseur Pour plus d informations reportez vous au manuel du téléviseur 3 Sélectionnez AV SamsungSoundbarT6 Series dans la liste sur l écran du téléviseur Une Soundbar disponible est indiquée NeedPairing ou Paired dans la liste des appareils Bluetooth sur le téléviseur Pour connecter la Soundbar sélectionnez le message et établissez la connexion ...

Страница 91: ...z sur le bouton PAIR de la télécommande ou maintenez le bouton Source situé sur la partie supérieure de la Soundbar enfoncé pendant plus de 5 secondes lorsque la Soundbar est en mode BT REMARQUES Si un code PIN est demandé lors de la connexion d un appareil Bluetooth saisissez 0000 En mode de connexion Bluetooth la connexion Bluetooth sera perdue si la distance entre la Soundbar et l appareil Blue...

Страница 92: ...5V 0 5A DIGITAL AUDIO IN OPTICAL OPTICAL OUT Câbleoptique PartieinférieuredelaSoundbar Partiesupérieuredela Soundbar LecteurBD DVD Boîtierdécodeur Consoledejeu D IN 1 Raccordez DIGITALAUDIOIN OPTICAL de l unité principale à la prise OPTICAL OUT de l appareil source à l aide d un câble optique numérique 2 Sélectionnez le mode D IN en appuyant sur le bouton Source situé sur le panneau frontal ou sur...

Страница 93: ...câble HDMI non fourni de la prise HDMI au dos du produit à la prise HDMI OUT de votre appareil numérique 2 Raccordez un câble HDMI non fourni de la prise HDMITOTV ARC au dos du produit à la prise HDMI IN de votre téléviseur 3 Appuyez surle bouton Source du panneau supérieurou de la télécommande puis sélectionnez HDMI 4 Le mode HDMI s affiche surle panneau d affichage de la Soundbaretvous pouvez en...

Страница 94: ... Soundbar La Soundbar s éteint automatiquement Auto Power Down si aucun périphérique USB n a été connecté pendant plus de 20 minutes Listedecompatibilités Extension Codec Débitd échantillonnage Débitbinaire mp3 MPEG1 Layer2 32 48 kHz 32 320 kbps MPEG1 Layer3 32 48 kHz 32 320 kbps MPEG2 Layer3 16 24 kHz 8 160 kbps MPEG2 5 Layer3 8 12 kHz 8 160 kbps wma WMA7 8 9 Audio uniquement 32 48 kHz 32 320 kbp...

Страница 95: ...connexion enregistrée b Lorsque BTREADY apparaît maintenez le bouton Source enfoncé sur le panneau supérieur de la Soundbar pendant plus de 5 secondes pour afficher BTPAIRING 2 Sélectionnez AV SamsungSoundbarT6 Series dans la liste Lorsqu une Soundbar est connectée à l appareil Bluetooth Nomdel appareilBluetooth BT apparaît sur l affichage avant 3 Lisez des fichiers musicaux à partir de l appareil...

Страница 96: ... conservés à distance de l unité principale Soundbar par ex des micro ondes des appareils LAN sans fil etc Le Soundbar prend en charge les données SBC 44 1 kHz 48 kHz Effectuez uniquement la connexion à un périphérique Bluetooth qui prend en charge la fonction A2DP AV Vous ne pouvez pas connecter le Soundbar à un périphérique Bluetooth qui prend en charge uniquement la fonction HF Hands Free Lorsq...

Страница 97: ...aide d une liaison sans fil courte distance Ce périphérique Bluetooth peut générer du bruit ou créer des dysfonctionnements en fonction des conditions d utilisation lorsque Une partie du corps de l appareil est en contact avec le système de réception transmission du périphérique Bluetooth ou du système Soundbar Il est soumis à des variations électriques provenant d obstructions provoquées par un m...

Страница 98: ...cez la lecture sur l appareil B L appareil ne commutera pas sur de la musique est en cours de lecture à partir de l appareil B tant que vous n avez pas mis en pause ou arrêté l appareil A 4 Dans les versions antérieures à AVRCP V1 4 la durée de commutation de l appareil sur lequel de la musique est en cours de lecture peut être supérieure REMARQUES Si vous essayez de connecter un troisième apparei...

Страница 99: ... cette touche pour activer le son SOUNDMODE VOL WOOFER SOUND MODE PAIR Vous pouvez sélectionner l effet sonore souhaité en choisissant parmi STANDARD SURROUND SOUND GAME SMARTSOUND ouDTS VIRTUAL X STANDARD Émet le son original SURROUNDSOUND Fournit un champ sonore plus large que la norme GAME Fournit un son stéréoscopique vous permettant une immersion dans l action pendant le jeu SMARTSOUND Analys...

Страница 100: ...an de la Soundbar Vous pouvez connecter la Soundbar à un nouvel appareil Bluetooth dans ce mode en sélectionnant la Soundbar dans la liste de recherche d appareils Bluetooth Lecture Pause VOL WOOFER SOUND MODE PAIR Appuyez sur la touche p pour mettre le fichier musical temporairement en pause Si vous appuyez à nouveau sur la touche le fichier musical est lu VOL WOOFER SOUND MODE PAIR Haut Bas Gauc...

Страница 101: ...s Gauche Droite et chaque réglage peut être défini entre 6 et 6 à l aide des touches Haut Bas Si l image sur le téléviseur et le son de la Soundbar ne sont pas synchronisés appuyez sur la touche Commandesonore pour sélectionner AUDIOSYNC puis réglez le décalage audio de 0 à 300 millisecondes à l aide des touches Haut Bas Non disponible en mode USB ou BT Si les enceintes Surround sont connectées il...

Страница 102: ...O L W O O F E R S O U N D B A R 5 Sec OFF TVREMOTE 3 Si vous voulez contrôler la Soundbar avec la télécommande de votre téléviseur poussez la touche WOOFER vers le haut et maintenez la enfoncée pendant 5secondes jusqu à ce que ALL TVREMOTE apparaisse à l écran Utilisez ensuite le menu de votre téléviseur pour sélectionner les enceintes externes S O U N D M O D E V O L W O O F E R S O U N D B A R 5...

Страница 103: ...ficationsdesortiepourlesdifférentsmodesd effetssonores Effet Entrée Sortie Sanskitd enceintes arrièresansfil Aveckitd enceintesarrière sansfil SOUNDMODE Surround VOL WOOFER SOUND MODE Bluetooth POWER STANDARD 2 0 canaux 2 1 canaux 4 1 canaux 5 1 canaux 3 1 canaux 5 1 canaux SURROUND SOUND 2 0 canaux 3 1 canaux 5 1 canaux 5 1 canaux 3 1 canaux 5 1 canaux GAME 2 0 canaux 3 1 canaux 5 1 canaux 5 1 ca...

Страница 104: ...dans les poteaux Achetez les vis de support mural selon le type et l épaisseur du mur sur lequel vous souhaitez monter la Soundbar Diamètre M5 Longueur 35 mm ou plus recommandés Connectez les câbles depuis l unité aux appareils externes avant d installer la Soundbar sur le mur Assurez vous que l unité est éteinte et débranchée avant de l installer Sinon cela pourrait provoquer un choc électrique C...

Страница 105: ...n trou dans le mur au niveau de chaque marque Si les marques ne correspondent pas aux positions des poteaux muraux veillez à insérer les ancrages ou les chevilles Molly appropriées dans les trous avant d insérer les vis portantes Si vous utilisez des ancrages ou des chevilles Molly pensez à percer des trous suffisamment larges pour les accueillir 5 Enfoncez une vis non fournie dans chaque Visdefix...

Страница 106: ...isser les Supportde fixationmurale vers le bas afin que les Supportdefixationmurale reposent de manière sûre sur les Visdefixation 10 INSTALLATION DELA SOUNDBARSUR UNSOCLEDE TÉLÉVISEUR Placez la Soundbar sur un socle de téléviseur 3cmouplus Comme indiqué sur l illustration alignez le centre de la Soundbar avec le centre du téléviseur en insérant avec précaution la Soundbar dans le socle du télévis...

Страница 107: ... du micrologiciel réinitialise également la connexion du subwoofer 1 Connectez une clé USB au port USB de votre ordinateur Important Assurez vous qu il n y a pas de fichiers musicaux sur la clé USB Cela peut entraîner l échec de la mise à jour du micrologiciel 2 Rendez vous sur le site Web Samsung sur samsung com sélectionnez Entrer le numéro de modèle et entrez le modèle de votre Soundbar Sélecti...

Страница 108: ...uées L unité principale s éteindra automatiquement après avoir terminé la mise à jour du micrologiciel Une fois la mise à jour terminée la configuration d utilisateur est initialisée dans la Soundbar Nous vous recommandons d écrire vos paramètres pour pouvoir les rétablir après la mise à jour Notez que la mise à jour du micrologiciel réinitialise également la connexion du subwoofer Si la connexion...

Страница 109: ...T Consultez les sections sur la connexion Bluetooth aux pages 12 et 17 Aucunsonn estproduit Lafonctiondecoupuredusonest elle activée Appuyez sur le touche Coupuredeson pour annuler la fonction de sourdine Levolumeest ilrégléàsonminimum Réglez le volume Latélécommandenefonctionnepas Lespilessont elleusées Remplacez avec des piles neuves Est cequeladistanceentrelatélécommande etl unitéprincipaleSoun...

Страница 110: ... and other countries The Bluetooth word mark and logos are registered trademarks owned by the Bluetooth SIG Inc and any use of such marks by Samsung Electronics Co Ltd is under license Other trademarks and trade names are those of their respective owners 14 AVISDELICENCE LIBRE Pour toute requête et demande concernant les sources ouvertes contactez Samsung via e mail à l adresse oss request samsung...

Страница 111: ...ansmission SRD max 6 mW à 2 402 GHz 2 480 GHz 25 mW à 5 725 GHz 5 825 GHz Nom du caisson de basse PS WR65BB Poids 6 2 kg Dimensions L x H x P 205 0 x 353 0 x 303 2 mm AMPLIFICATEUR Puissance de sortie nominale 160W PUISSANCE DE SORTIE DE L APPAREIL SANS FIL Puissance de transmission SRD max 25 mW à 5 725 GHz 5 825 GHz Consommation électrique totale en veille W 2 0W Bluetooth Méthode de désactivati...

Страница 112: ...pementsélectriques électroniques Applicableauxpaysdisposantdesystèmesdecollecteséparés Ce symbole sur le produit ses accessoires ou sa documentation indique que ni le produit ni ses accessoires électroniques usagés chargeur casque audio câble USB etc ne peuvent être jetés avec les autres déchets ménagers La mise au rebut incontrôlée des déchets présentant des risques environnementaux et de santé p...

Страница 113: ...nte dotata di messa a terra Tensione CA Questo simbolo indica che la tensione contrassegnata con questo simbolo è di tipo CA Tensione CC Questo simbolo indica che la tensione contrassegnata con questo simbolo è di tipo CC Attenzione consultare le Istruzioni per l uso Questo simbolo indica all utente la necessità di consultare il manuale dell utente per ottenere ulteriori informazioni sulla sicurez...

Страница 114: ...o di alimentazione dalla presa di corrente Il prodotto non è destinato all uso industriale Questo prodotto è destinato esclusivamente all uso personale Se il prodotto o il disco vengono conservati a basse temperature potrebbe formarsi della condensa Trasportando l unità in inverno attendere circa 2 ore prima di utilizzarla in modo che ritorni a temperatura ambiente 5 Le batterie utilizzate con que...

Страница 115: ...a il subwoofer e la Soundbar 6 Connessione manuale del subwoofer in caso di connessione automatica non riuscita 7 Collegamento del kit SWA 8500S venduto separatamente alla Soundbar 8 04 CollegamentoallaTV 10 Metodo 1 Collegamento mediante un cavo 10 Collegamento tramite un cavo ottico 10 Collegamento di una TV tramite un cavo HDMI 11 Metodo 2 Connessione wireless 12 Connessione di una TV mediante ...

Страница 116: ...e 25 Specifiche di uscita per diverse modalità di effetti sonori 25 09 Installazionedelsupportoaparete 26 Precauzioni per l installazione 26 Componenti per il montaggio a parete 26 10 CollocamentodellaSoundbarsulpiedistallo diunaTV 28 11 Aggiornamentodelsoftware 29 Procedura per l aggiornamento 29 Se non compare la scritta UPDATE 30 12 Risoluzionedeiproblemi 31 13 Licenza 32 14 Avvisodilicenzaopen...

Страница 117: ... prodotto Etichetta Fondo dell Unità Principale della Soundbar Per acquistare componenti aggiuntivi o cavi opzionali contattare un Centro servizi Samsung o l Assistenza clienti Samsung L aspetto degli accessori può variare leggermente dalle illustrazioni riportate sopra Inserimentodellebatterieprimadell utilizzodeltelecomando 2batterieAA Far scorrere il coperchio posteriore nella direzione della f...

Страница 118: ... livello del volume viene visualizzato sul display frontale della Soundbar Tasto Sorgente Consente di selezionare il modo di ingresso della sorgente Mododiingresso Visualizzazione Ingresso digitale ottico D IN Ingresso ARC HDMI OUT D IN TV ARC Conversione automatica Ingresso HDMI HDMI Modo BLUETOOTH BT Modo USB USB Per attivare il modo BTPAIRING cambiare la sorgente passando al modo BT quindi tene...

Страница 119: ...B tramite la Soundbar HDMI Consente l ingresso di segnali audio e video contemporaneamente utilizzando un cavo HDMI Collegare all uscita HDMI di un dispositivo esterno HDMITOTV ARC Collegare alla presa jack HDMI ARC di una TV DC24V Ingressoalimentazione Collegare l adattatore CA CC Quando si disconnette il cavo di alimentazione dell adattatore CA CC da una presa a muro tirare la spina Non tirare i...

Страница 120: ...nza elettrica assorbita e sul consumo di energia vedere l etichetta applicata al prodotto Etichetta Fondo dell unità principale della Soundbar POWER Retrodelsubwoofer Cavodi alimentazione Collegamentoalla reteelettrica HDMI HDMI TO TV ARC DC 24V TV ARC DC 24V Fondodell unità principaledellaSoundbar AdattatoreCA CC Cavodi alimentazione Collegamento allarete elettrica Assicurarsi di poggiare l adatt...

Страница 121: ...cita funzionamento normale Lampeggiante Ripristino della connessione Controllare che il cavo di alimentazione connesso all unità principale della Soundbar sia collegato correttamente oppure attendere circa 5 minuti Se continua a lampeggiare provare a connettere manualmente il subwoofer Consultare la pagina 7 Rosso Acceso Standby con l unità principale della Soundbar spenta Verificare che il cavo d...

Страница 122: ...sore si spegne e l indicatore blu lampeggia 5 Sec Retrodelsubwoofer 2 Tenere premuto il tasto Su del telecomando per almeno 5 secondi Il messaggio IDSET viene visualizzato brevemente sul display della Soundbar poi scompare La Soundbar si accenderà automaticamente una volta completata l IDSET IDSET SOUND MODE PAIR 5 Sec IllogoSAMSUNGsitrovasulla partesuperiore 3 Verificare che il LED LINK sia di co...

Страница 123: ...ipale e il subwoofer si frappone una parete metallica o di cemento armato il sistema potrebbe non funzionare affatto in quanto il segnale wireless non è in grado di attraversare il metallo PRECAUZIONI Le antenne di ricezione wireless sono integrate nel subwoofer wireless Tenere le unità al riparo da acqua e umidità Per prestazioni di ascolto ottimali assicurarsi che l area circostante il diffusore...

Страница 124: ... Tenere premuto il tasto Su del telecomando per almeno 5 secondi Il messaggio IDSET viene visualizzato brevemente sul display della Soundbar poi scompare La Soundbar si accenderà automaticamente una volta completata l IDSET IDSET SOUND MODE PAIR 5 Sec IllogoSAMSUNGsitrovasulla partesuperiore ATTENZIONE Se la Soundbar stava riproducendo musica al momento del collegamento al kit SWA 8500S potrebbero...

Страница 125: ...Collegamentomedianteuncavo Quando i segnali di radiodiffusione sono di tipo Dolby Digital e nella TV il Formato audio dell uscita digitale è impostato su PCM si raccomanda di modificare l impostazione passando a Dolby Digital Una volta modificata l impostazione è possibile godere di una qualità audio più elevata Sul menu del TV le diciture per Dolby Digital e PCM potrebbero essere diverse a second...

Страница 126: ...ore della Soundbar per passare al modo D IN Sullo schermo vengono visualizzati D IN e TVARC n sequenza e viene riprodotto l audio della TV Se TVARC non compare nella finestra di visualizzazione dell unità principale della Soundbar verificare che il cavo HDMI non fornito in dotazione sia collegato alla porta corretta Utilizzare i tasti del volume del telecomando della TV per regolare il volume dell...

Страница 127: ...alizzare BTPAIRING 2 Selezionare il modo Bluetooth sulla TV Per ulteriori informazioni consultare il manuale della TV 3 Selezionare AV SamsungSoundbarT6 Series dall elenco visualizzato nella schermata della TV Una Soundbar disponibile è indicata con NeedPairing o Paired nell elenco dei dispositivi Bluetooth della TV Per connettersi alla Soundbar selezionare il messaggio e stabilire una connessione...

Страница 128: ...remuto il tasto Sorgente nella parte superiore della Soundbar per più di 5 secondi mentre la Soundbar è in modo BT NOTE Se viene richiesto un codice PIN durante la connessione a un dispositivo Bluetooth immettere 0000 Nel modo di connessione Bluetooth la connessione Bluetooth viene persa se la distanza tra la Soundbar e il dispositivo Bluetooth supera i 10 m La Soundbar si spegne automaticamente d...

Страница 129: ...oottico USB 5V 0 5A DIGITAL AUDIO IN OPTICAL OPTICAL OUT Cavoottico FondodellaSoundbar Partesuperioredella Soundbar LettoreBD DVD Decoder Consolepervideogiochi D IN 1 Collegare il DIGITALAUDIOIN OPTICAL ell unità principale alla presa jack OPTICAL OUT del dispositivo sorgente utilizzando un cavo ottico digitale 2 Selezionare il modo D IN premendo il tasto Sorgente sul pannello superiore o sul tele...

Страница 130: ...azione dalla presa jack HDMI situata sul retro del prodotto alla presa jack HDMI OUT del dispositivo digitale 2 Collegare un cavo HDMI non fornito in dotazione dalla presa jack HDMITOTV ARC situata sul retro del prodotto alla presa jack HDMI IN della TV 3 Premere il tasto Sorgente sul pannello superiore o sul telecomando quindi selezionare HDMI 4 Il modo HDMI èvisualizzato sul pannello displaydell...

Страница 131: ...tomaticamente Auto Power Down se non è stato collegato alcun dispositivo USB per più di 20 minuti Elencodellacompatibilità Estensione Codec Frequenzadicampionamento Velocitàditrasmissione mp3 MPEG1 Layer2 32 kHz 48 kHz 32 320 kbps MPEG1 Layer3 32 kHz 48 kHz 32 320 kbps MPEG2 Layer3 16 kHz 24 kHz 8 160 kbps MPEG2 5 Layer3 8 kHz 12 kHz 8 160 kbps wma WMA7 8 9 solo audio 32 kHz 48 kHz 32 320 kbps ogg...

Страница 132: ...sente un record di connessione b Quando compare BTREADY tenere premuto il tasto Sorgente nel pannello superiore della Soundbar per più di 5 secondi per visualizzare BTPAIRING 2 Selezionare AV SamsungSoundbarT6 Series all elenco visualizzato Quando una Soundbar è connessa al dispositivo Bluetooth nel display frontale viene visualizzato il messaggio NomedispositivoBluetooth BT 3 Riprodurre file musi...

Страница 133: ...terferenze radio I dispositivi che generano onde elettromagnetiche come ad esempio forni a microonde LAN wireless e così via devono essere tenuti lontano dall unità principale della Soundbar Il Soundbar supporta i dati SBC 44 1kHz 48kHz Effettuare il collegamento esclusivamente a un dispositivo Bluetooth che supporti la funzione A2DP AV Non è possibile collegare il Soundbar a un dispositivo Blueto...

Страница 134: ...ispositivi compatibili con Bluetooth attraverso una connessione wireless a breve raggio Il dispositivo Bluetooth può provocare rumorosità o malfunzionamenti a seconda delle condizioni di utilizzo se Una parte del corpo è a contatto con il sistema di ricezione di trasmissione del dispositivo Bluetooth o dell Soundbar È soggetto a variazioni elettriche dovute a interferenze derivanti da riflessioni ...

Страница 135: ...vviare la riproduzione dal dispositivo B Non verrà cambiato dispositivo se la musica verrà riprodotta dal dispositivo B senza aver prima messo in pausa o arrestato il dispositivo A 4 Nelle versioni precedenti ad AVRCP V1 4 il tempo necessario per passare da un dispositivo che riproduce la musica all altro potrebbe essere maggiore NOTE Se si cerca di connettere un 3 dispositivo Bluetooth uno tra i ...

Страница 136: ...te per riattivare l audio SOUNDMODE VOL BASS SOUND MODE PAIR Consente di selezionare l effetto sonoro desiderato scegliendo traSTANDARD SURROUNDSOUND GAME SMARTSOUND o DTSVIRTUAL X STANDARD Emette l audio originale SURROUNDSOUND Fornisce un campo sonoro più ampio di quello standard GAME Fornisce l audio stereoscopico che consente la piena immersione nell azione di gioco SMARTSOUND Analizza il cont...

Страница 137: ...ay della Soundbar viene visualizzato BTPAIRING In questa modalità è possibile connettere la Soundbar a un nuovo dispositivo Bluetooth selezionando la Soundbar dall elenco di ricerca del dispositivo Bluetooth Riproduci Sospendi VOL BASS SOUND MODE PAIR Premere il tasto p per sospendere temporaneamente la riproduzione di un file musicale Premendo nuovamente il tasto si riavvia la riproduzione VOL BA...

Страница 138: ...5 kHz 5 kHz e 10 kHz e ciascuna selezione può essere regolata tra 6 e 6 mediante i pulsanti Su Giù Se il video della TV e l audio della Soundbar non sono sincronizzati premere il tasto Controlloaudio per selezionare AUDIOSYNC quindi impostare il ritardo audio tra 0 300 millisecondi utilizzando i tasti Su Giù Non disponibile nel modo USB o BT Se sono collegati dei Diffusori surround è possibile acc...

Страница 139: ...O D E V O L W O O F E R S O U N D B A R 5 Sec OFF TVREMOTE 3 Se si desidera controllare la Soundbar con il telecomando della propria TV tenere premuto il tasto WOOFER verso l alto per 5 secondi ripetutamente finché non viene visualizzato il messaggio ALL TVREMOTE Dopodiché utilizzare il menu della propria TV per selezionare i diffusori esterni S O U N D M O D E V O L W O O F E R S O U N D B A R 5 ...

Страница 140: ...rdiversemodalitàdieffettisonori Effetto Ingresso Uscita Senzakitdidiffusori posterioriwireless Conkitdidiffusori posterioriwireless SOUNDMODE Surround VOL WOOFER SOUND MODE Bluetooth POWER STANDARD 2 0 canali 2 1 canali 4 1 canali 5 1 canali 3 1 canali 5 1 canali SURROUND SOUND 2 0 canali 3 1 canali 5 1 canali 5 1 canali 3 1 canali 5 1 canali GAME 2 0 canali 3 1 canali 5 1 canali 5 1 canali 3 1 ca...

Страница 141: ...Acquistare viti per il montaggio a parete a seconda della tipologia e dello spessore del muro su cui si intende montare la Soundbar Diametro M5 Lunghezza si consiglia 35 mm o maggiore Collegare i cavi dall unità ai dispositivi esterni prima di installare la Soundbar sulla parete Assicurarsi che l unità sia spenta e scollegata dalla rete elettrica prima di installarla In caso contrario potrebbe pro...

Страница 142: ...nsioni praticare un foro nella parete in corrispondenza di ciascun segno Se i segni non corrispondono alle posizioni di montanti assicurarsi di inserire ancoraggi o tasselli appropriati nei fori prima di inserire leviti di supporto Se si utilizzano ancoraggi o tasselli assicurarsi che i fori praticati siano sufficientemente grandi da accogliere gli ancoraggi o i tasselli utilizzati 5 Far passare u...

Страница 143: ...ndi far scorrere le Supportopermontaggioaparete verso il basso in modo che le Supportoper montaggioaparete si appoggino saldamente sulle Rondelladifissaggio 10 COLLOCAMENTO DELLA SOUNDBARSUL PIEDISTALLODI UNATV Collocare la Soundbar sul piedistallo di una TV 3cmopiù Come illustrato nell immagine allineare il centro della Soundbar con il centro del TV quindi prestando la massima attenzione posizion...

Страница 144: ...ndo presente che l aggiornamento del firmware ripristina anche il collegamento al subwoofer 1 Connettere la chiavetta USB alla porta USB del computer Importante assicurarsi che la chiavetta USB non contenga file musicali In caso contrario l aggiornamento del firmwall potrebbe non riuscire 2 Visitare il sito Samsung su samsung com selezionare Enter Model Number quindi fornire il modello della Sound...

Страница 145: ...mente dopo il completamento dell aggiornamento del firmware Una volta completato l aggiornamento la configurazione dell utente nella Soundbar viene avviata ed è possibile ripristinare le proprie impostazioni Consigliamo di prendere nota delle impostazioni così da poterle ripristinare al termine dell aggiornamento Attenzione l aggiornamento del firmware azzererà anche la connessione al subwoofer Se...

Страница 146: ...ionel modoBT Consultare le sezioni relative alla connessione Bluetooth alle pagine 12 e 17 Nonvieneriprodottol audio LafunzioneMutoèattiva Premere il tasto Muto per disattivare la funzione Muto Ilvolumeèimpostatoalminimo Regolare il volume Iltelecomandononfunziona Lebatteriesonoesaurite Sostituirle con batterie nuove Ladistanzatrailtelecomandoel unità principaledellaSoundbarètroppa Avvicinare il t...

Страница 147: ...and other countries The Bluetooth word mark and logos are registered trademarks owned by the Bluetooth SIG Inc and any use of such marks by Samsung Electronics Co Ltd is under license Other trademarks and trade names are those of their respective owners 14 AVVISODI LICENZAOPEN SOURCE Per inviare richieste e domande sulle open source contattare Samsung tramite e mail oss request samsung com 15 NOTA...

Страница 148: ...trasmettitore SRD 6 mW a 2 402 GHz 2 480 GHz 25 mW a 5 725 GHz 5 825 GHz Nome del subwoofer PS WR65BB Peso 6 2 kg Dimensioni L x A x P 205 0 x 353 0 x 303 2 mm AMPLIFICA TORE Potenza di uscita nominale 160W POTENZA IN USCITA DEL DISPOSITIVO WIRELESS Potenza max trasmettitore SRD 25 mW a 5 725 GHz 5 825 GHz Consumo energetico complessivo in standby W 2 0W Bluetooth Metodo di disattivazione porta Te...

Страница 149: ...odotto e i relativi accessori elettronici quali caricabatterie cuffia e cavo USB non devono essere smaltiti con altri rifiuti al termine del ciclo di vita Per evitare eventuali danni all ambiente o alla salute causati dallo smaltimento dei rifiuti non corretto si invita l utente a separare il prodotto e i suddetti accessori da altri tipi di rifiuti conferendoli ai soggetti autorizzati secondo le n...

Страница 150: ...726 7864 www samsung com hu support AUSTRIA 08007267864 0800 SAMSUNG www samsung com at support SWITZERLAND 0800726786 www samsung com ch support German www samsung com ch_fr support French Area Contact Centre Web Site CZECH 800 SAMSUNG 800 726786 www samsung com cz support SLOVAKIA 0800 SAMSUNG 0800 726786 www samsung com sk support CROATIA 072726786 www samsung com hr support BOSNIA 055233999 ww...

Отзывы: