


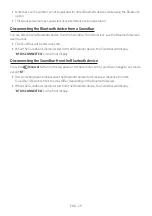
ENG - 14
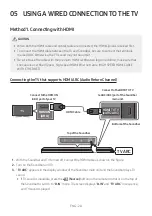
04 CONNECTING THE SOUNDBAR
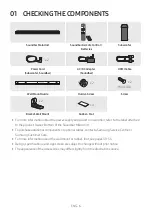
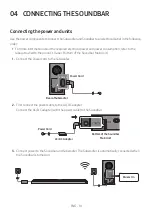
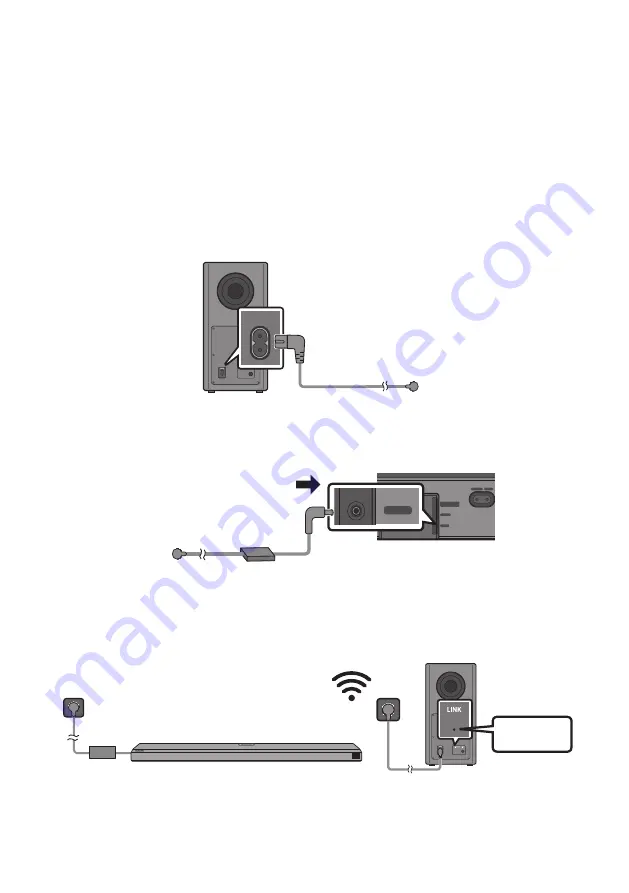
Connecting the power and units
Use the power components to connect the Subwoofer and Soundbar to an electrical outlet in the following
order:
•
For more information about the required electrical power and power consumption, refer to the
label attached to the product. (Label: Bottom of the Soundbar Main Unit)
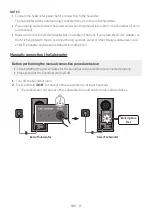
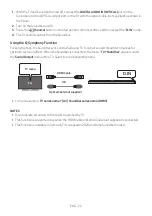
1.
Connect the Power cord to the Subwoofer.
POWER
Rear of Subwoofer
Power Cord
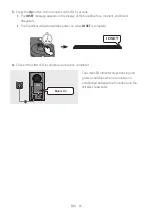
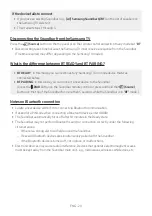
2.
First connect the power cable to the AC/DC adapter.
Connect the AC/DC adapter (with the power cable) to the Soundbar.
DIGITAL AUDIO IN
(OPTICAL)
SERVICE
DC 19V
HDMI
NETWORK ID SET
DIGITAL AUDIO IN
(OPTICAL)
SERVICE
NETWORK ID SET
HDMI TO TV
(eARC/ARC)
HDMI IN
HDMI OUT
(TV-ARC)
DIGITAL AUDIO IN
(OPTICAL)
SERVICE
DC 19V
DIGITAL AUDIO IN
(OPTICAL)
SERVICE
DC 19V
HDMI
HDMI TO TV
(eARC/ARC)
DIGITAL AUDIO IN
(OPTICAL)
SERVICE
DC 19V
HDMI
NETWORK ID SET
DIGITAL AUDIO IN
(OPTICAL)
SERVICE
NETWORK ID SET
HDMI TO TV
(eARC/ARC)
HDMI IN
HDMI OUT
(TV-ARC)
DIGITAL AUDIO IN
(OPTICAL)
SERVICE
DC 19V
DIGITAL AUDIO IN
(OPTICAL)
SERVICE
DC 19V
HDMI
HDMI TO TV
(eARC/ARC)
Bottom of the Soundbar
Main Unit
DC 19V
AC/DC Adapter
Power Cord
3.
Connect power to the Soundbar and Subwoofer. The Subwoofer is automatically connected when
the Soundbar is turned on.
Blue is On


