32
-
English
Playing Content
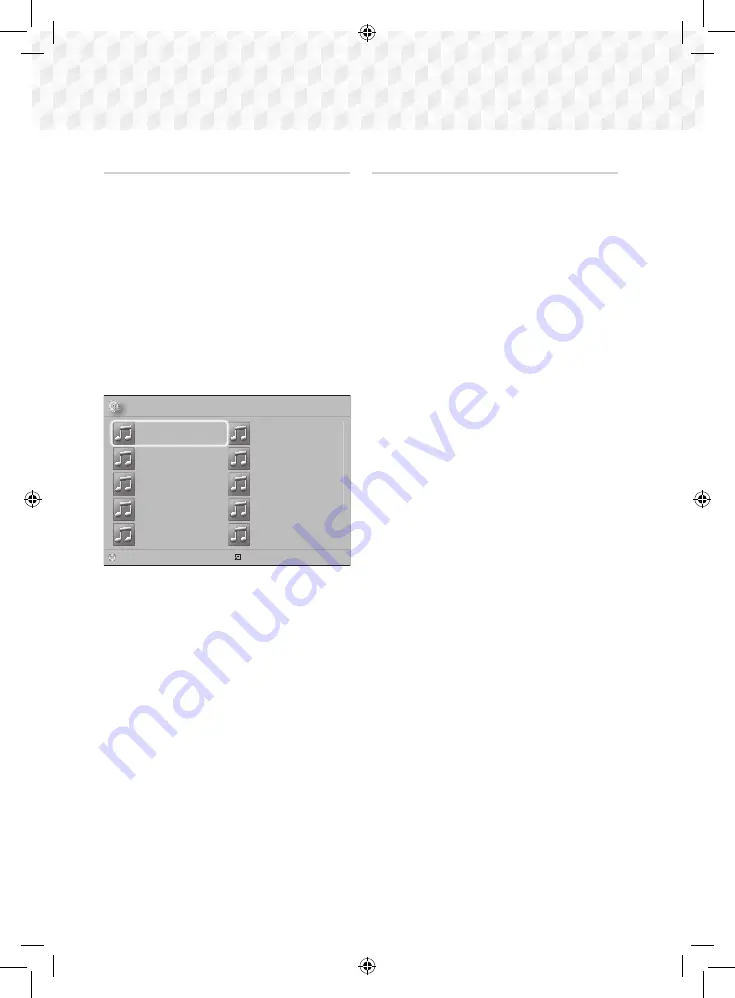
Creating a Music Playlist
1.
If you are playing music from a commercial CD
or DVD, press the
5
or
RETURN
button. The
Music List Screen appears. If you are creating
a playlist from music on a user created disk or
USB device, access the Music list as described
on page 27 or 28.
2.
Press the ▲▼◄► buttons to move to a desired
file, and then press the
YELLOW (C)
button
to select it. Repeat this procedure to select
additional files.
3.
If you want to select all files, press the
TOOLS
button, use the ▲▼ buttons to select
Select All
,
and then press
v
. If you want to deselect all
files, press the
TOOLS
button, select
Deselect
All
, and then press
v
.
✓
CD
a
Change Device
c
Select
Tools
()
Jump Page
'
Return
MUSIC
TRACK 001
1 file selected 1/2 Page
TRACK 001
05:57
TRACK 002
04:27
TRACK 003
04:07
TRACK 004
03:41
TRACK 005
03:17
TRACK 006
03:35
TRACK 007
03:47
TRACK 008
03:49
TRACK 009
03:53
TRACK 010
03:45
4.
To remove a file from the
Playlist
, move to the
file, and then press the
YELLOW (C)
button.
5.
Press the
v
button to play the selected files.
The
Playlist
screen appears.
6.
To go to the Music List, press the
5
or
RETURN
button.
7.
To go back to the
Playlist
, press the
v
button.
✎
You can create a playlist with up to 99 tracks on
Audio CDs (CD-DA).
✎
If you go to the Music List from the
Playlist
, and
then return to the
Playlist
, the
Playlist
will start
playing again from the beginning.
Ripping
1.
Insert a USB device into the USB jack on the
front of the product.
2.
With the Playback screen displayed, use the ▲▼
buttons to select a track, and then press the
YELLOW (C)
button. A check appears to the left
of the track.
3.
Repeat Step 2 to select and check additional
tracks.
4.
To remove a track from the list, move to the
track, and then press the
YELLOW (C)
button
again. The check on the track is removed.
5.
When done, press the
TOOLS
button.
The
Tools
menu appears.
6.
Use the ▲▼ buttons to select
Rip
, and then
press the
v
button. The
Rip
screen appears.
7.
Use the ▲▼ buttons to select the device to
store the ripped files on, and then press the
v
button.
✎
Do not disconnect the device while ripping is in
progress.
8.
If you want to cancel ripping, press the
v
button, and then select
Yes
. Select
No
to
continue ripping.
9.
When ripping is complete, the "
Ripping is
completed.
" message appears.
10.
Press the
v
button to go back to the Playback
screen.
✎
This function is not available for DTS Audio CDs.
✎
This function may not be supported by some
discs.
✎
Ripping encodes music in the .mp3 format at
192kbps.
✎
On the Track list screen, you can choose
Select
All
or
Deselect All
.
- Use
Select All
to select all tracks, and then
press the
v
button. This cancels your
individual track selections.
- Use
Deselect All
to deselect all selected tracks
at once.
02831P-HT-J5500K_J5530K_J5550K(W)-ZK-ENG-0224.indd 32
2015/3/12 15:34:00


