background image

26

  English


Settings

7. 

Select the 

IP Setting

 field, and then set it to 

Enter 

manually

.

8. 

Select a network value to enter (IP Address, for 
example), and then press 

button. Use the 

number keypad on your remote control to enter the 
numbers for the value. You can also enter numbers 
using the ▲▼ buttons. Use the ◄► buttons on the 
remote control to move from entry field to entry field 
within a value. When done with one value, press the 

E

 button.

9. 

Press the ▲ or ▼ button to move to another value, 
and then enter the numbers for that value following 
the instructions in Step 8. 

10. 

Repeat Steps 8 and 9 until you have filled in all 
values.

| NOTES |


You can get the Network values from your Internet 
provider.

11. 

When finished, select 

OK

, and then press the 

E


button. The Security Screen appears.

12. 

On the Security screen, enter your network's 
Security Code or Pass Phrase. Enter numbers 
directly using the number buttons on your remote 
control. Enter letters by selecting a letter with the 
▲▼◄► buttons, and then pressing the 

E

 button.

13. 

When finished, select 

Done

 at the right of the 

screen, and then press the 

E

 button. The product 

verifies the network connection and then connects 
to the network.

14. 

After the home theater verifies the network, select 

OK

, and then press the 

E

 button.

| NOTES |


You can also begin the Manual Network setting by 
going to 

Settings >Network > Network Status

.


WPS(PBC)

One of the easiest ways to set up the wireless network 
connection is using the WPS(PBC) function. If your 
wireless router has a WPS(PBC) button, follow these 
steps:

After following Steps 1 to 3 in "Configuring Your Network 
Connection" on page 24:

1. 

In the Network Settings screen, change 

Network 

type

 to 

Wireless

. The product searches for and 

then displays a list of the available networks.

2. 

Scroll the list down, select 

WPS(PBC)

, and then 

press the 

E

 button.

3. 

Press the 

WPS(PBC)

 button on your router within 

two minutes. Your product automatically acquires all 
the network settings values it needs and connects 
to your network.
The product connects to the network after the 
network connection is verified.

4. 

When it is done, highlight 

OK

, and then press 

E


button.

| NOTES |


For WPS connection, set your wireless router’s 
security encryption to AES. Setting to WEP security 
encryption does not support WPS connection.

Wi-Fi Direct

The Wi-Fi Direct function allows you to connect Wi-Fi 
Direct devices to the product and each other using a 
peer-to-peer network, without a wireless router.

| NOTES |


Some Wi-Fi Direct devices may not support the 
AllShare function if connected via Wi-Fi Direct. If this is 
the case, change the network connection method you 
used to connect the device to the home theater.


Wi-Fi Direct transmissions can interfere with the 
Bluetooth signal. Before you use the Bluetooth 
function, we strongly recommend that you turn off 
the Wi-Fi Direct function on any device in which it is 
currently on.

1. 

Turn on the Wi-Fi direct device and activate its Wi-Fi 
Direct function.

2. 

In the Home screen, select 

Settings

, and then 

press the 

E

 button.

3. 

Select 

Network

, and then press the 

E

 button.

4. 

Select 

Wi-Fi Direct

, and then press the 

E

 button. 

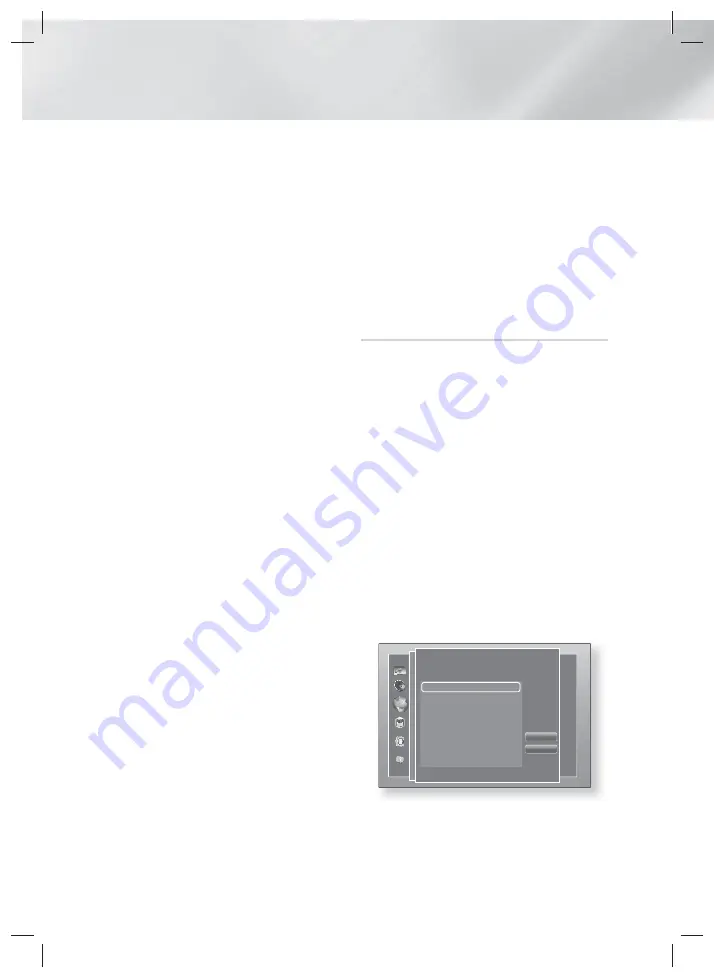
The Wi-Fi Direct devices that you can connect 
appear.

Refresh

Close

Wi-Fi Direct

Device Name : [HTS]F6550W

Select your Wi-Fi Direct device to connect to.

AndroidXXXXXXX

Disconnected

5. 

You have three ways to complete the Wi-Fi 
connection:

•  Through the Wi-Fi device.

•  Through the product using PBC.

•  Through the product using a PIN.

Each is covered below.

HT-F6550W_XP_0702.indd   26

HT-F6550W_XP_0702.indd   26

2013-07-02   오후 3:31:29

2013-07-02   오후 3:31:29

Содержание HT-F6550W

Страница 1: ...msung product To receive more complete service please register your product at www samsung com register 5 1CH Blu ray Home Entertainment System user manual HT F6550W HT F6550W_XP_0702 indd 1 HT F6550W_XP_0702 indd 1 2013 07 02 오후 3 30 35 2013 07 02 오후 3 30 35 ...

Страница 2: ...ABLE PARTS ARE INSIDE REFER SERVICING TO QUALIFIED SERVICE PERSONNEL CAUTION RISK OF ELECTRIC SHOCK DO NOT OPEN This symbol indicates dangerous voltage inside the product that presents a risk of electric shock or personal injury CAUTION TO PREVENT ELECTRIC SHOCK MATCH WIDE BLADE OF PLUG TO WIDE SLOT FULLY INSERT This symbol indicates important instructions accompanying the product CLASS 1 LASER PR...

Страница 3: ...off the power switch immediately and disconnect the power plug from the wall outlet Then contact the nearest customer service center for technical assistance Do not use the product Using the product as it is may cause a fire or an electric shock License Manufactured under license from Dolby Laboratories Dolby Pro Logic and the double D symbol are trademarks of Dolby Laboratories Manufactured under...

Страница 4: ...3D TV remove the 3D Active Glasses and rest Watching 3D images for an extended period of time may cause eye strain If you feel eye strain stop viewing 3D TV remove your 3D Active Glasses and rest A responsible adult should frequently check on children who are using the 3D function If there are any reports of tired eyes headaches dizziness or nausea have the child stop viewing 3D TV and rest Do not...

Страница 5: ...g Photo Contents 39 Listening to Radio 39 Using the Special Effects Remote Control Buttons NETWORK SERVICES 41 Logging In to Your Samsung Account 41 Before Using Movies TV Shows or Apps 42 Using Movies TV Shows 42 Using Apps 46 Screen Mirroring 46 Using the Web Browser 49 Linking your Internet Service Accounts to the Product 49 BD LIVE APPENDIX 50 Additional Information 53 Troubleshooting 56 Speci...

Страница 6: ...t ratio adjustment Information about the discs is written in detail on the disc box Please refer to this if necessary When you play a BD J title loading may take longer than a normal title or some functions may perform slowly Disc Types your Product cannot Play HD DVD DVD ROM PD MV Disc etc DVD RAM Super Audio CD except CD layer DVD RW VR mode CVD CD ROM CDV CD G CD I LD CD Gs play audio only not ...

Страница 7: ...ssia Central and South Asia DVD VIDEO 1 The U S U S territories and Canada 2 Europe Japan the Middle East Egypt Africa Greenland 3 Taiwan Korea the Philippines Indonesia Hong Kong 4 Mexico South America Central America Australia New Zealand Pacific Islands Caribbean 5 Russia Eastern Europe India North Korea Mongolia 6 China NOTES If the Region number of a Blu ray Disc DVDs does not correspond to t...

Страница 8: ...rts BD MVC Spec Only Audio decoder Supports WMA 10 Pro Up to 5 1 Does not support WMA lossless audio Supported ADPCM IMA MS Does not support ADPCM A Law μ Low Does not support QCELP AMR NB WB Supports vorbis Up to 2ch Supports Dolby Digital Plus Up to 7 1ch Comments MPEG4 Supports up to GMC 1 Warping Point H 264 Supports up to BP MP HP Level 4 1 WMV Supports V9 VC1 SP MP AP L3 MPEG1 Does not suppo...

Страница 9: ... FAT 32 and NTFS file systems Connect USB devices directly to the product s USB port Connecting through a USB cable may cause compatibility problems Inserting more than one memory device into a multi card reader may cause the reader to operate improperly The product does not support the PTP protocol Do not disconnect a USB device during a loading process The bigger the image resolution the longer ...

Страница 10: ...ny Corporation NOTES Some AVCHD format discs may not play depending on the recording conditions AVCHD format discs need to be finalized x v Color offers a wider color range than normal DVD camcorder discs Some MKV and MP4 format discs may not play depending on their video resolution and frame rate Accessories Check for the supplied accessories below FUNCTION DISC MENU TITLE MENU MUTE TV SOUND FULL...

Страница 11: ...ernet service or play the USB device contents on the TV you cannot select the BD DVD mode with the FUNCTION button Stop the playing contents on the TV first to select the BD DVD mode Rear Panel HDMI OUT HDMI IN 1 2 LAN POWER SPEAKERS OUT CENTER SUBWOOFER FRONT L FRONT R IMPEDANCE 3 AUX IN FM ANT OPTICAL DIGITAL AUDIO IN L R COOLING FAN SPEAKER OUTPUT CONNECTORS HDMI IN AUX IN FM ANTENNA POWER CORD...

Страница 12: ...ools menu Press to use Smart Hub Selects the disc Audio language To change to Television mode and control the TV press the TV button Press to stop play a disc Press to search contents Press to select MANUAL PRESET in the Tuner function Set a Sleep time to shut off the product Press to select the home theater s mode HDMI1 AUX BD DVD etc or Press to select TV s video mode Select MONO or STEREO for r...

Страница 13: ...5 Anam 01 02 03 04 05 06 07 08 09 10 11 12 13 14 AOC 01 18 40 48 Bell Howell M Wards 57 58 81 Brocsonic 59 60 Candle 18 Cetronic 03 Citizen 03 18 25 Cinema 97 Classic 03 Concerto 18 Contec 46 Coronado 15 Craig 03 05 61 82 83 84 Croslex 62 Crown 03 Curtis Mates 59 61 63 CXC 03 Daewoo 02 03 04 15 16 17 18 19 20 21 22 23 24 25 26 27 28 29 30 32 34 35 36 48 59 90 Daytron 40 Dynasty 03 Emerson 03 15 40...

Страница 14: ...he front face of the front speakers with the front face of the center speaker or place them slightly in front of the center speakers Center Speaker It is best to install the Center Speaker at the same height as the front speakers You can also install it directly over or under the TV Surround Speakers Place these speakers to the side of your listening position If there isn t enough room place these...

Страница 15: ...ab b Press down the black tab on the back of the speaker insert the black wire and then release the tab 3 Connect the speaker wire plugs from each speaker to the back of the product by matching the colors of the speaker plugs to the colors of the speaker jacks 4 Connect the left and right surround speakers to the wireless receiver module Again match the color of the plugs to the jacks on the wirel...

Страница 16: ...lace a speaker near your TV set the screen color may be distorted because of the magnetic field Place the wireless receiver module at the rear of the listening position If the wireless receiver module is too close to the product sound from the speakers may be disrupted because of interference If you use a device such as a microwave oven wireless LAN Card Bluetooth equipment or any other device tha...

Страница 17: ...f the product to the HDMI OUT jack on your digital device Select the HDMI1 or HDMI2 mode Method 2 AUX IN Connecting an External Analog Component Using a RCA audio cable not supplied connect the AUDIO In jack on the product to the AUDIO Out jack on the external analog component Select the AUX mode Be sure to match the colors on the cable plugs to the colors on the input and output jacks Method 3 OP...

Страница 18: ...dband service Wireless IP sharer NOTES If your wireless IP router supports DHCP this product can use a DHCP or static IP address to connect to the wireless network Set your wireless IP router to Infrastructure mode Ad hoc mode is not supported The product supports only the following wireless security key protocols WEP OPEN SHARED WPA PSK TKIP AES WPA2 PSK TKIP AES Select a channel on the wireless ...

Страница 19: ...ication 4 Apps Download Access various for pay or free of charge applications 5 Photos Videos Music Play photos videos or music content from Disc USB PC or mobile devices 6 Settings Set various functions to suit your personal preferences 7 RED A Press the RED A button on your remote to create and or log in to your personal Samsung account BLUE D Set up the Screen Mirroring function between the hom...

Страница 20: ...inter connectivity feature When you connect a Samsung product and a Samsung TV with BD Wise to each other via HDMI and BD Wise is on in both the product and TV the product outputs video at the video resolution and frame rate of the Blu ray DVD Disc Resolution Lets you set the output resolution of the HDMI video signal to BD Wise Auto 1080p 1080i 720p 480p The number indicates the number of lines o...

Страница 21: ...io Return Channel Lets you direct the sound from the TV to the Home Theater speakers Requires an HDMI connection and an Audio Return Channel ARC compatible TV If Audio Return Channel is set to on and you are using an HDMI cable to connect the product to the TV digital optical input will not work If Audio Return Channel is set to auto and you are using an HDMI cable to connect the product to the TV...

Страница 22: ...Apps Settings Lets you configure App notification settings and view basic info about your Apps Push Notification Settings Receive notifications from selected services Properties See basic info about Apps VOD Rating Lock You can lock access to Video on Demand VOD content based on its rating NOTES The default security PIN is 0000 Depending on your country this menu function may not be supported Term...

Страница 23: ... zone Front Display Lets you change the brightness of the front panel Time Zone You can specify the time zone that is applicable to your area Menu Transparency Adjust the transparency of the menu box Anynet HDMI CEC Anynet is a convenient function that offers linked operations with other Samsung products that have the Anynet feature and lets you control those products with one Samsung TV remote To...

Страница 24: ...e instructions for Wireless networks starting on page 25 Wired Network Wired Automatic After following Steps 1 to 3 above 1 In the Network Settings screen change Network type to Wired Then select Connect and press the E button The product detects the wired connection verifies the network connection and then connects to the network 2 When it is done highlight OK and then press E button Wired Manual...

Страница 25: ...d be able to find the security code or pass phrase on one of the set up screens you used to set up your router or modem Wireless Manual If you have a static IP address or the Automatic procedure does not work you ll need to set the Network Settings values manually After following Steps 1 to 3 in Configuring Your Network Connection on page 24 1 In the Network Settings screen change Network type to ...

Страница 26: ...s The product searches for and then displays a list of the available networks 2 Scroll the list down select WPS PBC and then press the E button 3 Press the WPS PBC button on your router within two minutes Your product automatically acquires all the network settings values it needs and connects to your network The product connects to the network after the network connection is verified 4 When it is...

Страница 27: ...ate menu allows you to upgrade the product s software for performance improvements or additional services Never turn the product off or back on manually during the update process 1 In the Home menu select Settings and then press the E button 2 Select Support and then press the E button 3 Select Software Update and then press the E button 4 To download update software and update now select Update n...

Страница 28: ...enter the model number a drop down will display products that match the model number 4 Left click your product s model number in the drop down list 5 On the page that appears scroll down to and then click Firmware Manuals Downloads 6 Click Firmware in the center of the page 7 Click the ZIP button in the File column on the right side of the page 8 Click Send in the first pop up that appears Click O...

Страница 29: ...ay or view multimedia files located on a USB device through your product Method 1 1 Turn the product on 2 Connect the USB device to the USB port on the front panel of the product The New Device Connected pop up appears Movies TV Shows Apps Photos Videos Music Apps Phot Vide Mus Apps Phot o i Photos Videos Music All Content New device connected USB Flash Disk Add App Add App Add App Web Browser Set...

Страница 30: ...ted pop up appears 2 Use the buttons to select the type of content you want to view or play Photos Videos or Music and then press the E button NOTES Even though the product will display folders for all content types it will only display files of the Content Type you selected in Step 2 For example if you selected music you will only be able to see music files You can change this selection by return...

Страница 31: ... product your PC and your DLNA compatible cellular phone to the same wireless network 2 Follow the directions in the AllShare software Installation Instruction manual to set up devices and files for playing or viewing 3 On your computer using the AllShare software confirm your phone is connected 4 On the phone select the file you want to view or play and then select the home theater system as the ...

Страница 32: ...creen may not display Repeat A B immediately Continue to press the buttons until Repeat A B is inside the applicable field You must set point B at least 5 seconds of playing time after point A Using the TOOLS Menu During playback press the TOOLS button Play from the Beginning Select to return to the beginning of the movie and then press the E button 3D Use 3D menu to select Side by Side or Top Bot...

Страница 33: ...arpness and noise reduction function respectively NOTES When you use the BD wise function this menu will not appear Equalizer Mode Select to use the Equalizer Equalizer Settings Select to set the Equalizer NOTES It only appears when equalizer mode is on Audio Select to set the desired audio language Audio Sync In some cases when the product is connected to a digital TV the audio signal may not syn...

Страница 34: ...ou are viewing video files on a USB flash drive a PC a disc you recorded yourself or a mobile device They are usually not available if you are viewing a commercial Blu ray DVD or CD disc Controlling Music Playback You can control the playback of music content located on a DVD CD USB mobile device or PC Depending on the disc or contents some of the functions described in this manual may not be avai...

Страница 35: ...ge device Options Play Selected Play Selected lets you create a playlist by selecting specific files to play It works essentially the same way for all media See Creating a Playlist on an Audio CD on the next page Send Select Send to upload selected files to apps Picasa Facebook etc or devices To use Send you need to establish an account with the on line site and then log in using the Log In functi...

Страница 36: ...ll to deselect all selected tracks at once Then select individual tracks or use Select All to select all the tracks and then press the RETURN button on your remote or select Play and then press the E button If you do not use Select All or select individual tracks the Playlist will not change Cancel cancels any changes you made on the Play Select screen When you return to the Playback screen the Pl...

Страница 37: ...play the BT message 2 Select the Bluetooth menu on the Bluetooth device you want to connect For instructions refer to the Bluetooth device s manual 3 Select the Stereo headset menu on the Bluetooth device You will see a list of devices 4 Select HTS Fxxxxx from the searched list When the Home Theater is connected to the Bluetooth device the device name of the connected Bluetooth device followed by ...

Страница 38: ...ed Select to set a slide show s speed Effects Select to set a slide show s special effects Zoom Select to enlarge the current picture Enlarge up to 4 times Rotate Select to rotate the picture This will rotate the picture either clockwise or counter clockwise Background Music Select to listen to music while viewing a slide show Settings Picture Mode Dynamic Choose to increase Sharpness Standard Cho...

Страница 39: ...to automatically search the band Setting Mono Stereo Press the MO ST button Each time you press the button the sound switches between STEREO and MONO In a poor reception area select MONO for a clear interference free broadcast Presetting Stations Example Presetting FM 89 10 into memory 1 Press the FUNCTION button to select FM 2 Press the TUNING CH button to select 89 10 3 Press the TUNER MEMORY bu...

Страница 40: ...hurch Amphitheater Rock Recommended setting for Rock Off Select for normal listening 3D Sound You can enjoy more natural and vivid surround sound with enriched tones by adjusting the depth of sound using the level options Off High Low NOTES 3D Sound is not available in FM mode TV Sound TV SOUND If you have a TV that supports Anynet HDMI CEC the TV SOUND button lets you direct the TV s audio to the...

Страница 41: ...logged in the My Account pop up appears On the pop up you can select Logout Change Account Information Link Service Accounts Remove Accounts from the Device and Deactivate Account To rent movies and purchase for pay apps you must have a credit card registered in your account If you haven t registered a card select Change Account Information On the Change Account information page select Register Ca...

Страница 42: ...w the directions on the screen to start the movie NOTES If you haven t logged into your Samsung account the Log in screen will appear after Step 3 and you will need to log in If you don t have a credit card associated with your Samsung account after you log in the Register Card screen will appear Follow the directions on the screen You must have a credit card registered to your account to rent mov...

Страница 43: ...tegory Each time you move the highlight to another category a different set of applications appears on the right 6 Use the button to move to the applications and the buttons to move from app to app 7 To see more information about an app select it and then press the E button 8 To download the app follow the directions in Steps 2 and 3 Starting an Application 1 Select Apps on the Home screen and the...

Страница 44: ...n the More Apps screen use the buttons to go to Options at the top of the screen and then press the E button 2 Select Edit My Apps and then press the E button The Edit My Apps screen appears 3 Select the app you want to delete from My Apps press the E button and then press the buttons in the direction of the The Remove from My Apps pop up appears 4 Select Yes and then press the E button 5 When you...

Страница 45: ...for the folder When finished select Done on the right side and then press the E button The Rename popup reappears displaying the new name 6 Select OK and then press the E button The folder is renamed 7 Select Close on the right side of the screen and then press the E button Delete Delete lets you delete apps and folders from the My Apps screen If there are apps in a folder both the folder and the ...

Страница 46: ...ser You can access the Internet using the Web Browser application Select Web Browser on the Home screen and then press the E button NOTES When you run the Web Browser with the product connected by HDMI to a BD Wise compatible TV and BD Wise is on the browser is maximized to fill the screen and the TV s resolution is set to the optimal resolution automatically The Web Browser is not compatible with...

Страница 47: ...and then press the E button the keyboard pop up appears E http www samsung com Caps 1 2 3 4 5 6 7 8 9 0 Clear q w e r t y u i o p 123 a s d f g h j k l Done z x c v b n m Cancel ENG www com 4 As you enter characters recommended text will be shown 100 To use the keyboard pop up with your remote follow these steps 1 Use the buttons on your remote to move the highlight to a letter or number of your c...

Страница 48: ...croll bar The Grabber function is only available in Pointer Browsing Approved Sites Lets you restrict your children s access to inappropriate web pages by allowing access only to the web sites you have registered Every time you access Approved Sites the PIN screen appears The first time you access Approved Sites enter the default PIN 0000 using the number buttons on your remote You can change the ...

Страница 49: ... you have logged in press the RED A button on your remote again 3 Select Link Service Accounts in the My Account pop up and then press the E button 4 On the Link Service Accounts screen select the service you want to link to the product and then press the E button 5 Select Register and then press the E button 6 In the ID and Password screen enter the ID you use to log in to the service you selecte...

Страница 50: ...t Digital Output or you will hear no sound or just loud noise If the HDMI device AV receiver TV is not compatible with compressed formats Dolby Digital DTS the audio signal outputs as PCM Regular DVDs do not have BONUSVIEW audio and Navigation Sound Effects Some Blu ray Discs do not have BONUSVIEW audio and Navigation Sound Effects This Digital Output setup does not affect the analog L R audio or ...

Страница 51: ...ish soundtrack Selecting the Subtitle Language Depending on the Blu ray Disc DVD you may be able to change the subtitle language in the Disc Menu Press the DISC MENU button This function depends on the selection of subtitles that are encoded on the disc and may not be available on all Blu ray Discs DVDs Information about the main feature BONUSVIEW mode will also appear if the Blu ray Disc has a BO...

Страница 52: ...y Disc Any Decodes the main feature audio and BONUSVIEW audio stream together into PCM audio and adds Navigation Sound Effects Outputs only the main feature audio stream so that your AV receiver can decode the audio bitstream You will not hear BONUSVIEW audio or Navigation Sound Effects Decodes the main feature audio and BONUSVIEW audio stream together into PCM audio and adds Navigation Sound Effe...

Страница 53: ...e power and then turn it back on Playback does not start Check the region number of the Blu ray DVD disc Blu ray DVD disc purchased from abroad may not be playable CD ROMs and DVD ROMs cannot be played on this product Make sure that the rating level is correct Playback does not start immediately when the Play Pause button is pressed Are you using a deformed disc or a disc with scratches on the sur...

Страница 54: ...9 Full mode 4 3 Letter Box mode or 4 3 Pan Scan mode but 4 3 Blu ray DVD discs are played in 4 3 ratio only Refer to the Blu ray Disc jacket and then select the appropriate function The product is not working Example The power goes out or a strange noise is heard The Product is not working normally Press and hold the remote control s 5 button for 5 seconds in STANDBY mode This will reset the unit ...

Страница 55: ...heck if the network is stable Check if the network cable is properly connected and if the network is not overloaded The wireless connection between the DLNA compatible device and the product is unstable Check the connection The AllShare connection between the product and PC is unstable IP address under the same subnetwork should be unique otherwise IP collision can results in such a phenomenon Che...

Страница 56: ...dance Frequency range Output sound pressure level Rated input Maximum input Dimensions W x H x D mm Weights kg Front 3 140Hz 20kHz 87dB W M 165W 330W 104 0 x 1212 5 x 99 7 Stand base Ф 264 0 3 90 Surround Center 170W 340W 267 0 x 103 0 x 73 5 0 87 Subwoofer 40Hz 160Hz 88dB W M 170 0 x 350 4 x 287 0 3 41 Network speeds equal to or below 10Mbps are not supported Samsung Electronics Co Ltd reserves t...

Страница 57: ...4 www samsung com OMAN 800 SAMSUNG 726 7864 www samsung com ae English www samsung com ae_ar Arabic KUWAIT 183 2255 183 CALL BAHRAIN 8000 4726 QATAR 800 2255 800 CALL EGYPT 08000 726786 www samsung com ALGERIA 0800 100 100 www samsung com n_ africa Area Contact Center Web Site PAKISTAN 0800 Samsung 72678 www samsung com pk TUNISIA 80 1000 12 www samsung com n_ africa JORDAN 0800 22273 06 5777444 w...

Отзывы: