background image

Turkish  

17


|

04

A

yarlar

| NOT |


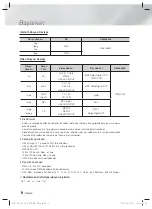
Başlangıç Ayarı ekranını tekrar görüntülemek ve 
değişiklik yapmak istiyorsanız, Sıfırla seçeneğini seçin. 
(Bkz. sayfa 20)


Ürünü (HDMI-CEC) uyumlu bir Samsung 
TV’ye bağlamak için HDMI kablosu kullanıyorsanız 
ve, 1) Hem TV hem de üründe (HDMI-
CEC) özelliğini ON (AÇIK) olarak ayarladıysanız ve 
2) TV'yi ürünün desteklediği bir dile ayarladıysanız, 
ürün otomatik olarak bu dili tercih edilen dil olarak 
seçecektir.

Ana Ekran

5

4

6

2

1

3

Videolar

Uyg 1

Uyg 2

Uyg 3

Uyg 4

Fotolar

Müzik

Ayarlar

Disk Yok 

Cihazı Değiştir


d


Cihazları Göster 

"


Giriş

1

Fotoğrafları Seçer.

2

Videoları Seçer.

3

Müziği Seçer.

4

Ayarları Seçer.

5

Uygulamaları seçer.

6

Kumandadan fonksiyonlara erişmeniz için 
kullanabileceğiniz düğmeleri gösterir.

1. 

Ana ekranda bir seçenek seçmek için, 

▲▼◄►


düğmelerini kullanarak imleci, istediğiniz seçeneği 
vurgulayıncaya kadar hareket ettirin ve sonra 

E


düğmesine basın.

| NOT |


Bilgisayarınızda bulunan videoları, fotoğrafları ve müzik 
dosyalarını oynatmak veya görüntülemek için ev 
sinemanızı ve bilgisayarınızı bir ev ağına bağlamalısınız 
ve DLNA yazılımını bilgisayarınıza indirmeli, kurulumunu 
yapmalı ve yapılandırmalısınız. (Bkz. sayfa 22)

Ayarlar Ekranına Erişme

1. 

Ana ekranda 

Ayarlar

 öğesini seçin ve sonra 

E


düğmesine basın. Ayarlar ekranı görünür.

Ayarlar

Ekran


3D 

Ayarları

Ses 

TV En Boy Oranı 

:  16:9 Orijinal

Ağ 

BD Wise 

:  Kapalı

Sistem 

Çözünürlük 

:  Oto

Dil 

Film Çerçevesi (24 Ç) 

:  Kapalı

Güvenlik 

HDMI Renk Biçimi 

:  Oto 

Genel 

HDMI Deep Color 

:  Kapalı

Destek 

Kademeli Mod 

:  Oto

2. 

Ayarlar ekranında menülere, alt menülere ve 
seçeneklere erişmek için lütfen aşağıda gösterilen 
uzaktan kumanda şekline bakın.

| NOT |


Ürünü kullanmadan 5 dakikadan fazla durdurma 
modunda bırakırsanız, TV'nizde bir ekran koruyucu 
görüntülenir. Eğer ürün ekran koruyucusu modunda 20 
dakikadan fazla kalırsa, otomatik olarak kapanacaktır.

Ayarlar Menüsü için Kullanılan Uzaktan 
Kumanda Düğmeleri

TOOLS

RETURN

EXIT

INFO

SUBTITLE

HOME

REPEAT

TUNER

2

4

3

1

1

HOME

 Düğmesi: Ana ekrana gitmek için bu 

düğmeye basın.

HT-F4500_50_TK_TUR_0530.indd   17

HT-F4500_50_TK_TUR_0530.indd   17

2013-05-30   오후 3:23:51

2013-05-30   오후 3:23:51

Содержание HT-F4550

Страница 1: ...product To receive more complete service please register your product at www samsung com register 5 1CH Blu ray Home Entertainment System user manual HT F4500 HT F4550 HT F4500_50_TK_0530 indd 1 HT F4500_50_TK_0530 indd 1 2013 05 30 오후 3 19 02 2013 05 30 오후 3 19 02 ...

Страница 2: ...LE PARTS ARE INSIDE REFER SERVICING TO QUALIFIED SERVICE PERSONNEL CAUTION RISK OF ELECTRIC SHOCK DO NOT OPEN This symbol indicates dangerous voltage inside the product that presents a risk of electric shock or personal injury CAUTION TO PREVENT ELECTRIC SHOCK MATCH WIDE BLADE OF PLUG TO WIDE SLOT FULLY INSERT This symbol indicates important instructions accompanying the product CLASS 1 LASER PROD...

Страница 3: ...ff the power switch immediately and disconnect the power plug from the wall outlet Then contact the nearest customer service centre for technical assistance Do not use the product Using the product as it is may cause a fire or an electric shock To turn this apparatus off completely you must pull the power plug out of the wall socket Consequently the power plug must be easily and readily accessible...

Страница 4: ...MATION FOR 3D PICTURES Read and understand the following safety information before using the 3D function Some viewers may experience discomfort while viewing 3D TV such as dizziness nausea and headaches If you experience any such symptom stop viewing 3D TV remove the 3D Active Glasses and rest Watching 3D images for an extended period of time may cause eye strain If you feel eye strain stop viewin...

Страница 5: ...ttings Procedure 17 The Home Screen 17 Accessing the Settings Screen 18 Settings Menu Functions 20 Networks and the Internet 21 Upgrading Software 22 Setting Up DLNA MEDIA PLAY 23 Playing Files on a USB Device 23 Playing a Disc with User Recorded Content 24 Playing a Commercial Video Disc 24 Controlling Video Playback 25 Playing a Pre Recorded Commercial Audio Disc 26 Controlling Music Playback 26...

Страница 6: ...d aspect ratio adjustment Information about the discs is written in detail on the disc box Please refer to this if necessary When you play a BD J title loading may take longer than a normal title or some functions may perform slowly Disc Types your Product cannot Play HD DVD DVD ROM PD MV Disc etc DVD RAM Super Audio CD except CD layer DVD RW VR mode CVD CD ROM CDV CD G CD I LD CD Gs play audio on...

Страница 7: ...ast Egypt Africa Greenland 3 Taiwan Korea the Philippines Indonesia Hong Kong 4 Mexico South America Central America Australia New Zealand Pacific Islands Caribbean 5 Russia Eastern Europe India North Korea Mongolia 6 China NOTES If the Region number of a Blu ray Disc DVDs does not correspond to the Region number of this product the product cannot play the disc Logos of Discs the Product can Play ...

Страница 8: ...k is not guaranteed if the file s container information is wrong or the file itself is corrupted Files having a higher bit rate frame rate than standard may stutter during sound video playback The Seek skip function is not available if the file s index table is damaged Video decoder Supports up to H 264 Level 4 1 and AVCHD Does not support H 264 FMO ASO RS and VC1 SP MP AP L4 MPEG4 SP ASP Below 12...

Страница 9: ... with the product Your product supports the FAT 16 FAT 32 and NTFS files systems Connect USB devices directly to the product s USB port Connecting through a USB cable may cause compatibility problems Inserting more than one memory device into a multi card reader may cause the reader to operate improperly The product does not support the PTP protocol Do not disconnect a USB device during a loading ...

Страница 10: ...s on the TV first to select the BD DVD mode Rear Panel HDMI OUT LAN POWER SPEAKERS OUT CENTER SUBWOOFER FRONT L SURROUND L FRONT R SURROUND R SPEAKER IMPEDANCE 3 AUX IN FM ANT OPTICAL DIGITAL AUDIO IN L R EXTERNAL DIGITAL AUDIO IN OPTICAL LAN POWER CORD SPEAKER OUTPUT CONNECTORS AUX IN FM ANT HDMI OUT COOLING FAN Connecting the FM Antenna 1 Connect the FM antenna supplied to the FM ANTENNA Jack 2 ...

Страница 11: ...the product and also several Blu ray Disc functions Press to view the disc menu Press to use the Tools menu Press to play a disc Audio signal can output to home cinema speaker or TV speaker See page 28 Select the desired DSP EQ audio mode Press to stop a disc Cut off the sound temporarily Press to search backwards or forwards Press to pause a disc Allows you to repeat a title chapter track or disc...

Страница 12: ...so that their tweeters will be at the same height as your ear Align the front face of the front speakers with the front face of the centre speaker or place them slightly in front of the centre speakers Centre Speaker It is best to install the Centre Speaker at the same height as the front speakers You can also install it directly over or under the TV Surround Speakers Place these speakers to the s...

Страница 13: ...he appearance after the speaker is installed Follow this steps to install other speaker Connecting The Speakers 1 Match each speaker cable bundle to the correct speaker by matching the colour coded plug on each bundle to the coloured sticker on the bottom of each speaker 2 To attach speaker wire to each speaker a Press down the red tab on the back of the speaker insert the red wire and then releas...

Страница 14: ...ting their hands or alien substances into the duct hole of the subwoofer speaker Do not hang the subwoofer on the wall through the duct hole NOTES If you place a speaker near your TV set the screen colour may be distorted because of the magnetic field Connecting to a Network Router HDMI OUT LAN POWER AUX IN FM ANT OPTICAL DIGITAL AUDIO IN L R SPEAKERS OUT CENTER SUBWOOFER FRONT L SURROUND L FRONT ...

Страница 15: ...e cinema are explained below Method 1 AUX IN Connecting an External Analogue Component Using an RCA audio cable not supplied connect the AUDIO In jack on the product to the AUDIO Out jack on the external analogue component Select the AUX mode Be sure to match the colours on the cable plugs to the colours on the input and output jacks Method 2 OPTICAL Connecting an External Digital Audio Component ...

Страница 16: ...ctures in Pan Scan format that fills the screen but cuts off the left and right sides of the picture and enlarges the middle vertically 5 The Network Wired screen appears If you have a network with dynamic IP addresses and most people do select Auto press the E button and then go to Step 6 If you have a network with static IP addresses we suggest you select Skip by pressing the BLUE D button and t...

Страница 17: ...ocated on your PC you must connect your home cinema and PC to a home network and you must download install and configure the DLNA software on your PC See page 22 Accessing the Settings Screen 1 Select Settings on the Home screen and then press the E button The Settings screen appears E Settings Display 3D Settings Audio TV Aspect Ratio 16 9 Original Network BD Wise Off System Resolution Auto Langu...

Страница 18: ...latest inter connectivity feature When you connect a Samsung product and a Samsung TV with BD Wise to each other via HDMI and BD Wise is on in both the product and TV the product outputs video at the video resolution and frame rate of the Blu ray DVD Disc Resolution Lets you set the output resolution of the HDMI video signal to BD Wise Auto 1080p 1080i 720p 576p 480p The number indicates the numbe...

Страница 19: ...ing you hear the original sound On Turns dynamic range control on for all three Dolby formats Quieter sounds are made louder and the volume of loud sounds is reduced Audio Sync When the product is attached to a digital TV lets you adjust the audio delay so that the audio syncs with the video You can set the delay between 0 and 300 milliseconds Downmixing Mode Lets you select the multi channel down...

Страница 20: ...etwork based applications and functions such as BD LIVE and upgrade the product s software through the network connection Configuring Your Network Connection Before you begin contact your ISP to find out if your IP address is static or dynamic If it is dynamic we recommend you use the Automatic procedure below If it is static you must use the Manual procedure that follows Before you begin confirm ...

Страница 21: ...t and then press the E button 3 Select Software Upgrade and then press the E button 4 Select one of the following methods By Online By USB Auto Upgrade Notification 5 Press the E button Directions for each method begin below NOTES The update is complete when the product turns off after restarting Press the POWER button to turn on the updated product for your use Never turn the product on or off ma...

Страница 22: ...ress the POWER button to turn on the product NOTES The update is complete when the product turns off after restarting Press the POWER button to turn on the updated product for your use Never turn the product on or off manually during the update process Samsung Electronics shall take no legal responsibility for product malfunction caused by unstable of Internet connection or consumer negligence dur...

Страница 23: ...ct a file to play or view and then press the E button NOTES 3D file playback is not supported To prevent possible damage to the USB memory you must remove the USB storage device safely using the Safely Remove USB function Press the HOME button to move to the Home menu select the YELLOW C button and then press the E button Playing a Disc with User Recorded Content You can play multimedia files you ...

Страница 24: ...r 2 button Each time you press 1 or 2 button the disc moves to the previous or next chapter or file 2 Using the disc menu title menu popup menu and title list DISC MENU During playback press this button to display the Disc menu TITLE MENU During playback press this button to display the Title menu If your disc has a playlist press the GREEN B button to go to the playlist POPUP MENU During playback...

Страница 25: ...on Menu that appears only when a file plays Full Screen Select to set the desired full screen size You can select Original Mode1 larger and Mode2 largest Information Check the video file s information NOTES Depending on the disc or storage device the Tools menu may differ All options may not be displayed Creating a Video Playlist You can create a playlist of video files in a way that is nearly ide...

Страница 26: ... to move to the desired file and then press the YELLOW C button to select it Repeat this procedure to select additional files Music TRACK 002 2 files selected 1 2 Page TRACK 001 05 57 TRACK 002 04 27 TRACK 003 04 07 TRACK 004 03 41 TRACK 005 03 17 TRACK 006 03 35 TRACK 007 03 47 TRACK 008 03 49 TRACK 009 03 53 TRACK 010 03 45 TRACK 004 TRACK TRACK 002 002 04 27 CD Select Jump page Return 3 To remo...

Страница 27: ...UP DOWN button to select 89 10 3 Press the TUNER MEMORY button NUMBER flashes on the display 4 Press the TUNER MEMORY button again Press the TUNER MEMORY button before NUMBER disappears from the display on its own After you press the TUNER MEMORY button NUMBER disappears from the display and the station is stored in memory 5 To preset another station repeat steps 2 to 4 To tune in to a preset stat...

Страница 28: ...Y PTY SEARCH PTY RDS DISPLAY TA 4 5 6 1 Press the PTY SEARCH button while listening to an FM station 2 Press the PTY or PTY button until the PTY code you want appears on the display The display gives you the PTY codes described to the right 3 Press the PTY SEARCH button again while the PTY code selected in the previous step is still on the display The centre unit searches 15 preset FM stations sto...

Страница 29: ...gh your home cinema Follow the directions in the DLNA user s guide to setup DLNA on your PC and to tag folders and files you want to share with the home cinema To access and play files located on your PC after you have setup DLNA follow these steps 1 Turn on your PC your TV and the home cinema 2 Make sure the DLNA Shared server is running on your PC 3 On your home cinema press the BLUE D button Vi...

Страница 30: ...TV is not compatible with compressed formats Dolby Digital DTS the audio signal outputs as PCM Regular DVDs do not have BONUSVIEW audio and Navigation Sound Effects Some Blu ray Discs do not have BONUSVIEW audio and Navigation Sound Effects This Digital Output setup does not affect the analogue L R audio or HDMI audio output to your TV It affects the optical and HDMI audio output when your product...

Страница 31: ...DISC MENU button This function depends on the selection of subtitles that are encoded on the disc and may not be available on all Blu ray Discs DVDs Information about the main feature BONUSVIEW mode will also appear if the Blu ray Disc has a BONUSVIEW section This function changes both the primary and secondary subtitles at the same time The total number of primary and secondary subtitles are disp...

Страница 32: ...fects Outputs only the main feature audio stream so that your AV receiver can decode the audio bitstream You will not hear BONUSVIEW audio or Navigation Sound Effects Decodes the main feature audio and BONUSVIEW audio stream together into PCM audio and adds Navigation Sound Effects then re encodes the PCM audio into DTS bitstream Decodes the main feature audio and BONUSVIEW audio stream together i...

Страница 33: ...off the power and then turn it back on Playback does not start Check the region number of the Blu ray DVD disc A Blu ray DVD disc purchased from abroad may not be playable CD ROMs and DVD ROMs cannot be played on this product Make sure that the rating level is correct Playback does not start immediately when the Play Pause button is pressed Are you using a deformed disc or a disc with scratches on...

Страница 34: ...l reset the unit Using the RESET function will erase all stored settings Do not use this unless necessary You have forgotten the rating level password With no disc in the product press and hold the product s 5 button for longer than 5 seconds INIT appears on the display and all settings will return to the default values Then press the POWER button Using the RESET function will erase all stored set...

Страница 35: ...que otherwise IP collision can results in such a phenomenon Check if you have a firewall enabled If so disable the firewall function BD LIVE I cannot connect to the BD LIVE server Test whether the network connection is active by using the Network Status function Check whether a USB memory device is connected to the product The memory device must have at least 1GB of free space to accommodate the B...

Страница 36: ... 720p 576p 480p Audio PCM multichannel audio Bitstream audio PCM audio Amplifier Front speaker output 80W x 2 3 Centre speaker output 80W 3 Surround speaker output 80W x 2 3 Subwoofer speaker output 100W 3 Frequency response Analogue input 20Hz 20kHz 3dB Digital input 20Hz 40kHz 4dB S N Ratio 70dB Channel separation 60dB Input sensitivity AUX 500mV Specifications HT F4500_50_TK_0530 indd 36 HT F45...

Страница 37: ...5 0 x 1112 0 x 74 5 Stand base 276 x 189 95 0 x 1112 0 x 74 5 Stand base 276 x 189 227 0 x 95 0 x 74 0 155 0 x 300 0 x 285 5 Weights Unit kg HT F4500 0 34 0 34 0 34 3 76 HT F4550 2 70 2 70 0 51 3 76 Network speeds equal to or below 10Mbps are not supported Samsung Electronics Co Ltd reserves the right to change the specifications without notice Weight and dimensions are approximate Design and spec...

Страница 38: ...ler Daha fazla hizmet almak için lütfen ürününüzü www samsung com register adresinde kaydedin 5 1CH Blu ray Ev Eğlence Sistemi kullanma kılavuzu HT F4500 HT F4550 HT F4500_50_TK_TUR_0530 indd 1 HT F4500_50_TK_TUR_0530 indd 1 2013 05 30 오후 3 23 10 2013 05 30 오후 3 23 10 ...

Страница 39: ...ETKİLİ SERVİS PERSONELİNE BAŞVURUN DİKKAT RISK OF ELECTRIC SHOCK DO NOT OPEN Bu sembol ürünün içinde elektrik çarpması veya yaralanma riski teşkil eden tehlikeli voltaj bulunduğunu ifade eder DİKKAT ELEKTRİK ÇARPMASINI ÖNLEMEK İÇİN FİŞİN GENİŞ UCUNU GENİŞ YUVAYLA EŞLEŞTİRİN VE TAMAMEN TAKIN Bu sembol ürünle birlikte verilen önemli talimatları belirtir CLASS 1 LASER PRODUCT KLASSE 1 LASER PRODUKT L...

Страница 40: ...derhal güç düğmesini kapatıp güç kablosunu duvar prizinden çıkarın Sonra teknik yardım için en yakındaki müşteri hizmetleri merkezine başvurun Ürünü kullanmayın Ürünü olduğu haliyle kullanmak yangına veya elektrik çarpmasına yol açabilir Bu cihazı tamamen kapatmak için güç fişini duvardaki prizden çıkarmanız gerekir Dolayısıyla güç fişi her zaman hızla ve kolayca erişilebilir bir noktada olmalıdır...

Страница 41: ...İşlevinin Kullanılması 3D GÖRÜNTÜLERİNE DAİR ÖNEMLİ SAĞLIK VE GÜVENLİK BİLGİLERİ 3D işlevini kullanmadan önce aşağıdaki güvenlik bilgilerini okuyup anlayın Bazı izleyiciler 3D TV izlerken baş dönmesi bulantı ve baş ağrısı gibi rahatsızlıklar yaşayabilirler Buna benzer bir belirti yaşarsanız 3D TV izlemeyi bırakın 3D Aktif Gözlüklerini çıkarın ve dinlenin Uzun süreyle 3D görüntüleri izlemek gözün y...

Страница 42: ...ı Prosedürü 17 Ana Ekran 17 Ayarlar Ekranına Erişme 18 Ayarlar Menüsü İşlevleri 20 Ağlar ve İnternet 21 Yazılımın Yükseltilmesi 22 DLNA yı Kurma ORTAM OYNATMA 23 Bir USB Cihazında Dosyaların Oynatılması 23 Kullanıcı Tarafından Kaydedilen İçeriğe Sahip bir Diskin Oynatılması 24 Ticari bir Video Diskinin Oynatılması 24 Video Oynatmanın Kontrolü 25 Önceden Kaydedilmiş bir Ses Diskinin Çalınması 26 Mü...

Страница 43: ...ilgi disk kutusunun üzerinde bulunmaktadır Lütfen gerektiğinde bu bilgilere başvurun Bir BD J başlığı oynattığınızda yükleme normal bir başlığa göre daha uzun sürebilir veya bazı işlevler yavaşlayabilir Ürününüzün Oynatamayacağı Disk Tipleri HD DVD DVD ROM PD MV Disc vb DVD RAM Süper Ses CD si CD oynatıcı hariç DVD RW VR modu CVD CD ROM CDV CD G CD I LD CD G ler yalnızca ses oynatır grafik oynatma...

Страница 44: ...Grönland 3 Tayvan Kore Filipinler Endonezya Hong Kong 4 Meksika Güney Amerika Orta Amerika Avustralya Yeni Zelanda Pasifik Adaları Karayipler 5 Rusya Doğu Avrupa Hindistan Kuzey Kore Moğolistan 6 Çin NOT Blu ray Disk DVD lerin Bölge numarası bu ürünün Bölge numarasıyla eşleşmiyorsa ürün diski oynatamaz Ürünün Oynatabileceği Disklerin Logoları Blu ray Disk BD LIVE Dolby DTS 3D Blu ray Disk DivX İng...

Страница 45: ...lgisi yanlışsa veya dosyanın kendisi bozuksa normal oynatma garanti edilemez Standarttan daha yüksek bir bit hızı veya kare hızına sahip dosyalar ses video oynatma sırasında tekleyebilir Dosyanın dizin tablosu bozuksa Arama atlama işlevi kullanılmaz Video şifre çözücüsü H 264 Seviyesi 4 1 e kadar ve AVCHD desteklenir H 264 FMO ASO RS ve VC1 SP MP AP L4 desteklenmez MPEG4 SP ASP 1280 x 720 den az M...

Страница 46: ...ilir Ürününüz FAT 16 FAT 32 ve NTFS dosya sistemlerini destekler USB cihazlarını doğrudan ürünün USB bağlantı noktasına bağlayın Bir USB kablosu ile bağlamak uyumluluk sorunlarına yol açabilir Birden fazla bellek cihazını bir çoklu kart okuyucuya takmak okuyucunun doğru çalışmamasına yol açabilir Ürün PTP protokolünü desteklemez Yükleme işlemi sırasında USB cihazının bağlantısını kesmeyin Görüntü ...

Страница 47: ... TV de oynatılan içerikleri durdurun Arka Panel HDMI OUT LAN POWER SPEAKERS OUT CENTER SUBWOOFER FRONT L SURROUND L FRONT R SURROUND R SPEAKER IMPEDANCE 3 AUX IN FM ANT OPTICAL DIGITAL AUDIO IN L R HARİCİ DİJİTAL SES GİRİŞ OPTİK LAN TERMİNALİ GÜÇ KABLOSU HOPARLÖR ÇIKIŞ KONNEKTÖRLERİ AUX GİRİŞİ FM ANTENİ HDMI ÇIKIŞI SOĞUTMA FANI FM Antenini bağlama 1 Birlikte verilen FM antenini FM ANTENİ Jakına ba...

Страница 48: ...sın Araçlar menüsünü kullanmak için bu düğmeye basın Diski oynatmak için basın Ses sinyali ev sineması hoparlörü veya TV hoparlöründen çıkış yapabilir bkz sayfa 28 İstediğiniz DSP EQ ses modunu seçin Diski durdurmak için basın Sesi geçici olarak keser Geriye veya ileriye doğru aramak için basın Diski duraklatmak için basın Bir başlığı bölümü parçayı ya da diski tekrar etmenizi sağlar Açılır menüsü...

Страница 49: ...ükseklikte olacak şekilde ön hoparlörleri yerleştirin Ön hoparlörlerin ön yüzünü orta hoparlörün ön yüzü ile hizalayın veya orta hoparlörlerin biraz önüne yerleştirin Orta Hoparlör Orta Hoparlörü ön hoparlörlerle aynı yükseklikte yerleştirmek en iyisidir Ayrıca doğrudan TV nin üzerine veya altına da kurabilirsiniz Surround Hoparlörler Bu hoparlörleri dinleme konumunuzun yan tarafına yerleştirin Ye...

Страница 50: ...arlör kurulduktan sonraki görünümdür Diğer hoparlörü kurmak için bu adımları uygulayın Hoparlörleri Bağlama 1 Her kablo demetindeki renk kodlu fişi her hoparlörün altında bulunan renkli etiketle eşleştirerek her hoparlör kablosu demetini doğru hoparlörle eşleştirin 2 Hoparlör kablosunu her hoparlöre bağlamak için a Hoparlörün arkasındaki kırmızı tırnağı aşağı bastırın kırmızı kabloyu takın ve sonr...

Страница 51: ...çin subwoofer hoparlörünü çocukların erişemeyeceği bir yere yerleştirin Subwoofer ı duvara kanalından deliğinden tutturarak asmayın NOT TV setinizin yanına bir hoparlör yerleştirirseniz manyetik alan nedeniyle ekran rengi bozulabilir Bir Ağ Yönlendiricisine Bağlanmak HDMI OUT LAN POWER AUX IN FM ANT OPTICAL DIGITAL AUDIO IN L R SPEAKERS OUT CENTER SUBWOOFER FRONT L SURROUND L FRONT R SURROUND R SP...

Страница 52: ...bağlamanın iki yöntemi aşağıda açıklanmıştır Yöntem 1 AUX GİRİŞİ Harici bir Analog Bileşeni Bağlama Bir RCA ses kablosunu ürünle birlikte verilmez kullanarak ürün üzerindeki AUDIO In SES Giriş jakını harici analog bileşeninin SES Çıkış jakına bağlayın AUX modunu seçin Kablo fişlerindeki renklerle giriş ve çıkış jaklarındaki renkleri eşleştirmeye dikkat edin Yöntem 2 OPTİK Harici bir Dijital Ses Bi...

Страница 53: ...am ekran ve 16 9 görüntülerini ekranı dolduran ama görüntünün sol ve sağ yanlarını kesip ortasını dikey olarak genişleten Pan Scan Yatay Kaymalı biçiminde görüntüler 5 Ağ Kablolu ekranı görünür Dinamik IP adresli bir ağınız varsa birçok kişinin vardır Oto öğesini seçin ardından E düğmesine basın ve sonra 6 Adıma gidin Statik IP adresli bir ağınız varsa MAVİ D düğmeye basarak Atla öğesini seçmenizi...

Страница 54: ...ve müzik dosyalarını oynatmak veya görüntülemek için ev sinemanızı ve bilgisayarınızı bir ev ağına bağlamalısınız ve DLNA yazılımını bilgisayarınıza indirmeli kurulumunu yapmalı ve yapılandırmalısınız Bkz sayfa 22 Ayarlar Ekranına Erişme 1 Ana ekranda Ayarlar öğesini seçin ve sonra E düğmesine basın Ayarlar ekranı görünür Ayarlar Ekran 3D Ayarları Ses TV En Boy Oranı 16 9 Orijinal Ağ BD Wise Kapal...

Страница 55: ...g ürünü ile bir Samsung TV yi BD Wise kullanarak HDMI kablosuyla birbirine bağladığınızda ve BD Wise hem üründe hem de TV de açık olduğunda ürün video çıkışını Blu ray DVD Diskin video çözünürlüğü ve kare hızında verir Çözünürlük HDMI video sinyalinin çıkış çözünürlüğünü BD Wise Oto 1080p 1080i 720p 576p 480p olarak ayarlamanızı sağlar Rakam kare başına düşen görüntü satırı sayısını gösterir i ve ...

Страница 56: ...imi için de dinamik aralık kontrolünü açar Daha hafif sesler yükseltilir ve yüksek seslerin gücü azaltılır Ses Senkr Ürün bir dijital TV ye bağlı olduğunda sesin videoyla senkronize olmasını sağlayacak biçimde ses gecikmesini ayarlamanızı sağlar Gecikmeyi 0 ila 300 milisaniye arasında ayarlayabilirsiniz Aşağı karıştırma modu Stereo sisteminizle uyumlu çok kanallı indirgeme yöntemini seçmenizi sağl...

Страница 57: ...lantısı üzerinden yükseltebilirsiniz Ağ Bağlantınızın Yapılandırılması Başlamadan önce IP adresinizin statik mi yoksa dinamik mi olduğunu öğrenmek için ISS nize başvurun Dinamik ise aşağıdaki Otomatik işlemin kullanılmasını tavsiye ederiz IP adresiniz statik ise ondan sonraki Manuel işlemini kullanmanız gerekir Başlamadan önce ürünün bir ağ kablosu üzerinden yönlendiricinize bağlı olduğunu doğrula...

Страница 58: ...ve E düğmesine basın 3 Yazılım Yükseltme öğesini seçin ve sonra E düğmesine basın 4 Aşağıdaki yöntemlerden birini seçin Çevrimiçi olarak USB üzerinden Otomatik Yükseltme Bildirimi 5 E düğmesine basın Her yöntemle ilgili talimatlar aşağıda verilmiştir NOT Güncelleme ürün yeniden başlatıldıktan sonra kapanınca tamamlanacaktır Güncellenen ürünü kullanmak üzere açmak için GÜÇ düğmesine basın Güncellem...

Страница 59: ...atıldıktan sonra kapanınca tamamlanacaktır Güncellenen ürünü kullanmak üzere açmak için GÜÇ düğmesine basın Güncelleme işlemi sırasında ürünü hiçbir zaman manuel olarak kapatmayın veya açmayın Samsung Electronics yazılım yükseltme sırasında İnternet bağlantısındaki sorunlardan veya müşterilerin dikkatsizliğinden kaynaklanan ürün arızaları konusunda hiçbir yasal sorumluluk üstlenmemektedir DLNA yı ...

Страница 60: ...ın ve sonra E düğmesine basın NOT 3D dosya oynatımı desteklenmez USB bellekte meydana gelebilecek olası zararları önlemek için USB depolama cihazını USB Güven Kaldır işlevini kullanarak çıkarmanız gerekir Ana menüye gitmek için HOME düğmesine basın ardından SARI C düğmeye ve sonra da v düğmesine basın Kullanıcı Tarafından Kaydedilen İçeriğe Sahip bir Diskin Oynatılması DVD veya CD disklerine kayde...

Страница 61: ...mesine her bastığınızda disk önceki veya sonraki bölüme veya dosyaya geçer 2 Disk menüsünü başlık menüsünü açılır menüyü ve başlık listesini kullanma DISC MENU Oynatma sırasında Disk menüsünü görüntülemek için bu düğmeye basın TITLE MENU Oynatma sırasında Başlık menüsünü görüntülemek için bu düğmeye basın Diskinizin oynatma listesi bulunuyorsa oynatma listesine gitmek için YEŞİL B düğmeye basın PO...

Страница 62: ...ayarlamak için seçin Sadece dosya oynatıldığında görüntülenen menü Tam Ekran İstenen tam ekran boyutunu ayarlamak için seçin Orijinal Mod 1 daha büyük ve Mod 2 en büyük arasından seçim yapabilirsiniz Bilgi Video dosyasının bilgisini kontrol edin NOT Disk veya depolama cihazına bağlı olarak Araçlar menüsü farklı olabilir Bütün seçenekler görüntülenmeyebilir Video Oynatma Listesi Oluşturma Video dos...

Страница 63: ...k listesine erişin 2 İstenilen dosyaya gitmek için düğmelerine basın ve sonra dosyayı seçmek için SARI C düğmeye basın Başka dosyalar seçmek için de bu işlemi tekrarlayın Müzik TRACK 002 2 dsyrı seçildi 1 2 Sayfa TRACK 001 05 57 TRACK 002 04 27 TRACK 003 04 07 TRACK 004 03 41 TRACK 005 03 17 TRACK 006 03 35 TRACK 007 03 47 TRACK 008 03 49 TRACK 009 03 53 TRACK 010 03 45 TRACK 004 TRACK TRACK 002 0...

Страница 64: ...yonların Önceden Ayarlanması Örneğin 89 10 FM frekansını hafızaya alma 1 FM seçeneğini seçmek için FUNCTION düğmesine basın 2 89 10 frekansını seçmek için TUNING UP DOWN düğmesine basın 3 TUNER MEMORY düğmesine basın Ekranda SAYI yanıp sönmeye başlar 4 TUNER MEMORY düğmesine tekrar basın SAYI ekrandan kaybolmadan önce TUNER MEMORY düğmesine basın TUNER MEMORY düğmesine bastıktan sonra ekrandaki SA...

Страница 65: ...3 PTY PTY SEARCH PTY RDS DISPLAY TA 4 5 6 1 Bir FM istasyonunu dinlerken PTY SEARCH düğmesine basın 2 İstediğiniz PTY kodu ekranda görününceye kadar PTY veya PTY düğmesine basın Ekran sağda açıklanan PTY kodlarını görüntüler 3 Önceki adımda seçilen PTY kodu hala ekrandayken PTY SEARCH düğmesine tekrar basın Orta birim önceden ayarlanmış 15 FM istasyonu arar seçtiğinizi bulduğunda durur ve bu istas...

Страница 66: ...ve dosyaları etiketlemek için DLNA kullanım kılavuzundaki talimatları izleyin DLNA yı kurduktan sonra bilgisayarınızda bulunan dosyalara erişip bunları oynatmak için aşağıdaki adımları izleyin 1 Bilgisayarınızı televizyonunuzu ve ev sinemasını açın 2 DLNA Paylaşımlı sunucunun bilgisayarınızda çalıştığından emin olun 3 Ev sinemanızda MAVİ D düğmeye Cihazları Görüntüle basın 4 Cihaz Listesinde bilgi...

Страница 67: ...sınız HDMI cihazı AV alıcısı TV sıkıştırılmış biçimlerle uyumlu değilse Dolby digital DTS ses sinyali PCM olarak çıkış yapar Olağan DVD lerde BONUSVIEW ses ve Gezinme Ses Efektleri bulunmaz Bazı Blu ray Disklerde BONUSVIEW ses ve Gezinme Ses Efektleri bulunmaz Bu Dijital Çıkış televizyonunuzdaki analog Sol Sağ ses veya HDMI ses çıkışını etkilemez Ürününüz bir AV alıcısına bağlı olduğunda optik ve ...

Страница 68: ...anan altyazıların seçimine bağlı olarak değişir ve bütün Blu ray Disk DVD lerde bulunmayabilir Blu ray Disk te bir BONUSVIEW bölümü varsa ana özellik BONUSVIEW modu hakkında bilgiler de görüntülenecektir Bu işlev aynı anda hem birincil hem de ikincil alt yazıyı değiştirir Birincil ve ikincil altyazının toplam sayısı sırasıyla görüntülenir JPEG dosyalarının oynatılması Tam ekran modunda altyazıyı v...

Страница 69: ...olby Digital Dolby Digital DTS 5 1 kanal PCM e kadar DTS DTS DTS Blu ray Disk için Tanım Herhangi biri Ana özellik sesinin ve BONUSVIEW ses akışının kodunu çözerek PCM ses olarak iletir ve Gezinme Ses Efektleri ekler Yalnızca ana özellik ses akışının çıkışını vererek AV alıcınızın ses veri akışının kodunu çözmesini sağlar BONUSVIEW ses veya Gezinme Ses Efektleri duymazsınız Ana özellik sesinin ve ...

Страница 70: ... kapatıp tekrar açın Oynatma başlamıyor Blu ray DVD diskinin bölge numarasını kontrol edin Yurtdışından alınmış olan Blu ray DVD diskleri oynatılamayabilir CD ROM ve DVD ROM lar bu üründe oynatılamaz Sınıflandırma düzeyinin doğru olduğundan emin olun Oynat Duraklat düğmesine basıldığında oynatma hemen başlamıyor Şekli bozulmuş veya yüzeyinde çizikler olan bir disk mi kullanıyorsunuz Diski silerek ...

Страница 71: ...tlı ayarlar silinir Gerekmedikçe bunu kullanmayın Derecelendirme düzeyi parolasını unuttunuz Üründe disk yokken ürün üzerindeki 5 düğmesini 5 saniyeden uzun bir süre basılı tutun Ekranda INIT yazısı görünür ve tüm ayarlar varsayılan değerlere geri döner Sonra GÜÇ düğmesine basın RESET SIFIRLA işlevi kullanıldığında tüm kayıtlı ayarlar silinir Gerekmedikçe bunu kullanmayın Radyo yayınları alınamıyo...

Страница 72: ...IP çakışması bu gibi durumlara yol açabilir Güvenlik duvarınızın etkin olup olmadığını kontrol edin Etkinse güvenlik duvarını devre dışı bırakın BD LIVE BD LIVE sunucusuna bağlanamıyorum Ağ Durumu işlevini kullanarak ağ bağlantısının başarılı olup olmadığını kontrol edin Ürüne bir USB bellek cihazının bağlı olup olmadığını kontrol edin BD LIVE hizmeti için bellek cihazında en az 1GB boş alan olmas...

Страница 73: ...720p 576p 480p Ses PCM çok kanallı ses Bitstream ses PCM ses Amplifikatör Ön hoparlör çıkışı 80W x 2 3 Orta hoparlör çıkışı 80W 3 Surround hoparlör çıkışı 80W x 2 3 Subwoofer hoparlör çıkışı 100W 3 Frekans yanıtı Analog giriş 20Hz 20kHz 3dB Dijital giriş 20Hz 40kHz 4dB S N Oranı 70 dB Kanal ayırma 60 dB Giriş hassaslığı AUX 500mV Spesifikasyonlar HT F4500_50_TK_TUR_0530 indd 36 HT F4500_50_TK_TUR_...

Страница 74: ...74 5 Stand kaidesi 276 x 189 95 0 x 1112 0 x 74 5 Stand kaidesi 276 x 189 227 0 x 95 0 x 74 0 155 0 x 300 0 x 285 5 Ağırlıklar Birim kg HT F4500 0 34 0 34 0 34 3 76 HT F4550 2 70 2 70 0 51 3 76 10Mbps e eşit veya altında ağ hızları desteklenmez Samsung Electronics Co Ltd bu spesifikasyonları önceden bildirim yapmadan değiştirme hakkını saklı tutar Ağırlık ve boyutlar yaklaşık olarak verilmiştir Ta...

Страница 75: ... ьlkelerinde geзerlidir Ьrьn aksesuarlar veya literatьrde yer alan bu işaret ьrьnьn ve elektronik aksesuarlarının цrn şarj cihazı kulaklık USB kablosu kullanım цmьrlerinin sonunda diğer ev atıklarıyla birlikte atılması gerektiğini belirtir Kontrolsьz atık atılması nedeniyle зevrenin veya insan sağlığının zarar gцrmesini цnlemek iзin lьtfen bu цğeleri diğer atık tьrlerinden ayırın ve malzeme kaynak...

Отзывы: