background image

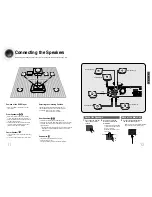
SUBWOOFER

CENTER

IMPEDANCE
FRONT / CENTER / REAR : 4

SUBWOOFER : 4

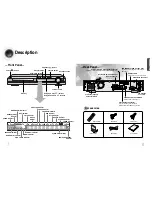
—Rear Panel—

Audio Cable

Video Cable

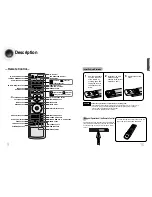
Remote Control 

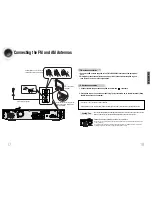
FM Antenna 

User's Manual 

AM Antenna

DSP

P.SCAN

TITLE GRP CHAP

PRGM

TRK

ST

TUNED

kHz

MHz

LINEAR PCM

DVD AUDIO MPEG

L

C

R

SW RR

RL

LS

S

RS

RDS RT

REP.1

TA

DOLBY DIGITAL

indicator 

P.SCAN indicator 

PRO LOGIC indicator

TITLE indicator 

PROGRAM indicator 

RDS indicator 

RT TA indicator 

STEREO indicator 

REPEAT indicator 

CHAPTER indicator 

TRACK indicator 

TUNER indicator 

DSP indicator 

7

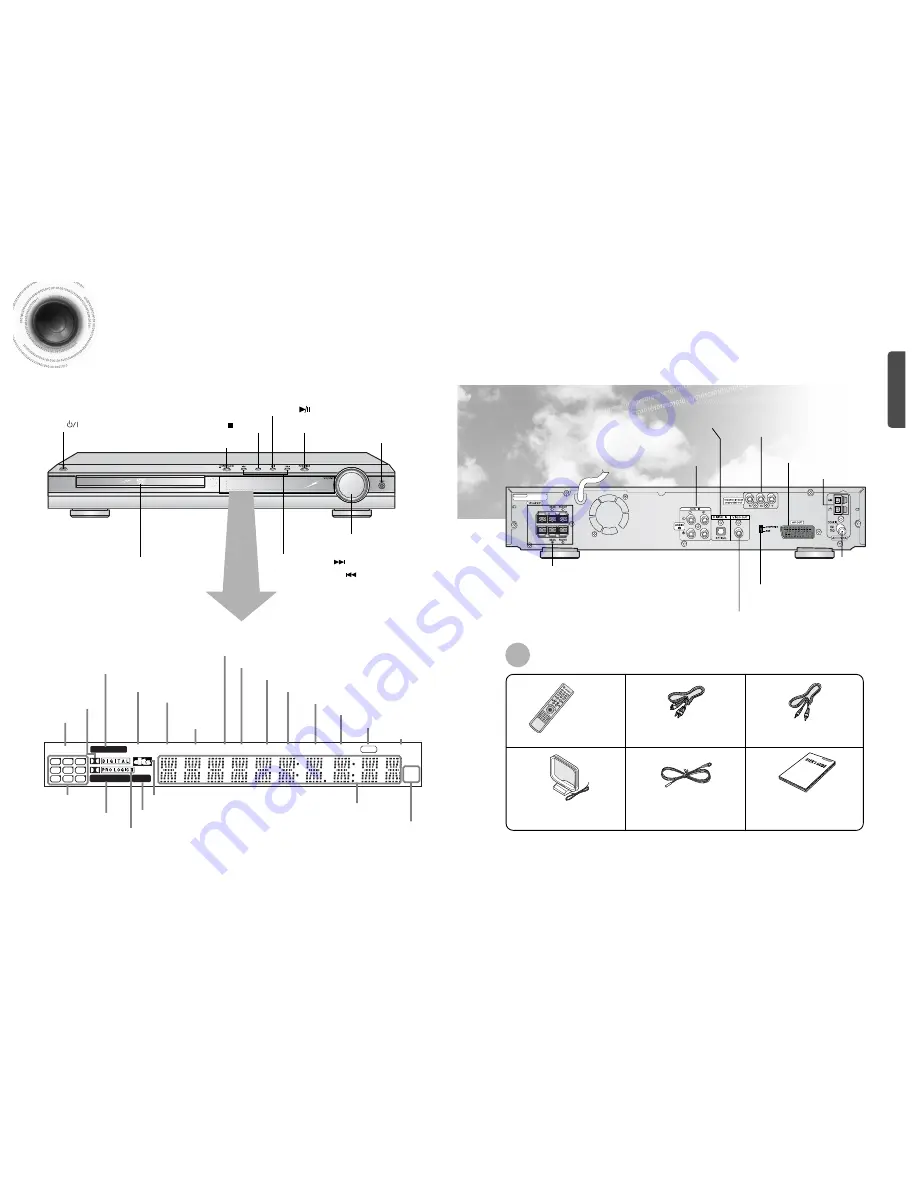
Description

FM Antenna
Connector 

5.1 Channel Speaker

Output Terminals 

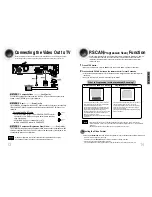
Video Output Connector

Connect the TV's video input jacks 
(VIDEO IN) to the VIDEO OUT connector.

Accessories 

RADIO FREQUENCY

indicator

System Status Display

SPEAKER indicator

DTS Disc indicator

LINEAR PCM indicator

DVD AUDIO indicator

MPEG indicator

GROUP

indicator

PREP

ARA

TION

AM Antenna Connector 

SCART JACK

Connect to a TV with scart input jack.

COMPONENT VIDEO OUTPUT jacks

Connect a TV with component video inputs to
these jacks.

VIDEO OUT SELECT SWITCH

Use the switch to set video out

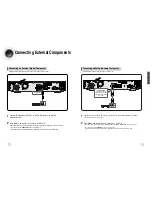
External Digital in Optical Input Connector  

Use this to connect external equipment capable of digital output.

External Audio Component

Input Connector 

—Front Panel—

Power (    ) button

Function button

Disc Tray

Volume control

Headphone Jack

Play/Pause (    ) button 

Tuning Down & Skip (    ) buttons

Tuning Up & Skip (    ) buttons

Stop (    ) button 

Open/Close button

8

Содержание HT-DS420

Страница 1: ... STEP PL II RET URN MENU INFO MU TE MODE ENTER SOUNDEDIT TESTTONE SLEEP LOGO DIGEST SLIDEMODE CANCEL ZOOM REMAIN TUNER MEMORY P SCAN PL II EFFECT VOLUME DSP EQ REPEAT BAND MO ST TV VIDEO MODE DIMMER COMPACT DIGITAL VIDEO Instruction Manual AH68 01490B REV 01 THIS APPLIANCE IS MANUFACTURED BY COMPACT DIGITAL AUDIO AV SYNC NA LC ...

Страница 2: ... operating and maintenance instructions accompanying the unit WARNING To reduce the risk of fire or electric shock do not expose this appliance to rain or moisture CAUTION TO PREVENT ELECTRIC SHOCK MATCH WIDE BLADE OF PLUG TO WIDE SLOT FULLY INSERT Wiring the Main Power Supply Plug UK Only IMPORTANT NOTICE The main lead on this equipment is supplied with a moulded plug incorporating a fuse The val...

Страница 3: ...exceptional sound quality in terms of dynamic range low level resolution and high frequency detail PREPARATION Contents PREPARATION Safety Warnings 1 Precautions 2 Features 3 Notes on Discs 5 Description 7 CONNECTIONS Connecting the Speakers 11 Connecting the Video Out to TV 13 P SCAN Progressive Scan Function 14 Connecting External Components 15 Connecting the FM and AM Antennas 17 Before Using Y...

Страница 4: ...e sound may skip during playback If more than 500 tracks are recorded on a single CD a maximum of 500 tracks can be played If more than 300 folders are recorded on a single CD a maximum of 300 folders can be played DVD Digital Versatile Disc offers fantastic audio and video thanks to Dolby Digital surround sound and MPEG 2 video compression technology Now you can enjoy these realistic effects in t...

Страница 5: ...ect the TV s video input jacks VIDEO IN to the VIDEO OUT connector Accessories RADIO FREQUENCY indicator System Status Display SPEAKER indicator DTS Disc indicator LINEAR PCM indicator DVD AUDIO indicator MPEG indicator GROUP indicator PREPARATION AM Antenna Connector SCART JACK Connect to a TV with scart input jack COMPONENT VIDEO OUTPUT jacks Connect a TV with component video inputs to these jac...

Страница 6: ...ies to heat or flame TV DVD RECEIVER OPEN CLOSE DVD TUNER AUX EZ VIEW NTSC PAL SLOW SUBTITLE STEP PL II R E T U R N MENU INFO M U T E MODE ENTER SOUNDEDIT TESTTONE RDSDISPLAY PTY PTY PTYSEARCH TA SLEEP LOGO DIGEST SLIDEMODE CANCEL ZOOM REMAIN TUNER MEMORY PL II EFFECT VOLUME DSP EQ REPEAT BAND MO ST TV VIDEO MODE DIMMER TUNING CH P SCAN PL II MODE button VOLUME button MENU button TV DVD POWER butt...

Страница 7: ...orner near the front speakers Front Speakers Place these speakers in front of your listening position facing inwards about 45 toward you Place the speakers so that their tweeters will be at the same height as your ear Align the front face of the front speakers with the front face of the center speaker or place them slightly in front of the center speakers Center Speaker It is best to install it at...

Страница 8: ...P button When disc is played back press the STOP button twice so that STOP appears on the display Press and hold P SCAN button on the remote control for over 5 seconds Pressing and holding the button for over 5 seconds will select Progressive Scan and Interlace Scan repetitively When you select P SCAN P SCAN will appear on the display In interlaced scan video a frame consists of two inter laced fi...

Страница 9: ...Analog Component Audio Cable If the external analog component has only one Audio Out connect either left or right 15 CONNECTIONS Press AUX on the remote control to select DIGITAL IN Each time the button is pressed the selection changes as follows DIGITAL IN AUX 1 AUX 2 You can also use the FUNCTION button on the main unit The mode switches as follows DVD CD DIGITAL IN AUX1 AUX2 FM AM Connecting Ex...

Страница 10: ...FM antenna supplied to the FM 75Ω COAXIAL terminal as a temporary mea sure 2 Slowly move the antenna wire around until you find a location where reception is good then fasten it to a wall or other rigid surface If reception is poor connect an outdoor antenna Before attaching a 75Ω coaxial cable with a standard type connector disconnect the supplied FM antenna 1 Connect the AM loop antenna supplied...

Страница 11: ...n To Operate the TV and DVD Player with a Single Remote Control 2 3 Press the MODE button so that the TV indicator on the remote control flashes TV DVDRECEIVER TV DVDRECEIVER Press the POWER button to turn on the TV 5 6 Press the MODE button so that the DVD RECEIVER indicator on the remote control flashes Press DVD button to select DVD CD mode 19 CONNECTIONS Before Using Your DVD Player Your DVD p...

Страница 12: ...k press STOP during playback Note 21 In this manual the instructions marked with DVD are applicable to DVD VIDEO DVD AUDIO and DVD R RW discs Where a particular DVD type is mentioned it is indicated separately Depending on the content of the disc the initial screen may appear different DVD Note Groups and tracks DVD AUDIO DVD audios are divided into several large sections called groups and smaller...

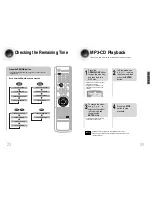
Страница 13: ... OPEN CLOSE button to open the disc tray and then load the MP3 disc 4 Press the STOP button to stop playback To select another album and track repeat Steps 2 and 3 above 3 To change the album use to select another album in Stop mode and then press the ENTER button Checking the Remaining Time Each time the REMAIN button is pressed Press the REMAIN button For checking the total and remaining time of...

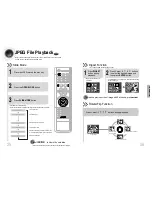
Страница 14: ...ured with a digital camera or camcorder or JPEG files on a PC can be stored on a CD and then played back with this DVD player Slide Mode JPEG 25 Place the JPEG disc on the disc tray Each time the button is pressed the slide moves backward or forward Press to skip to the next slide 1 Playback starts automatically Each image is shown for 5 seconds before another image is displayed Press the OPEN CLO...

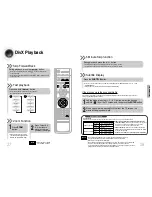
Страница 15: ...ompatibility WMV WMV V1 V2 V3 V7 Screen Size 720 576 MP3 CBR 80kbps 320kbps AUDIO Compatibility AC3 CBR 128kbps 384kbps WMA CBR 56kbps 160kbps 5 Minute Skip function During playback press the button Go to the screen about 5 minutes after whenever you press button Go to the screen about 5 minutes earlier whenever you press button Note Subtitle Display Press the SUBTITLE button 1In Stop mode press t...

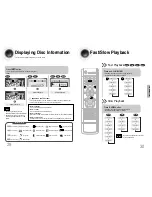
Страница 16: ...sc you can also select DTS DOLBY DIGITAL or PRO LOGIC Note What is a Group A movie contained in a DVD AUDIO disc What is a Title A movie contained in a DVD VIDEO disc What is a Chapter Each title on a DVD disc is divided into several smaller sections called chapters What is a Track File A section of video or a music file recorded on a DVD AUDIO CD or MP3 CD appears on the TV screen If this symbol ...

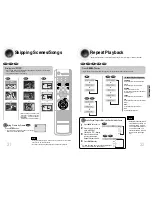
Страница 17: ...G discs you cannot select Repeat Play from the information display screen Press ENTER button 4 DVD VCD CD MP3 JPEG Repeat Playback Options Note Skipping Scenes Songs DVD VCD MP3 DVD DVD VCD MP3 Briefly press Each time the button is pressed briefly during playback the previous or next chapter track or directory file will be played You cannot skip chapters consecutively During fast playback of a CD ...

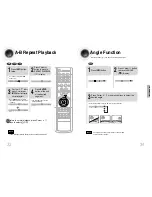
Страница 18: ...tored in memory 3 Press Cursor buttons to select A and then press ENTER button at the beginning of the desired segment To return to normal playback press Cursor buttons to select OFF DVD VCD CD 33 Note OPERATION Angle Function This function allows you to view the same scene in different angles DVD 2 Press Cursor button to move to ANGLE display 1Press INFO button 1 3 Each time the button is pressed...

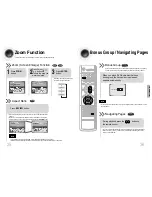
Страница 19: ...mat Black bars may not disappear because some DVD discs have a built in horizontal to vertical ratio 35 Note OPERATION EZ VIEW OFF EZ VIEW SELECT ZOOM POSITION Bonus Group Navigating Pages Some DVD Audio discs have an extra bonus group that requires a 4 digit key number to access See the disc packaging for details and the key number Bonus Group When you play a DVD Audio disc that has a bonus group...

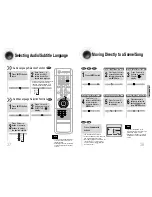
Страница 20: ...5 025 040 1 17 30 1 1 5 Press Cursor buttons to move to time display Moving to a Specific Time Press the numeric buttons You can press on the remote control to move directly to the desired title chapter or track Depending on the disc you may not be able to move to the selected title or time 37 Selecting Audio Subtitle Language Depending on the number of languages on a DVD disc a different audio la...

Страница 21: ...u select the disc menu that is not supported by the disc the This menu is not supported message appears on the screen 1 In Stop mode press MENU button Press Cursor buttons to move to DISC MENU and then press ENTER button 4 Press ENTER button 3 Press Cursor buttons to select the desired item PBC Playback Control Function Press the MENU button while VCD 2 0 version disk is played Each time you press...

Страница 22: ...uage was set to English OSD will be displayed in English 3 Selecting the Subtitle Language recorded on the disc Selecting the Menu Language recorded on the disc Press ENTER button 5 Press Cursor button to select the desired item and then press ENTER button Press Cursor button to select the desired language and then press ENTER button Press RETURN button to return to the previous level Press MENU b...

Страница 23: ...ither 4 3LB or 4 3PS option according to personal preference Select 16 9 if you have a wide screen TV Select this to view a 16 9 picture in the full screen mode on your wide screen TV You can enjoy the wide screen aspect Select this to play a 16 9 picture in the letter box mode on a conventional TV Black bars will appear at the top and bottom of the screen Select this to play a 16 9 picture in the...

Страница 24: ...on Press Cursor button to move to Setup and then press ENTER button 4 The password is set to 7890 by default Once the setup is complete you will be taken to the previous screen If you have selected Level 6 you cannot view DVDs with Level 7 or higher The higher the level the closer the content is to violent or adult material 3 5 Press Cursor button to move to PARENTAL and then press ENTER button Pr...

Страница 25: ...te 3 5 Press RETURN button to return to the previous level Press MENU button to exit the setup screen 47 48 Press Cursor button to move to PASSWORD and then press ENTER button Press ENTER button Enter the password and then press ENTER button SETUP Setting the Password You can set the password for the Parental rating level setting The password is set to 7890 by default Note ...

Страница 26: ...he power will turn off and then back on and the disc tray will open automatically PAUSE COPY LOGO DATA Setting the Wallpaper 2 1 3 In Stop mode press MENU button Press Cursor button to move to Setup and then press ENTER button Press Cursor button to move to LOGO and then press ENTER button To Change the Wallpaper 5 4 Press MENU button to exit the setup screen Press to select the desired USER and t...

Страница 27: ...switch to DVD AUDIO Play mode When Selecting DVD Play Mode DVD VIDEO set to play the DVD video contents contained in DVD audio disc DVD AUDIO set to play the default DVD audio AV SYNC Setup Press RETURN button to return to the previous level Press MENU button to exit the setup screen Audio menu appears 2 1 Setup menu appears AV SYNC screen appears 3 Press Cursor buttons to move to Audio and then p...

Страница 28: ...or L and R the mode is set to SMALL Press RETURN button to return to the previous level Press MENU button to exit the setup screen 53 54 SETUP SMALL Select this when using the speakers NONE Select this when no speakers are installed 2 1 In Stop mode press MENU button Press Cursor button to move to Audio and then press ENTER button 3 Press Cursor button to move to TEST TONE and then press ENTER but...

Страница 29: ...rsor button to move to Audio and then press ENTER button You can set the delay time for C between 00 and 05mSEC and for LS and RS between 00 and 15mSEC 4 3 5 Press Cursor button to move to DELAY TIME and then press ENTER button Press Cursor buttons to move to the desired speaker and then press ENTER button Press Cursor to set the Delay time 0 ms 3 ms 6 ms 9 ms 12 ms 15 ms Setting REAR SURROUND SPE...

Страница 30: ...oser to 6dB Method 1 Whenadjustingtheaudioqualityusingthesetupscreen Method 2 When manually adjusting with the SOUND EDIT button 2 1 Adjusting Front Speaker Balance Adjusting Rear Speaker Balance Press SOUND EDIT button and then press Cursor 3 Adjusting Center Speaker Level 4 5 Adjusting Rear Speaker Level Adjusting Subwoofer Speaker Level Press RETURN button to return to the previous level Press ...

Страница 31: ...nt acoustic environments EQ You can select from ROCK POP or CLASSIC depending on the genre of music DSP appears on the display panel Each time the button is pressed the selection changes as follows POP JAZZ ROCK Depending on the genre of music you can select from POP JAZZ and ROCK STUDIO Provides a sense of presence as if in a studio CLUB Simulates the sound of a dance club with a throbbing bass b...

Страница 32: ...ont left and right speakers produce phantom sound DIMENSION Incrementally adjusts the sound field DSP from the front or rear When playing a DVD disc encoded with two or more channels multi channel mode will be selected automatically and Dolby Pro Logic II button does not work You can select either 0 or 1 Press PL II MODE button to select MUSIC mode Press PL II EFFECT button and then press Cursor b...

Страница 33: ... To tune in to a preset station press on the remote control to select a channel Refer to Step 2 on page 63 to automatically or manually tune in to a station 2 1 Each time the button is pressed the band switches between FM AM PRGM flashes in the display Tune in to a station 3 Example Presetting FM 89 1 in the memory Press to select 89 10 Press the TUNER BAND button and select Press the TUNER MEMORY...

Страница 34: ... display window cannot show accented letters A for instance may stans for accented A s like À Â Ä Á Åand à 65 66 To search for a program using the PTY codes Before you start remember The PTY Search is only applicable to preset stations To stop searching any time during the process press PTY SEARCH while searching There is a time limit in doing the following steps If the setting is cancelled before...

Страница 35: ...n the display MISCELLANEOUS Each time the button is press the brightness changes as follows SLIGHTLY DARK DARK BRIGHT TITLE CHAP PRGM RDS RT ST TUNED kHz MHz Adjusting Display Brightness You can adjust the brightness of the display on the main unit so it won t interfere with your movie viewing Press DIMMER button Using Headphones Use headphones not supplied for private listening pleasure MUTE flas...

Страница 36: ... press POWER If the TV turns off or on the setting is complete TV DVDRECEIVER Note MISCELLANEOUS 1 2 3 4 5 6 7 8 9 10 11 12 13 14 15 16 17 18 19 20 21 22 23 24 25 26 27 28 29 SAMSUNG ANAM DAEWOO LG HITACHI JVC SHARP SONY TOSHIBA SANYO MITSUBISHI MATSUSHITA TELEFUNKEN RCA PANASONIC SABA PHILIPS GRUNDIG ZENITH MIVAL NOBLEX EMERSON MAGNAVOX LOEWE THOMSON NORDMENDE LOEWE OPTA BLAUPUNKT SIEMENS TV Bran...

Страница 37: ...c Dolby Digital 5 1 CH Surround Sound is produced only if the disc is recorded with 5 1 channel sound Is the audio language correctly set to DOLBY DIGITAL 5 1 CH in the information display Dolby Digital 5 1 CH Surround Sound is not produced Symptom Check Remedy Is the TV power on Are the video cables connected properly Is the disc dirty or damaged A poorly manufactured disc may not be playable Dis...

Страница 38: ...pping Be especially careful not to scratch discs when handling them Do not allow the discs to become contaminated with dirt Do not load cracked or scratched discs Caution Condensation may form if warm air comes into contact with cold parts inside the player When condensation forms inside the player the player may not operate correctly If this occurs remove the disc and let the player stand for 1 o...

Страница 39: ...these movies are numbered as Title 1 Title 2 etc These numbers are assigned to the tracks which are recorded on video and audio CDs They enable specific tracks to be located quickly Contains recordings of pictures and sound whose quality is roughly comparable to that of video tape This player also supports video CDs with playback control version 2 0 You can enjoy 5 1 or 6 channels of high fidelity...

Страница 40: ...Icelandic 1393 Occitan 1529 Tigrinya 1079 Catalan 1254 Italian 1403 Afan Oromo 1531 Turkmen 1093 Corsican 1257 Hebrew 1408 Oriya 1532 Tagalog 1097 Czech 1261 Japanese 1417 Punjabi 1534 Setswana 1103 Welsh 1269 Yiddish 1428 Polish 1535 Tonga 1105 Danish 1283 Javanese 1435 Pashto Pushto 1538 Turkish 1109 German 1287 Georgian 1436 Portuguese 1539 Tsonga 1130 Bhutani 1297 Kazakh 1463 Quechua 1540 Tata...

Отзывы: