1
Recording ratio
TV Type setting
Wide (16:9) TV
4:3 TV
Images recorded in a 16:9
ratio
• Video Image
• Photo capture images
• Photo Image
16:9
4:3
Images recorded in 4:3
ratio
• Video Image
• Photo images
• Photo capture images
16:9
4:3
Images in the Slow Motion
mode
16:9
4:3
If the
Pr
,
Pb
, or
Y
jack is connected incorrectly, the TV screen may appear red or blue.
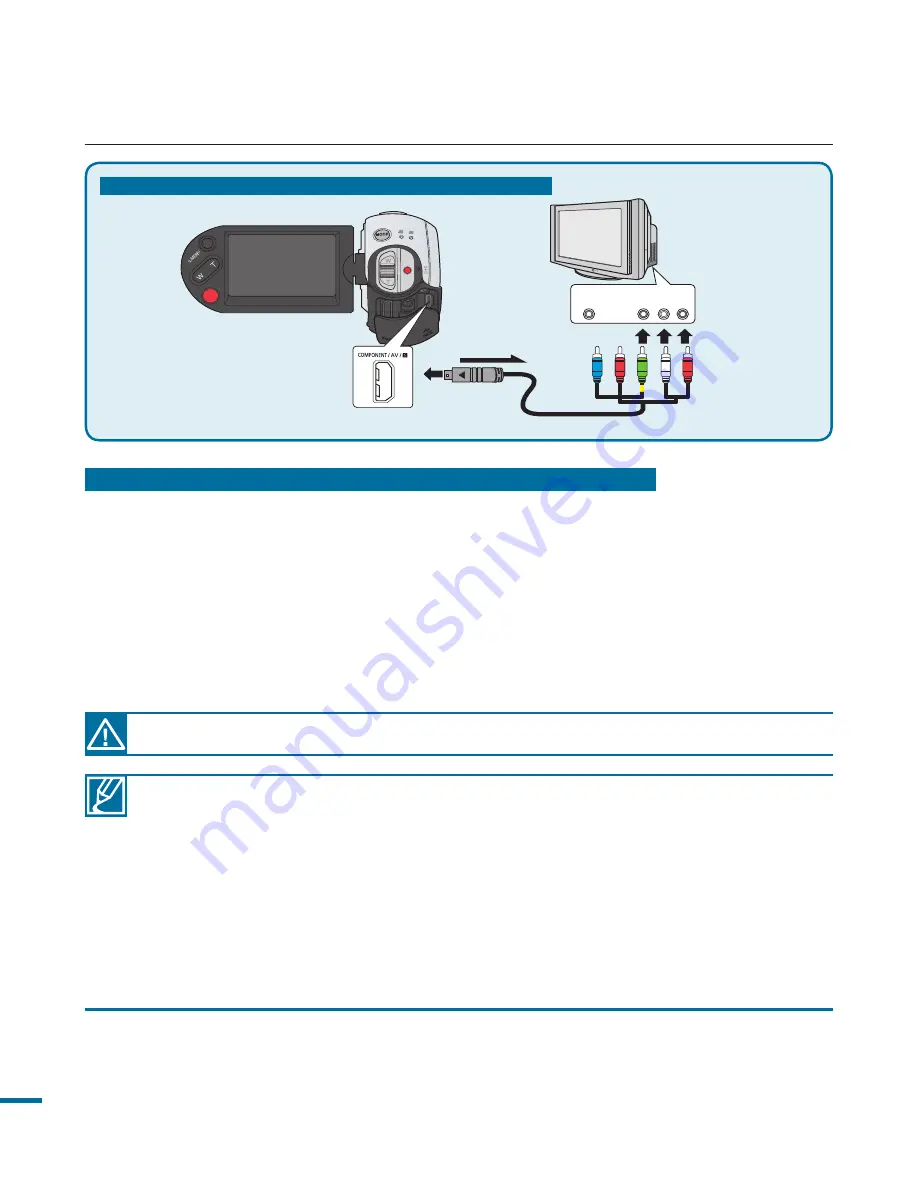
connecting to a TV
COMPONENT IN
Y
Pb
Pr
L
R
AUDIO IN
S-VIDEO IN
L
R
AUDIO IN
VIDEO IN
DC IN
DC IN
Regular TV
Camcorder
Component/AV cable
Signal flow
Type B: Connecting a Component/AV cable for the composite output.
Type B:
Connecting a Component/AV cable for the composite output
1.
Connect the provided component/AV cable to the Composite jack, “
Video
and
L-R
(Audio)” on TV. Use the Green plug with the yellow label to connect to the Video
input on your TV.
• After the connection is complete, check the desired TV out method by setting
“
Analog TV Out
” to “
Composite.
”
page 105
2.
Turn on your TV and set the TV’s input selector to the Input your camcorder is
connected to.
• This is often referred to as “line.”
• Refer to the TV’s instruction manual to see how to select the TV input.
• Check the connection status between the HD camcorder and TV, the TV screen may not
deliver the right video information if connected incorrectly.
• When the camcorder is connected to a TV with more than one cable, the output signal is
followed in the order of priority:
HDMI
Component/AV output.
• Do not use excessive force when connecting the cables.
• For more information about the TV connection jack and the connecting method, refer to
the TV user manual.
• Following method
Type B
above, the Green plug may not match the Video input on your
TV due to the VIDEO input being labeled differently. Sometimes the TV set has a “
Y
” input
jack instead of “
VIDEO.
”


