background image

Troubleshooting

117

Error messages appear when opening music files

Some music files may not play on your device for a number of 

reasons. If you receive error messages when opening music 

files on your device, try the following:

Free some memory by transferring files to a computer or 


deleting files from your device.

Ensure that the music file is not Digital Rights Management 


(DRM)-protected. If the file is DRM-protected, ensure that 

you have the appropriate licence or key to play the file.

Ensure that your device supports the file type.


Another Bluetooth device is not located

Ensure that the Bluetooth feature is activated on your 


device.

Ensure that the Bluetooth feature is activated on the device 


you wish to connect to, if necessary.

Ensure that your device and the other Bluetooth device are 


within the maximum Bluetooth range (10 m).

If the tips above do not solve the problem, contact a Samsung 

Service Centre.

A connection is not established when you connect 

the device to a computer

Ensure that the USB cable you are using is compatible with 


your device.

Ensure that you have the proper drivers installed and 


updated on your computer.

Содержание GT-P3108

Страница 1: ...tall Samsung Kies PC Sync Download the latest version of Samsung Kies from 1 the Samsung website www samsung com kies and install it on your computer Connect your device to a computer with a USB 2 cable Refer to the Samsung Kies help for more information ...

Страница 2: ...GT P3108 usermanual ...

Страница 3: ...and proper use The descriptions in this manual are based on the default settings of your device The images and screenshots used in this manual may differ from the actual product The contents of this manual may differ from the product or from software provided by service providers or carriers and are subject to change without prior notice Access the Samsung website www samsung com cn for the latest...

Страница 4: ... your device or applications to work improperly You can upgrade your device s software by accessing the Samsung website www samsung com cn Software audio wallpapers and images provided in this device are licensed for limited use between Samsung and their respective owners Extracting and using these materials for commercial or other purposes is an infringement of copyright laws Samsung is not liabl...

Страница 5: ...situations that could cause damage to your device or other equipment Note notes usage tips or additional information Refer to pages with related information for example p 12 represents refer to page 12 Followed by the order of options or menus you must select to perform a step for example In the application list select Settings About device represents Settings followed by About device ...

Страница 6: ...ademarks SAMSUNG and the SAMSUNG logo are registered trademarks of Samsung Electronics The Android logo is a trademark of Google Inc Bluetooth is a registered trademark of the Bluetooth SIG Inc worldwide Oracle and Java are registered trademarks of Oracle and or its affiliates Other names may be trademarks of their respective owners Windows Media Player is a registered trademark of the Microsoft C...

Страница 7: ... and software tools to convert your files into DivX videos DivX Certified to play DivX video up to HD 720p including premium content ABOUT DIVXVIDEO ON DEMAND This DivX Certified device must be registered in order to play purchased DivXVideo on Demand VOD movies To obtain your registration code locate the DivXVOD section in your device setup menu Go to vod divx com for more information on how to c...

Страница 8: ...rted 20 Turn on or off your device 20 Use the touch screen 20 Lock or unlock the touch screen and the keys 23 Get to know the Home screen 23 Access applications 28 Launch multiple applications 30 Customise your device 30 Enter text 34 Web and GPS based services 37 Internet 37 Communication 41 Calling 41 Messages 53 Email 55 Entertainment 58 Camera 58 Video player 65 ...

Страница 9: ...s 76 S Planner 79 Memo 81 Connectivity 82 USB connections 82 WLAN 83 WLAN Direct 86 AllShare 87 Mobile network sharing 89 Bluetooth 91 GPS 92 VPN connections 94 Tools 96 Alarm 96 Calculator 96 Downloads 97 My files 97 Task manager 99 World clock 100 Settings 101 Access the setting options 101 WLAN 101 ...

Страница 10: ... 104 Power saving 105 Storage 105 Battery 106 Applications 106 Accounts and sync 106 Location services 106 Security 106 Language and input 108 Back up and reset 109 Dock 109 Date and time 110 Accessibility 110 Developer options 111 About device 112 Troubleshooting 113 Safety information 118 ...

Страница 11: ...unctions that are not covered by your manufacturer s warranty The items supplied with your device and available accessories may vary depending on your region or service provider You can buy additional accessories from your local Samsung retailer The supplied items are designed only for your device and may not be compatible with other devices Other accessories may not be compatible with your device...

Страница 12: ...Assembling 11 Device layout Front view Number Function 1 Earpiece 2 Light sensor 3 Proximity sensor 4 SIM card slot 5 Memory card slot 6 Touch screen 7 Speaker ...

Страница 13: ...era lens 10 Microphone Rear view Number Function 11 Microphone1 12 GPS antenna2 1 Active only when you use the speakerphone feature or record videos 2 Do not touch or cover the area around the antenna with your hands or other objects while using the GPS functions ...

Страница 14: ...wer Reset1 Lock Turn on the device press and hold Access the device options press and hold Reset the device press and hold for 8 10 seconds Turn off and lock the touch screen or turn it on Volume Adjust the device s volume 1 If your device experiences fatal errors hanging or freezing you may need to reset the device to regain functionality ...

Страница 15: ...he cover of the SIM card slot 1 Insert the SIM or USIM card with the gold coloured 2 contacts facing downwards Do not insert a memory card into the SIM card slot If the memory card becomes lodged in the SIM card slot you must take your device to a Samsung Service Centre to have the memory card removed The SIM card slot of your device is only suited for standard SIM cards Inserting a microSIM card ...

Страница 16: ...ntre Use only Samsung approved chargers and cables Unapproved chargers or cables may cause batteries to explode or damage your device When your battery is low the device will emit a warning tone and show a low battery message Recharge your battery to continue using your device If the battery is completely discharged you cannot turn on the device even while it is charging Allow a depleted battery t...

Страница 17: ...isuse is not covered by the warranty Plug the USB power adapter into a power outlet 2 If the device receives an unstable power supply while charging the touch screen may not function If this happens unplug the USB cable from the device The device may heat up while charging This is normal and should not affect your device s lifespan or performance If your device is not charging properly take your d...

Страница 18: ...wer switch so you must unplug the USB power adapter from the electrical socket when not in use to avoid wasting power The device should remain close to the electrical socket while charging Reduce the battery consumption Your device provides options that help you save battery power By customising these options and deactivating features in the background you can use the device longer between charges...

Страница 19: ...also corrupt data saved on the memory card Your device supports only the FAT file structure for memory cards If you insert a memory card formatted with a different file structure your device will ask you to reformat the memory card Frequent writing and erasing of data will shorten the lifespan of your memory cards When you insert a memory card into your device the memory card s file directory will...

Страница 20: ... a memory card while the device is transferring or accessing information as this could result in loss of data or damage to the memory card or device Format a memory card Formatting your memory card on a computer may cause incompatibilities with your device Format the memory card only on the device In the application list select Settings Storage Format SD card Format SD card Delete all Before forma...

Страница 21: ...ricted such as aeroplanes and hospitals To use only your device s non network features switch to Flight mode p 101 Use the touch screen Your device s touch screen lets you easily select items or perform functions Learn basic actions for using the touch screen To avoid scratching the touch screen do not tap it with anything sharp Do not allow the touch screen to come into contact with other electri...

Страница 22: ... by the human body For best performance tap the touch screen with your fingertip The touch screen will not react to touches from sharp objects such as a stylus or pen Control your touch screen with the following actions Tap Touch once to select or launch a menu option or application Tap and hold Tap an item and hold it for more than 2 seconds Drag Tap an item and move it to a new location ...

Страница 23: ... Place two of your fingers far apart and then pinch them together Your device turns off the touch screen when you do not use it for a specified period To turn on the screen press the Power key You can set the length of time that the device waits before turning off the screen In the application list select Settings Display Screen timeout ...

Страница 24: ...essing the Power key tap anywhere on the screen and then drag your finger outside of the large circle You can activate the screen lock feature to prevent others from using or accessing your personal data and information saved in your device p 32 Get to know the Home screen From the Home screen you can view your device s status and access applications The Home screen has multiple panels Scroll left...

Страница 25: ...list of recent applications 4 Capture an image of the current screen and edit the image Capture and add an image of the current screen to the clipboard tap and hold 5 Open the mini apps panel 6 View the current time and your device s status Open the notifications panel Indicator icons Icons shown on the display may vary depending on your region or service provider Icon Definition No signal Signal ...

Страница 26: ...work WLAN AP connected Bluetooth feature activated GPS based services in use Call in progress Missed call Connected to computer No SIM or USIM card New message Alarm activated Roaming outside of service area Flight mode activated Error occurred or caution required Battery power level ...

Страница 27: ...ilent mode Mobile data Activate or deactivate the data connection Sync Activate or deactivate auto syncing of applications Screen rotation Allow or prevent the interface from rotating when you rotate the device Bluetooth Activate or deactivate the Bluetooth feature p 91 Notification Hide or show notification icons Airplane mode Activate or deactivate Flight mode The options available may vary depe...

Страница 28: ...or reorganise panels 2 To remove a panel tap and hold the panel s thumbnail image and then drag it to the rubbish bin To add a new panel select To set the first panel of the Home screen select To change the order of panels tap and hold the panel s thumbnail image and then drag it to a new location Select 3 to return to the previous screen Use widgets Widgets are small applications that provide con...

Страница 29: ...ur device s functionality On the Home screen select 1 to access the application list Scroll left or right to another screen 2 You can also select one of the dots at the bottom of the screen to move directly to the corresponding screen Select an application 3 Select 4 to return to the previous screen Select to return to the Home screen You can add an application shortcut to the Home screen by tappi...

Страница 30: ...ation to a new panel drag it to To delete the application drag it to Select 4 Download an application In the application list select 1 Samsung Apps Search for an application and download it to the device 2 To install applications that you downloaded from other sources you must select Settings Security Unknown sources Delete an application In the application list select 1 Uninstall Select 2 on an a...

Страница 31: ...ct 1 Task manager Active applications The task manager launches and shows active applications Control active applications 2 To switch applications select one from the list To close an application select End To close all active applications select End all Customise your device Get more from your device by changing settings to match your preferences Turn on or off the touch tones In the application ...

Страница 32: ...ingtone Select a ringtone 2 OK Select a wallpaper for the Home screen On the Home screen tap and hold the empty area 1 Select 2 Home screen an image folder an image Adjust the brightness of the display Your device includes a light sensor which can detect the level of ambient light and adjust the brightness of the display automatically You can also manually set the brightness of the display The bri...

Страница 33: ...u can lock your device with a pattern a PIN or a password Once the screen lock is enabled your device will require your password each time you turn it on or unlock the touch screen If you forget your password take your device to a Samsung Service Centre to reset it Samsung is not responsible for the loss of passwords or private information or other damages caused by illegal software Set an unlock ...

Страница 34: ...d select 3 OK Set an unlock password In the application list select 1 Settings Security Screen lock Password Enter a new password alphanumeric and select 2 Continue Enter the password again and select 3 OK Set a face detection unlock In the application list select 1 Settings Security Screen lock Face unlock Select 2 Set it up Continue Rotate the device clockwise to the landscape view 3 Adjust the ...

Страница 35: ...card Enter your PIN and select 2 OK If you enter an incorrect PIN too many times your SIM or USIM card will be blocked You must enter a PIN unlock key PUK to unblock the SIM or USIM card If you block your SIM or USIM card by entering an incorrect PUK take the SIM or USIM card to your service provider to unblock it Enter text You can enter text by selecting characters on the virtual keypad or by wr...

Страница 36: ...ng keys 3 Number Function 1 Input selection panel From the input selection panel you can change the keypad type or switch text input modes To add more keypad types or text input modes to the panel select 2 Insert a space 3 Clear your input 4 Start a new line 5 Access the keypad settings Change the text input method tap and hold 6 Add an image from the clipboard ...

Страница 37: ...pplication Tap and hold a passage of text 1 Drag 2 or to select the text to be copied Select 3 Copy or Cut to add the text to the clipboard In another application place the cursor at the point where 4 the text will be inserted Select 5 Paste to insert the text from the clipboard into the text field ...

Страница 38: ...eature may be labelled differently depending on your region or service provider Available icons may vary depending on your region or service provider Browse a webpage In the application list select 1 Internet To access a specific webpage select the URL field enter 2 the web address and then select Go Navigate webpages with the following keys 3 Number Function 1 Open a new window 2 Close the curren...

Страница 39: ...wly spread them apart or pinch them together You can also double tap the screen To reload the current webpage select Refresh To move backwards or forwards to webpages in history select or select Forward To bookmark the current webpage select Add bookmark To send a web address to others select Share page To search for text on a webpage select Find on page To switch to the desktop view select Deskto...

Страница 40: ...nto your device s microphone The device searches for webpages related to the keyword Select a search result 4 Bookmark your favourite webpage If you know the address of a webpage you can add a bookmark manually In the application list select 1 Internet Enter a web address or navigate to a webpage 2 Select 3 Add bookmark Enter a name for the bookmark and select 4 OK To view your bookmarks select Bo...

Страница 41: ...ternet When you download files or applications from the Internet your device saves them to the internal memory Files you download from the Internet can include viruses that will damage your device To reduce this risk only download files from sources you trust Some media files include Digital Rights Management to protect copyrights This protection may prevent you from downloading copying modifying ...

Страница 42: ...all related features To prevent accidental inputs turn on the proximity sensor to lock the touch screen when you hold the device near your face p 51 Static electricity discharged from your body or clothing may interfere with the proximity sensor during a call Make a call In the application list select 1 Phone Keypad and then enter an area code and a phone number 7 8 9 ...

Страница 43: ...voice call You can set the device to show the area code In the application list select Phone Keypad Settings Call settings Phone number locator Enable PNL Select 2 Call to make a voice call To make a video call select Video call Select 3 End call to end the call You can save numbers that you call frequently in the contact list p 76 To access the call log and redial numbers you have called recently...

Страница 44: ...video call select 2 Show me to allow the caller to see your image via the front camera Select 3 End call to end the call Reject a call During an incoming call select and then drag your finger outside of the large circle To send a message to the caller when you reject a call drag the reject message bar at the bottom of the screen upwards You can select one of several preset messages or create your ...

Страница 45: ...on list select 1 Phone Keypad and then enter an area code and a phone number Select 2 Add 2 sec pause or Add wait Enter additional numbers 3 Select 4 Call to dial the number For a 2 second pause the additional numbers will be sent to the system automatically after 2 seconds For a waiting pause select Yes when the pop up window appears Make an international call In the application list select 1 Pho...

Страница 46: ... and hold the headset button To end a call press the headset button Use options during a voice call You can use the following options during a voice call 1 4 5 6 3 2 7 Number Function 1 Place a call on hold or retrieve a held call 2 Record a call conversation 3 Activate the speakerphone feature In noisy environments you may have difficulty hearing some calls while using the speakerphone feature Fo...

Страница 47: ...ew number To switch between two calls select Swap To answer a second call select and then drag your finger outside of the large circle when a call waiting tone sounds The first call is placed on hold automatically You must subscribe to the call waiting service to use this feature To open the dialling screen select Dialling Pad To activate the speakerphone feature select Speaker In noisy environmen...

Страница 48: ...ect Speaker To turn off the microphone so that the other party cannot hear you select Mute To hide your image from the other party select Hide me To select an image to be shown to the other party select Outgoing image To open the dialling screen select Dialpad To converse with the other party via a Bluetooth headset select Switch to headset To switch between the front and rear camera select Switch...

Страница 49: ... return the call tap the right bottom of the screen to open the notifications panel then select the missed call notification Set auto rejection Use auto rejection to reject calls from specified numbers automatically In the application list select 1 Settings Call message block Select 2 Voice call block or Video call block Block registered numbers only Select 3 Voice call block list or Video call bl...

Страница 50: ...ing Call diverting is a network feature that sends incoming calls to a specified number You can set this feature separately for several conditions In the application list select 1 Phone Keypad Settings Call settings Call forwarding a call type Select a condition 2 Enter a number to which calls will be forwarded and select 3 Enable Your setting will be sent to the network Set call barring Call barr...

Страница 51: ...our setting will be sent to the network View a call or message log You can view logs of calls and messages that are filtered by type In the application list select 1 Phone Logs Select 2 View by an option Select a log entry to view its details 3 From the detail view you can make a call send a message to the number or add the number to the contact list or the auto reject list Customise call settings...

Страница 52: ... a Bluetooth headset even when your device is locked Call settings Accessary settings for call Outgoing call type Select the type of outgoing calls to make you use a Bluetooth headset Call settings Accessary settings for call Automatic answering Set whether or not the device answers calls automatically after a specified period available only when a headset is connected Call settings Accessary sett...

Страница 53: ...itional settings Call waiting Set the device to alert you to incoming calls during a call Call settings Additional settings Auto redial Set to automatically redial a call that was not connected or that was cut off Call settings Additional settings Fixed dialing numbers Activate FDN mode to prevent calls to phone numbers that are not in the FDN list on the SIM or USIM card Call settings Additional ...

Страница 54: ... by voice call When you reject a video call and the caller tries to reach you again with a voice call the call is answered automatically Voicemail Voicemail service Select a voicemail service provider Voicemail Voicemail settings Enter the voicemail server number You can obtain this number from your service provider Messages Learn to create and send text SMS or multimedia MMS messages and view or ...

Страница 55: ... 4 Send Send a multimedia message In the application list select 1 Messaging Add recipients 2 Enter phone numbers or email addresses manually and separate them with a semicolon or a comma Select phone numbers or email addresses from your contact list by selecting When you enter an email address the device will convert the message to a multimedia message Select the text field and enter your message...

Страница 56: ...rver callers may leave voicemail messages when you miss calls In the application list select 1 Phone Keypad and then tap and hold Follow the instructions from the voicemail server 2 You must save the voicemail server number before accessing the voicemail server Contact your service provider for this number Email Learn to send or view email messages via your personal or company email account Set up...

Страница 57: ...message In the application list select 1 Email Add recipients 2 Enter email addresses manually and separate them with a semicolon or a comma Select phone numbers from your contact list by selecting Select the subject field and enter a subject 3 Select the text field and enter your email text 4 Select 5 and attach a file To send the message select 6 Send If you are offline or outside your service a...

Страница 58: ...vice select Save email The message will be saved in My files sdcard Saved Email To change the view mode select Display mode To print the message viaWLAN or USB select Print Your device is compatible only with some Samsung printers To save the email address of the recipients to the phonebook as a group of contacts select Save as group To change the email settings select Settings To save an attachme...

Страница 59: ...egapixels and record videos at resolutions up to 1280 x 720 pixels The camera turns off automatically when you do not use it for a specified period The memory capacity may differ depending on the scene or shooting conditions Take a photo In the application list select 1 Camera Aim the camera lens at the subject and make any 2 necessary adjustments ...

Страница 60: ...cation 4 Switch to the camcorder 5 Take a photo 6 View photos you have taken Select 3 to take a photo The photo is saved automatically After taking a photo select the image viewer to view it To view more photos scroll left or right To zoom in or out place two fingers on the screen and slowly spread them apart or pinch them together You can also double tap the screen To view the photo on a DLNA cer...

Страница 61: ...age editor select Edit p 69 To change the name of a file select Rename To view photo details select Details Change the shooting mode You can take photos with various shooting modes To change the shooting mode select Shooting mode an option Option Function Smile shot Set the device to recognise people s faces and help you take photos of them when they smile Panorama Take panoramic photos Customise ...

Страница 62: ...hting conditions Metering Select a type of exposure metering Guidelines Set to view the grid lines on the preview screen GPS tag Set the camera to include location information for your photos To improve GPS reception avoid shooting in locations where the signal may be obstructed such as between buildings or in low lying areas or in poor weather conditions Your location may appear on your photos wh...

Страница 63: ...on 1 Use camera shortcuts Switch to the front camera to record a video of yourself Change the recording mode for attaching to a message or for saving normally Select the length of the delay before the camcorder records a video Adjust the exposure value to change the brightness Apply a special effect You can add or remove shortcuts to frequently used options p 64 2 Change the camcorder settings ...

Страница 64: ...After recording a video select the image viewer to view it To view more videos scroll left or right To play the video select To play the video on a DLNA certified device select To send the video to others select To delete the video select Delete To view video details select Details Customise camcorder settings Before recording a video select to access the following options Option Function Edit sho...

Страница 65: ... Adjust the colour balance according to the lighting conditions Guidelines Set to view the grid lines on the preview screen Storage Select a memory location for saving recorded videos Reset Reset camcorder settings Edit the shortcut icons You can add or remove shortcuts to frequently used options From the preview screen select 1 Edit shortcuts Tap and hold an icon from the option list and then dra...

Страница 66: ...ware If a file size exceeds the memory available an error may occur when you try to open the file Playback quality may vary by content type Some files may not play properly depending on how they are encoded Play a video In the application list select 1 Video player Select a video 2 Control playback with the following keys 3 11 ...

Страница 67: ... a bookmark 11 Skip to the next file Scan forwards in the file tap and hold During playback select to access the following options To listen to audio via a Bluetooth headset select Via Bluetooth You cannot use this option if you connect a headset to your device s headset jack To send the video to others select Share via To trim a segment of the video select Trim To change the playback speed select...

Страница 68: ...t type Some files may not play properly depending on how they are encoded View an image In the application list select 1 Gallery Select a folder 2 an image While viewing an image use the following options To view more images scroll left or right To zoom in or out place two fingers on the screen and slowly spread them apart or pinch them together You can also double tap the screen To view the image...

Страница 69: ...t select 1 Gallery Select a folder 2 a video indicated by the icon Control playback with the keys 3 p 65 During playback select to access the following options To listen to audio via a Bluetooth headset select Via Bluetooth You cannot use this option if you connect a headset to your device s headset jack To send the video to others select Share via To trim a segment of the video select Trim To cha...

Страница 70: ...tion To edit the selection border select or If you select Grab you can adjust the border size by selecting To reverse the selection select Inverse Edit the image with the following tools 5 Tool Function Rotate Rotate or flip the image Resize Resize the image by dragging the rectangle or selecting 100 an option Crop Crop the image by moving or dragging the rectangle Colour Apply a colour effect Eff...

Страница 71: ...Tap and hold a file and then drag it to the bottom of the 5 screen To set the length of time that an image appears select the thumbnail and then drag the left or right border of the thumbnail To delete images or videos tap and hold an item and then drag it to the rubbish bin To rearrange images or videos tap and hold an item and then drag it to a new location Select 6 Transition and drag an effect...

Страница 72: ...4 should end Save the edited video 5 Split a video Launch the video editor and open a video file 1 Select the thumbnail 2 Drag the thumbnail at the bottom of the screen to place 3 the yellow line Select 4 Save the edited video 5 Apply an effect to a video Launch the video editor and open a video file 1 Drag the thumbnail at the bottom of the screen to place 2 the yellow line Select 3 Effect an eff...

Страница 73: ...e files may not play properly depending on how they are encoded Add music files to your device Start by transferring files to your device or memory card Download from the Internet p 37 Download from a computer with Samsung Kies p 82 Download from a computer withWindows Media Player p 82 Receive via Bluetooth p 92 Copy to your memory card p 82 Play music In the application list select 1 Music playe...

Страница 74: ...ile as your favourite track 3 Mute the sound 4 Scan forwards or backwards in the file by dragging or tapping the bar 5 Activate Shuffle mode 6 Restart playback Skip to the previous file tap within 2 seconds Scan backwards in the file tap and hold 7 Pause playback Select to resume playback 8 View music details ...

Страница 75: ...ing playback select to access the following options To add the music file to a playlist select Add to playlist To listen to music via a Bluetooth headset select Via Bluetooth You cannot use this option if you connect a headset to your device s headset jack To send the music file to others select Share via To set the music file as your ringtone select Set as To change the music player settings sele...

Страница 76: ...options 3 Option Function Advanced SoundAlive Select a sound effect Advanced Play speed Change the playback speed Advanced Lyrics Set to show song lyrics during playback Advanced Music auto off Set the music player to turn off automatically after a specific period of time Music menu Select music categories to show in the music library ...

Страница 77: ...memory location 2 Enter contact information 3 To add a new item select To delete an item select Select 4 to add the contact to memory You can create contacts from the dialling screen by selecting New contact Create contact Find a contact In the application list select 1 Contacts Contacts Scroll up or down the contact list 2 Select a contact s name 3 From the contact view use the following options ...

Страница 78: ...eed dial number by tapping and holding the location number on the dialling screen Create your namecard In the application list select 1 Contacts Contacts Select 2 Set up profile Enter your personal details and select 3 You can send your namecard to others by selecting Share namecard via Create a group of contacts By creating groups of contacts you can manage multiple contacts and send a message to...

Страница 79: ...ntacts Select 2 Import Export Export to SIM card Select contacts to copy and then select 3 OK Import or export a contact You can import or export files in vcf format to or from your device s USB storage or a memory card Import contact files In the application list select 1 Contacts Contacts Select 2 Import Export Import from SD card or Import from USB storage Select an option for importing a singl...

Страница 80: ...ntly and effectively Learn to create and manage events and tasks and set alarms to remind yourself of important events and tasks Create an event or task In the application list select 1 S Planner Select 2 Select an event type at the top of the screen 3 Enter the details of the event and select 4 Done Change the view mode In the application list select 1 S Planner Select a view mode 2 Year All mont...

Страница 81: ...ate on the calendar 2 To move to a specific day select Go to and enter the date To move to today s date select Today Select an event to view its details 3 You can send the event to others by selecting Send via Stop an event or task alarm If you set a reminder for a calendar event or task an alarm will sound at the specified time Tap the right bottom of the system bar to open the 1 notifications pa...

Страница 82: ...3 Done View a memo In the application list select 1 Memo Select a memo to view its details 2 While viewing the memo use the following options To delete the memo select To change the background colour select To protect the memo from accidental deletion select To print the memo viaWLAN or USB select Your device is compatible only with some Samsung printers To send the memo to others select ...

Страница 83: ...es not launch double click the Samsung Kies icon on the computer Transfer files between your device and the computer 2 Refer to the Samsung Kies help for more information Connect withWindows Media Player Ensure thatWindows Media Player is installed on your computer Connect your device to a computer with a USB cable 1 OpenWindows Media Player and synchronise music files 2 Connect as a mass storage ...

Страница 84: ...work WLAN compatible with the IEEE 802 11 standards You can connect to the Internet or other network devices anywhere an access point or wireless hotspot is available Activate theWLAN feature In the application list select Settings and then select OFF in WLAN TheWLAN feature running in the background will consume battery power To preserve battery power activate the feature only when needed Find an...

Страница 85: ...cess point must have aWPS button Connect with aWPS button In the application list select 1 Settings WLAN Select an AP that hasWPS available and then select 2 Show advanced options Select the 3 WPS drop down menu Select 4 Push button Connect Press theWPS button on the AP within 2 minutes 5 Connect with aWPS PIN In the application list select 1 Settings WLAN Select an AP that hasWPS available and th...

Страница 86: ...ect 6 Connect CustomiseWLAN settings In the application list select 1 Settings WLAN Advanced Change the following options 2 Option Function Network notification Set the device to notify you when an openWLAN AP is available KeepWLAN on during sleep Set whether or not to keep theWLAN feature active in Sleep mode WLAN reselection Proxy Exception list MAC address View the MAC address IP address View t...

Страница 87: ...t 3 WLAN Direct Scan Select a device 4 When the owner of the other device accepts the connection the devices are connected Send data viaWLAN Select a file or item from an appropriate application 1 Select an option for sending data viaWLAN 2 The method for selecting an option may vary by data type Search for and select another device 3 Receive data viaWLAN When you receive data it is saved to your ...

Страница 88: ...lay your files on another device In the application list select 1 AllShare Select 2 My device Select a media category 3 a file Select a player 4 Playback begins on the selected player Control playback with the keys on your device 5 Play a file from another device on your device In the application list select 1 AllShare Your device searches for DLNA certified devices automatically Select a device t...

Страница 89: ...ngs for sharing media files To allow other DLNA certified devices to access media files on your device you must activate media sharing In the application list select 1 AllShare Change the following options 2 Option Function Media server name Enter a media server name for your device Share media Set to share your videos images or music with other devices Access point network Select a connection pro...

Страница 90: ...able hotspot Select 2 PortableWLAN hotspot to activate mobile network sharing viaWLAN Select 3 Configure portableWLAN hotspot to configure network settings to use your device as an AP Option Function Network SSID Edit the device name that will be shown to other devices Hide my device Set to prevent other devices from locating your device Security Select a security type Password Enter a password to...

Страница 91: ...otspot Select 3 USB tethering to activate mobile network sharing via USB To stop sharing the network connection clear the tick box next to USB tethering The sharing method may differ depending on the computer s operating system Share your device s mobile network via Bluetooth In the application list select 1 Settings More Tethering and portable hotspot Select 2 Bluetooth tethering to activate the ...

Страница 92: ...le with your device Activate the Bluetooth feature In the application list select Settings and then select OFF in Bluetooth Find and pair with another device In the application list select 1 Settings Bluetooth Scan for devices Select a device 2 Select 3 Pair to match the Bluetooth PIN between two devices Alternately enter a Bluetooth PIN and select OK When the owner of the other device accepts the...

Страница 93: ...ce will be visible select Visible time out When prompted select 2 Pair to match the Bluetooth PIN or enter the Bluetooth PIN and select OK if necessary Select 3 Accept to confirm that you are willing to receive data Received data is saved to the bluetooth folder If you receive a contact it is saved to the phonebook automatically GPS Your device is equipped with a global positioning system GPS rece...

Страница 94: ...ding on your region or service provider Activate location services You must activate location services to receive location information or search the map In the application list select 1 Settings Location services Change the following options 2 Option Function Use wireless networks Set to useWLAN and or mobile networks to find your location You may incur additional charges for using mobile networks...

Страница 95: ...the screen lock feature Set up aVPN profile In the application list select 1 Settings More VPN AddVPN network Change the following options 2 Option Function Name Enter a name for theVPN server Type Select aVPN type Server address Enter the IP address of theVPN server L2TP secret Enter an L2TP secret password IPSec identifier Enter a user name IPsec pre shared key Enter a pre shared security key IP...

Страница 96: ...l use to identify you You can import certificates from theVPN server or download them from the Internet PPPencryption MPPE Set to encrypt data before sending it to theVPN server Show advanced options Set to change the advanced network settings The options available may vary depending on theVPN type When you are finished select 3 Save Connect to a private network In the application list select 1 Se...

Страница 97: ...next to the alarm To delete an alarm select and then select the tick box next to an alarm and select Done Stop an alarm When the alarm sounds To stop the alarm select and then drag your finger outside of the large circle To silence the alarm for the snooze period select and then drag your finger outside of the large circle Calculator Learn to perform calculations with your device Perform a calcula...

Страница 98: ...hide the calculator keypad The calculation history appears Downloads Learn to manage logs of files you have downloaded from the web or email In the application list select 1 Downloads Select a download category 2 To open a downloaded file select the log 3 To delete a log select the tick box and select My files Learn to access various types of files saved in your device Supported file formats Your ...

Страница 99: ...e file directory select To return to the Home directory select Select a file 3 From the folder list access the following options To search for files saved in your device select To view the files in the thumbnail view select To create folders for managing files select To sort files or folders select the Name drop down menu and select an option To send a file to others select the tick box and select...

Страница 100: ...mation In the application list select 1 Task manager Use the following options 2 Option Function Active applications View open applications Downloaded View the total amount of memory used by all applications installed on your device RAM manager View and clear the RAM for your device Storage View the used and available memory in your device and on the memory card Help View information about using t...

Страница 101: ...another region and set world clocks to appear on your display In the application list select 1 World clock Enter a city name or select one from the globe 2 Select 3 To apply summer time to the clock tap and hold the clock and then select DST settings ...

Страница 102: ...WLAN AP and access the Internet or other network devices Bluetooth Activate the Bluetooth feature to exchange information over short distances Data usage Keep track of your data usage amount More Change the settings to control connections with other devices or networks Airplane mode Activate Flight mode to disable all wireless functions on your device You can use only non network features ...

Страница 103: ...our device as a wireless access point for other devices Configure portableWLAN hotspot Change the network settings for your access point or hotspot Bluetooth tethering Activate the Bluetooth tethering feature to share your mobile network with computers via Bluetooth Help View information about using the tethering features WLAN Direct Activate theWLAN Direct feature to connect two devices via WLAN ...

Страница 104: ... vibrate or mute all sounds except for media sounds and alarm ringtones Phone profiles Select a sound profile to use or customise sound options in profiles as desired Phone ringtone Select a ringtone to alert you to incoming calls Device vibration Add or select a vibration pattern Ringtone after vibration Set the device to vibrate first and then play a ringtone to alert you to incoming calls Defau...

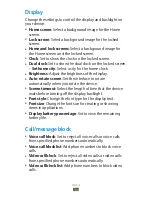
Страница 105: ...en Set the interface to rotate automatically when you rotate the device Screen timeout Select the length of time that the device waits before turning off the display backlight Font style Change the font type for the display text Font size Change the font size for creating or showing items in applications Display battery percentage Set to view the remaining battery life Call message block Voice cal...

Страница 106: ... saving mode deactivate Power saving mode CPU power saving Set the device to limit some system resource usage Screen power saving Set the device to decrease the brightness of the display Background colour Set the device to decrease the brightness of the email background colour Learn about power saving View information for saving battery power Storage View memory information for your device and mem...

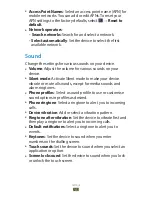
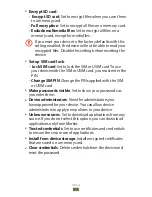
Страница 107: ...eWLAN and or mobile networks for finding your location Use GPS satellites Set to use GPS satellites for finding your location Security Change the settings for securing your device Screen lock Activate the screen lock feature Owner information Enter your information that is shown on the locked screen Encrypt device Set a password to encrypt data saved on the device You must enter the password each ...

Страница 108: ... or USIM card you must enter the PIN Change SIM PIN Change the PIN supplied with the SIM or USIM card Make passwords visible Set to show your passwords as you enter them Device administrators View the administrators you have approved for your device You can allow device administrators to apply new policies to your device Unknown sources Set to download applications from any source If you do not se...

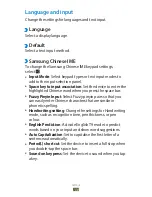
Страница 109: ...you press the space bar Fuzzy Pinyin Input Select Fuzzy pinyin pairs so that you can easily enter Chinese characters that are similar in phonetic spelling Handwriting setting Change the settings for Handwriting mode such as recognition time pen thickness or pen colour English Prediction Activate EnglishT9 mode to predict words based on your input and show word suggestions Auto Capitalization Set t...

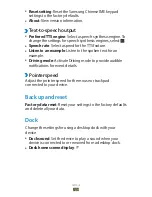
Страница 110: ...mple Listen to the spoken text for an example Driving mode Activate Driving mode to provide audible notifications for event details Pointer speed Adjust the pointer speed for the mouse or trackpad connected to your device Back up and reset Factory data reset Reset your settings to the factory defaults and delete all your data Dock Change the settings for using a desktop dock with your device Dock ...

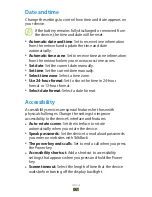
Страница 111: ...ormat Set to show the time in 24 hour format or 12 hour format Select date format Select a date format Accessibility Accessibility services are special features for those with physical challenges Change the settings to improve accessibility to the device s interface and features Auto rotate screen Set the interface to rotate automatically when you rotate the device Speak passwords Set the device t...

Страница 112: ...B debugging mode to connect your device to a computer with a USB cable Development device ID View your device s development ID Allow mock locations Allow mock locations and service information to be sent to a Location Manager service for testing Desktop backup password Set a password to secure your backup data Strict mode Set the device to flash the screen when applications perform long operations...

Страница 113: ... activities Set to end a running application when you launch a new application Limit background processes Set to limit the number of processes that can run in the background Show all ANRs Set the device to alert you to unresponsive applications that are running in the background About device View information about your device such as model number and version You can download and install firmware u...

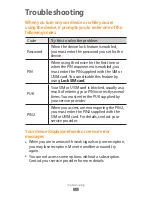
Страница 114: ...u can disable this feature by using Lock SIM card PUK Your SIM or USIM card is blocked usually as a result of entering your PIN incorrectly several times You must enter the PUK supplied by your service provider PIN2 When you access a menu requiring the PIN2 you must enter the PIN2 supplied with the SIM or USIM card For details contact your service provider Your device displays network or service e...

Страница 115: ...ouch screen is scratched or damaged take your device to a Samsung Service Centre Your device freezes or has fatal errors If your device freezes or hangs you may need to close applications or reset the device to regain functionality If your device is still responsive and an application is frozen close the application with the task manager If your device is frozen and unresponsive press and hold the...

Страница 116: ... Others cannot hear you speaking on a call Ensure that you are not covering the built in microphone Ensure that the microphone is close to your mouth If using a headset ensure that it is properly connected Audio quality is poor Ensure that you are not blocking the device s internal antenna When you are in areas with weak signals or poor reception you may lose reception Move to another area and try...

Страница 117: ...se applications on your device for an extended period of time your device may feel hot This is normal and should not affect your device s lifespan or performance Error messages appear when launching the camera Your device must have sufficient memory and battery power available to operate the camera application If you receive error messages when launching the camera try the following Charge the bat...

Страница 118: ...key to play the file Ensure that your device supports the file type Another Bluetooth device is not located Ensure that the Bluetooth feature is activated on your device Ensure that the Bluetooth feature is activated on the device you wish to connect to if necessary Ensure that your device and the other Bluetooth device are within the maximum Bluetooth range 10 m If the tips above do not solve the...

Страница 119: ...e device Do not charge the battery with chargers that are not approved by the manufacturer Do not use your device during a thunderstorm Your device may malfunction and your risk of electric shock is increased Handle and dispose of the device and chargers with care Use only Samsung approved chargers specifically designed for your device Incompatible chargers can cause serious injuries or damage to ...

Страница 120: ...er Do not use your device in a hospital or near medical equipment that can be interfered with by radio frequency If you use medical equipment contact the equipment manufacturer before using your device to determine whether or not the equipment will be affected by radio frequencies emitted by the device If you use a hearing aid contact the manufacturer for information about radio interference The r...

Страница 121: ...eavy traffic or hazardous weather conditions Rain sleet snow ice and heavy traffic can be hazardous Do not take notes or look up phone numbers Jotting down a to do list or flipping through your address book takes attention away from your primary responsibility of driving safely Dial sensibly and assess the traffic Place calls when you are not moving or before pulling into traffic Try to plan calls...

Страница 122: ...alls it may be damaged Do not store your device in very hot or very cold areas Use your device at temperatures from 20 C to 45 C Your device can explode if left inside a closed vehicle as the internal temperature can reach up to 80 C Do not expose your device to direct sunlight for extended periods of time on the dashboard of a car for example Store the battery at temperatures from 20 C to 45 C Do...

Страница 123: ...s on in the room and do not hold the screen too close to your eyes Seizures or blackouts can occur when you are exposed to flashing lights while watching videos or playing Flash based games for extended periods If you feel any discomfort stop using the device immediately Reduce the risk of repetitive motion injuries When you repetitively perform actions such as pressing keys drawing characters on ...

Страница 124: ... If you useTalk mode repeatedly Use manufacturer approved chargers accessories and supplies Using generic chargers may shorten the life of your device or cause the device to malfunction Samsung cannot be responsible for the user s safety when using accessories or supplies that are not approved by Samsung Do not bite or suck the device Doing so may damage the device or cause an explosion If childre...

Страница 125: ...ments or touch a metal object to discharge static electricity before connecting a headset to the device Use caution when using the device while walking or moving Always be aware of your surroundings to avoid injury to yourself or others Do not carry your device in your back pockets or around your waist You could be injured or damage the device if you fall Do not disassemble modify or repair your d...

Страница 126: ...nel to service your device Allowing unqualified personnel to service your device may result in damage to your device and will void your manufacturer s warranty Handle SIM cards or memory cards with care Do not remove a card while the device is transferring or accessing information as this could result in loss of data and or damage to the card or device Protect cards from strong shocks static elect...

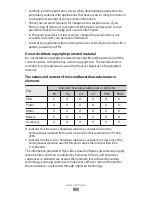
Страница 127: ...he manufacturer is not liable for any legal issues caused by the user s illegal use of copyrighted material The names and content of toxic and hazardous substances or elements Part Toxic and hazardous substances or elements Pb Hg Cd Cr6 PBB PBDE PBA X O O O O O Plastic O O O O O O Metal X O O O O O Battery X O O O O O Accessory X O O O O O O Indicates that the toxic or hazardous substance containe...

Страница 128: ...PLIEDWARRANTIES INCLUDING BUT NOT LIMITEDTO WARRANTIES OF MERCHANTABILITY OR FITNESS FOR A PARTICULAR PURPOSE SAMSUNG DOES NOT GUARANTEETHE ACCURACY VALIDITY TIMELINESS LEGALITY OR COMPLETENESS OF ANY CONTENT OR SERVICE MADE AVAILABLETHROUGH THIS DEVICE AND UNDER NO CIRCUMSTANCES INCLUDING NEGLIGENCE SHALL SAMSUNG BE LIABLE WHETHER IN CONTRACT ORTORT FOR ANY DIRECT INDIRECT INCIDENTAL SPECIAL OR C...

Страница 129: ......
Страница 130: ...our service provider The maximum SAR value of your device is 1 010W kg body 0 516W kg head for US band and accords with the requirement of standard GB 21288 2007 天津三星通信技术有限公司 地址 天津市西青区微电子工业区微五路 9 号 邮编 300385 深圳三星科健移动通信技术有限公司 地址 中国广东省深圳市南山区高新北区松坪街 2 号 三星科健园 邮编 518057 惠州三星电子有限公司 地址 中国广东省惠州市陈江镇 邮编 516029 ...

Страница 131: ...on to the public and to account for any variations in measurements SAR tests are conducted using standard operating positions accepted by the FCC with the phone transmitting at its highest certified power level in all tested frequency bands Although the SAR is determined at the highest certified power level the actual SAR level of the phone while operating can be well below the maximum value This ...

Страница 132: ...rmful interference to radio communications However there is no guarantee that interference will not occur in a particular installation If this equipment does cause harmful interference to radio or television reception which can be determined by turning the equipment off and on the user is encouraged to try to correct the interference by one or more of the following measures Reorient or relocate th...

Страница 133: ...802 11a mode For 802 11a devices operating in the frequency range of 5 15 5 25 GHz they are restricted for indoor operations to reduce any potential harmful interference for Mobile Satellite Services MSS in the US WIFI Access Points that are capable of allowing your device to operate in 802 11a mode 5 15 5 25 GHz band are optimized for indoor use only If your WIFI network is capable of operating i...

Отзывы: