


Samsung GALAXY Note 10.1 -
Quick Start Guide: Page 3 of 3
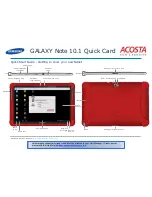
GALAXY Note 10.1 Quick Card
Hardware and connectivity issues should first be directed to your Unit Manager. If issues persist,
please send the issue to:
Enter text using the onscreen
keyboard
Use the virtual QWERTY keyboard for text
entry, including letters, punctuation,
numbers and other characters. Access the
keyboard by touching any text entry field.
1 - Change case.
2 - Switch between Number and ABC mode.
3 - Clear your input.
4 - Start a new line.
5 - Insert a space.
There are two other types of keyboard: a
Floating and a Split keyboard.
To change the keyboard type:
1.
Use two fingers, such as your index finger
and thumb, to make an inward pinch
motion on the screen, where the keyboard is
displayed.
A pop-up displays the three keyboard types.
2.
Touch one of the keyboard types to display it.
The Split keyboard can be moved up and
down and the Floating keyboard can be
moved anywhere.
Tap and hold with two fingers to move the
Floating or Split keyboard.
How to Connect to a
Wi-Fi Network
1.
From the Home screen, tap
the icon in the upper right
corner of the
Secure
Launcher
bar at the top of
the screen.
2.
Tap on
Settings
.
3.
Tap on
Wi-Fi
on the left
side of the screen.
4.
Tap on
Scan
on the right
side of the screen to have
the device search for
available networks.
5.
A list of available Wi-Fi
network names displays.
6.
Tap on the desired
network you wish to
connect with.
7.
If the network is secured,
use the onscreen keyboard
to enter the password and
then tap
Connect
.
8.
Once connected, the name
of the network will display
in the
Connected to
field.
9.
Tap the icon to return
to the Home screen.
How to Set Up
an Email Account
1.
Ensure that the device is
connected to the Internet
prior
to setting up email.
2.
From the Home screen, tap
the
icon.
3.
Tap the
Corporate
icon.
4.
Enter your current email
address in the top field.
(
Ex
.
)
5.
Enter your current email
password in the
Password
field.
Note
: The Password field is case sensitive.
6.
Tap
Next
in the upper right
corner of the screen.
7.
Tap
OK
on the Activation
message.
8.
Tap
OK
on the Remote security
administration message.
9.
Tap
Next
in the upper right
corner on the Account options
screen.
10.
Tap
Activate
on the Activate
device administrator message
screen.
11.
Tap
Next
in the upper right
corner of the Set up email
screen to complete the email
setup.
Note
: You may not receive all of the
messages or screens listed above.
Appendix
AirWatch Browser
:
Tap to access the default
web browser.
Camera
:
Tap to access the camera
to take pictures.
Content Locker
:
Document management
and distribution tool.
:
Tap to setup, view and
manage your email account.
Gallery
:
Tap to view all of the
captured images.
Maps
:
Tap this app to get
directions.
Polaris Office
:
Easy-to-use Microsoft Office
compatible product suite.
Smart Battery
:
Tap to view the current
battery status.


