background image

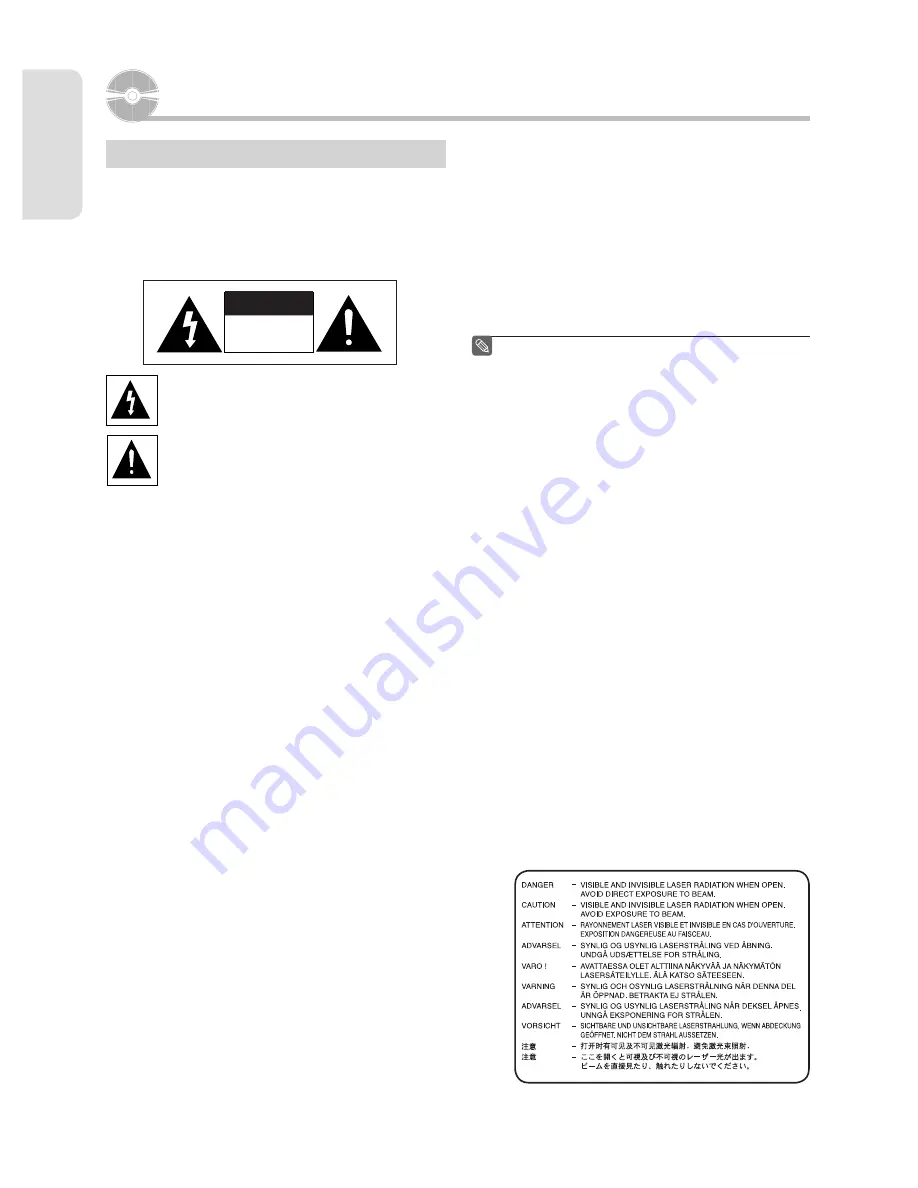
ATTENTION

RISQUE DE CHOC ELECTRIQUE. 

NE PAS OUVRIR

M

ise en route

Français - 2

Mise en route

Avertissement

POUR RÉDUIRE LES RISQUES D'ÉLECTROCUTION, 
NE DÉMONTEZ PAS LE COUVERCLE OU LE PANNEAU 
ARRIÈRE. NE CONTIENT AUCUNE PIÈCE POUVANT 
ÊTRE RÉPARÉE PAR L'UTILISATEUR. CONFIEZ LES 
RÉPARATIONS À UN TECHNICIEN QUALIFIÉ.

Ce symbole indique qu’une tension dangereuse 
constituant un risque d’électrocution est présente 
dans cet appareil.

Ce symbole indique que les documents 
accompagnant cet appareil contiennent des 
consignes d’exploitation et d’entretien importantes.

N’installez pas cet équipement dans un espace réduit 
comme une bibliothèque ou un meuble de ce type.

AVERTISSEMENT

 :  Pour éviter tout dommage pouvant 

causer un incendie ou une électrocution, 
n’exposez pas cet appareil à la pluie ni 
à une humidité excessive.

ATTENTION :  LES ENREGISTREURS DVD AVEC 

MAGNÉTOSCOPES UTILISENT 
UN FAISCEAU LASER QUI PEUT 
REPRÉSENTER UNE SOURCE 
DANGEREUSE D’EXPOSITION AUX 
RAYONNEMENTS LORSQU’ELLE EST 
DIRIGÉE VERS LES PERSONNES.
RESPECTEZ LES INSTRUCTIONS AFIN 
D’UTILISER L’ENREGISTREUR EN TOUTE 
CONFORMITÉ.

ATTENTION

CE PRODUIT COMPORTE UN LASER.
L’UTILISATION DE COMMANDES, DE RÉGLAGES OU 
DE PROCÉDURES DE FONCTIONNEMENT AUTRES 
QUE CELLES INDIQUÉES DANS LES PRÉSENTES 
INSTRUCTIONS PEUT REPRÉSENTERUNE SOURCE 
DANGEREUSE D’EXPOSITION AUX RAYONNEMENTS.
N’OUVREZ PAS LE BOÎTIER ET NE RÉPAREZ PAS 
VOUSMÊME L'APPAREIL. CONFIEZ LES RÉPARATIONS 
À UN TECHNICIEN QUALIFIÉ.

MISE EN GARDE

Avertissement:  Pour éviter un risque de décharge électrique, 

faites correspondre la broche large de la 

fi

 che 

mâle avec la fente large de la prise femelle et 
insérez-les complètement l’une dans l’autre.

Attention:  Pour éviter les chocs électriques, introduíre 

la lame la plus large de la 

fi

 che dans la borne 

correspondante de la prise et pousser jusqu au fond.

Cet appareil est conforme à la réglementation de la FCC 
(Commission fédérale des communications des États-Unis) 
lorsqu’il est branché à d’autres équipements à l’aide de 
câbles et de connecteurs blindés. N’utilisez que des câbles 
et des connecteurs blindés a

fi

 n d’éviter toute interférence 

électromagnétique avec d’autres appareils électriques 
comme un téléviseur ou une radio.
Avertissement :  la réglementation de la FCC américaine stipule 

que tout changement ou toute modi

fi

 cation 

non autorisée de cet appareil peut annuler les 
droits d’exploitation de l’utilisateur.

 Cet appareil doit être utilisé uniquement avec une 
alimentation électrique de 120 V c.a., 60 Hz. Ne pas 
l’utiliser dans d’autres conditions.
 Cet enregistreur DVD avec magnétoscope a été conçu 
et fabriqué en conformité avec les indications de codes 
de régions. Si le code de région d’un disque DVD ne 
correspond à aucun de ceux pris en charge par cet 
appareil, l’enregistreur DVD avec magnétoscope ne 
pourra pas lire les données contenues sur le DVD.
 Cet appareil est protégé par les brevets américains 
numéros 4,631,603;4,577,216;4,819,098;4,907,093; et 
6,516,132. Il comprend une technologie de protection 
des droits d'auteur qui est protégée par des brevets 
américains ou d’autres sources de droits de propriété 
intellectuelle. L’utilisation de cette technologie de 
protection des droits d'auteur doit être autorisée par 
la société Macrovision et doit se limiter à des 

fi

 ns 

de divertissement privé à moins d'une autorisation 
préalable et explicite de Macrovision. Toute rétro-
ingénierie ou tout démontage est interdit.
 Ce produit est protégé par un ou plusieurs des brevets 
américains ci-après :
5,034,830 5,060,200 5,457,669 5,561,649
5,691,858 5,705,762 5,987,417 6,043,912
6,222,983 6,272,096 6,377,524 6,377,531
6,385,587 6,389,569 6,389,570 6,408,408
6,466,532 6,473,736 6,477,501 6,480,829
6,556,520 6,556,521 6,556,522 6,594,208
6,674,697 6,674,957 6,721,493 6,728,474
6,741,535 09/610381 09/610695

01343A-VR355-XAC-FRA.indb   2

01343A-VR355-XAC-FRA.indb   2

2007-03-26   오전 9:48:14

2007-03-26   오전 9:48:14

Содержание DVD-VR355

Страница 1: ...Instruction Manual DVD VR355 www samsung com ca AK68 01343A 00 English Français ...

Страница 2: ... unit to other equipment To prevent electromagnetic interference with electric appliances such as radios and televisions use shielded cables and connectors for connections Caution FCC regulations state that any unauthorized changes or modifications to this equipment may void the user s authority to operate it This unit can be used only where the power supply is AC 120V 60Hz It cannot be used elsew...

Страница 3: ...recorder while a disc is being played or the disc may be scratched or broken and the recorder s internal parts may be damaged Do not put a flower vase filled with water or any small metal objects on the recorder Be careful not to put your hand into the disc tray Do not place anything other than the disc in the disc tray Exterior interference such as lightning and static electricity can affect norm...

Страница 4: ...1 DivX 4 x DivX 5 x Available Audio Format MP3 MPEG PCM AC3 DTS Supported subtitle file formats smi srt sub psb txt Using CD R RW Use a 700MB 80 minutes CD R RW disc If possible do not use a 800MB 90 minutes or above disc as the disc may not play back If the CD R RW disc was not recorded as a closed session you may experience a delay in the early play back time and all recorded files may not play ...

Страница 5: ...onnecting your recorder to a VCR results in a distorted picture from copy protected DVD discs This product incorporates copyright protection technology that is protected by methods claims of certain U S patents and other intellectual property rights owned by Macrovision Corporation and other rights owners Use of this copyright protection technology must be authorized by Macrovision Corporation and...

Страница 6: ...Amplifier with Analog Input Jacks 24 Connecting to an AV Amplifier with a Digital Input Jack 25 Connecting External Devices 26 Connecting a VCR cable box satellite receiver Set top box or DVD player to the AV 1 IN or S VIDEO IN Jacks 26 Connecting a Camcorder 27 System Setup On Screen Menu Navigation 28 Auto Clock Set 28 Manual Clock Set 29 Channel Set 30 Auto Channel Memory 30 Channel Add Delete ...

Страница 7: ... 63 Deleting the Scheduled Record List 64 EZ REC MODE 64 VCR Recording Basic VCR Recording 65 Check Remaining Time 66 Special Recording Features 66 Copy to DVD or VCR 67 Editing Playing the Title List 69 Basic Editing Title List 70 Renaming Labeling a Title 70 Locking Protecting a Title 71 Deleting a Title 71 Deleting a Section of a Title 72 Editing a Chapter 73 Dividing a Title 74 Advanced Editin...

Страница 8: ...r content using DV input jack Record digital camcorder images onto DVD RAM DVD RW DVD R discs or video tape using the DV input jack IEEE 1394 4pin See page 60 High quality progressive scan Progressive scanning provides high resolution and flicker free video The 10 bit 54 MHz DAC 2D Y C Separating circuitry and Time Base Corrector processor technology provide you with the highest image playback and...

Страница 9: ...Select the disc type This unit can record on the following types of discs If you want to repeatedly record on the same disc or you want to edit the disc after recording select a rewritable DVD RW or DVD RAM type disc If you want to save a recording without making any changes choose a non rewritable DVD R Step 2 Format the disc to start recording Unlike a VCR the recorder automatically starts forma...

Страница 10: ...ing and recording operations then finalize the disc When using a DVD RW disc in VR Mode Although finalizing is generally unnecessary when playing the disc on a VR Mode compatible component a finalized disc should be used for playback When using a DVD RW disc in Video Mode The disc should be finalized first to enable playback on anything other than this recorder No more editing or recording can be ...

Страница 11: ...ons Brand Codes Brand Codes SAMSUNG 01 14 15 23 31 NEWSAN 27 DAEWOO 19 NOBLEX 25 EMERSON 21 PANASONIC 12 24 GRADIENTE 30 RCA 07 29 HITACHI 10 SANYO 05 20 JVC 11 SHARP 02 16 22 LG 06 08 18 SONY 03 LOEWE 28 TELEFUNKEN 26 MAGNAVOX 04 TOSHIBA 09 MITSUBISHI 13 ZENITH 17 Result If your television is compatible with the remote control it will switch off It is now programmed to operate with the remote con...

Страница 12: ...et the status of the disc that is being played 15 REC Button Press this to make a recording on VCR DVD RAM RW R discs 16 TO DVD COPY Button Press this when you copy from the VCR to the DVD 17 REC SPEED Button Press this to set the desired recording time and picture quality 18 VCR Button Press this when you use a VCR 19 INPUT SEL Button Press this to select AV input signal in external input mode Tu...

Страница 13: ...JACK 9 P SCAN BUTTON 10 FRONT PANEL DISPLAY 11 DVD VCR SELECT BUTTON 12 COPY BUTTON 13 CH BUTTON 14 RECORD BUTTON 15 STOP BUTTON 16 PLAY STILL BUTTON 1 DVD is activated 2 DVD RAM is activated 3 DVD R or DVD RW is actived 4 Progressive Scan mode is activated 5 Record function is activated 6 VCR is activated 7 DVD or CD media is loaded 8 The time counter position or current deck status is indicated ...

Страница 14: ...ish 14 Rear Panel 1 VIDEO INPUT JACK AV 1 IN 2 VIDEO OUT JACK AV OUT 3 AUDIO OUT JACKS COMPONENT OUT 4 S VIDEO IN OUT JACKS 5 ANT IN JACK 6 ANT OUT TO TV JACK 7 AUDIO INPUT JACKS AV 1 IN 8 AUDIO OUT JACKS AV OUT 9 DIGITAL AUDIO OUT JACK OPTICAL 10 DIGITAL AUDIO OUT JACK COAXIAL 11 VIDEO OUT JACKS COMPONENT OUT 12 HDMI OUT Connects the input of external equipment using an HDMI cable ...

Страница 15: ...by selecting the channel on the DVD Recorder VCR Also use this method if you watch channels without a cable box If you are using an off air antenna that has 300 ohm twin flat leads use an external antenna connector 300 75 ohm adaptor not supplied to connect the antenna to the DVD Recorder VCR If you have two separate antennas one VHF and the other UHF use a UHF VHF combineradaptor available at mos...

Страница 16: ...able box DVD Recorder VCR TV Cable box with many scrambled channels You can record channels by selecting the channel on the cable box You cannot record one channel while watching another channel Be sure that the cable box is turned on ...

Страница 17: ...17 Antenna DVD Recorder VCR Cable box TV Cable box with a few scrambled channels You can record non scrambled channels by selecting the channel on the cable box You cannot record scrambled channels that require a cable box ...

Страница 18: ...ver you use audio may not be supported If your TV does not support Dolby digital DTS Audio output is not available when you set the Digital output as Bitstream or select DTS On in the Audio setup menu In this case set the digital audio output to PCM or DTS Off If you use an HDMI cable to connect a Samsung TV to the DVD recorder VCR you can operate the recorder using the TV remote control This is o...

Страница 19: ... channel audio HDMI connection description HDMI connector Both uncompressed video data and digital audio data LPCM or Bit Stream data Even though the DVD Recorder VCR records analog audio and video with HDMI the analog signal is converted to digital signal and is sent to the TV If your TV does not support HDCP High bandwidth Digital Content Protection snow noise appears on the screen Why does Sams...

Страница 20: ...r VCR 2 The message Press Yes to confirm Progressive scan mode Otherwise press No will appear Press the buttons to select Yes and then press the ENTER button Compared to standard interlaced video progressive scan doubles the amount of video lines fed to your TV resulting in a clearer more stable and flicker free image than interlaced video The component output jack of the DVD player can be used fo...

Страница 21: ...present clearer images than regular video input mode This connection outputs the 480i resolution to your TV Connect the audio cables white and red between the AUDIO OUT jacks on the DVD Recorder VCR and AUDIO IN jacks on your TV or AV amplifier See pages 23 25 S Video and Component video output are available only if your TV supports S Video input or Component video input respectively If S Video or...

Страница 22: ...w OUT jack on DVD Recorder VCR and VIDEO yellow IN jack on the TV You will enjoy regular quality images This connection outputs the 480i resolution to your TV Connect the audio cables white and red between the AUDIO OUT jacks on the DVD Recorder VCR and AUDIO IN jacks on your TV or AV amplifier See pages 23 25 ...

Страница 23: ...Connections English 23 Connecting the Audio Cable Select one of the Audio connections on the following pages Connecting to your TV This connection will use your TV s speakers ...

Страница 24: ...Connections English 24 Connecting to a Stereo Amplifier with Analog Input Jacks If your stereo amplifier only has AUDIO INPUT jacks L and R use the AUDIO OUT AV OUT jacks Front R speaker Front L speaker ...

Страница 25: ...l or DTS decoder and a digital input jack use this connection To enjoy Dolby Digital or DTS sound you will need to set up the audio settings See page 32 Manufactured under license from Dolby Laboratories Dolby and the double D symbol are trademarks of Dolby Laboratories DTS and DTS Digital Out are trademarks of DTS Inc ...

Страница 26: ...1 IN jacks of the DVD Recorder VCR If desired you can connect an S Video cable to the S Video In jack instead of connecting the Video yellow cable You can record from connected equipment VCR cable box satellite receiver Set top box or DVD You can also use the AV 2 IN jacks on the front panel of the DVD Recorder VCR Press the INPUT SEL button to select the AV1 or S Video input Copy protected conten...

Страница 27: ...as a camcorder by using the AV2 IN or DV IN jacks on front of the DVD Recorder VCR If the Input is not selected automatically press the INPUT SEL button on the remote control to select desired input Check your camcorder s owner s manual to see how to use the camcorder in this mode See page 60 ...

Страница 28: ...lock See pages 15 17 for Antenna Connections The Clock will be automatically set when you turn off the recorder 1 With the unit in Stop mode No Disc mode press the MENU button 2 Press the buttons to select Setup then press the ENTER or button 3 Press the buttons to select Clock Set then press the ENTER or button 4 Press the buttons to select Auto Clock Set then press the ENTER or button If your cl...

Страница 29: ...the buttons to select Clock Set then press the ENTER or button 4 Press the buttons to select Manual Clock Set then press the ENTER or button 5 Press the buttons to select the Current Date and Time then press the ENTER button When the current time is stored in memory and then the set is powered off the current time will appear in the front panel display Sets the value You can set the value using th...

Страница 30: ... pages 15 17 Cable TV Select this if the DVD Recorder VCR is connected to a cable TV See page 16 Auto Channel Memory Auto Channel Memory will automatically seek and store all active channels in your area 1 With the unit in Stop mode No Disc mode press the MENU button 2 Press the buttons to select Setup then press the ENTER or button 3 Press the buttons to select Channel Set then press the ENTER or...

Страница 31: ...annel When you connect the DVD Recorder VCR to your TV with the RF Antenna Cable follow the steps below to set the RF Output Channel 1 With the unit in Stop mode No Disc mode press the MENU button 2 Press the buttons to select Setup then press the ENTER or button 3 Press the buttons to select Channel Set then press ENTER or button 4 Press the buttons to select RF Output Channel then press the ENTE...

Страница 32: ...utton 2 Press the buttons to select Setup then press the ENTER or button 3 Press the buttons to select Audio then press the ENTER or button The Audio setup menu will be displayed 4 Press the buttons to select the desired audio option then press the ENTER or button 5 Press the buttons to select the desired item then press the ENTER or button Digital Output PCM Converts to PCM 2CH 48kHz audio Select...

Страница 33: ...TV when you want to see the central portion of the 16 9 screen Extreme left and right side of movie picture will be cut off 16 9 Wide You can view the full 16 9 picture on your wide screen TV Input Level Adjusts the level of the input signal Darker If you feel the screen is too light and you want to make the screen darker Lighter If you feel the screen is too dark and you want to make the screen l...

Страница 34: ... the P SCAN button 480p 720p 1080i If the DVD Recorder is connected to your TV with Component cables no HDMI DVI cable connected the output resolution mode toggles between 480p 480i DivX R Registration Please use the Registration code to register your DVD Recorder VCR with the DivX R Video On Demand format To learn more visit www divx com vod Video DVD Recorder No Disc Timer Rec Setup TV Aspect 16...

Страница 35: ...he buttons to select Rating Level then press the ENTER or button 2 Press the buttons to select the rating level you want then press the ENTER or button For example if you select up to Level 6 discs that contain Level 7 8 will not play A larger number indicates that the program is intended for adult use only Changing the Password 1 Press the buttons to select Change Password then press the ENTER or...

Страница 36: ...te is set the VCR can display the amount of time remaining on the tape when you press the INFO button Auto Play If you want your videotapes to play automatically when you insert them turn on Auto Play Off Auto play is disabled On The VCR will automatically begin playing a video tape when it is inserted as long as the safety tab of the cassette has been removed Auto Repeat It sets the VCR to play a...

Страница 37: ...ing to 6 or 8 hours 1 With the unit in Stop mode No Disc mode press the MENU button 2 Press the buttons to select Setup then press the ENTER or button 3 Press the buttons to select System then press the ENTER or button 4 Press the buttons to select DVD EP Mode Time then press the ENTER or button 5 Press the buttons to select 6 Hours or 8 Hours then press the ENTER or button System DVD Recorder No ...

Страница 38: ... at least 5 minutes to create a chapter In LP and EP mode 15 minutes 9 Press the STOP button to stop recording 10 To display the created titles finalize the disc see page 81 and then press the TITLE MENU button The title menu will be displayed 11 To display the created chapters select the desired Title and then press the DISC MENU button The chapter menu for the selected Title will be displayed On...

Страница 39: ...ress the ENTER or button For using Anynet HDMI CEC 1 Connect the recorder to a Samsung TV with an HDMI cable See page 18 2 Set the Anynet HDMI CEC to On on your DVD Recorder VCR see above 3 Set the Anynet function on your TV See the TV instruction manual for more information You can operate the DVD Recorder VCR by using TV remote control TV buttons that can be used to control the DVD Recorder VCR ...

Страница 40: ... VIDEO AUDIO Single sided 5 4 7GB 1hr XP Excellent Quality 2hrs SP Standard Quality 4hrs LP Long Playback 6 or 8hrs EP Extended Double sided 5 9 4GB 2hr XP Excellent Quality 4hrs SP Standard Quality 8hrs LP Long Playback 12 or 16hrs EP Extended DVD RW VIDEO AUDIO 5 4 7GB 1hr XP Excellent Quality 2hrs SP Standard Quality 4hrs LP Long Playback 6 or 8hrs EP Extended DVD R VIDEO AUDIO Single Layer 5 4...

Страница 41: ...s the disc tray and plays the disc automatically The recorder does not play discs automatically after initially being powered on initially When the recorder is powered on and a disc is in the tray the unit will be activated and wait in stop mode Press the PLAY button to start playback Power on the unit with the PLAY button if you wish to automatically play a disc in the recorder while it is powere...

Страница 42: ...t be played again Playlist DVD RAM RW VR Press the PLAY LIST button A playlist is a custom made list of titles When one playlist is played only the titles within the playlist will play and then stop Even if that playlist is deleted the original recording will not be deleted Using the Search Skip Functions Searching Through a Chapter or Track During playback press the SEARCH or button on the remote...

Страница 43: ...k press F ADV SKIP button to skip ahead exactly 30 seconds Slow Motion Play Step Motion Play Slow Motion Play During Still mode press the SEARCH or button on the remote control for more than 1 second Each time you press the button l Slow 1 l Slow 2 l Slow 3 Each time you press the button l Slow 1 l Slow 2 l Slow 3 To return to normal speed playback press the ll button Slow motion operates only in ...

Страница 44: ...r buttons Then press the ENTER button This may not work for some discs When an Audio CD CD DA or an MP3 disc is inserted depending on the disc type the information display may not be appear To make the sub menu disappear press the ANYKEY or RETURN button Repeat Playback Playing Repeatedly 1 Press the ANYKEY button during playback 2 Press the buttons to select Repeat 3 Select repeat mode using butt...

Страница 45: ...anguage Subtitle languages may not work depending on the disc type This is only available during playback You can also operate this function by pressing the SUBTITLE button on the remote control 1 Press the ANYKEY button during playback 2 Press the buttons to select Subtitle then press the buttons to select the desired subtitle language The subtitle display may be different depending on the disc t...

Страница 46: ...ltiple angles of a particular scene you can use the Angle function If the disc contains multiple angles ANGLE appears on the screen You can also operate this function by pressing the ANGLE button on the remote control 1 Press the ANYKEY button during playback 2 Press the buttons to select Angle then press the buttons or number 0 9 buttons to select the desired angle scene This function is disc dep...

Страница 47: ...scene appears The number 1 is displayed and the scene is memorized 3 Press the button to move to the next position 4 Press the ENTER button again when the desired scene appears The number 2 is displayed and the scene is memorized Repeat the steps above to bookmark other positions You can bookmark up to 10 scenes Playing Back a Bookmark 1 Press the MARKER button 2 Press the buttons to select a book...

Страница 48: ...g playback 2 Press the buttons to select a marked scene 3 Press the ENTER or ll button to start playing from the selected scene If you press the NEXT SKIP l button or the PREVIOUS SKIP l button in marker mode and the next or current marked point plays for shorter than three seconds playback starts from the previous marked point Clearing a Marker 1 Press the MARKER button during playback 2 Press th...

Страница 49: ...A into the disc tray The Audio CD menu appears and the tracks songs are played automatically 2 Press the buttons to select the track song to start playback from and then press the ENTER button Audio CD CD DA Screen Elements 1 Play mode icon 2 Current track song Displays the number of the track currently being played 3 Displays the current play index and total track number 4 This shows the operatin...

Страница 50: ...s the ANYKEY button The Repeat mode will be highlighted 2 Press the buttons to select the desired repeat mode you want to play repeatedly then press the ENTER button Repeat Track CD CD DA MP3 Repeat Folder MP3 Repeat Disc CD CD DA MP3 To return to normal playback 3 Press the CANCEL button to return to normal playback Music List MP3 PLAY MODE MOVE ENTER EXIT RETURN No Title SONGO1 01 11 SONGO1 3 5M...

Страница 51: ...ed 3 Press the buttons to select tracks in the order in which you want them to play then press the ENTER button If there is a track on your playlist you wish to remove Press the button then press the buttons to select the track you wish to remove then press the CANCEL button The selected track will be removed 4 Press the PLAY button to play the playlist Playing a Picture Disc 1 Insert a JPEG into ...

Страница 52: ...rt a MPEG4 Disc into the disc tray 2 Press the buttons to select the Disc Navigation and then press the ENTER or button 3 Press the buttons to select the DivX and then press the ENTER or button 4 Press the buttons to select the avi file DivX then press the ENTER or PLAY button 5 When an MPEG4 file is played you can use following functions Pressing the STOP button once during playback will display ...

Страница 53: ...ress the STOP button on the remote control or on the front panel of the unit 4 Playback through the VCR is possible when HDMI is connected Tracking The Tracking adjustment removes the white lines that sometimes appear during playback because of slight differences in recording decks Adjust Tracking Manually During playback press the CH TRK buttons to remove white lines from the picture Special VCR ...

Страница 54: ...search for the 0 00 00 counter position on a cassette 1 During playback press the CANCEL button at the point on the tape where you want to set the counter to 0 00 00 2 While a cassette is stopped press the ANYKEY button 3 Press the buttons to select Go To Zero then press the ENTER button The VCR will rewind or fast forward searching for the 0 00 00 counter position and then automatically stop at t...

Страница 55: ...ble V Mode Samsung finalized Not recordable not finalized Recordable Other Company finalized Not recordable not finalized Not recordable DVD R V Mode Samsung finalized Not recordable not finalized Recordable Other Company finalized Not recordable not finalized Not recordable DVD RW Samsung X Not recordable in some cases Other Company X Not recordable in some cases DVD R Samsung finalized Not recor...

Страница 56: ... in Stop mode select one of four recording modes by pressing the REC SPEED button repeatedly for the desired recording time and picture quality In general picture quality improves as the recording time decreases In AUTO mode the most suitable record mode is adjusted automatically according to remaining time on the disc and length of the timer recording You can select only one mode from XP SP LP an...

Страница 57: ...e O O DVD R O DVD RAM Ver 2 0 O O DVD R O DVD RW O Once Copy Once has been recorded additional recordings cannot be performed compatible with CPRM Content Protection for Recordable Media CPRM CPRM is a mechanism that ties a recording to the media on which it is recorded It is supported by some DVD Recorder VCR but not by many DVD players Each blank recordable DVD has a unique 64 bit media ID etche...

Страница 58: ... 1 hour SP Standard approx 2 hours LP Low approx 4 hours EP Extended Play approx 6 hours 8hours 5 Press the REC button is displayed on the screen and recording begins 6 Press the STOP button to stop or finish a recording in progress The message Updating the information of disc Please wait for a moment is displayed Pausing Resuming Press the REC PAUSE button to pause a recording in progress Press t...

Страница 59: ...n your external device 5 Press the REC button on your DVD Recorder VCR to start recording when the desired video is displayed from the external device Pausing Resuming Press the PLAY STILL button to pause a recording in progress Press the PLAY STILL button again during pause to resume recording To stop recording Press the STOP button to stop or finish the recording in progress When using DVD RAM D...

Страница 60: ...eed quality DVD SP LP EP XP VCR SP SLP 5 If the input is set to DV a playback record menu that enables camcorder control appears on the top of the screen 6 Select the Play icon on the upper part of the screen to playback the camcorder and find the starting position to copy 7 To start recording Press the button to select the Rec icon in the top side of the screen then press the ENTER button You can...

Страница 61: ...REC button to start recording 4 While in Record mode press the REC button again to activate the One Touch Recording OTR Record length 0 30 appears on the On Screen Display and the DVD Recorder VCR will record for exactly 30 minutes 5 Continue pressing REC button to add recording time in preset increments up to 4hours 0 30 1 00 1 30 2 00 3 00 4 00 Off The DVD Recorder VCR stops recording automatica...

Страница 62: ...ecording Recording mode DVD AUTO Select when you want the video quality adjusted automatically In AUTO mode the most suitable record mode is chosen according to the remaining time on the disc and length of the timer recording You can select only one mode from XP SP LP and EP for timer recording XP high quality Select when audio and video qualities are important Approx 1 hour SP standard quality Se...

Страница 63: ...overlapping or when the previous recording ends within 3 minutes before the start time of the next recording Editing the Scheduled Record List Follow these directions to edit the timer record list 1 Press the MENU button 2 Press the button to select Timer Rec then press the ENTER or button 3 Press the button to select Scheduled Record List then press the ENTER or button 4 Press the button to selec...

Страница 64: ...der the following conditions When you press the OPEN CLOSE button on your DVD Recorder VCR after recording on at least 30 of the disc The tray will open after the disc has been finalized When the disc is full it will finalize automatically and the Recorder will remain in stop mode When you make a timer recording and it occupies at least 30 of the disc the disc will finalize automatically and the R...

Страница 65: ...ton to select AV 1 AV 2 or DV if recording from an external device connected to the input jacks of the recorder 3 Press the REC SPEED button on the remote control to set the Record Speed to one of the following options SP Standard Play for best picture quality SLP Super Long Play for maximum recording time 3 times SP The selected Record Speed will appear on the front panel and have on screen displ...

Страница 66: ...l automatically change to the DVD and start playback During DVD recording insert a Video tape in the VCR deck The output will automatically change to the VCR and start playback Only if the tape is missing the safety tab 3 To Add Recording Time Refer to the One Touch Recording OTR See page 61 4 Recording on the DVD and VCR at the same time You can record on the DVD and VCR at the same time but both...

Страница 67: ...disc you can only use Direct copy function 5 Press the buttons to select the desired copylist then press the ENTER or button 6 Press the buttons to select Copy then press the ENTER or button Direct Copy DVD to VCR Insert a DVD disc you want to copy Insert a VHS tape Press the VCR copy button on front panel or remote control TO VCR To stop recording press the STOP button You can also copy from DivX...

Страница 68: ...d 6 Press the buttons to select desired copylist then press the ENTER or button 7 Press the buttons to select Copy then press the ENTER or button The VCR will fast forward searching for a start position and then automatically start a copy The Start and End points may not match up exactly If you want to copy all content select Copy All Direct Copy VCR to DVD Insert the VHS tape you want to copy Ins...

Страница 69: ...selected title Rename Changes the name of a selected title Delete Deletes the selected title from the list Edit Deletes a section of title Protection Locks or unlocks the selected title Button display By pressing the ANYKEY button you can play the desired title see page 44 This may depend on the disc type DVD RW V DVD RW R discs have limited editing function Title List 01 JAN 01 2007 12 00 00 00 1...

Страница 70: ...s to select Rename then press the ENTER or button The Rename screen is displayed 4 Select the desired characters using the buttons press the ENTER button Back Space Moves the cursor one position backwards Space Enters a blank and moves the cursor one forward to the right Delete Deletes the character at the cursor position Clear Deletes all the character inputs Save Registers the character inputs 5...

Страница 71: ...ge Do you want to delete Related playlists may be deleted is displayed DVD RW Video mode DVD RW DVD R Since a Playlist is not present the message Do you want to delete is displayed The message may depend on the type of disc 4 Press the buttons to select Yes then press the ENTER button You cannot delete a protected title If you want to delete a protected title select Off in the Title Protection men...

Страница 72: ...buttons to select Return Edit Title List Screen Elements 1 Playback bar 2 Playtime 3 Section deletion starting point window and time 4 Section deletion end point window and time Select the start and end points of the section you want to delete using the playback related buttons Playback related buttons II I The length of the section to be deleted must be at least 5 seconds long End point cannot be...

Страница 73: ... the Edit Compatible function See page 82 If you add a chapter the title is divided at that point If you add a chapter onto a title that has only one chapter it creates another chapter Deleting a Chapter Follow steps 1 to 3 4 Select a chapter you want to delete using the playback related buttons Playback related buttons II I I 5 Press the buttons to select Delete and then press the ENTER button Th...

Страница 74: ...TLE LIST button The Title List screen is displayed 2 Press the buttons to select a title you want to divide from the Title List then press the ENTER or button 3 Press the buttons to select Divide Title then press the ENTER or button The Divide Title List screen is displayed 4 Select the point you want to divide using the playback related buttons then press the ENTER button Playback related buttons...

Страница 75: ...en may have a slight difference A disc that is recorded on this unit will not display the playlist menu if EZ REC MODE is set to On Playing Titles in the Playlist Follow these instructions to play the playlist titles 1 Press the PLAY LIST button with the disc stopped The Edit Playlist screen is displayed 2 Press the buttons to select the title you want to play from the Playlist then press the ENTE...

Страница 76: ... Edit Playlist screen is displayed 2 Press the buttons to select the title you want to edit from the Playlist and then press the ENTER or button 3 Press the buttons to select Edit Scene then press the ENTER or button The Edit Scene screen is displayed Playing a Selected Scene 4 Press the buttons to select the scene you want to play then press the ENTER button The playlist title to be played is sel...

Страница 77: ...ress the buttons to select the position to which you want to move the selected scene then select the ENTER button The selected scene is moved to the selected position Depending on the kind of disc the displayed screen may be different Modify Scene DVD Recorder DVD RAM VR Start End Scene No 001 Cancel Change End MOVE ENTER RETURN EXIT II Start 00 00 04 00 00 10 00 00 10 Title List 1 31 MOVE ENTER R...

Страница 78: ...Scene Follow steps 1 to 3 on page 76 4 Press the buttons to select the scene you want to delete and then press the ENTER button 5 Press the buttons to select Delete then press the ENTER button Edit Scene DVD Recorder Scene No 3 3 Playlist No 3 DVD RAM VR 01 00 00 03 02 00 00 42 Play Modify Move Add Delete 03 00 00 04 04 00 00 00 MOVE ENTER RETURN EXIT Add Scene DVD Recorder DVD RAM VR Scene No 001...

Страница 79: ...ns to select Disc Manager then press the ENTER or button 3 Press the buttons to select Disc Name then press the ENTER or button The Edit Name screen is displayed 4 Enter the desired characters using the buttons Back Space Moves the cursor one position backwards Space Enters a blank and moves the cursor one forward to the right Delete Deletes the character at the cursor position Clear Deletes all t...

Страница 80: ... you want to continue DVD RW You will be prompted with the confirmation message Choose the recording format for DVD RW You will be prompted with the confirmation message All data will be deleted Do you want to continue 4 Press the buttons to select Yes then press the ENTER button The disc is formatted DVD VR and DVD V modes are compatible with the following disc types DVD VR DVD V DISC DVD RAM DVD...

Страница 81: ...R mode 1 With the unit in Stop mode press the MENU button 2 Press the buttons to select Disc Manager then press the ENTER or button 3 Press the button to select Disc Unfinalize then press the ENTER or button You will be prompted with the message Do you want to unfinalize disc 4 Press the buttons to select Yes then press the ENTER button You will be prompted again with the message Disc will be unfi...

Страница 82: ... order to view edited chapters or titles on a standard DVD player 1 With the unit in Stop mode press the MENU button 2 Press the buttons to select Disc Manager then press the ENTER or button 3 Press the buttons to select Edit Compatible then press the ENTER or button 4 Press the buttons to select Yes then press the ENTER button to execute the edit compatible After performing this function you can ...

Страница 83: ...cording Cannot record Check whether the disc is formatted This product can record on formatted discs only See pages 56 80 Check whether your DVD RAM DVD RW DVD R disc has a sufficient free space I pressed the REC button but there is no response Recording is available on DVD RAM DVD RW DVD R discs only If a program is copy protected you cannot record it I forgot the parental control password Press ...

Страница 84: ...ayed back If the scene changes from dark to bright suddenly the screen may jitter temporarily but it is not defective Desired sound language and subtitle language are not played Sound languages and subtitle languages are disc specific Only the sound and subtitle languages contained on a DVD disc are available and displayed on the disc menu No progressive output Check whether PS is displayed on fro...

Страница 85: ... see normal broadcasts Noise bars or streaks on playback Check the tuner external setting It should be on tuner Check the TV antenna connections Press the CH TRK buttons to minimize this effect When the II button is pressed during playback the still picture has severe noise bar streaks A still picture may have noise bars depending on the condition of the tape Press the CH TRK buttons during slow m...

Страница 86: ... played Please check the regional code of the disc The disc does not match the regional code for your area and cannot be played on this device This disc cannot be formatted Please check the disc Make sure there are no scratches or dirt on the disc You could not format the disc because of error detection You could not finalize the disc because of error detection You could not unfinalize the disc be...

Страница 87: ...tton on the front of the device for 10 seconds After turning off press the Open button and remove the disc from the device The DV device is not connected Make sure the DV device is connected properly to the DV connection Jack If it is connected properly turn it off and on once again If you are unable to solve the problem after reading the above instructions note The model and serial number on the ...

Страница 88: ... audio output support Min 100 dB signal to noise ratio Max 0 005 total harmonic distortion T H D at average 1 KHz Video Video output jacks S Video output Y 1 0Vp p C 0 286Vp p at 75Ω load Component output Y 1 0Vp p Pb 0 70Vp p Pr 0 70Vp p at 75Ω load HDMI output 480p 720p 1080i DVD Picture Compression format MPEG II Audio Compression format Dolby AC 3 256kbps Recording Quality XP about 8 Mbps SP a...

Страница 89: ...ble proof of purchase It must be presented to the authorized service center at the time service is requested This warranty does not cover damage due to accident fire flood and or other acts of God misuse incorrect line voltage improper installation improper or unauthorized repairs commercial use or damage that occurs in shipping Exterior and interior finish lamps glass are not covered under this w...

Страница 90: ...ANCE 3260 SAMSUNG or 08 25 08 65 65 0 15 Min www samsung com fr GERMANY 01805 121213 0 14 Min www samsung de HUNGARY 06 80 SAMSUNG 7267864 www samsung com hu ITALIA 800 SAMSUNG 7267864 www samsung com it LUXEMBURG 0032 0 2 201 24 18 www samsung lu NETHERLANDS 0900 20 200 88 0 10 Min www samsung com nl NORWAY 815 56 480 www samsung com no POLAND 0 801 801 881 www samsung com pl PORTUGAL 80 8 200 12...

Страница 91: ...AK68 01343A 00 English Français HEADQUARTERS SAMSUNG ELECTRONICS CANADA INC 55 STANDISH COURT MISSISSAUGA ONTARIO L5R 4B2 CANADA TEL 1 800 SAMSUNG 1 800 7267864 www samsung com ca ...

Страница 92: ...Manuel d instructions DVD VR355 www samsung com ca AK68 01343A 00 English Français ...

Страница 93: ... pousser jusqu au fond Cet appareil est conforme à la réglementation de la FCC Commission fédérale des communications des États Unis lorsqu il est branché à d autres équipements à l aide de câbles et de connecteurs blindés N utilisez que des câbles et des connecteurs blindés afin d éviter toute interférence électromagnétique avec d autres appareils électriques comme un téléviseur ou une radio Aver...

Страница 94: ... normalement ou s il est tombé Précautions à prendre lors de la manipulation de cet appareil Mettez tout composant hors tension avant de le brancher sur l appareil Ne déplacez pas l enregistreur DVD avec magnétoscope lorsqu un disque est en cours de lecture car cette manoeuvre pourrait endommager le disque et les pièces internes de l appareil Ne placez pas de pot à fleurs rempli d eau ni aucun obj...

Страница 95: ...e du débit qui peut être lue s étend de 56 à 320 kbit s L appareil peut prendre en charge jusqu à 1000 fichiers et dossiers Les DVD RAM RW R contenant des fichiers MP3 peuvent être lus CD R et CD RW de format JPEG Pour être lus les fichiers JPEG doivent comporter l extension du nom de fichier jpg ou JPG L appareil peut prendre en charge jusqu à 1000 fichiers et dossiers La taille maximale d une im...

Страница 96: ...arge uniquement les disques DVD RAM standard de version 2 0 Les DVD RAM gravés à l aide de cet appareil ne sont pas compatibles avec les autres lecteurs DVD Vérifiez la compatibilité avec les disques DVD RAM en consultant le guide de l utilisateur du lecteur PROTECTION CONTRE LA COPIE La plupart des disques DVD sont codés afin de les protéger contre la copie Pour cette raison vous devez brancher v...

Страница 97: ...nt du câble audio 23 Raccordement à un téléviseur 23 Raccordement à un amplificateur stéréo à prises d entrée analogiques 24 Raccordement à un amplificateur AV à prises d entrée numériques 25 Raccordement d appareils périphériques 26 Raccord d un magnétoscope boîtier décodeur récepteur satellite décodeur ou lecteur DVD aux prises AV 1 IN ou S VIDEO IN 26 Raccord à un caméscope 27 Configuration du ...

Страница 98: ...mmée 64 MODE EZ REC 64 Enregistrement avec le magnétoscope Fonctions de base d enregistrement avec le magnétoscope 65 Vérification de la durée restante 66 Fonctionnalités d enregistrement spécifiques au magnétoscope 66 Copie du DVD au magnétoscope et inversement 67 Modifications Lecture de la Liste de Titres 69 Fonctions de modifications de base Liste de Titres 70 Modification du nom d un titre 70...

Страница 99: ...otre caméscope numérique sur disques DVD RAM DVD RW DVD R ou sur cassettes vidéo en utilisant la prise d entrée DV IEEE 1394 à 4 brins Consultez la page 60 pour plus d information Balayage progressif de qualité supérieure Le balayage progressif produit une image vidéo à haute définition et sans scintillement La technologie est basée sur un processeur de conversion numérique analogique à 10 bits 54...

Страница 100: ...oyez enregistrer à plusieurs reprises sur le même disque ou si vous souhaitez modifier le contenu du disque après l enregistrement Choisissez un disque DVD R qui n est pas réinscriptible si vous souhaitez protéger votre enregistrement sans y apporter de modification ultérieure Étape 2 formatage du disque avant l enregistrement Contrairement à un magnétoscope l enregistreur DVD formate automatiquem...

Страница 101: ...e modification et d enregistrement Terminez l enregistrement du disque Si vous utilisez un disque DVD RW en mode DVD VR Vous devez toujours terminer l enregistrement d un disque avant d en faire la lecture bien qu en général cela ne soit pas nécessaire sur un appareil compatible avec le mode DVD VR Si vous utilisez un disque DVD RW en mode vidéo DVD V Terminez l enregistrement du disque si vous so...

Страница 102: ...opriés Marque Codes Marque Codes SAMSUNG 01 14 15 23 31 NEWSAN 27 DAEWOO 19 NOBLEX 25 EMERSON 21 PANASONIC 12 24 GRADIENTE 30 RCA 07 29 HITACHI 10 SANYO 05 20 JVC 11 SHARP 02 16 22 LG 06 08 18 SONY 03 LOEWE 28 TELEFUNKEN 26 MAGNAVOX 04 TOSHIBA 09 MITSUBISHI 13 ZENITH 17 Résultat Si votre téléviseur est compatible avec la télécommande il s éteint Il est alors programmé pour fonctionner avec cette t...

Страница 103: ...15 Touche REC Pour enregistrer sur un disque DVD RAM DVD RW DVD R ou sur une cassette vidéo 16 Touche TO DVD COPY Appuyez sur cette touche pour copier du magnétoscope vers l enregistreur DVD 17 Touche REC SPEED Pour régler le temps d enregistrement et la qualité de l image 18 Touche Magnétoscope Pour commander le magnétoscope 19 Touche INPUT SEL Pour sélectionner le signal d entrée AV d une source...

Страница 104: ...ITE AV IN 2 8 PRISE D ENTRÉE DV 9 TOUCHE P SCAN 10 AFFICHEUR DU PANNEAU AVANT 11 SÉLECTION DVD MAGNÉTOSCOPE 12 TOUCHE COPIE 13 CH 14 ENREGISTREMENT 15 TOUCHE STOP ARRÊT 16 TOUCHE PLAY STILL LECTURE FIGÉ 1 DVD est activé 2 DVD RAM est activé 3 DVD R ou DVD RW est activé 4 Balayage progressif est activé 5 Fonction d enregistrement est activée 6 Magnétoscope est activé 7 Un DVD ou un CD est chargé 8 ...

Страница 105: ...UDIO AV 1 IN 8 PRISES DE SORTIE AUDIO AV OUT 9 PRISE DE SORTIE AUDIO NUMÉRIQUE OPTIQUE 10 PRISE DE SORTIE AUDIO NUMÉRIQUE COAXIALE 11 PRISES DE SORTIE VIDÉO SORTIE COMPOSANT 12 SORTIE HDMI HDMI OUT sert à raccorder des appareils périphériques par câble HDMI 10 11 12 4 3 7 8 9 2 1 Ventilateur Les pales du ventilateur tournent sans arrêt lorsque l appareil est sous tension Prévoyez un dégagement de ...

Страница 106: ...s en sélectionnant la chaîne sur le graveur DVD Utilisez aussi cette méthode si vous visionnez les chaînes sans câblosélecteur Si vous utilisez une antenne extérieure avec un câble plat de 300 ohm utilisez un adaptateur externe 300 à 75 ohm non fourni pour raccorder l antenne au graveur DVD avec magnétoscope Si vous disposez de deux antennes VHF et UHF utilisez un mélangeur de bande UHF VHF dispon...

Страница 107: ...eurs canaux brouillés Vous pouvez enregistrer des chaînes en les syntonisant à partir du câblosélecteur Il est impossible d enregistrer une chaîne tout en visionnant une autre chaîne Assurez vous que le câblosélecteur est allumé Au mur Boîtier décodeur DE ANT OUT DE ANT INPUT à ANT IN Graveur DVD avec magnétoscope SORTIE ENTRÉE ...

Страница 108: ...chaînes brouillées Vous pouvez enregistrer des chaînes non brouillées en les syntonisant à partir du câblosélecteur Il est impossible d enregistrer des canaux brouillés qui nécessitent un boîtier décodeur Au mur Boîtier décodeur DE ANT OUT DE ANT INPUT à ANT IN Graveur DVD avec magnétoscope SORTIE ENTRÉE Câble de Blaster IR compris ...

Страница 109: ... Dolby digital DTS la sortie audio n est pas disponible lorsque vous réglez la sortie numérique sur Bitstream ou DTS On DTS activé dans le menu Audio setup Configuration audio Dans ce cas réglez la sortie audio numérique sur PCM ou DTS Off DTS désactivé Si vous utilisez un câble HDMI pour raccorder un téléviseur Samsung au graveur DVD avec magnétoscope il devient alors possible d utiliser la téléc...

Страница 110: ...compressées données LPCM ou Bitstream Même si le graveur DVD avec caméscope enregistre les fichiers audio et vidéo en format analogique la fonction HDMI convertit le signal analogique en signal purement numérique et ce dernier est transmis au téléviseur Si le téléviseur ne prend pas en charge le dispositif de protection HDCP High bandwidth Digital Content Protection Protection du contenu numérique...

Страница 111: ...sur le Oui pour confirmer le mode de balayage progressif Sinon appuyez sur le Non s affiche Appuyez sur les touches pour sélectionner Oui puis appuyez sur la touche ENTER Comparé au balayage vidéo entrelacé standard le balayage progressif double le nombre de lignes de trame transmises à votre téléviseur reproduisant une image plus stable sans scintillement et plus nette que le balayage vidéo entre...

Страница 112: ...alité d images plus nette que le mode d entrée vidéo standard Raccordez les câbles audio blanc et rouge entre les prises AUDIO OUT SORTIE AUDIO du graveur DVD avec magnétoscope et les prises AUDIO IN ENTRÉE AUDIO du téléviseur Voir les pages 23 à 25 Les sorties S Video S vidéo ou Component Composante ne sont disponibles que si votre téléviseur peut accueillir les signaux d entrée S Vidéo ou Compos...

Страница 113: ...VIDÉO jaune du graveur DVD avec magnétoscope et la prise d entrée VIDEO IN ENTRÉE VIDÉO jaune du téléviseur Vous pourrez profiter d images de qualité Raccordez les câbles audio blanc et rouge entre les prises AUDIO OUT SORTIE AUDIO du graveur DVD avec magnétoscope et les prises AUDIO IN ENTRÉE AUDIO du téléviseur Voir les pages 23 à 25 Câble AUDIO VIDEO ...

Страница 114: ...onfiguration Français 23 Raccordement du câble audio Sélectionnez une connexion audio sur les pages suivantes Raccordement à un téléviseur Ce raccordement utilise les haut parleurs de votre téléviseur Câble AUDIO VIDEO ...

Страница 115: ...amplificateur stéréo à prises d entrée analogiques Utilisez les prises AUDIO OUT SORTIE AV si votre amplificateur stéréophonique ne possède que les prises AUDIO INPUT L R ENTRÉE AUDIO G et D Câble AUDIO VIDEO rouge blanc Haut parleur avant D Haut parleur avant G ...

Страница 116: ... numérique Vous devez régler les conditions audio pour profiter du son numérique Dolby Digital ou DTS Voir la page 32 Fabriqué sous licence de Dolby Laboratories Dolby et le symbole du double D sont des marques de commerce de Dolby Laboratories DTS et DTS Digital Out sont des marques de commerce de DTS Inc Câble Coaxial non compris Câble Optique non compris Amplificateur AV Arrière G Avant G Basse...

Страница 117: ...TRÉE AV du graveur DVD avec magnétoscope Il vous est possible d enregistrer à partir d appareils périphériques magnétoscope boîtier décodeur ou lecteur DVD Magnétoscope boîtier décodeur récepteur satellite décodeur ou DVD Permet aussi l utilisation des prises AV 2 IN ENTRÉE AV 2 sur le panneau avant du graveur DVD avec magnétoscope Appuyez sur le touche INPUT SEL pour sélectionner l entrée AV1 ou ...

Страница 118: ...ENTRÉE ou DV IN ENTRÉE situées sur le devant du graveur DVD avec magnétoscope Si le mode d entrée n est pas sélectionné automatiquement utilisez la touche INPUT SEL de la télécommande pour sélectionner l entrée DV Pour utiliser le caméscope dans ce mode reportez vous au Manuel de l usager Voir la page 60 Câble AUDIO VIDEO Câble DV non compris ou Caméscope ...

Страница 119: ...il est en mode Stop Arrêt ou Pas de disque appuyez sur la touche MENU 2 Sélectionnez Paramétrer en déplaçant la barre de sélection à l aide des touches puis appuyez sur ENTER ou sur 3 Sélectionnez Réglage de l horloge en déplaçant la barre de sélection à l aide des touches puis appuyez sur ENTER ou sur 4 Sélectionnez Paramétrage Auto Horloge en déplaçant la barre de sélection à l aide des touches ...

Страница 120: ...NTER ou sur 3 Sélectionnez Réglage de l horloge en déplaçant la barre de sélection à l aide des touches puis appuyez sur ENTER ou sur 4 Sélectionnez Paramétrage Manuel Horloge en déplaçant la barre de sélection à l aide des touches puis appuyez sur ENTER ou sur 5 Sélectionnez la Date du jour et le l heure actuelle en déplaçant la barre de sélection à l aide des touches puis appuyez sur ENTER L heu...

Страница 121: ...ure Voir les pages 15 et 17 Câble TV si votre enregistreur DVD avec magnétoscope est raccordé à un câblosélecteur Voir les page 16 Mèmoire Canal Auto Mèmoire Canal Auto permet de prérégler automatiquement tous les canaux recevables 1 Lorsque l appareil est en mode Stop Arrêt ou Pas de disque appuyez sur la touche MENU 2 Sélectionnez Paramétrer en déplaçant la barre de sélection à l aide des touche...

Страница 122: ...r ENTER Canal de Sortie Si vous avez raccordé l enregistreur DVD avec magnétoscope à un téléviseur doté d un câble RF réglez le RF Canal de sortie comme suit 1 Lorsque l appareil est en mode Stop Arrêt ou Pas de disque appuyez sur la touche MENU 2 Sélectionnez Paramétrer en déplaçant la barre de sélection à l aide des touches puis appuyez sur ENTER ou sur 3 Sélectionnez Réglage des chaînes en dépl...

Страница 123: ... sélection à l aide des touches puis appuyez sur ENTER ou sur 3 Sélectionnez Audio en déplaçant la barre de sélection à l aide des touches puis appuyez sur ENTER ou sur Le menu de paramétrage audio sera affiché 4 Sélectionnez l option audio que vous souhaitez paramétrer en déplaçant la barre de sélection dans la liste à l aide des touches puis appuyez sur ENTER ou sur 5 Sélectionnez le sous élémen...

Страница 124: ... d image 4 3 des barres noires apparaissent au haut et au bas de l écran 4 3 Pan Scan Sélectionnez ce format conventionnel quand vous voulez voir la partie centrale de l image 16 9 l image sera coupée à l extrême gauche et à l extrême droite 16 9 Large Vous pouvez voir en entier l image 16 9 sur votre téléviseur à grand écran Niveau d Entrée Permet de régler le niveau d entrée du signal vidéo Plus...

Страница 125: ...et à chaque fois que vous appuyez sur la touche P SCAN 480p 720p 1080i Si votre téléviseur est raccordé à l aide des câbles composite ou composante sans câble HDMI DVI la résolution de sortie bascule entre 480p et 480i Inscription DivX R Veuillez utiliser le code d enregistrement fourni pour enregistrer votre graveur DVD avec caméscope à l aide du formulaire de DivX R Vidéo sur demande Pour en sav...

Страница 126: ...élection à l aide des touches puis appuyez sur ENTER ou sur 2 Sélectionnez le niveau de contrôle souhaité en déplaçant la barre de sélection à l aide des touches puis appuyez sur ENTER ou sur Par exemple si vous sélectionnez les niveaux 6 et moins les disques de niveau 7 et 8 ne pourront être visionnés Un niveau de contrôle plus élevé signifie que le titre vidéo est pour adulte seulement Modificat...

Страница 127: ...oix possibles sont T120 T160 ou T180 Après avoir spécifié le type de cassette vidéo le magnétoscope affichera la durée de lecture restante si vous appuyez sur la touche INFO Lecture auto Si vous souhaitez que la lecture d une cassette vidéo démarre automatiquement lorsque vous en insérez une activez l option Auto Play Non désactive la lecture automatique Oui lorsque vous insérez une cassette le ma...

Страница 128: ...que l appareil est en mode Stop Arrêt ou aucun disque appuyez sur la touche MENU 2 Sélectionnez Paramétrer en déplaçant la barre de sélection à l aide des touches puis appuyez sur ENTER ou sur 3 Sélectionnez Système en déplaçant la barre de sélection à l aide des touches puis appuyez sur ENTER ou sur 4 Sélectionnez Temps DVD en Mode EP en déplaçant la barre de sélection à l aide des touches puis a...

Страница 129: ...ez enregistrez pendant au moins 5 minutes pour créer un chapitre En mode LP et EP 15 minutes 9 Appuyez sur la touche STOP pour arrêter l enregistrement 10 Pour afficher les chapitres créés terminez l enregistrement du disque voir à la page 81 puis appuyez sur la touche TITLE MENU Le menu des chapitres apparaîtra 11 Pour afficher les chapitres créés choisissez le titre puis appuyez sur la touche DI...

Страница 130: ...eur SAMSUNG à l aide d un câble HDMI Voir la page 18 2 Réglez Anynet HDMI CEC sur Oui sur le graveur DVD avec magnétoscope Voir plus haut 3 Réglez la fonction Anynet sur votre téléviseur Reportez vous au manuel de l usager de votre téléviseur pour plus de détails La télécommande du téléviseur vous permet de manipuler le graveur DVD avec magnétoscope Touches du téléviseur pouvant contrôler le grave...

Страница 131: ...G4 Movie Simple face 5po Simple face 3 5po DVD RAM VIDEO AUDIO Simple face 5po 4 7 Go 1 h XP qualité supérieure 2 h SP qualité standard 4 h LP lecture prolongée 6 ou 8 h EP longue durée Double face 5po 9 4 Go 2 h XP qualité supérieure 4 h SP qualité standard 8 h LP lecture prolongée 12 ou 16 h EP longue durée DVD RW VIDEO AUDIO 5po 4 7 Go 1 h XP qualité supérieure 2 h SP qualité standard 4 h LP le...

Страница 132: ... magnétoscope fermera le plateau et amorcera automatiquement la lecture du disque Le lecteur ne peut lire automatiquement les disques au premier allumage Lorsqu il est mis sous tension et qu un disque y est inséré l appareil demeure en mode arrêt Appuyez sur la touche PLAY pour lancer la lecture Appuyez sur la touche PLAY pour allumer et pour lancer automatiquement la lecture d un disque dans l ap...

Страница 133: ...Appuyez sur la touche PLAY LIST Une liste de lecture correspond à une liste de titres personnalisée Lorsqu une liste de lecture est lue seule la lecture des titres figurant dans cette liste peuvent être lancée puis interrompue Même si la liste de lecture est supprimée l enregistrement original est conservé Utilisation des fonctions de recherche et de saut Recherche dans un chapitre ou une piste Ap...

Страница 134: ...ADV SKIP pour faire un saut avant d exactement 30 secondes Lecture au ralenti Lecture par sauts Lecture au ralenti Mettez la lecture active en pause et appuyez sur la touche SEARCH ou de la télécommande pendant plus d une seconde À chaque fois que vous appuyez sur l Lent 1 l Lent 2 l Lent 3 À chaque fois que vous appuyez sur l Lent 1 l Lent 2 l Lent 3 Appuyez sur la touche ll pour revenir à la vit...

Страница 135: ...es touches numériques Appuyez ensuite sur ENTER Il est possible que cette fonction ne soit pas utilisable avec certains types de disque Certains types de disque CD audio CD DA ou MP3 ne permettent pas l affichage de ce genre d information Pour que l écran de sous menu disparaisse appuyez sur la touche ANYKEY ou RETURN Lecture à répétition Lecture d un disque en boucle 1 Appuyez sur la touche ANYKE...

Страница 136: ...u type de disque les langues de sous titrage peuvent ne pas être disponibles Cette fonction n est disponible que pour la lecture Cette fonction peut aussi être activée en appuyant sur la touche SUBTITLE de la télécommande 1 Appuyez sur la touche ANYKEY durant une lecture 2 Sélectionnez Sous titre en déplaçant la barre de sélection à l aide des touches puis sélectionnez de la même façon la langue d...

Страница 137: ...ngles pour une scène spécifique Lorsqu un disque contient plusieurs angles le terme ANGLE apparaît à l écran Cette fonction peut aussi être activée en appuyant sur la touche ANGLE de la télécommande 1 Appuyez sur la touche ANYKEY durant une lecture 2 Sélectionnez Angle en déplaçant la barre de sélection à l aide des touches puis sélectionnez le numéro de l angle souhaité en vous servant des mêmes ...

Страница 138: ...sée 3 Appuyez sur les touches pour vous déplacer vers la position suivante 4 Appuyez à nouveau sur la touche ENTER lorsque la scène voulue suivante apparaît Le chiffre 2 est affiché et la position de la scène est mémorisée Répétez ces étapes pour repérer d autres positions Vous pouvez créer jusqu à 10 signets correspondant à 10 scènes Lecture à partir d un Signet 1 Appuyez sur la touche MARKER 2 S...

Страница 139: ...nnez le marqueur de votre choix en déplaçant la barre de sélection à l aide des touches 3 Appuyez sur ENTER ou sur ll pour débuter la lecture à partir de la scène correspondant au marqueur sélectionné Si vous appuyez sur la touche NEXT SKIP l ou sur PREVIOUS SKIP l en mode de marqueur alors que le marqueur actuel est actif depuis moins de trois secondes la lecture passe au début du marqueur suivan...

Страница 140: ...s de lecture et de répétition Lecture d un CD audio CD DA 1 Déposez un CD audio CD DA sur le plateau de disque Le menu du CD audio sera affiché et la lecture des pistes des pièces musicales débutera automatiquement 2 Sélectionnez la piste pièce musicale en déplaçant la barre de sélection à l aide des touches puis appuyez sur ENTER Audio CD CD DA Screen Elements 1 Icône du mode Lecture 2 Piste pièc...

Страница 141: ...ur la touche ANYKEY durant une lecture Le mode Répéter s affiche en surbrillance 2 Sélectionnez le mode de lecture en boucle à l aide des touches puis appuyez sur ENTER Répéter la piste CD CD DA MP3 Répéter le dossier MP3 Répéter le disque CD CD DA MP3 Pour revenir au mode de lecture normal 3 Appuyez sur la touche CANCEL pour revenir à la lecture normale Liste de Musique MP3 No Titre SONGO1 01 11 ...

Страница 142: ...iste pièce musicale dans l ordre d écoute de votre choix en déplaçant la barre de sélection à l aide des touches puis appuyez sur ENTER Si vous souhaitez supprimer une piste de votre liste de lecture Appuyez sur la touche puis sélectionnez la piste erronée à l aide des touches et appuyez ensuite sur la touche CANCEL La piste sélectionnée est supprimée 4 Pour effectuer la lecture de la liste de lec...

Страница 143: ...tiroir disque 2 Appuyez sur les boutons pour sélectionner Navigation par Disque puis appuyez sur le bouton ou sur ENTER 3 Appuyez sur les boutons pour sélectionner DivX puis appuyez sur le bouton ou sur ENTER 4 Appuyez sur les boutons pour sélectionner le fichier avi DivX puis appuyez sur le bouton PLAY ou sur ENTER 5 Lors de la lecture d un fichier MPEG4 vous pouvez utiliser les fonctions suivant...

Страница 144: ...ment Le réglage de l alignement permet d éliminer les rayures blanches qui apparaissent parfois à l écran lors de la lecture Ces rayures sont dues à de légers écarts entre les dispositifs de lecture de différents magnétoscopes Appuyez sur les touches CH TRK durant une lecture pour faire disparaître les rayures blanches apparaissant à l écran Fonctionnalités de lecture spécifiques au magnétoscope L...

Страница 145: ... créées par d autres magnétoscopes utilisant le même système et inversement Aller à 0 00 00 Utilisez cette fonction pour retrouver la position 0 00 00 sur la bande vidéo 1 En cours de lecture appuyez sur la touche CANCEL au point sur la cassette où vous souhaitez remettre le compteur à 0 00 00 2 Si la bande vidéo est arrêtée appuyez sur la touche ANYKEY 3 Sélectionnez Aller à 0 00 00 en déplaçant ...

Страница 146: ...e V Samsung Terminé Non enregistrable Non terminé Enregistrable Autre fabricant Terminé Non enregistrable Non terminé Non enregistrable DVD R mode V Samsung Terminé Non enregistrable Non terminé Enregistrable Autre fabricant Terminé Non enregistrable Non terminé Non enregistrable DVD RW Samsung X Il est parfois impossible d enregistrer Autre fabricant X Il est parfois impossible d enregistrer DVD ...

Страница 147: ...Lorsque l appareil est en mode Stop sélectionnez l un des quatre modes d enregistrement en appuyant de manière répétée sur le touche REC SPEED afin d obtenir la durée d enregistrement et la qualité d image souhaitées Ces modes déterminent la durée maximale d enregistrement et la qualité de l image En mode AUTO le mode d enregistrement le plus approprié sera réglé automatiquement selon le temps res...

Страница 148: ...r 1 1 O DVD RW Ver 1 1 avec CPRM mode VR O O DVD R O DVD RAM Ver 2 0 O O DVD R O DVD RW O Lorsque Copy Once Une seule copie a été enregistrée un autre enregistrement ne peut plus jamais être réalisé compatible avec CPRM Le mécanisme de protection CPRM Le CPRM est un mécanisme qui permet d associer un enregistrement au média sur lequel il est gravé Il peut être accueilli par quelques graveurs DVD a...

Страница 149: ...ure SP qualité standard durée d environ 2 heures LP qualité inférieure durée d environ 4 heures EP mode longue durée durée de 6 à 8 heures 5 Appuyez sur la touche REC L icône s affiche à l écran et l enregistrement débute 6 Appuyez sur la touche STOP pour arrêter ou terminer un enregistrement en cours Le message Mise à jour de l information sur le disque Veuillez patienter un instant est affiché P...

Страница 150: ...ériphérique externe 5 Appuyezsur la touche REC de l enregistreur DVD avec magnétoscope pour commencer l enregistrement lorsque l option vidéo souhaitée est affichée à partir d une source externe Pause Reprise Appuyez sur la touche PLAY STILL pour interrompre momentanément l enregistrement en cours Appuyez à nouveau sur la touche PLAY STILL pour reprendre l enregistrement en cours Pour interrompre ...

Страница 151: ...e DVD SP LP EP XP VCR SP SLP 5 Si l entrée est réglée à DV le menu lecture enregistrement permettant d activer les réglages du caméscope s affiche au haut de l écran 6 Sélectionnez l icône de lecture au haut de l écran pour effectuer la lecture du caméscope et trouver le point de départ de la copie 7 Pour débuter l enregistrement déplacez vous à l aide des touches jusqu à l icône d enregistrement ...

Страница 152: ...istrement 4 En mode d enregistrement appuyez à nouveau sur la touche REC pour active la fonction d enregistrement immédiat OTR L expression Durée d enregistrement 0 30 apparaît sur l afficheur et l enregistreur DVD avec magnétoscope enregistrera pendant exactement 30 minutes 5 Continuez d appuyer sur la touche REC pour ajouter à la durée de l enregistrement en incréments pré réglés jusqu à un maxi...

Страница 153: ...ment Mode d enregistrement sur DVD AUTO sélectionnez cette option lorsque vous voulez régler automatiquement la qualité vidéo En mode AUTO le mode d enregistrement le plus adapté est sélectionné automatiquement en fonction du temps restant sur le disque et de la durée de l enregistrement programmé Vous ne pouvez sélectionner qu un seul mode parmi les modes XP SP LP et EP pour l enregistrement prog...

Страница 154: ...précédent se termine avec trois minutes d avance sur l heure de départ de l enregistrement suivant Modification à la Liste d Enregistrements Programmée Suivez les instructions ci dessous pour modifier la liste des enregistrements programmés 1 Appuyez sur MENU 2 Sélectionnez Enr par minut en déplaçant la barre de sélection à l aide des touches puis appuyez sur ENTER ou sur 3 Sélectionnez Liste d En...

Страница 155: ...ement 4 Appuyez sur la touche REC 5 Le mode EZ REC finalise automatiquement le disque dans les conditions suivantes Si vous appuyez sur la touche OPEN CLOSE du graveur DVD avec caméscope après avoir enregistré au moins 30 du disque Le tiroir s ouvre après la finalisation du disque Si le disque est plein il est finalisé automatiquement et le graveur demeure en arrêt Si un enregistrement programmé a...

Страница 156: ...sélectionner la chaîne souhaitée Appuyez sur la touche INPUT SEL pour sélectionner AV 1 AV 2 ou DV si vous effectuez un enregistrement depuis un périphérique raccordé aux prises d entrée du graveur 3 Appuyez sur la touche REC SPEED de la télécommande pour sélectionner la vitesse d enregistrement SP Vitesse d enregistrement normale qui offre la meilleure qualité d image SLP Enregistrement à vitesse...

Страница 157: ...ture du disque commence Pendant un enregistrement sur DVD insérez une cassette vidéo dans le magnétoscope Le signal de sortie passe automatiquement au magnétoscope et la lecture de la bande vidéo commence Mais seulement si l onglet de protection a été retiré 3 Augmenter la durée prévue de l enregistrement Consultez la section Enregistrement immédiat à la page 61 4 Enregistrement simultanément sur ...

Страница 158: ...la fonction Direct Copy Sur les disques DVD RW V DVD RW R vous ne pouvez utiliser que la fonction Direct copy 5 Sélectionnez la Liste à Copier en déplaçant la barre de sélection à l aide des touches puis appuyez sur ENTER ou sur 6 Sélectionnez Copier en déplaçant la barre de sélection à l aide des touches puis appuyez sur ENTER ou sur Copie directe du DVD au magnétoscope Insérez le disque DVD que ...

Страница 159: ...plaçant la barre de sélection à l aide des touches puis appuyez sur ENTER ou sur 7 Sélectionnez Copier en déplaçant la barre de sélection à l aide des touches puis appuyez sur ENTER ou sur Le magnétoscope effectue une avance rapide jusqu au prochain emplacement vierge puis il commence automatiquement à copier Les points Start et End peuvent ne pas correspondre exactement Pour copier tout le conten...

Страница 160: ...gistré g Durée de l enregistrement durée de lecture h Menu de modifications Lecture Lecture du titre sélectionné Renommer Modifie le nom du titre sélectionné Supprimer Suppression de la liste du titre sélectionné Éditer Suppression d une partie d un titre Protection Verrouillage ou déverrouillage du titre sélectionné i Commandes possibles Vous pouvez lire le titre souhaité en appuyant sur la touch...

Страница 161: ...n déplaçant la barre de sélection à l aide des touches puis appuyez sur ENTER ou sur L écran Renommer apparaît 4 Sélectionnez les caractères souhaités en déplaçant la case de sélection à l aide des touches puis appuyez sur ENTER Espace Libre Déplace le curseur vers l arrière d une position Espace Insère une espace et avance le curseur d une position vers la droite Suppr Efface le caractère qui se ...

Страница 162: ...mode VR puisqu une Liste de Lecture est activée le message suivant s affiche Souhaitez vous supprimer Les listes de lecture liées risquent d être supprimées DVD RW mode vidéo DVD RW DVD R aucune Playlist Liste de Lecture n étant activée le message suivant s affiche Souhaitez vous supprimer Ces messages varient d un disque à l autre 4 Sélectionnez Oui en déplaçant la barre de sélection à l aide des...

Страница 163: ...ntifiée a été supprimée Pour revenir à l écran de la Liste de Titres sélectionnez Revenir en déplaçant la barre de sélection à l aide des touches Éléments de l écran Éditer la Liste de Titres 1 Barre de lecture 2 Heure 3 Sous fenêtre de l image et de la position de départ de suppression 4 Sous fenêtre de l image et de la position de fin de suppression Utilisez les touches de lecture pour identifie...

Страница 164: ...n Vérifier la compatibilité Voir la page 82 Lorsque vous ajoutez un chapitre le titre est divisé à partir de ce point Lorsque vous ajoutez un chapitre à un titre n en comportant qu un seul un nouveau chapitre est créé Suppression d un chapitre Suivez les étapes 1 à 3 4 Sélectionnez un chapitre que vous souhaitez supprimer à l aide des touches de lecture appropriées Touches de lecture II I I 5 Appu...

Страница 165: ...T La Liste de Titres s affiche 2 Appuyez sur les touches pour sélectionner le titre que vous souhaitez diviser dans la Liste de Titres puis appuyez sur ENTER ou sur la touche 3 Appuyez sur les touches pour sélectionner Diviser le titre puis appuyez sur la touche ENTER ou la touche L écran Liste de titres à diviser s affiche 4 Sélectionnez l élément que vous souhaitez diviser à l aide des touches d...

Страница 166: ...n Éditer la Liste de Lecture s affiche Vous pouvez créer jusqu à 99 titres de Liste de Lecture L information affichée à l écran peut différer légèrement selon le type de disque utilisé Un disque enregistré sur cet appareil ne peut être affiché sur le menu de la liste de lecture lorsque le mode EZ REC est Oui Lecture de titres dans la Liste de Lecture Suivez les instructions ci dessous pour lire le...

Страница 167: ...iste de lecture 1 Appuyez sur le touche PLAY LIST lorsque le disque est arrêté L écran Éditer la Liste de Lecture s affiche 2 Sélectionnez dans la Liste de Lecture le titre que vous souhaitez éditer en déplaçant la barre de sélection à l aide des touches puis appuyez sur ENTER ou sur 3 Sélectionnez Éditer Scène en déplaçant la barre de sélection à l aide des touches puis appuyez sur ENTER ou sur L...

Страница 168: ... puis appuyez sur ENTER La fenêtre de la scène à déplacer s affiche en jaune 6 Appuyez sur les touches pour sélectionner la position de destination de la scène que vous souhaitez déplacer puis appuyez sur la touche ENTER La scène sélectionnée est déplacée à la position choisie L information affichée à l écran peut différer légèrement selon le type de disque utilisé Éditer Scène DVD Recorder Scène ...

Страница 169: ...nsérée avant que le thème ne soit choisi Suppression d une scène Suivez les étapes 1 à 3 à la page 76 4 Appuyez sur les touches pour sélectionner la scène que vous souhaitez supprimer puis appuyez sur la touche ENTER 5 Sélectionnez Suppr en déplaçant la barre de sélection à l aide des touches puis appuyez sur ENTER Éditer Scène DVD Recorder Scène No 3 3 Liste de lect No 3 DVD RAM VR 01 00 00 03 02...

Страница 170: ...l aide des touches puis appuyez sur ENTER ou sur 3 Sélectionnez Nom du Disque en déplaçant la barre de sélection à l aide des touches puis appuyez sur ENTER ou sur L écran Modif Nom s affiche 4 Sélectionnez les caractères souhaités en déplaçant la barre de sélection à l aide des touches Espace Libre Déplace le curseur vers l arrière d une position Espace Insère une espace et avance le curseur d un...

Страница 171: ...nnées vont être supprimées Souhaitez vous poursuivre DVD RW Le message suivant s affiche Choisissez le format d enregistrement du DVD RW Suivi de ce message Toutes les données vont être supprimées Souhaitez vous poursuivre 4 Sélectionnez Oui en déplaçant la barre de sélection à l aide des touches puis appuyez sur ENTER Le disque est ensuite formaté Les modes DVD VR et DVD V sont compatibles avec l...

Страница 172: ...t la barre de sélection à l aide des touches puis appuyez sur ENTER ou sur 3 Sélectionnez Disque Non Finalisé en déplaçant la barre de sélection à l aide des touches puis appuyez sur ENTER ou sur Le message suivant s affiche Souhaitez vous ne pas finaliser le disque 4 Appuyez sur les touches pour sélectionner Oui puis appuyez sur ENTER Le message de confirmation Le disque ne sera pas finalisé Souh...

Страница 173: ...fiés par un lecteur DVD standard 1 Lorsque l appareil est en mode Stop Arrêt appuyez sur la touche MENU 2 Sélectionnez Gestionnaire de Disque en déplaçant la barre de sélection à l aide des touches puis appuyez sur ENTER ou sur 3 Sélectionnez Vérifier la compatibilité en déplaçant la barre de sélection à l aide des touches puis appuyez sur ENTER ou sur 4 Appuyez sur les touches pour sélectionner O...

Страница 174: ...e panne ou pour toute autre raison Impossible d enregistrer Vérifiez si le disque est formaté Ce produit ne peut enregistrer que sur les disques formatés Voir les pages 56 et 80 Vérifiez si le disque DVD RAM DVD RW ou DVD R que vous utilisez comporte suffisamment d espace disponible pour l enregistrement Aucune réaction lorsque j appuie sur la touche REC L enregistrement n est possible que sur un ...

Страница 175: ... écran et non d une défectuosité La langue audio et ou les sous titres ne sont pas activés selon ma sélection Les options de langue audio et de langue de sous titres sont spécifiques à chaque disque Seules les langues disponibles sur le disque DVD s affichent dans le menu du disque et peuvent être choisies Le mode de sortie progressive ne fonctionne pas Vérifiez si le sigle PS est affiché sur le p...

Страница 176: ...ayures ou lignes noires à la lecture Vérifiez le réglage syntoniseur source externe Celui ci devrait être réglé sur syntoniseur Vérifiez les connexions de l antenne du téléviseur Appuyez sur les touches CH TRK pour atténuer cet effet En appuyant sur la touche II pendant une lecture l image figée contient beaucoup de rayures horizontales Une image figée peut comporter des rayures horizontales si la...

Страница 177: ...fier le code régional du disque Le disque ne correspond pas à votre code régional et ne peut être lu sur cet appareil Ce disque ne peut être formaté Veuillez vérifier le disque Veillez à ce qu il n y ait pas d égratignures ou de saleté sur le disque Ce disque n a pu être formaté à cause de détection d erreur Ce disque n a pu être finalisé à cause de détection d erreur Ce disque n a pu être définal...

Страница 178: ...t de l appareil et maintenez la enfoncée pour 10 secondes Après l avoir éteint appuyez sur la touche Ouvrir et enlevez le disque Le dispositif DV n est pas raccordé Veillez à ce que le DV soit bien raccordé à la sortie DV S il est bien raccordé éteignez le et rallumez de nouveau Si vous ne pouvez résoudre le problème après avoir lu ces directives notez Le numéro de modèle et le numéro de série sit...

Страница 179: ...que et coaxiale Rapport entre le signal et le bruit min 100 dB Distorsion harmonique totale max 0 005 à 1 KHz Vidéo Prises de sortie vidéo 1 Prise de sortie S Vidéo Y 1 0 V c à c C 0 286 V c à c 75 Ω Sortie à composantes Y 1 0 V c à c Pb 0 70 V c à c Pr 0 70 V c à c 75 Ω HDMI DVI 480p 720p 1080i DVD Format de compression d image MPEG II Format de compression audio Dolby AC 3 256 Kbit s Qualité d e...

Страница 180: ...ù il fait la demande d une réparation sous garantie Cette garantie ne couvre pas les dommages causés par un accident un incendie une inonda tion un cas de force majeure un mauvais usage ou une tension incorrecte La garantie ne couvre pas une mauvaise installation une mauvaise réparation une réparation non autorisée et tout usage commercial ou dommages survenus durant le transport Le fini extérieur...

Страница 181: ...ANCE 3260 SAMSUNG or 08 25 08 65 65 0 15 Min www samsung com fr GERMANY 01805 121213 0 14 Min www samsung de HUNGARY 06 80 SAMSUNG 7267864 www samsung com hu ITALIA 800 SAMSUNG 7267864 www samsung com it LUXEMBURG 0032 0 2 201 24 18 www samsung lu NETHERLANDS 0900 20 200 88 0 10 Min www samsung com nl NORWAY 815 56 480 www samsung com no POLAND 0 801 801 881 www samsung com pl PORTUGAL 80 8 200 12...

Страница 182: ...AK68 01343A 00 English Français SIÈGE SOCIAL SAMSUNG ELECTRONICS CANADA INC 55 STANDISH COURT MISSISSAUGA ONTARIO L5R 4B2 CANADA TEL 1 800 SAMSUNG 1 800 7267864 www samsung com ca ...

Отзывы: